Picture this: You’re standing in your kitchen at the start of the day, making coffee. The morning light streams in, hitting the wall behind your counter. What do you see? A surface that feels chaotic and stained, adding a tiny bit of stress to your morning? Or a surface that feels calm, clean, and beautiful, reflecting that light and setting a gentle, positive tone for the rest of your day? That surface, your backsplash, is one of the most powerful and underestimated elements in your home for influencing your daily well-being.
As a wellness architect, I help people understand that the spaces we inhabit are constantly shaping our physical and mental health. A backsplash isn’t just a decorative shield against spaghetti sauce splatters. It’s a vertical landscape in the heart of your home. Its color can influence your mood, its texture can ground you, its material can impact your air quality, and its pattern can either calm your mind or create cognitive clutter. So, let’s talk—friend to friend—about how to choose a backsplash that doesn’t just look good, but feels good, and truly supports the healthy, happy home you deserve.
Planning Your Vision and Assessing Your Needs (Part 1)
Before you even think about stepping into a tile store, we need to lay the groundwork. This first phase is all about intention. It’s about understanding the soul of your current kitchen and creating a clear vision for how you want the space to feel. Rushing this part is the number one mistake I see people make, and it leads to choices that clash, go over budget, or just don’t feel right in the end. Let’s get clear on your vision so the rest becomes easy.
1. Assess Kitchen Aesthetics for Seamless Integration
Okay, before you fall in love with a photo on Pinterest, take a deep, honest look at what’s already happening in your kitchen. This isn’t about judging; it’s about observing. What is the feeling of your cabinets? Are they warm wood, crisp white, or a cool gray? What story does your countertop tell—is it busy with granite speckles or a quiet, solid quartz? These existing elements are the foundation, and your backsplash needs to join the conversation, not scream over everyone else. Its job is to create harmony. A seamless, integrated space is calming to the nervous system, reducing the subtle visual static that can contribute to daily stress.
I had a client once who adored a vibrant, geometric Moroccan tile. She was about to buy it for her kitchen, which had beautiful, warm cherry cabinets and a very active Uba Tuba granite countertop. In the showroom, the tile was a work of art. But when we put a sample board up in her kitchen, it was an immediate disaster. The two bold patterns fought each other, creating a sense of visual chaos. We pivoted to a simple, handmade ceramic tile in a warm cream color. It didn’t shout, but its subtle texture and color unified the wood and stone, making the whole kitchen feel settled and serene. She told me later that just being in the space felt less overwhelming. That’s the power of integration.
Now, let’s connect this to choosing the right materials to bring that vision to life.
2. Accurately Measure Backsplash Area for Precise Material Orders
This sounds boring, I know, but trust me on this—getting your measurements right from the start will save you so much stress and money. Nothing derails the positive energy of a project faster than realizing you’re five tiles short and the batch you ordered is now sold out. It’s a design nightmare. Precision here is a form of self-care. It ensures a smooth process, prevents waste (which is good for your wallet and the planet), and avoids the project-stalling panic that comes from poor planning.
Here’s the shortcut everyone should know: after you measure the length and height of each section and calculate the square footage, always—always—add 15% for what’s called a “waste factor.” Everyone thinks they can get by with 10%, but 15% is the professional secret. It accounts for cuts, accidental breaks, and that one tricky piece around an outlet that you might have to cut twice. The peace of mind from having a little extra is invaluable. And you’ll have a few spare tiles for any future repairs, which is just smart homeownership.
With your exact measurements in hand, we can now attach a real number to your project.
3. Define Your Project Budget for Materials and Professional Installation
Let’s talk money, because a budget isn’t a restriction; it’s a tool that gives you clarity and freedom. Knowing your numbers helps you filter out the noise and focus on what’s realistically achievable, preventing the immense stress of financial overruns. When budgeting for your backsplash, you need to think about two key components: the materials themselves, and the labor to install them. The biggest mistake people make is falling in love with a tile and completely forgetting that a complex installation for a cheap tile can cost more than a simple installation for an expensive one.
I always tell my clients to get at least three quotes for installation, and to make sure the quotes are itemized. That means they should break down the cost of demo, surface prep, tile setting, grouting, and sealing. This way you’re not just comparing a single number; you’re comparing the scope of work. And please, allocate a 15% contingency fund. It’s not for if things go wrong, it’s for when they do. You might open up a wall and find old water damage that needs fixing. That contingency fund turns a potential crisis into a manageable bump in the road. It’s the ultimate stress-reducer.
Now that we have a financial framework, we can start the fun part: exploring what’s out there.
4. Research Trending Materials and Contemporary Styles
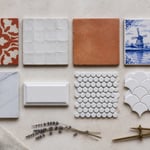
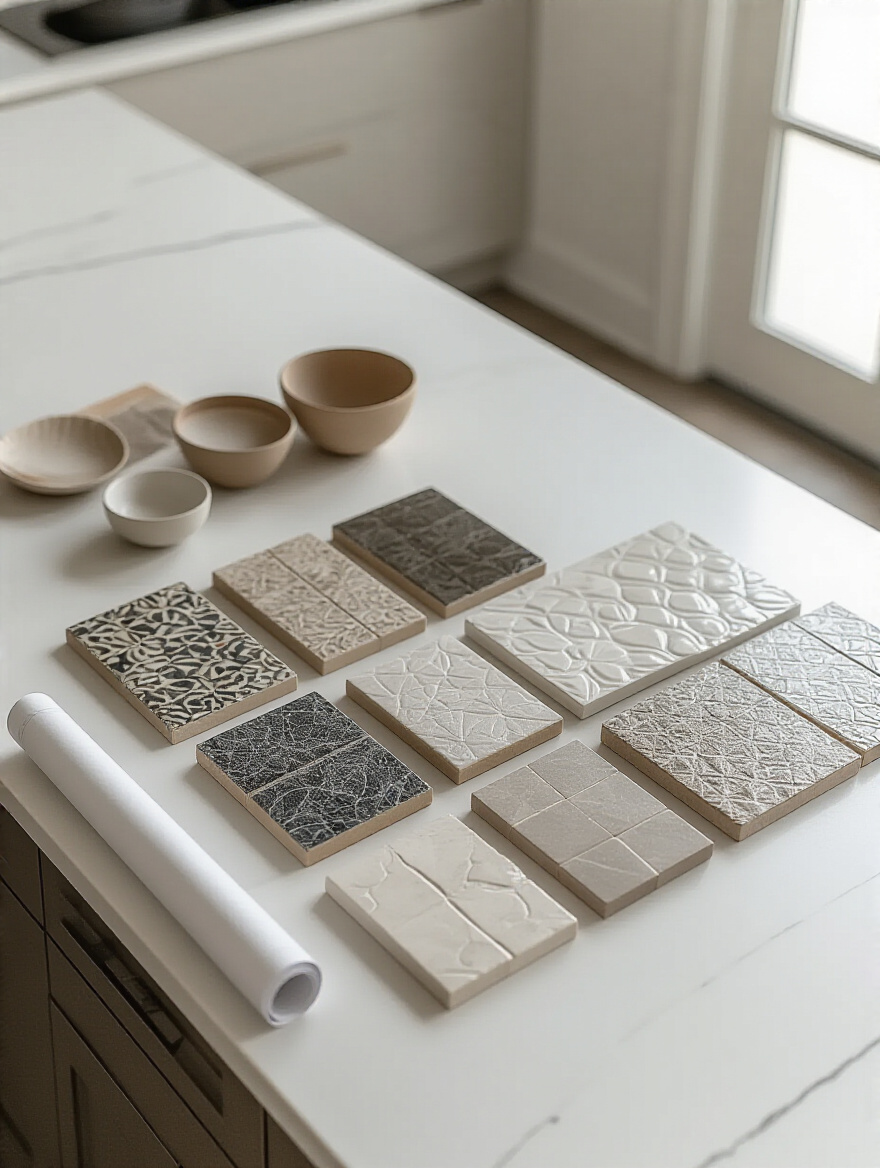
Now you can finally dive into the world of beautiful materials. But do it mindfully. “Trending” can be a trap. The goal isn’t to have the most fashionable kitchen of 2024; it’s to find a style that feels both current and timelessly you. Your home should be a reflection of your personality, not a temporary design fad. The best contemporary designs right now are moving towards materials that are authentic, textural, and have a natural feel. Think large slabs that minimize busy grout lines, or handmade tiles like Zellige that have beautiful, subtle imperfections.
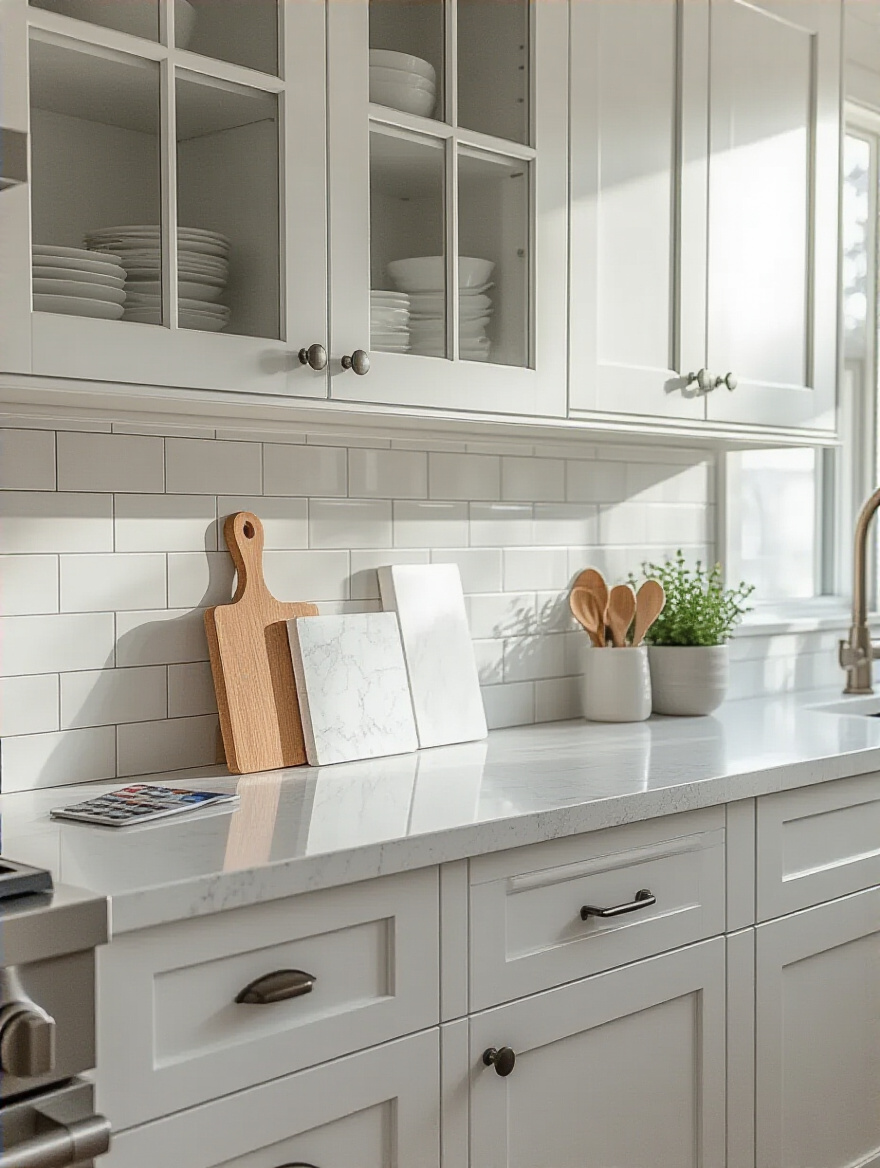
The most important advice I can give you is to bring samples home. A tile looks completely different in a bright showroom than it will under your kitchen’s specific lighting. Get the largest samples you can find and live with them for a few days. See how they look in the morning light, in the afternoon, and under your artificial lights at night. Notice how they feel next to your cabinets and counters. Does it create the energy you want? This process grounds your decision in your real-life environment, not just in an idealized photo, ensuring you’ll love the result for years to come.
Thinking about trends naturally leads us to the rules and regulations that govern our spaces.
Planning Your Vision and Assessing Your Needs (Part 2)
Okay, we’ve covered the creative vision. Now we have to touch on the less glamorous—but absolutely critical—technical side of things. Getting this part right is foundational to the safety and longevity of your kitchen. This is where we ensure that your beautiful new backsplash is not just installed correctly, but is also compliant and safe, protecting the very core of your home.
5. Understand Local Building Codes and Ventilation Requirements
I know, I know—building codes sound like the most boring topic on earth. But this is a non-negotiable step for your family’s safety. Your backsplash area, especially behind your cooktop and near your sink, has specific electrical and fire safety rules. For example, any outlet within a certain distance of a sink must be a GFCI (ground-fault circuit interrupter) outlet to prevent electric shock. The material directly behind your stove might also need to have a specific fire rating. Ignoring these codes isn’t just risky; it can cause you to fail a home inspection and lead to expensive tear-outs and rework.
The common misconception is that if the outlets are already there, they must be fine. But codes change! What was compliant ten years ago might not be today. A quick call to your local building department or a consultation with a licensed electrician is one of the smartest investments you can make at the start of a project. Proper ventilation is another huge wellness component. A good range hood that vents to the outside pulls cooking fumes, grease, and moisture out of your home, dramatically improving your indoor air quality. Don’t let a beautiful backsplash be a mask for an unsafe or unhealthy kitchen.
With the safety checks in place, let’s move back to the design itself, starting with the materials.
Selecting Materials and Core Design Elements (Part 1)
This is where your vision starts to become tangible. We’re going to explore the specific materials that define a contemporary aesthetic. The focus here is on clean lines, authentic textures, and a sense of calm sophistication. Each of these options offers a different feeling and function, so think about which one aligns best with the atmosphere you want to create in the heart of your home.
6. Opt for Large-Format Porcelain Slabs for a Seamless Look
If your goal is a space that feels calm, expansive, and incredibly clean, a large-format porcelain slab is your answer. Instead of a grid of tiles and grout lines that creates visual clutter, a slab offers a single, uninterrupted surface. This is a concept from wellness architecture called “visual simplicity.” Our brains are wired to find calm in uncluttered environments, and minimizing grout lines is one of the most effective ways to achieve this in a kitchen. It creates a serene backdrop that makes the entire kitchen feel larger and more peaceful.
The wellness benefits go beyond the visual. With virtually no grout, you eliminate the primary breeding ground for mold, mildew, and grime. Porcelain is non-porous, meaning it won’t harbor bacteria, and you can clean it with simple, non-toxic cleaners. This contributes directly to better indoor air quality and a healthier food prep environment. The one thing people get wrong here is underestimating the installation. These slabs are heavy and require specialized installers. This is not a DIY job. Invest in a professional to ensure the substrate is perfectly flat and the slab is properly supported.
From the clean look of porcelain, we can move to something with a more organic, earthy feel.
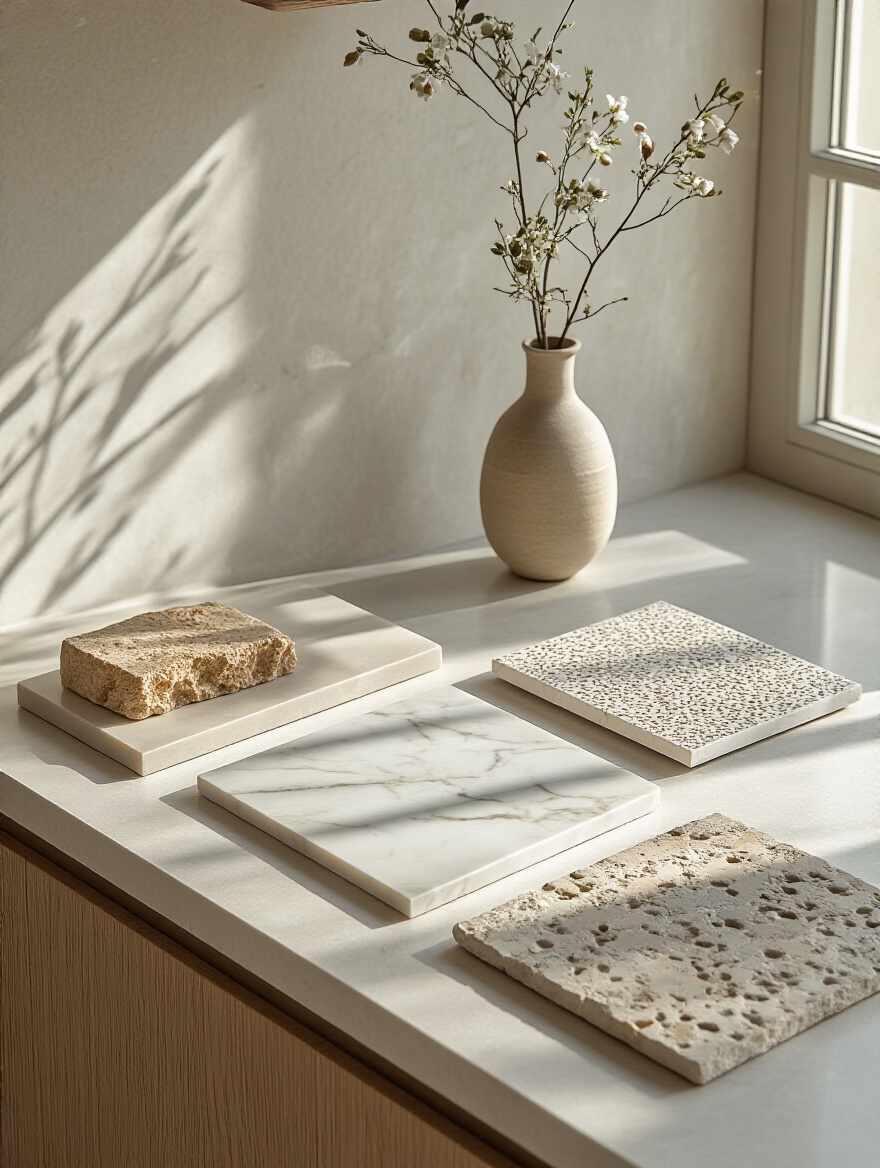
7. Embrace Natural Stone Finishes for Organic Texture and Durability
There is a powerful, grounding energy that comes from bringing natural materials into the home. This principle is called biophilia—our innate human need to connect with nature. Using a natural stone like marble, quartzite, or soapstone for your backsplash taps into this directly. The unique veining and subtle variations in each slab are created by the earth over millions of years. It’s a piece of natural art that brings an organic, calming texture to your space. Every time you see it, it’s a quiet reminder of the world outside your walls.
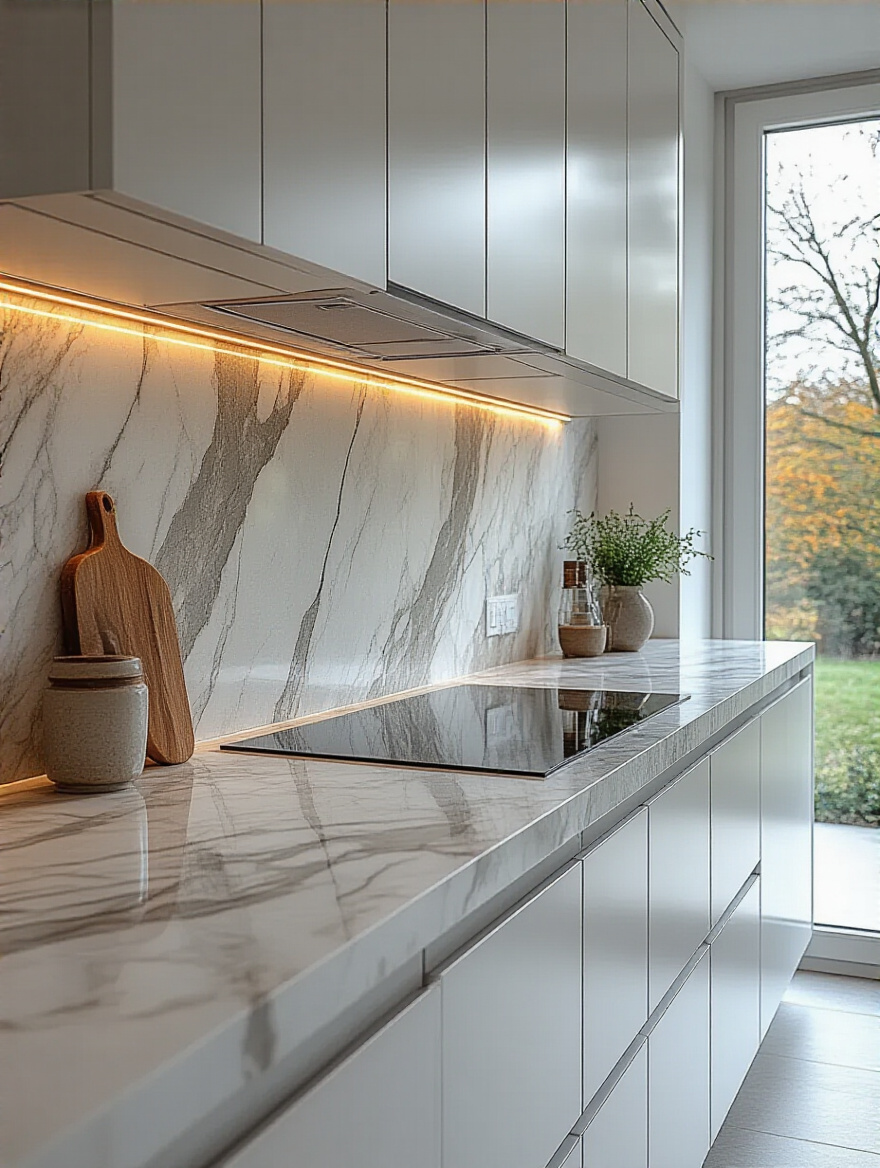
The key to keeping that stone beautiful is understanding its properties. So many people fall for the beauty of marble but aren’t prepared for the reality that it’s a soft, porous stone. It can etch from acidic things like lemon juice and stain from red wine. The shortcut? Honed (matte) finishes are much more forgiving of etching than polished ones. And a high-quality impregnating sealer is non-negotiable. It creates an invisible shield that repels liquids, giving you time to clean up spills. I recommend sealing every year. It’s a small ritual that protects the soul of your kitchen.
Now, let’s explore a material that offers a completely different kind of energy.
8. Incorporate Metallic Accents for an Industrial Chic Statement
Using metal as a backsplash introduces an element of sleek, dynamic energy. Stainless steel, copper, or brass can bring a really sophisticated, industrial-chic vibe to a kitchen. From a wellness perspective, metals are fantastic for light reflection. A brushed stainless steel panel, for example, will bounce both natural and artificial light around the room, making the space feel brighter and more alive. This can have a tangible effect on your mood, especially in kitchens that don’t get a lot of natural light.
The BS I often hear is that metal backsplashes are cold and sterile, like a commercial kitchen. That only happens when they’re not balanced correctly. I had a client who wanted stainless steel but was worried about this. We paired a sheet of brushed steel behind her range with warmer surrounding elements: off-white cabinets and soapstone counters. The metal became a sleek, functional focal point that reflected the light beautifully, while the other materials kept the space from feeling clinical. The key is contrast—pair the cool energy of metal with the warmth of wood or the soft texture of a matte finish.
From the gleam of metal, let’s look at another material that plays with light in a magical way.
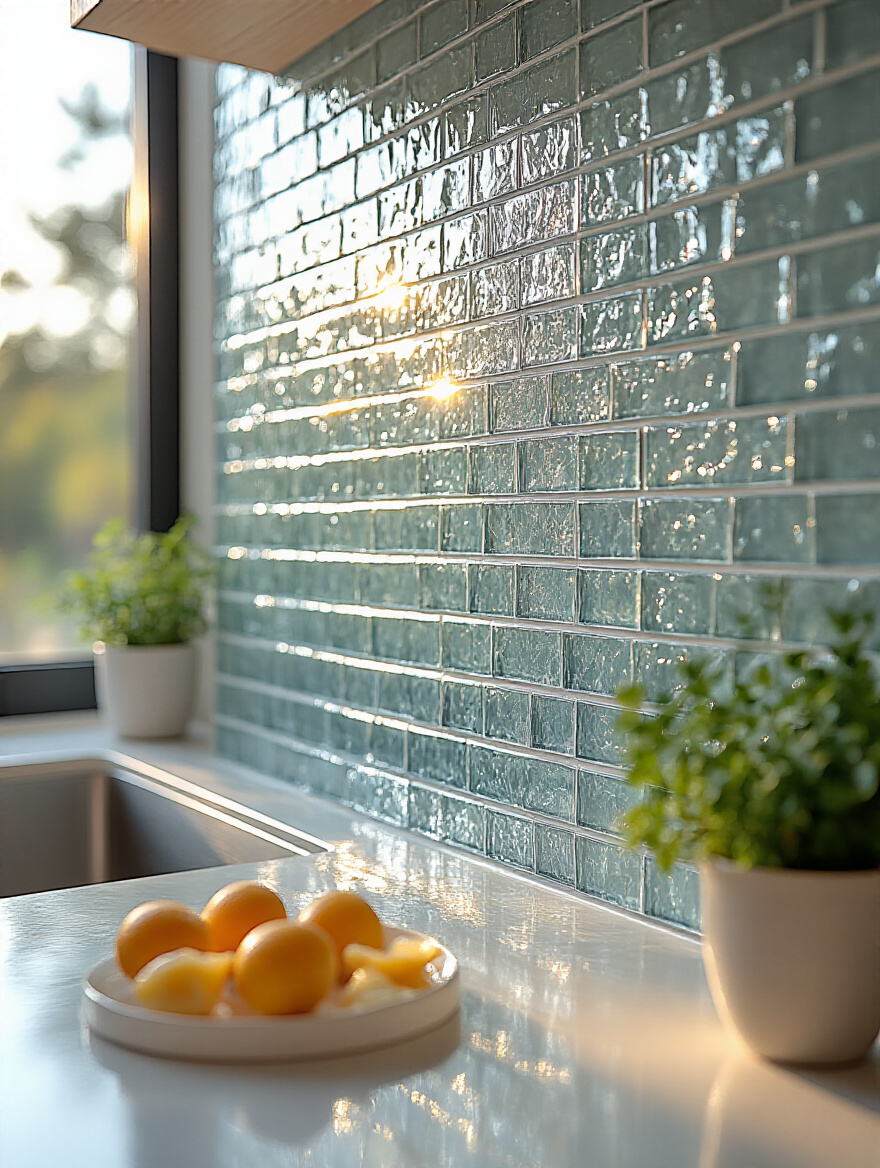
9. Explore Glass Tiles for Reflective Light and Added Depth
Glass tiles are like jewelry for your kitchen. They have a unique ability to capture, reflect, and refract light, which adds an incredible sense of depth and luminosity to a space. This can be profoundly uplifting. A wall of shimmering glass tiles can make a small, dark kitchen feel brighter, more open, and more vibrant. The way the light dances off the surface throughout the day adds a subtle, dynamic quality that keeps the space from feeling static. It’s a fantastic way to bring a sense of life and energy to the heart of your home.
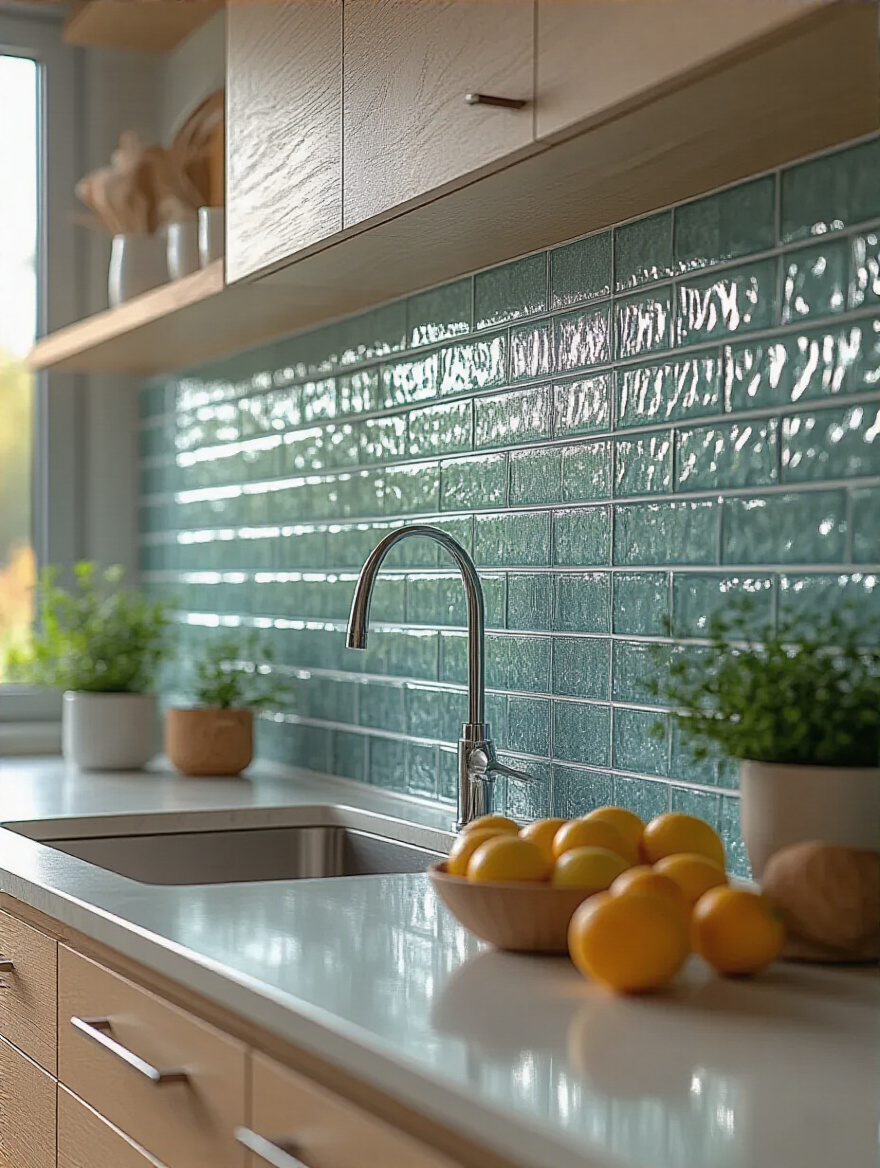
The secret to a successful glass tile installation is what’s behind the tile. Because glass is translucent, any imperfections on the wall or any color in your adhesive will show through. This is where people often go wrong, using standard gray thin-set mortar which muddies the color of the tile. You must use a bright white, high-quality adhesive specifically formulated for glass tiles. And the wall surface has to be perfectly smooth and evenly primed. This meticulous preparation ensures the color of the glass stays true and the final result is flawless and radiant.
Now that we’ve covered some core materials, let’s talk about how to use them to create visual interest.
Selecting Materials and Core Design Elements (Part 2)
We’re moving beyond just the material itself and into how we use it. This is where we can really start to inject personality and intentional design into your space. Think of this section as learning the artistic techniques—how to use pattern, layout, and light to turn your backsplash from a simple surface into a true design statement.
10. Utilize Patterned Tiles to Create a Dynamic Visual Feature
Pattern can be a wonderful way to express your personality and infuse your kitchen with energy and joy. But it’s a powerful tool that must be used with intention. From a neuro-architecture perspective, our brains are hardwired to look for and make sense of patterns. A harmonious, repeating pattern can be very pleasing and soothing. However, a pattern that is too bold, complex, or chaotic for the space can create cognitive overload—a low-level sense of visual stress you might not even be aware of.
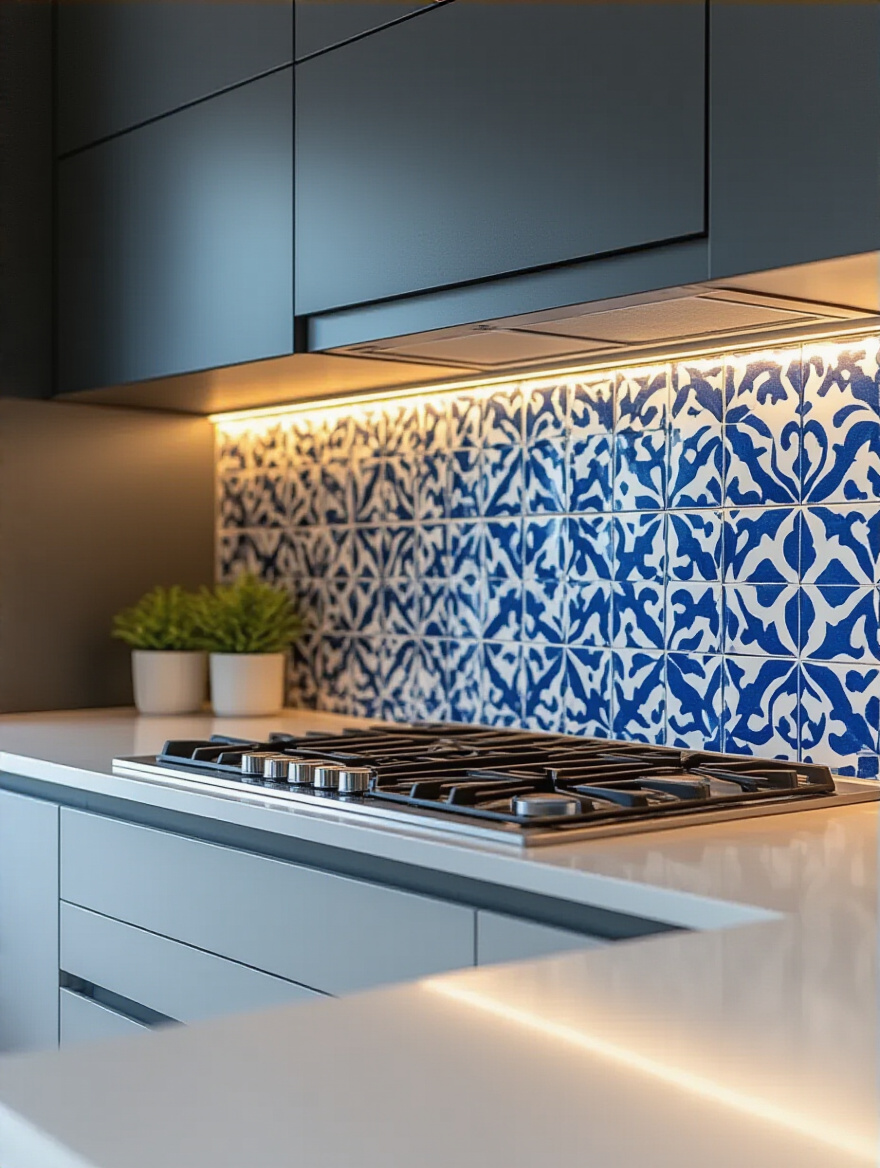
The key is balance. If you have calm, simple countertops and cabinets, a patterned backsplash can be the perfect focal point. I once worked with a client in a minimalist home who felt her all-white kitchen was a bit sterile. We chose a beautiful cement tile with a gentle, repeating geometric pattern in soft gray and white for the wall behind her sink. It was just enough pattern to add a layer of warmth and personality without overwhelming the serene, minimalist aesthetic of the rest of the space. It brought the room to life without creating chaos.
But what if you love a classic material and just want to give it a fresh twist?
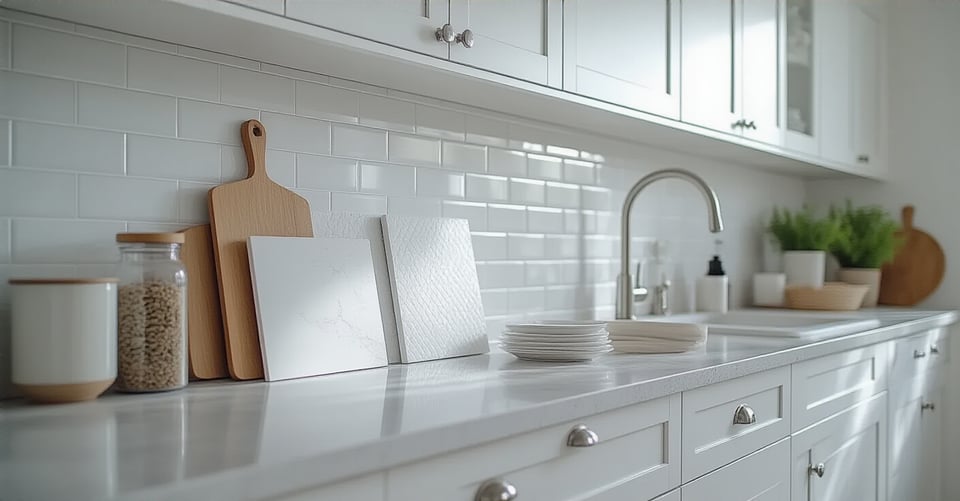
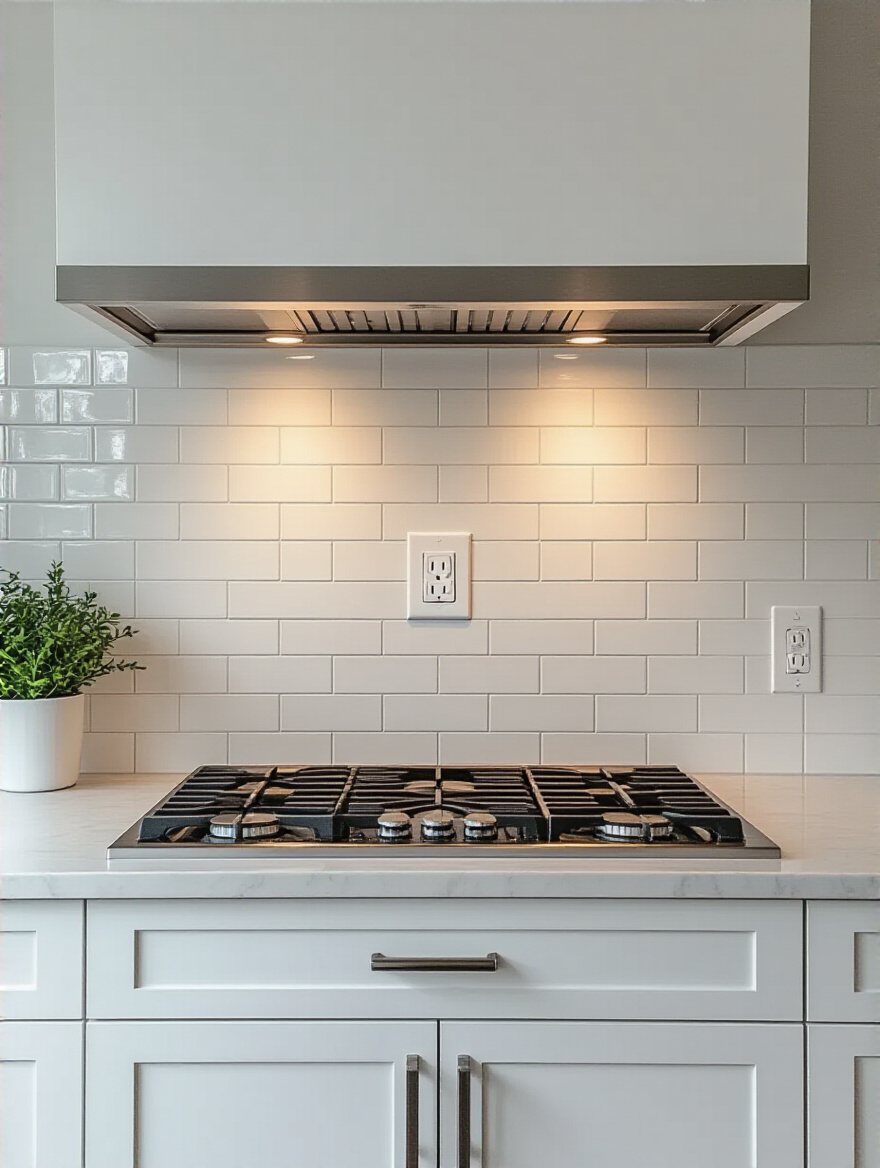
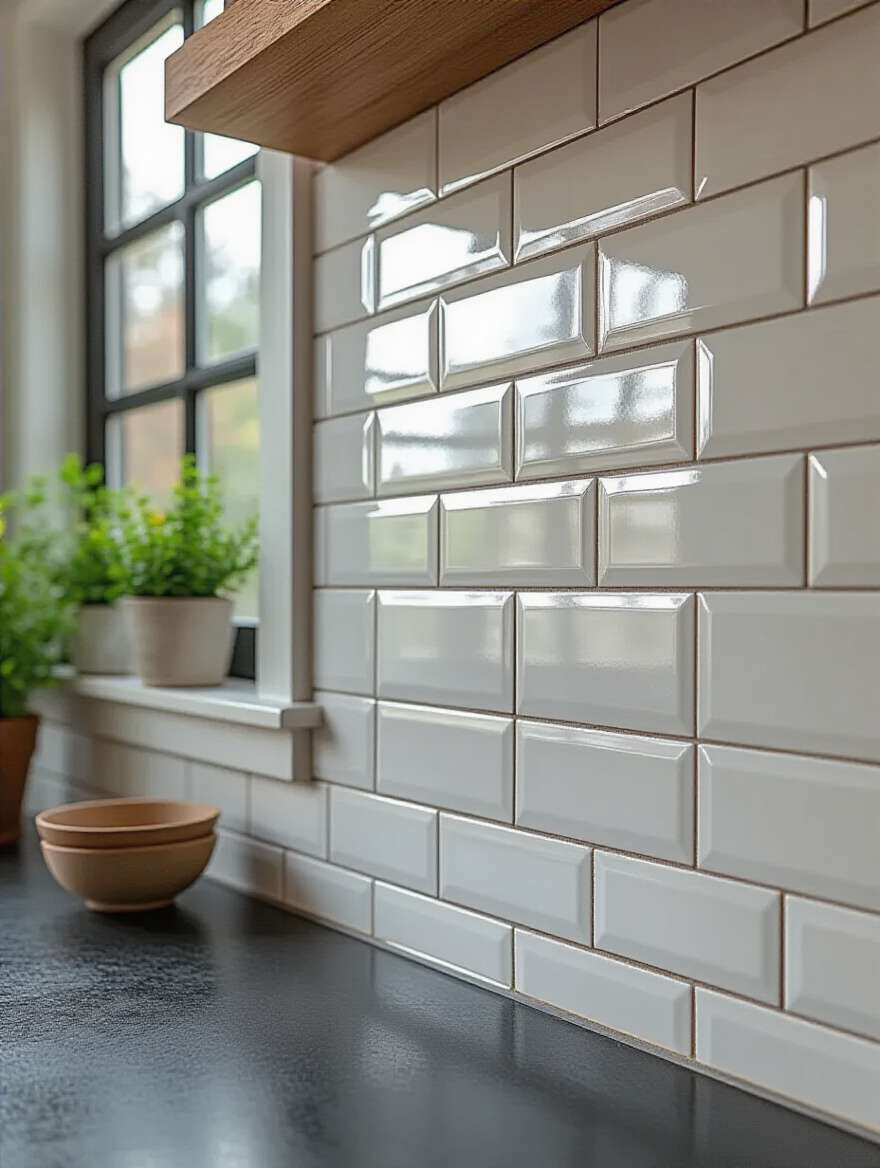
11. Consider Minimalist Subway Tile in Modern, Non-Traditional Layouts
Subway tile is a classic for a reason: it’s clean, affordable, and timeless. But everyone gets stuck on the traditional brick-like running bond layout. Here’s the shortcut to making it feel completely fresh and contemporary: change the layout. Stacking the tiles in a straight grid—either horizontally or vertically—creates a clean, graphic look that feels incredibly modern and orderly. A vertical stack is especially powerful, as it draws the eye upward and can make your ceilings feel higher, which enhances the feeling of spaciousness and freedom in a room.
The mistake to avoid here is using a contrasting grout color with a busy new layout. If you’re using a strong pattern like a herringbone, a grout that matches the tile will let the pattern itself be the star. This keeps the look sophisticated and prevents it from becoming too busy, which can contribute to that feeling of visual clutter. For a stacked layout, a matching grout creates a serene, monolithic feel, while a subtly contrasting grout can emphasize the clean, grid-like pattern. It’s a simple shift that completely transforms a budget-friendly material into a high-design feature.
No matter which material or pattern you choose, this next element is what will truly make it shine.
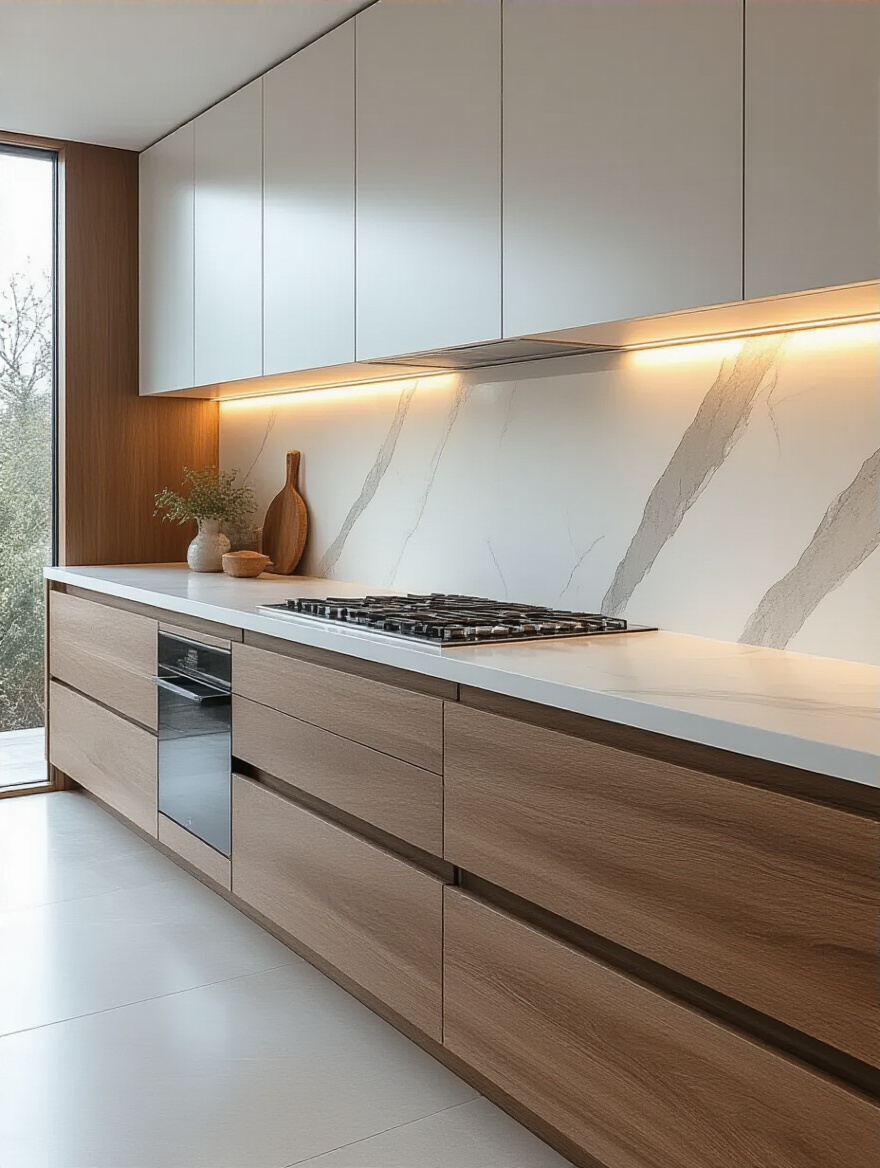
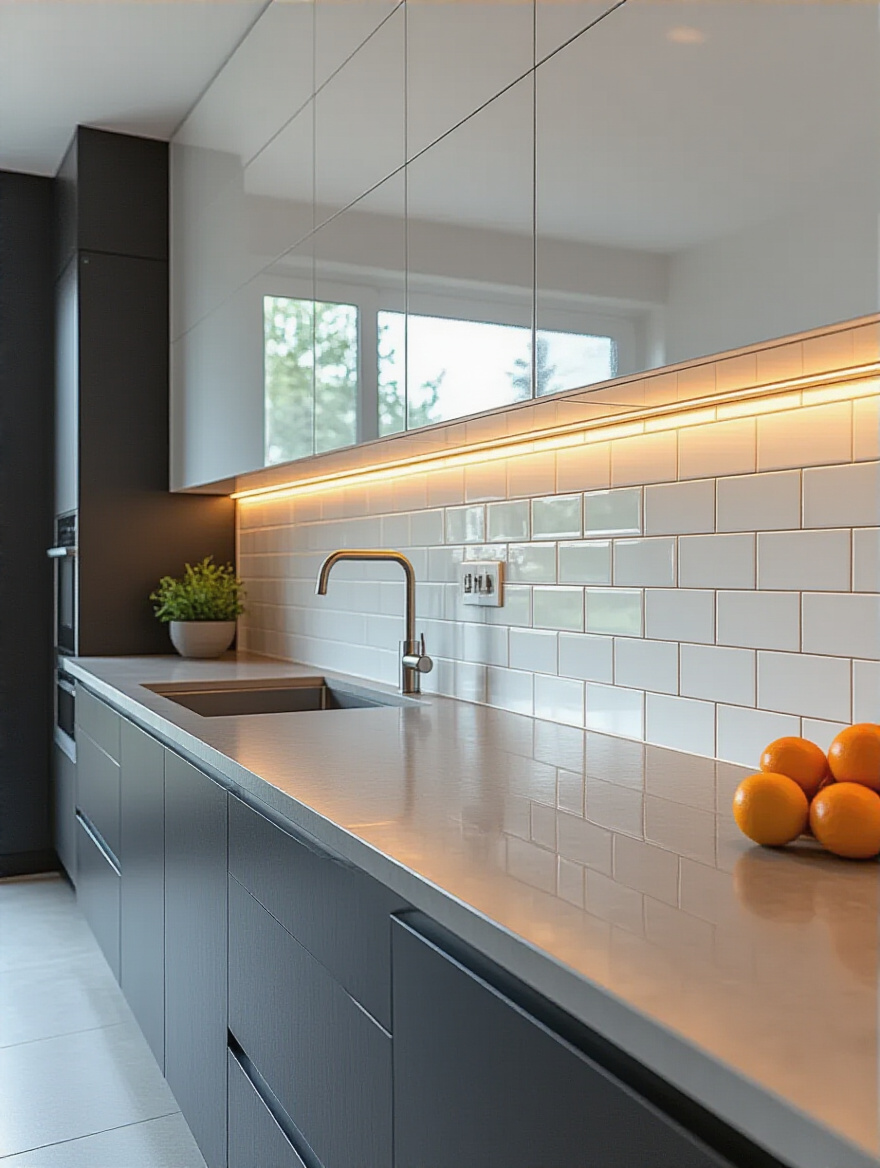
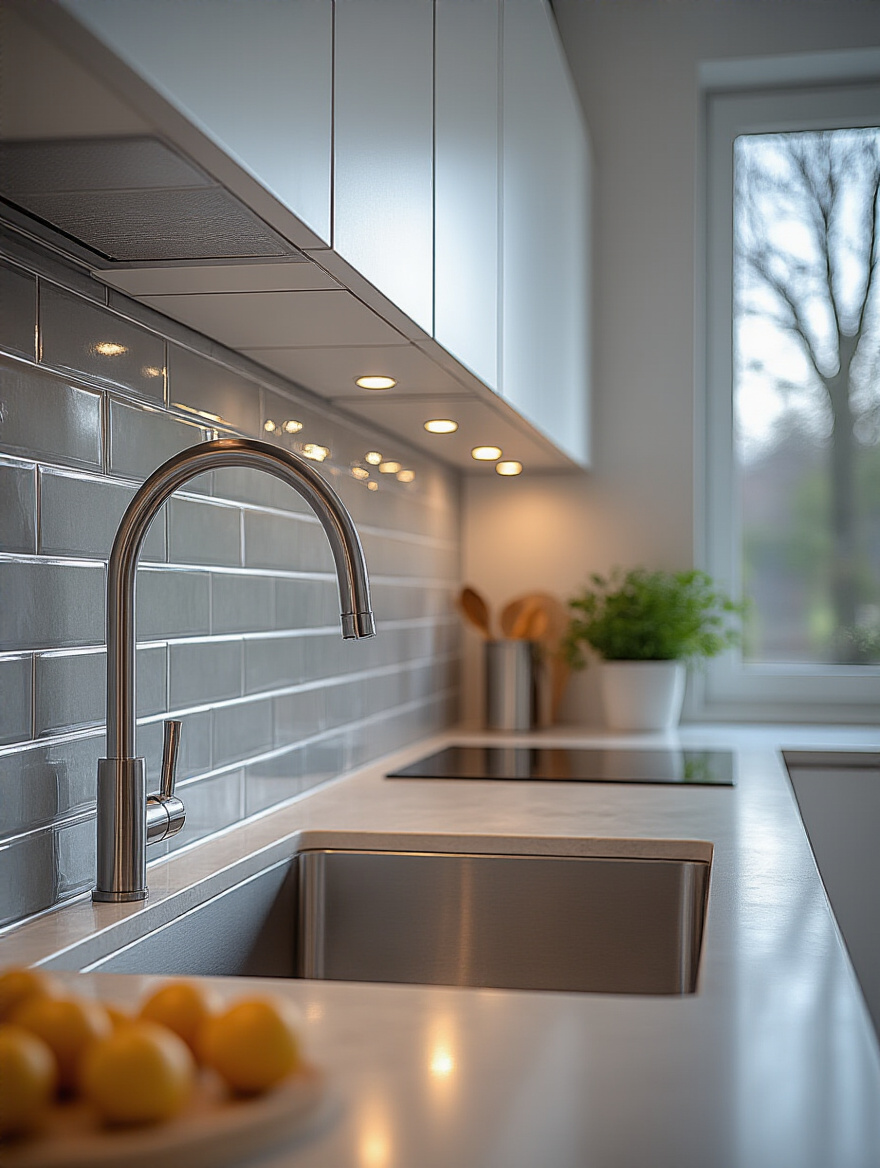
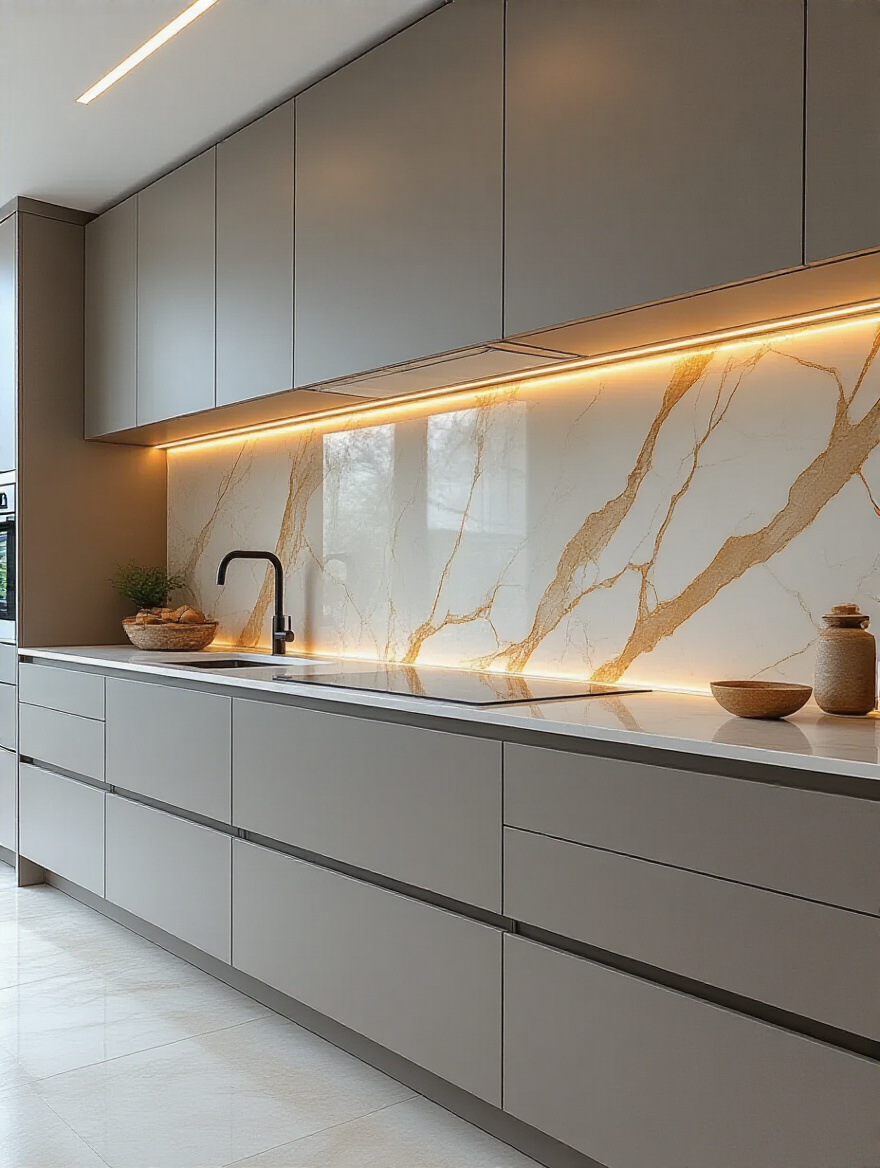
12. Integrate Under-Cabinet Lighting to Enhance Backsplash Texture and Ambience
This is my number one non-negotiable tip for any kitchen renovation. Under-cabinet lighting is not a luxury; it’s an essential design tool that elevates everything. It does two critical things from a wellness perspective. First, it provides crucial task lighting directly on your work surfaces, reducing eye strain and making food prep safer and more enjoyable. Second, it transforms the ambiance of your entire kitchen. It washes the backsplash in a soft glow, highlighting its texture, color, and depth, turning a simple wall into a deliberate, beautiful feature.
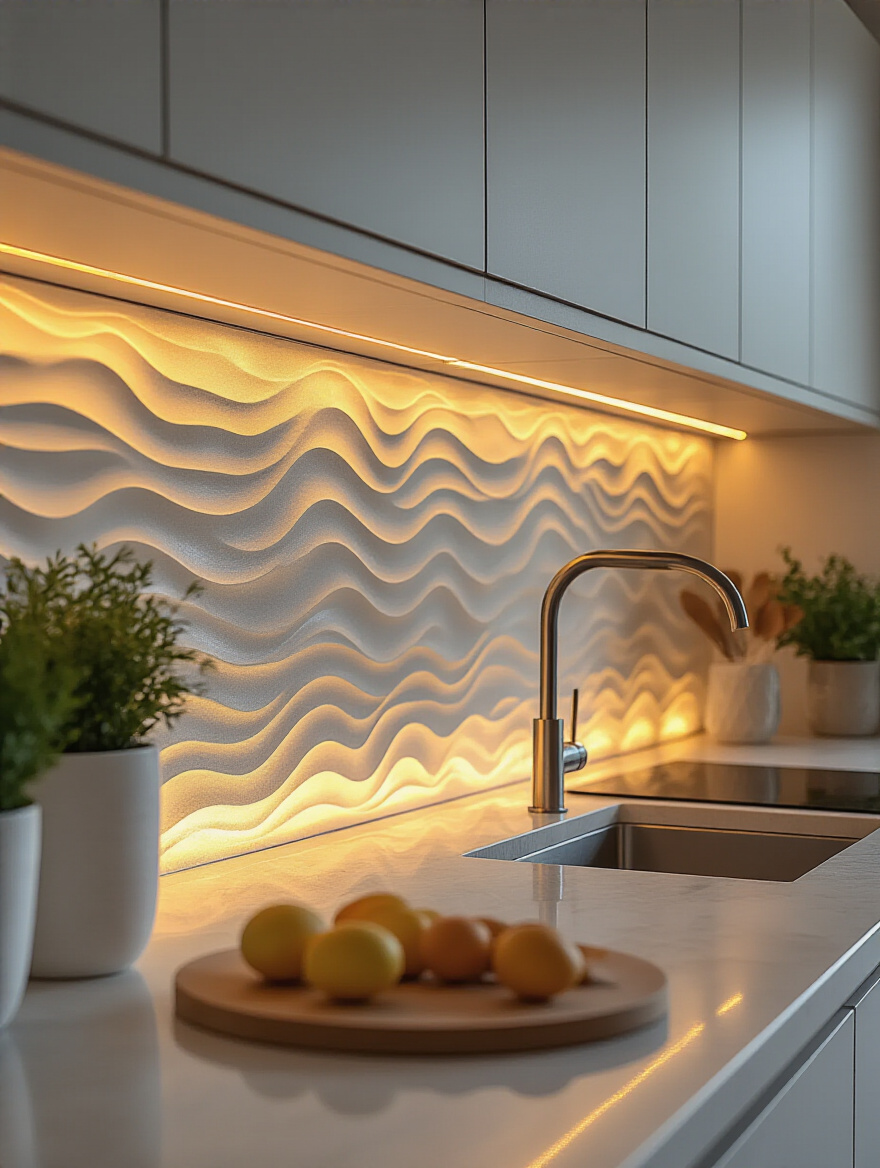
The effect on your well-being is profound. In the evenings, you can turn off the harsh overhead lights and rely solely on the warm, indirect glow from under your cabinets. This signals to your brain that it’s time to wind down, supporting your natural circadian rhythms. A confession: I used to think all LED strips were the same. But the color temperature makes all the difference. Look for a warm white (around 2700K-3000K) and make sure you install a dimmer. Being able to control the intensity of the light gives you complete control over the mood of your space, from bright and functional to soft and restorative.
Now let’s move into the nitty-gritty of making all this beautiful design a lasting reality.
Installation Mastery and Professional Finishes
You can choose the most exquisite, calming materials in the world, but if the installation is sloppy, the entire effect is lost. This is the stage where craftsmanship truly matters. Paying attention to these finishing details is what separates a standard job from a high-end, professional result. These steps ensure that your backsplash not only looks perfect but is also durable and built to last.
13. Ensure Proper Wall Surface Preparation for Optimal Adhesion
The single most important day in the life of your backsplash is the day before the tile goes up. Proper preparation of the wall surface is the invisible foundation for a beautiful and long-lasting installation. A tile is only as strong as the bond it has with the wall behind it, and that bond can be completely compromised by grease, dust, or an uneven surface. I tell all my clients that over 70% of tile failures are due to poor prep. The adhesive simply can’t do its job if the wall isn’t clean, flat, and primed.
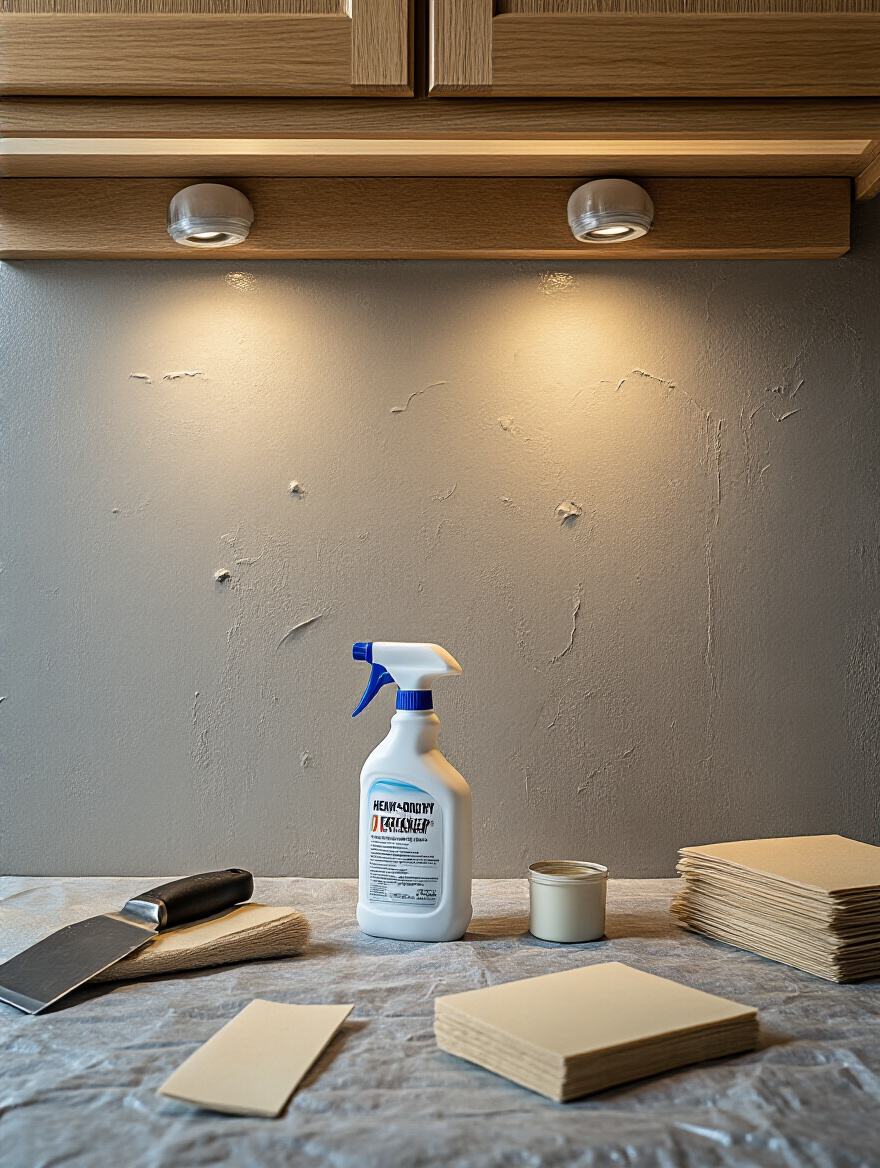
Don’t just give the wall a quick wipe. Use a degreaser, especially behind the stove, to remove any trace of cooking oils. Fill any holes, sand them smooth, and then—this is the part everyone skips—prime the wall. Primer seals the surface of the drywall, ensuring that the moisture from your adhesive is absorbed slowly and evenly, which is what creates a powerful, permanent bond. A professional installer knows this, which is why hiring a true craftsperson is always worth the investment. Their meticulous prep work is the silent hero of your project.
Once the tile is up, the next detail that makes a world of difference is the grout.
14. Master Grout Selection for Enhanced Aesthetics and Maintenance
Grout is so much more than the stuff that fills the gaps. It is a design element that will define the entire look of your backsplash. A common misconception is that grout color is just a minor detail, but it can completely change the final aesthetic. A contrasting grout will highlight the shape of each tile, creating a graphic pattern. A matching grout will make the lines disappear, creating a more seamless, monolithic, and calming surface. Neither is right or wrong, but it has to be an intentional choice that aligns with your overall vision.
From a wellness and maintenance standpoint, investing in a high-performance grout is one of the smartest decisions you can make. Standard cement-based grout is porous and prone to staining and mildew. I always recommend upgrading to an epoxy or single-component grout. They are non-porous, stain-proof, and never need to be sealed. Yes, they cost more upfront, but they will save you countless hours of scrubbing and frustration down the road. This small upgrade ensures your beautiful backsplash stays pristine and hygienic with minimal effort.
Next up is the detail that truly signals a professional job.
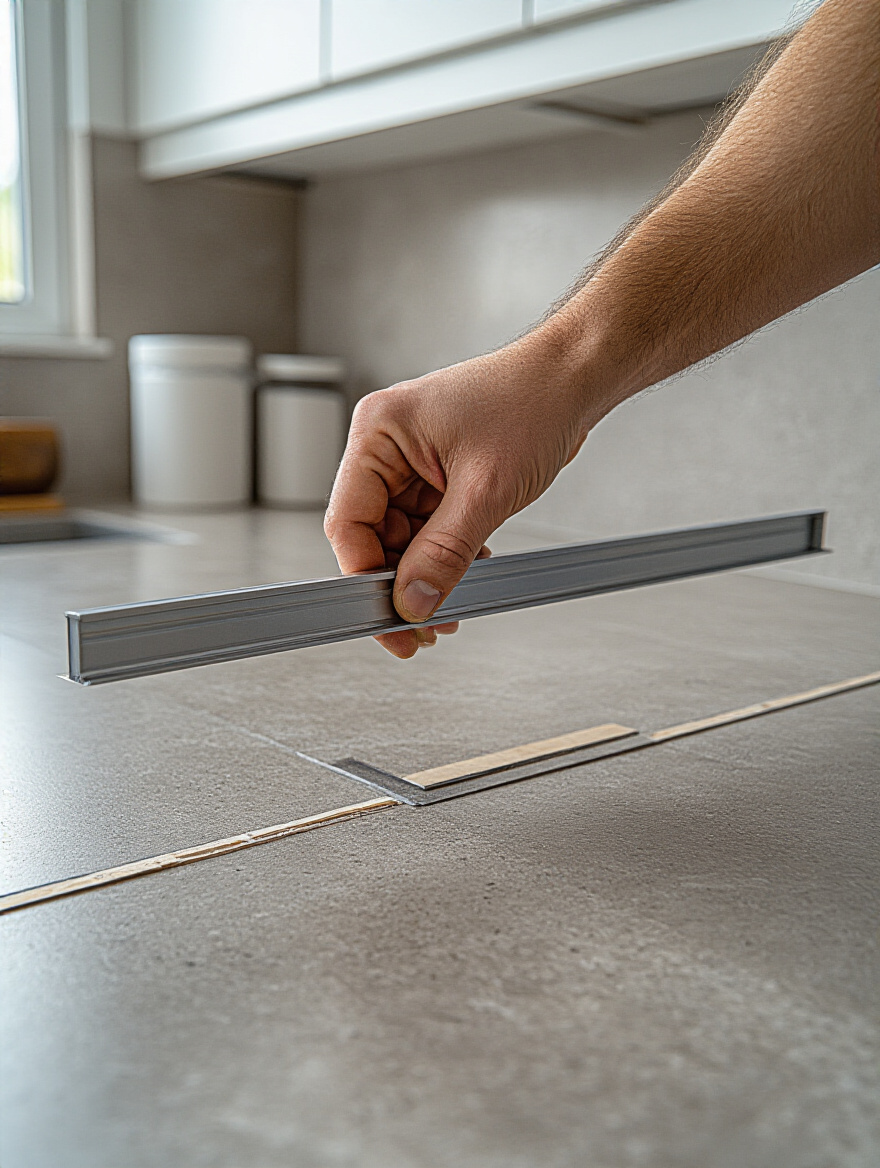
15. Execute Flawless Edge Finishing for a Clean, Professional Result
How a backsplash ends is just as important as how it looks in the middle. The exposed edges—where the tile stops at the end of a counter or the edge of a cabinet—can make or break the entire installation. Leaving a raw, cut edge of a tile exposed looks unfinished and unprofessional, and it’s also prone to chipping. This is where edge trim, like a Schluter profile, or a dedicated bullnose (rounded edge) tile comes in. It provides a clean, crisp, and protected line to finish the installation beautifully.
A pet peeve of mine is seeing a beautiful tile job finished with a messy, thick bead of caulk to hide a bad cut. A true professional plans their layout so that cuts are minimal and hidden, and they use trim to create a deliberate, finished edge. For natural stone slabs, a mitered edge, where two pieces are cut at a 45-degree angle to meet perfectly at a corner, is the ultimate sign of high-end craftsmanship. These finishing touches are the details that create a sense of quality and care in your space.
Let’s talk about another detail that can easily disrupt a beautiful design.
16. Address Electrical Outlets and Switches Seamlessly within the Design
Nothing ruins the serene flow of a beautiful backsplash faster than a clunky, bright white plastic outlet cover sitting right in the middle of it. Integrating outlets is a critical design detail that is so often overlooked. The goal is to make them disappear as much as possible, so the eye can travel uninterrupted across the surface. This creates a more peaceful and uncluttered visual experience, which directly contributes to a calmer state of mind.

There are so many great solutions now. My favorite shortcut is the under-cabinet power strip. This relocates your outlets to a hidden strip tucked up under your upper cabinets, leaving your backsplash completely free of visual interruptions. If you must have outlets on the wall, opt for screwless cover plates in a color that matches your tile or grout as closely as possible. For a recent project with a dark gray soapstone backsplash, we used dark bronze outlets and covers, and they practically vanished into the stone. It’s a small detail that makes a huge difference in achieving a sophisticated, high-end look.
Now that the backsplash is installed, let’s explore some advanced techniques to maximize its impact.
Advanced Styling, Maintenance, and Optimization
We’ve covered the fundamentals, but here are a few advanced strategies that can take your kitchen design to the next level. These ideas are about creating a truly immersive and cohesive experience. We’ll also cover how to protect your investment and keep your backsplash looking beautiful for years to come, ensuring the wellness benefits you’ve created are long-lasting.
17. Design a Full-Height Backsplash for Dramatic Visual Impact
If you truly want to make a statement and create a feeling of luxury and expansiveness, take your backsplash material all the way to the ceiling. A full-height backsplash is an incredibly powerful design move. By creating one continuous vertical surface, you eliminate the awkward line where the tile stops and the painted wall begins. This draws the eye upward, making the ceilings feel higher and the entire kitchen feel grander and more cohesive. It’s an architectural statement that turns the entire wall into a feature.
This is particularly effective on the wall behind your range or sink. I designed a kitchen for a client with standard 8-foot ceilings, and we ran a beautiful, subtly veined quartzite slab from the counter all the way up to the ceiling behind her range hood. It instantly became the undisputed work of art in the room. The seamless vertical expanse created an illusion of height and a sense of effortless luxury that completely transformed the space. It’s a bold choice, but the visual and emotional payoff is immense.
For the ultimate in cohesion, consider this next step.
18. Blend Backsplash with Countertop Material for a Unified Look
For the ultimate in serene, seamless design, use the same slab material for your countertop and your backsplash. This is the hallmark of a truly high-end, contemporary kitchen. It creates a “waterfall” effect as the material flows from the horizontal plane of the counter up the vertical plane of the wall. This visual continuity is incredibly calming to the eye, eliminating the mental work of processing two different materials and the line where they meet. The result is a clean, monolithic look that feels both minimalist and incredibly luxurious.

This approach is perfect for materials with beautiful veining, like marble or quartzite, as it allows the natural pattern to be displayed like a piece of art. The key here is working with an expert fabricator who can “bookmatch” the slabs, meaning they align the stone so the veining continues seamlessly from the countertop up the wall. This is a level of artistry that requires incredible skill, but the effect is breathtaking. It creates a space that feels deeply intentional, harmonious, and unified.
No matter which material you choose, you have to protect it.
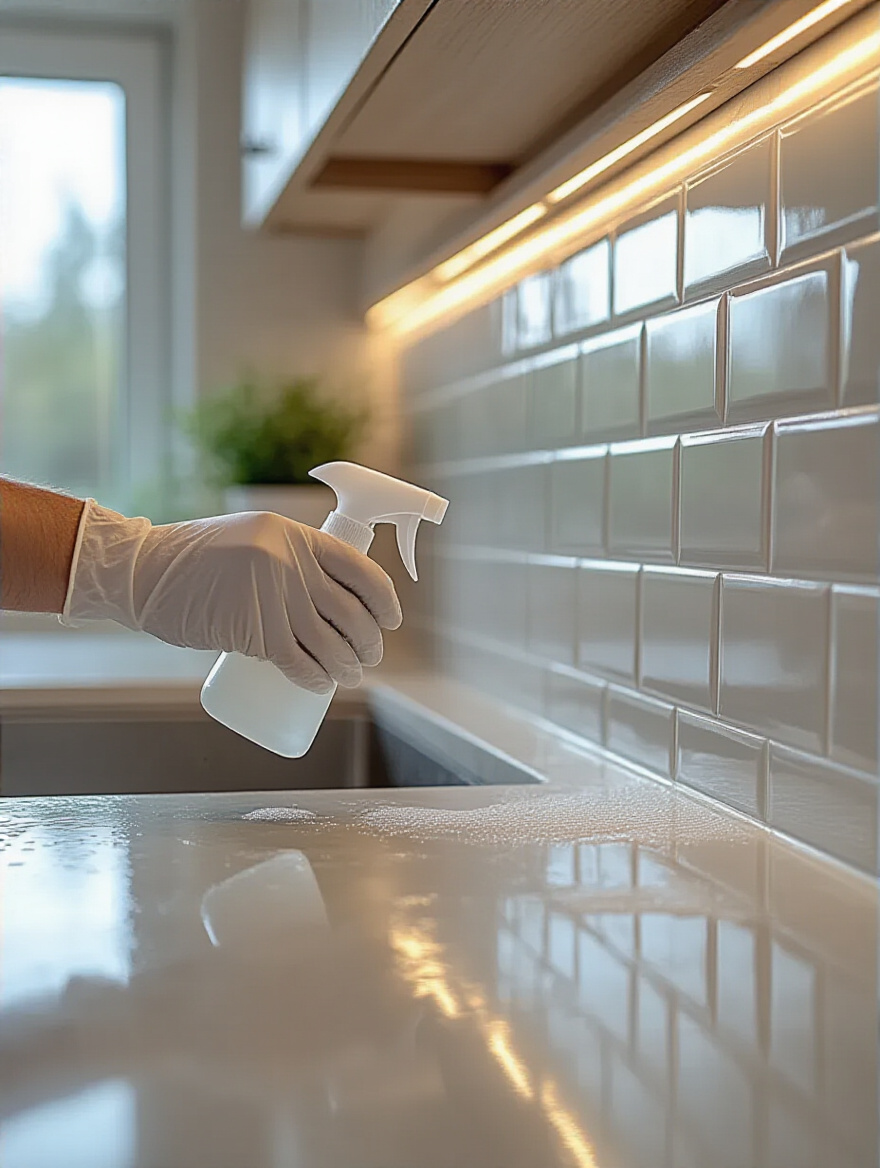
19. Apply High-Quality Protective Sealants to Prevent Stains
Think of sealant as invisible insurance for your beautiful new backsplash. For any porous material—like natural stone, unglazed tile, or most importantly, your grout lines—a high-quality penetrating sealer is absolutely essential. It works by soaking into the material and creating a protective barrier that repels water, oil, and other potential stains. This doesn’t make the surface stain-proof, but it gives you precious time to wipe up a spill before it has a chance to soak in and cause permanent damage.
So many people either skip this step or forget to reapply it. The water droplet test is the easiest shortcut: just flick a few drops of water onto your grout or stone. If it beads up, your sealant is working. If it soaks in and darkens the material, it’s time to re-seal. I recommend doing this once a year as part of your spring cleaning routine. This simple act of maintenance is what will keep your backsplash looking as pristine and beautiful as the day it was installed, protecting both your investment and your peace of mind.
Finally, let’s establish a simple routine to keep everything looking its best.
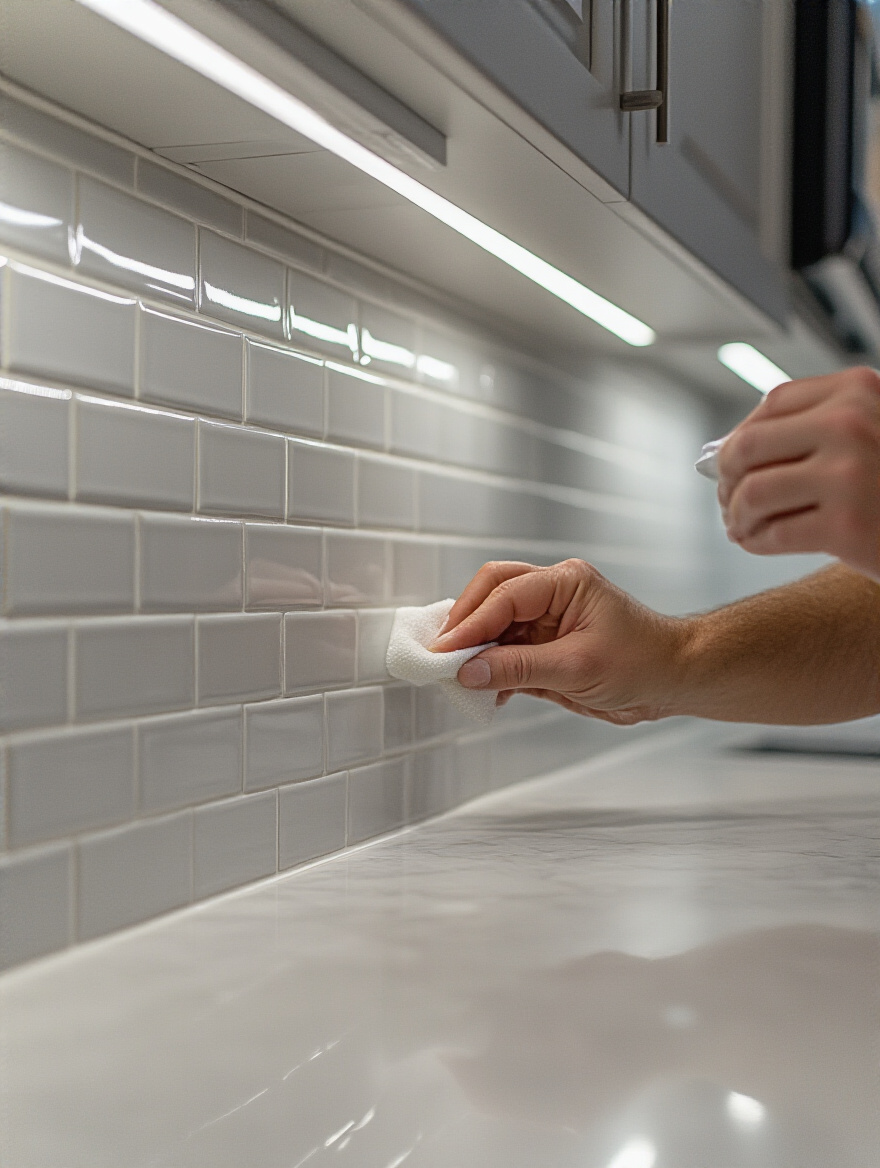
20. Develop a Routine Cleaning Strategy for Pristine, Lasting Appearance
The secret to a backsplash that always looks beautiful isn’t intense, marathon scrubbing sessions; it’s a simple, consistent daily routine. The most impactful thing you can do is wipe down your backsplash after you cook, especially behind the stove. Use a soft microfiber cloth and a gentle, pH-neutral cleaner. This takes less than 30 seconds, but it prevents grease and food splatters from building up and becoming a major chore later on. A clean and clear space reduces stress and contributes to a sense of calm and order.
The biggest mistake I see is people reaching for harsh, abrasive, or acidic cleaners, which can permanently damage many materials. You should never use vinegar on natural stone, as the acid will etch the surface. A simple rule is to always match the cleaner to the material. When in doubt, a drop of gentle dish soap in warm water is safe for almost any surface. This mindful, gentle approach to cleaning isn’t just about maintenance; it’s a small daily ritual of caring for your home, which in turn helps your home care for you.
Conclusion
So there you have it. Choosing a contemporary kitchen backsplash is about so much more than what’s trending. It’s about making a series of mindful choices that come together to create a space that truly nurtures you. It’s about balancing beauty with function, style with safety, and trends with timelessness. By thinking about how a material reflects light, how a pattern affects your focus, and how a surface feels to clean, you are actively designing for your own well-being.
Your kitchen is the heart of your home—the place where you nourish yourself and your family. The backsplash is its backdrop. Let it be one that brings you a sense of calm every morning, a feeling of clean simplicity while you cook, and a soft, ambient glow at the end of the day. You have the knowledge now to make an empowered choice, so trust your intuition. Create a space that doesn’t just look like your dream kitchen, but feels like it, too.