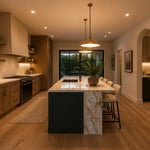
Picture this: You’re standing at the bottom of a rickety pull-down ladder, peering up into the dusty, cobweb-filled darkness of your attic. It’s a space full of forgotten treasures and maybe a few resident spiders, smelling of old timber and history. Most people see a storage problem. I see the most character-filled room in your house just waiting to be born.
You know what people always ask me? “Mark, can I really turn this old attic into a livable bedroom?” The answer is an emphatic yes, but it’s not as simple as those home renovation shows make it look. They skip over the hard parts. The real story is about respecting the home’s original bones while making it safe, comfortable, and functional for today. Forget the corporate speak and the quick-fix nonsense. I’m going to tell you what actually matters, the expensive lessons I’ve learned the hard way, and the shortcuts I wish I’d known when I first started restoring these old beauties.
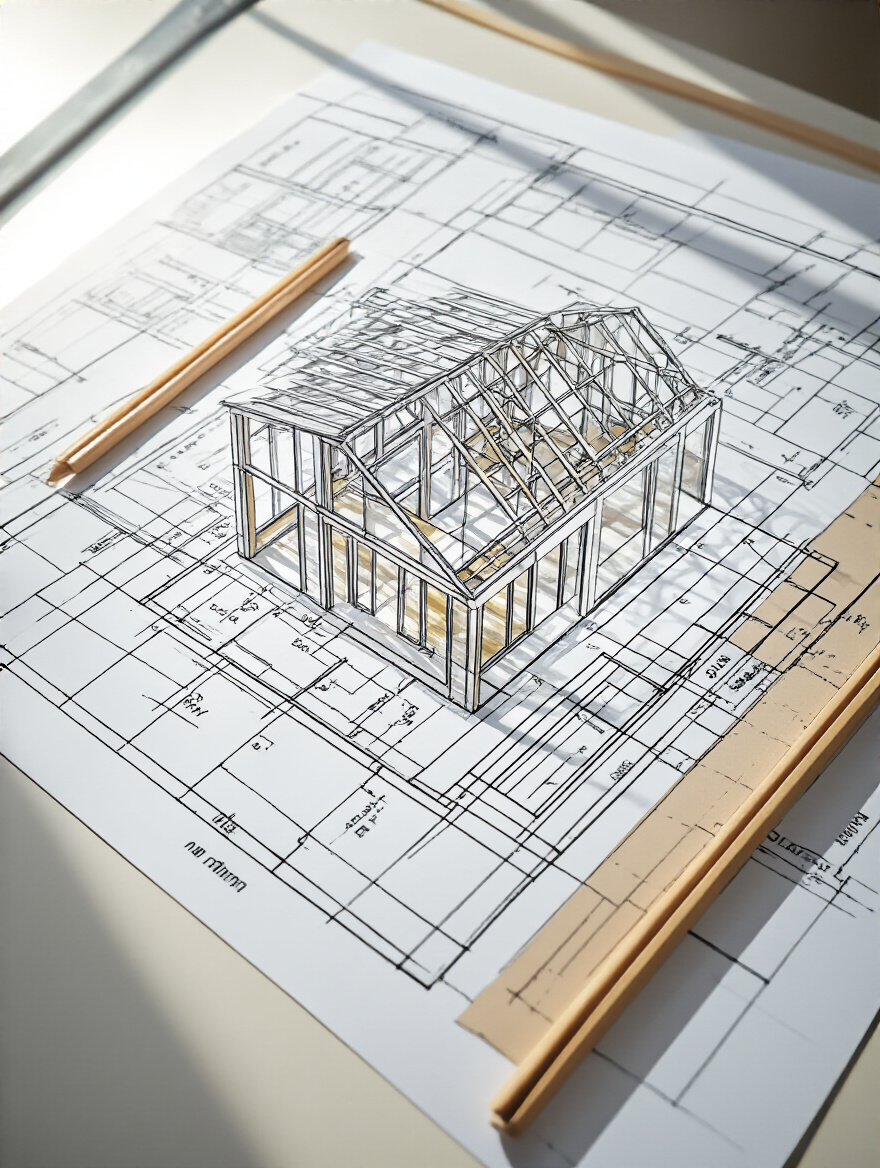
Foundational Planning and Feasibility Assessment (Part 1)
This is the boring part, I know. But I’m telling you, this is where you save yourself from financial ruin and heartbreak. I watched a client try to skip this stage on a 1910s Craftsman home, and it cost them dearly. Getting the foundation right—both literally and figuratively—is the single most important part of the entire project. Don’t even think about paint colors until you’ve nailed these first steps.
1. Evaluate Structural Integrity and Headroom Requirements
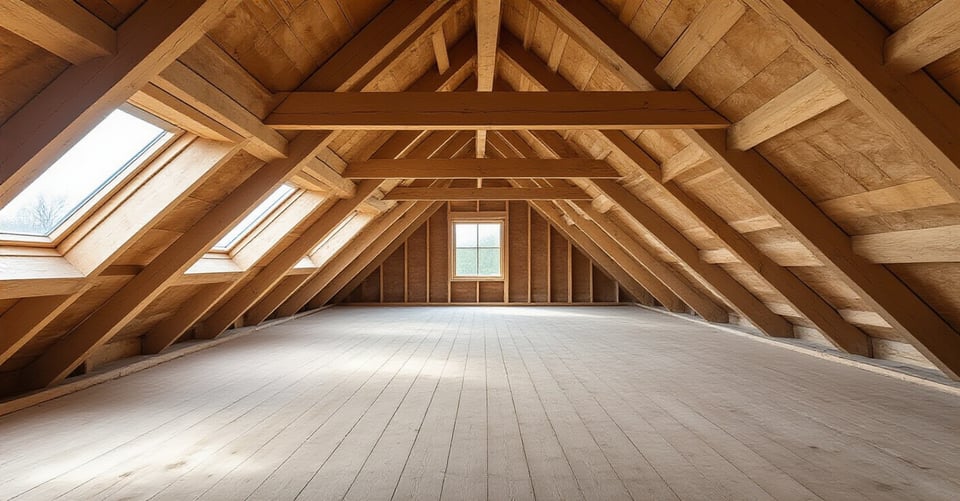
Before you buy a single 2×4, you need to know if your attic floor can even hold a bed, let alone a person. Those joists were likely designed to hold up a plaster ceiling and some light storage, not to be a proper floor. You need a structural engineer. This is non-negotiable. They’ll assess the joists, the roof structure, and the foundation to see if it can handle the new “live load.” People think they can eyeball this. They can’t.
Most building codes require a minimum ceiling height, usually around 7 feet 6 inches, over at least half the floor area. Get out a tape measure and see what you’re actually working with from the top of the joists to the bottom of the roof rafters. I once had a project where the peak was over 8 feet, but the usable space that met code was a tiny sliver down the middle. That discovery changed the entire design from a master suite to a cozy office. Don’t guess; measure.
Once you know the structure is sound, your next call is to the one place everyone loves to avoid: the local building department.
2. Verify Building Codes and Permit Compliance for Attic Conversions
Can we talk about why everyone tries to skip permits? It’s a fool’s errand. Attempting an attic conversion “under the radar” is the most expensive mistake you can make. The fines are one thing, but when they make you tear everything out because your staircase isn’t to code or you don’t have a proper emergency exit, that’s when the real pain starts. Permits aren’t just bureaucracy; they are a checklist for keeping you and your family safe.
Contact your local planning department and ask them for the specific requirements for converting an attic to “habitable space.” They will have rules for everything: insulation R-values, window sizes for egress, staircase dimensions, and electrical requirements. Getting this information upfront saves you from having to undo expensive work later. An unpermitted attic bedroom doesn’t add value to your home—it becomes a liability you have to disclose when you sell.
Now that you’re on speaking terms with your building inspector, let’s figure out how you’re actually going to get up there.
3. Strategize Essential Access and Staircase Integration
That flimsy pull-down ladder has to go. To be a legal bedroom, an attic needs a permanent, code-compliant staircase. This is often the biggest puzzle in an attic conversion, because a proper staircase eats up a surprising amount of floor space on the level below. You can’t just stick it anywhere; you have to think about the flow of both floors.
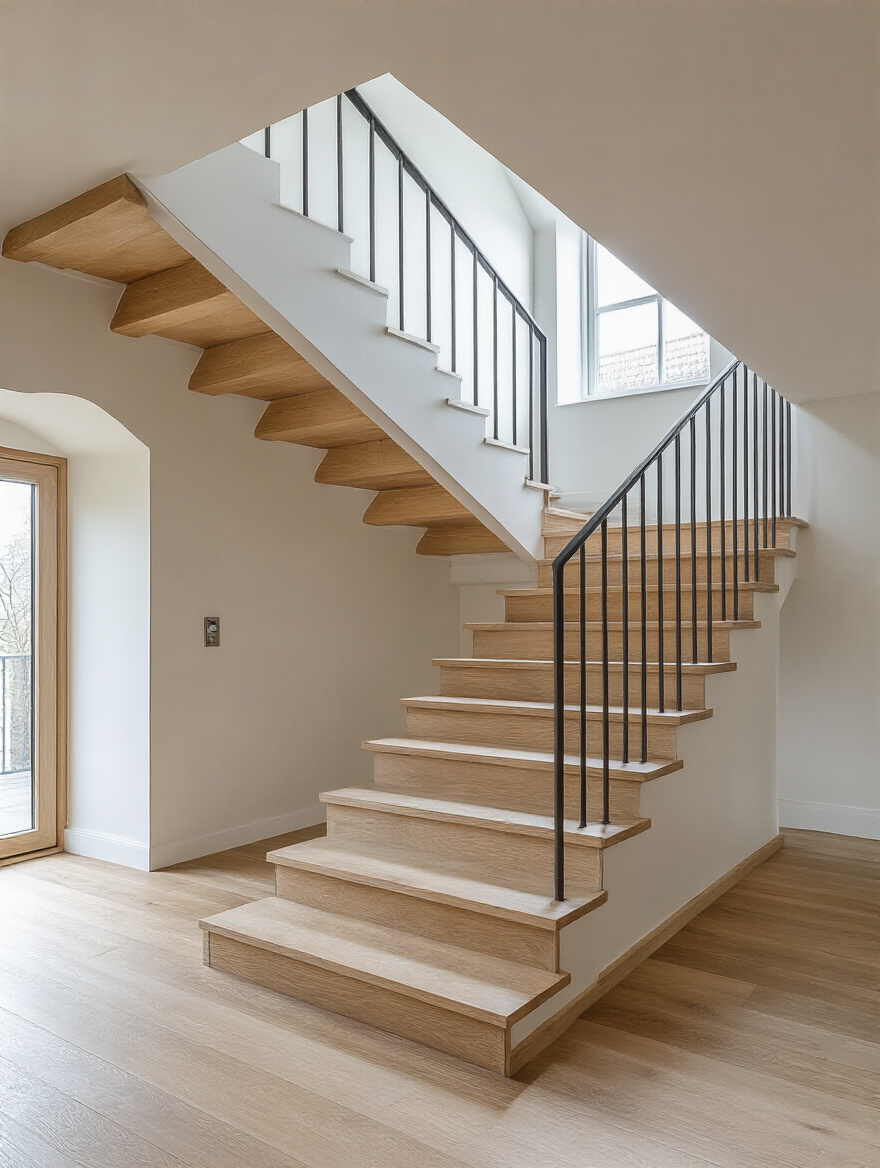
Work with your architect or designer to find the most logical spot. Do you sacrifice a closet? Rework a hallway? A straight-run stair is simplest but takes up the most linear space. An L-shaped or spiral staircase can be more compact, but spiral stairs often don’t meet code for primary access in some areas, so check first. This is another area where I’ve seen people get it wrong. They build a beautiful attic room with a gorgeous, ship-ladder style staircase, only to be told it’s illegal and they can’t count the space in their home’s square footage.
With access sorted, you can start laying out the room itself, working with those quirky angles, not against them.
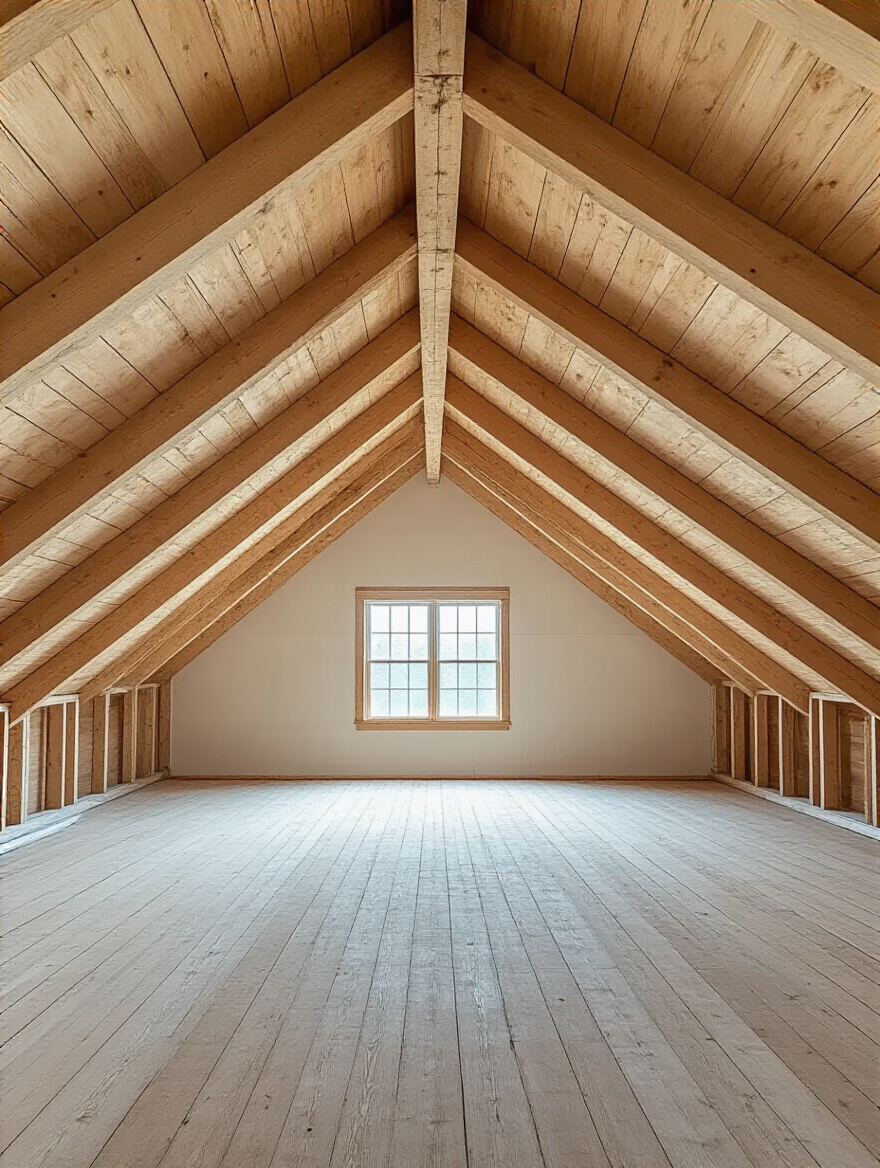
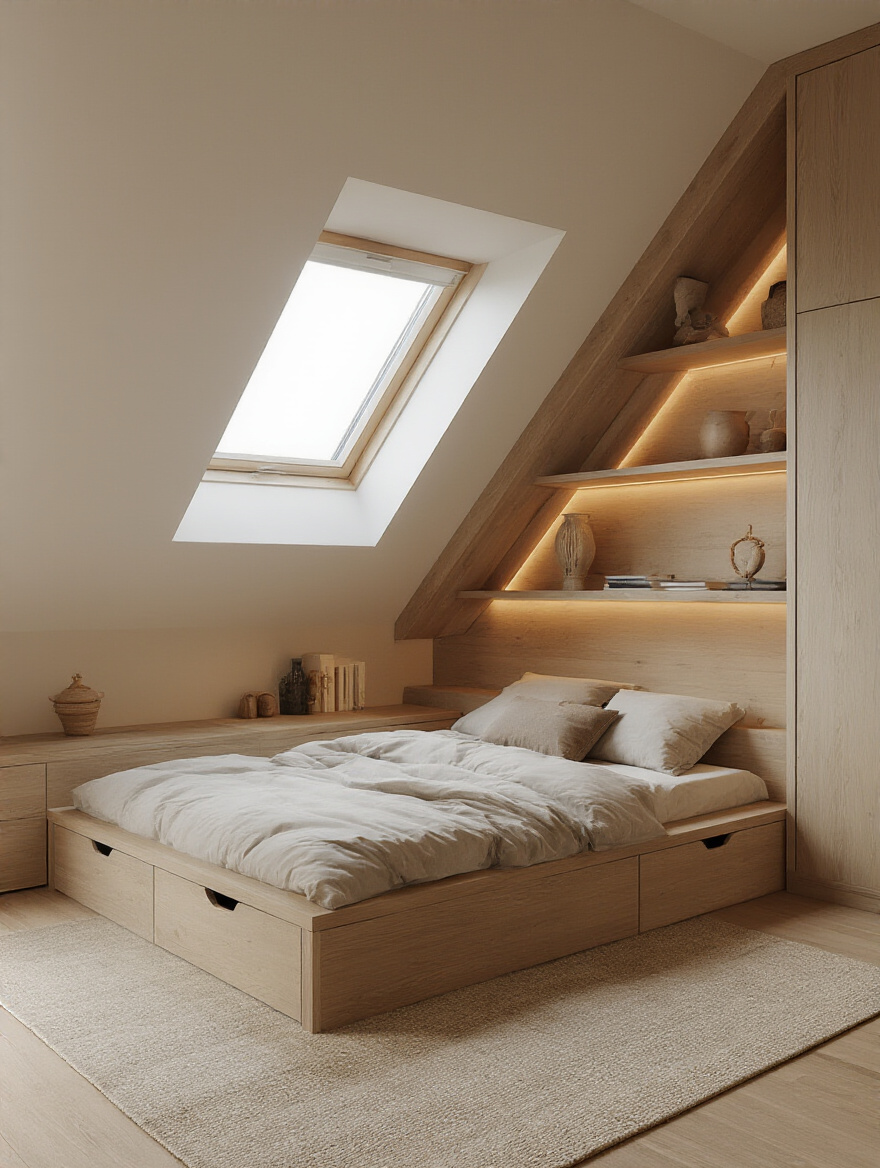
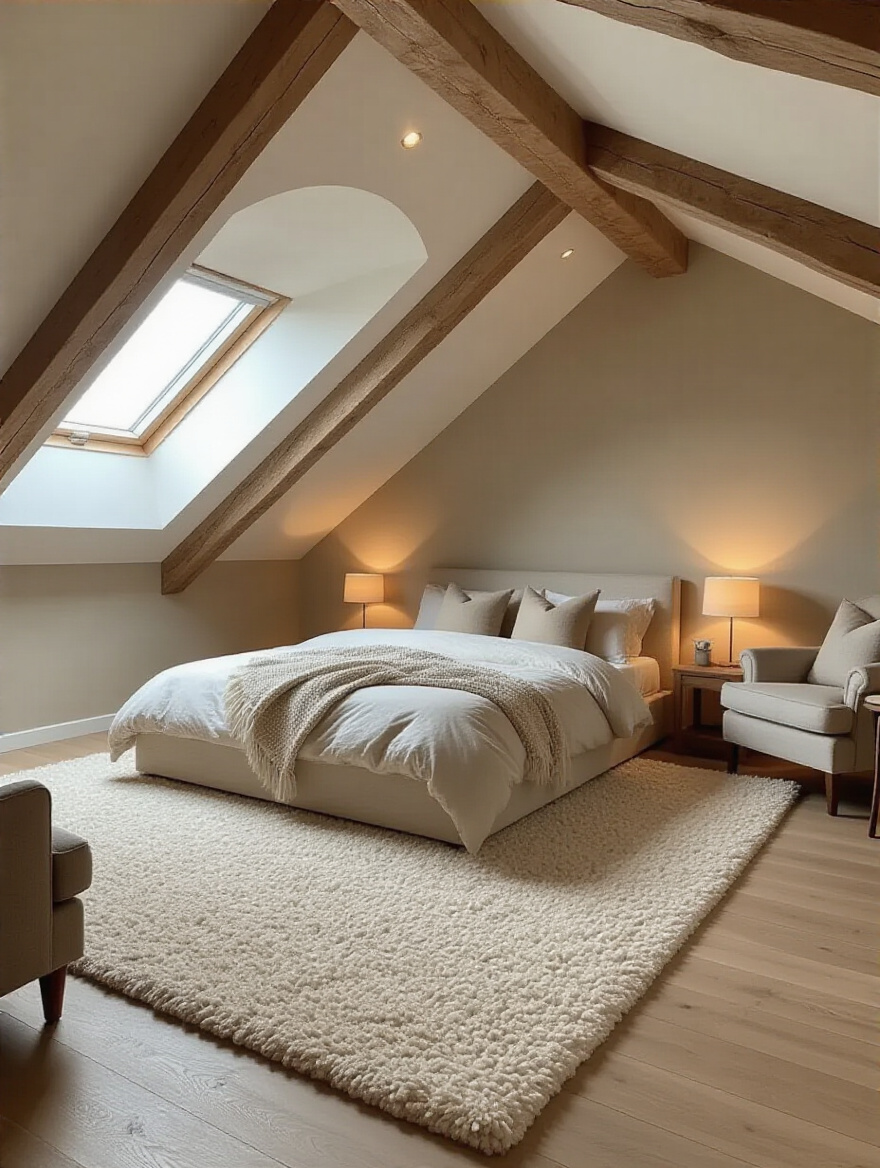
4. Develop Smart Layouts to Maximize Sloped Ceiling Areas
Those sloped ceilings are the defining feature of an attic. Don’t fight them; embrace them. The common mistake is trying to arrange furniture like you would in a regular room with four vertical walls. Instead, use the low-ceiling areas for things that don’t require standing height. The space under the eaves is perfect for a bed, a low-slung dresser, built-in drawers, or a cozy reading nook.
Place your high-traffic zones—like the path from the door to the closet or the area where you get dressed—in the parts of the room with the highest ceilings. I tell my clients to use painter’s tape on the floor to map out furniture and walkways. It’s a simple trick that helps you feel the flow of the space and identify any awkward spots before you start moving heavy furniture up that brand-new staircase.
Now we shift from the basic structure to the elements that make the space truly comfortable.
Foundational Planning and Feasibility Assessment (Part 2)
Okay, you’ve confirmed the attic can be a room. Now, how do we make it a room you actually want to spend time in? Attics are notorious for being the hottest and coldest places in a house. Addressing insulation and light isn’t just a design choice; it’s a fundamental requirement for making the space habitable.
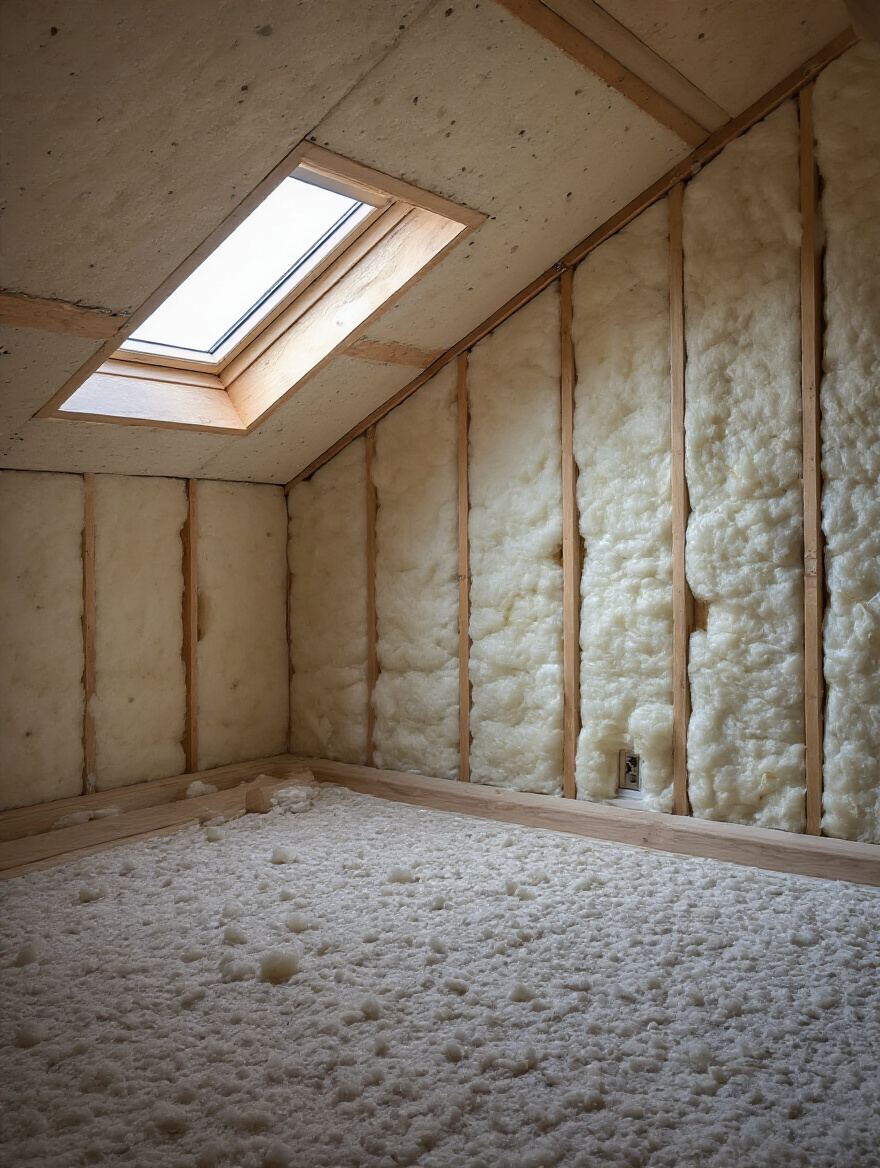
5. Prioritize Effective Insulation for Year-Round Comfort
If you do one thing right, do this. An uninsulated or poorly insulated attic is an oven in the summer and an icebox in the winter. Your HVAC system will run constantly, your energy bills will be astronomical, and you’ll still be uncomfortable. The goal is to create a sealed, conditioned envelope around your new living space. The BS everyone falls for is thinking insulation is just about stuffing some fiberglass batts between the rafters.
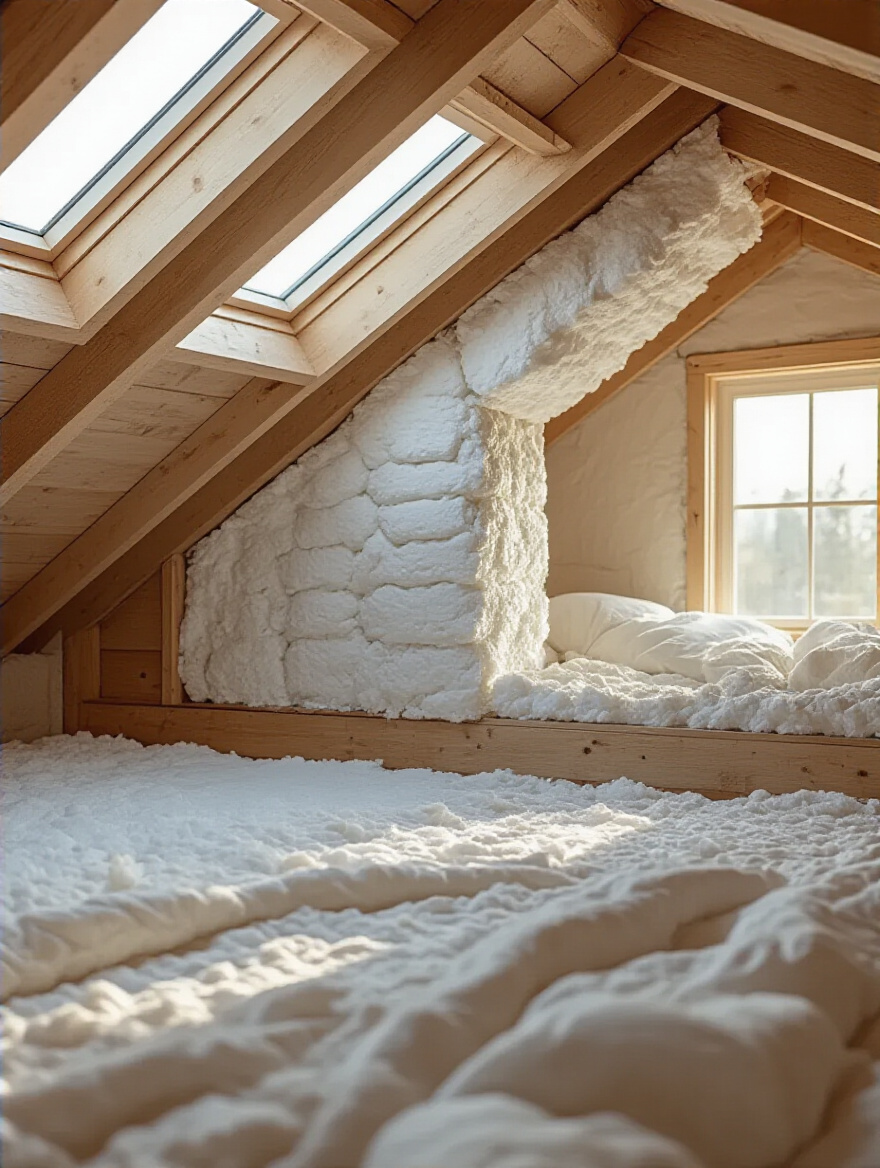
Modern building science has given us much better tools. Spray foam insulation is often the best choice for attics because it creates both a thermal barrier and an air seal in one step, getting into all the little crevices of an old roof structure. It’s more expensive upfront, but it pays for itself in energy savings and comfort. Whatever you choose, make sure you meet or exceed your local code for R-value, and don’t forget to properly ventilate the roof deck to prevent moisture buildup.
With the climate under control, it’s time to banish the gloom and let the sunshine in.
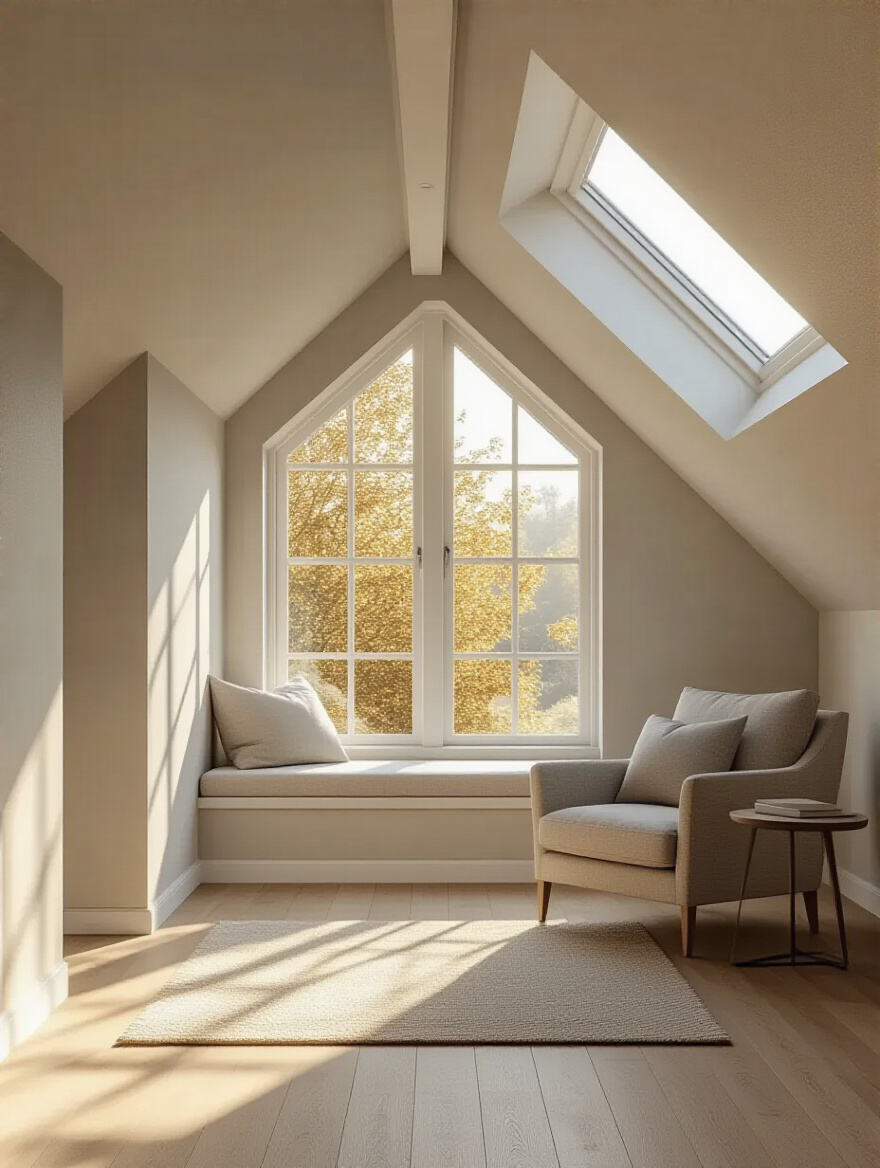
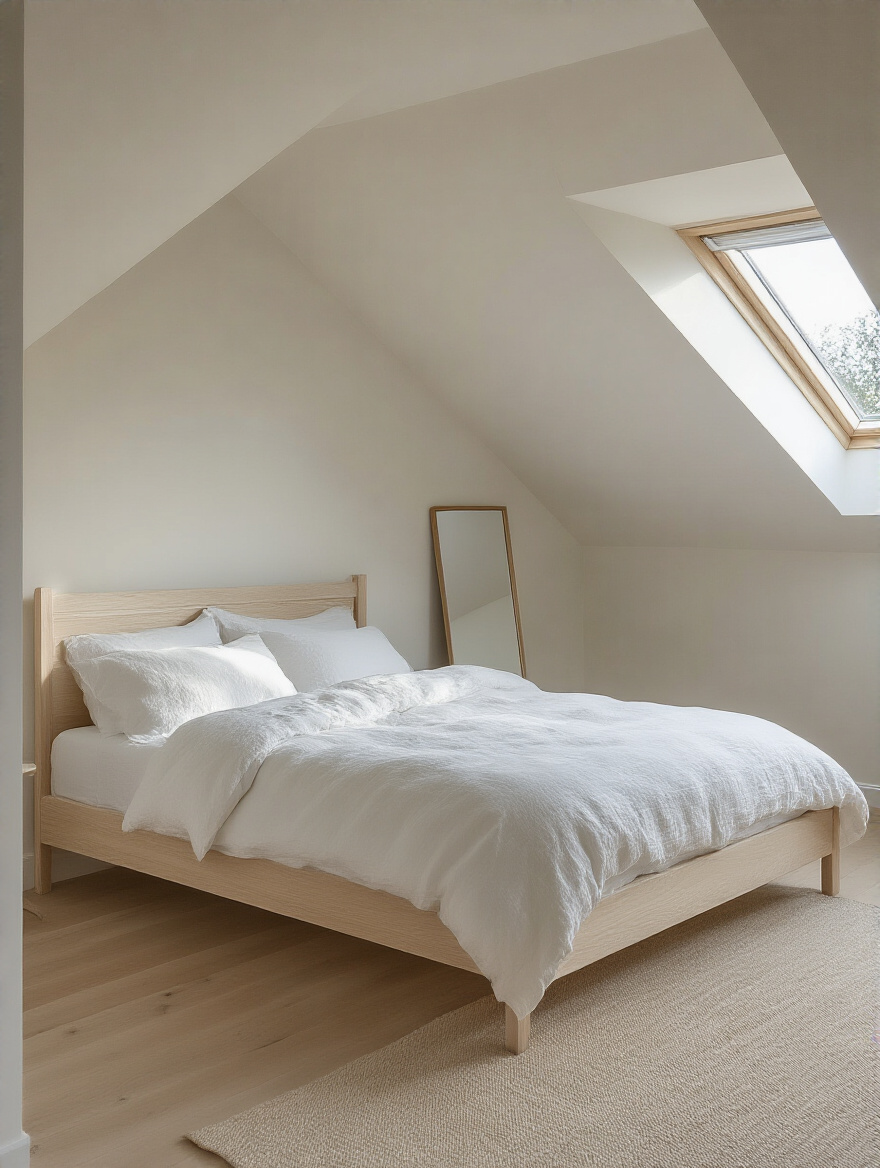
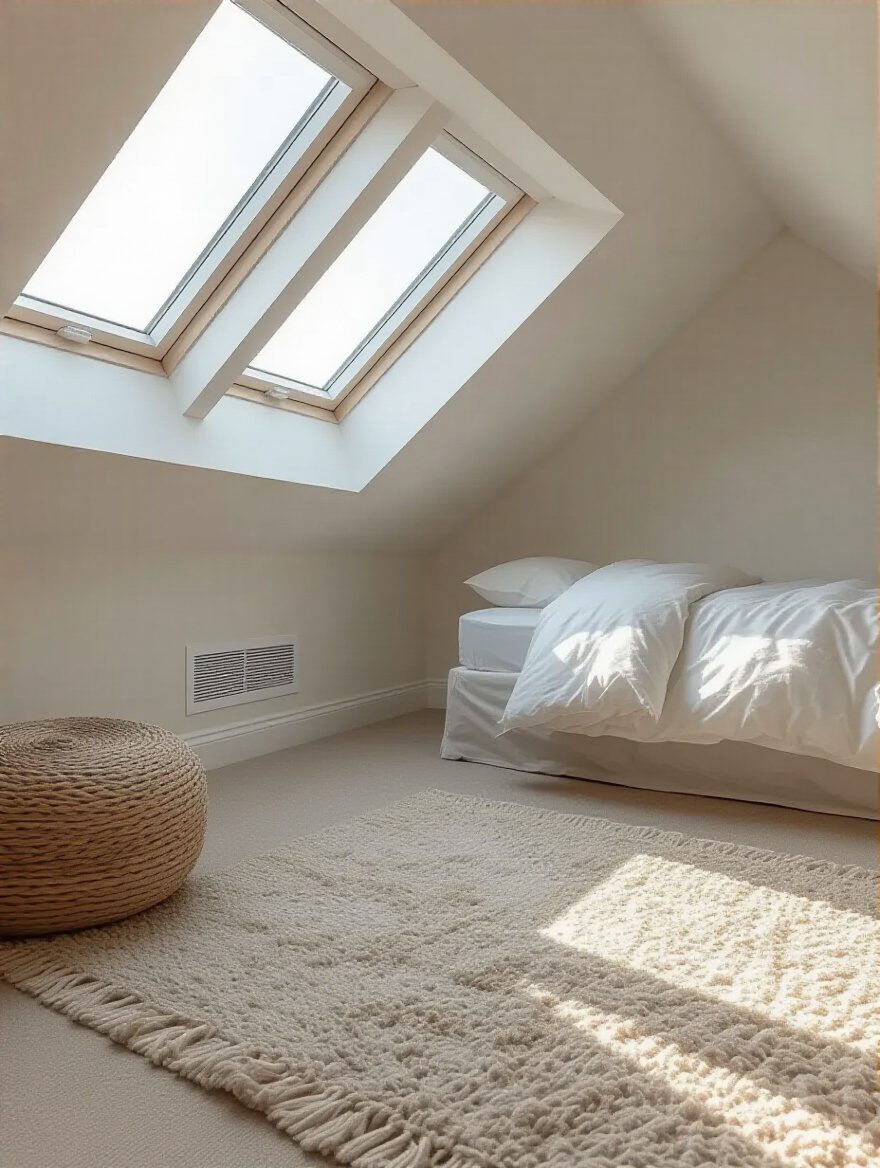
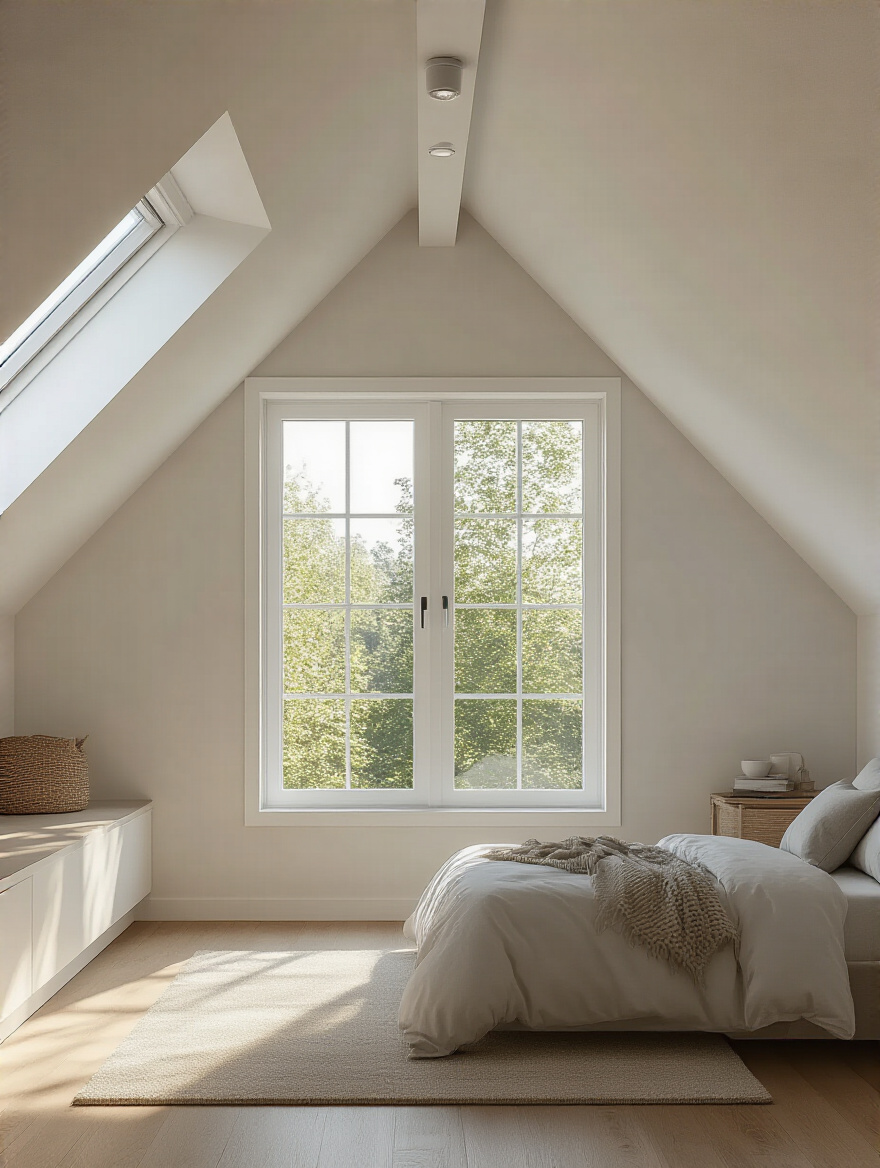
6. Integrate Dormers or Skylights to Enhance Natural Light
Natural light is the magic ingredient that transforms a cramped, cave-like attic into a bright, airy retreat. Don’t skimp on this. While you can add a simple skylight, I often encourage clients with historic homes to consider dormers. A well-designed dormer not only floods the space with light but also adds precious headroom and usable square footage.
A “shed” dormer adds the most space, while a “gable” or “doghouse” dormer can add incredible architectural charm, especially on a Victorian or Colonial Revival home. The key is to make it look like it’s always been there. Study the home’s original architectural language—the roof pitch, the window styles, the trim details—and design the dormer to match. A poorly designed dormer sticks out like a sore thumb and can detract from a historic home’s character.
With the big structural and environmental issues handled, we can start building the room from the inside out.
Core Design Elements and Essential Installations (Part 1)
This section covers the guts of your new bedroom. We’re talking about the surfaces you’ll walk on, the lights that will illuminate the space, and the systems that will keep you comfortable. These are the workhorses of the design, and getting them right is crucial for long-term satisfaction.
7. Select Lightweight and Sound-Dampening Flooring Options
Remember those floor joists we talked about? Even after reinforcement, you want to be mindful of weight. Heavy materials like tile or thick solid hardwood might not be the best choice. I often recommend engineered hardwood, luxury vinyl plank (LVP), or cork. They are durable, lightweight, and look fantastic.

But the real secret weapon for an attic bedroom is the underlayment. An attic floor is also the ceiling for the room below, and you don’t want every footstep to echo through the house. Invest in a high-quality acoustic underlayment. It’s a thin layer of material—like cork or rubber—that goes down before the flooring, and it works wonders for dampening sound. This is a shortcut I wish I’d known earlier; it makes a world of difference in creating a quiet, peaceful home.
Once the floor is down, it’s time to think about how you’ll light the space when the sun goes down.
8. Optimize Artificial Lighting Solutions for Every Corner
A single light fixture plopped in the middle of the ceiling is a recipe for a dreary, shadowy room. Good lighting design in an attic is all about layers. You need a mix of ambient (overall), task (focused), and accent (mood) lighting. And because of the sloped ceilings, you have to be clever about where you put it.
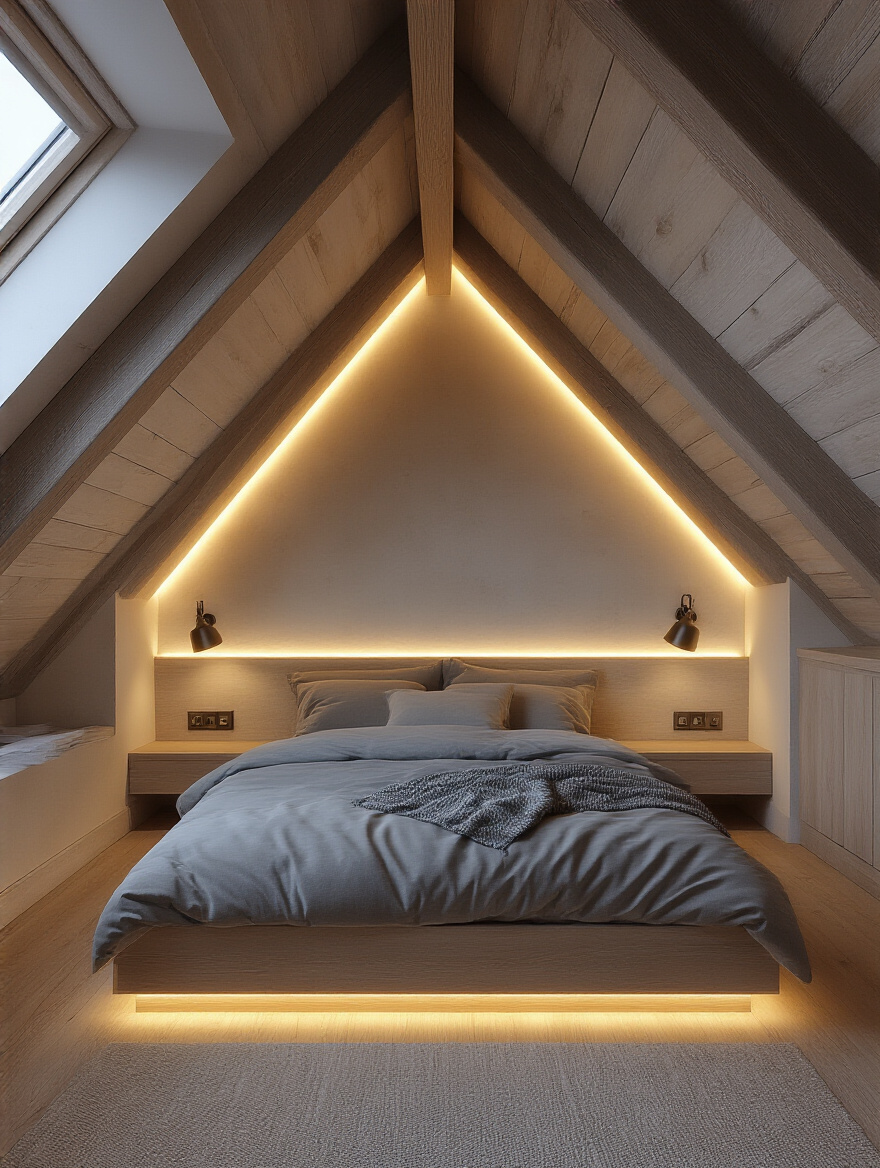
Recessed cans are great for general ambient light, but make sure you get ones designed for angled ceilings. Track lighting can be incredibly versatile, allowing you to aim light exactly where you need it. Wall sconces are perfect for adding soft, ambient light without taking up floor space. And for that reading nook under the eaves? A dedicated reading lamp is a must. Put everything on dimmers. It’s a cheap upgrade that gives you total control over the mood of the room.
Now for the invisible element that determines whether you’ll love or hate your new room: climate control.
9. Implement Efficient HVAC Solutions for Temperature Control
Everyone thinks they can just extend the ductwork from their main HVAC system up to the attic. This almost never works. Your central system wasn’t sized to handle that extra cubic footage, especially a space with such high heat gain and loss. You’ll end up with an attic that’s never quite comfortable and a main floor that suffers as well.
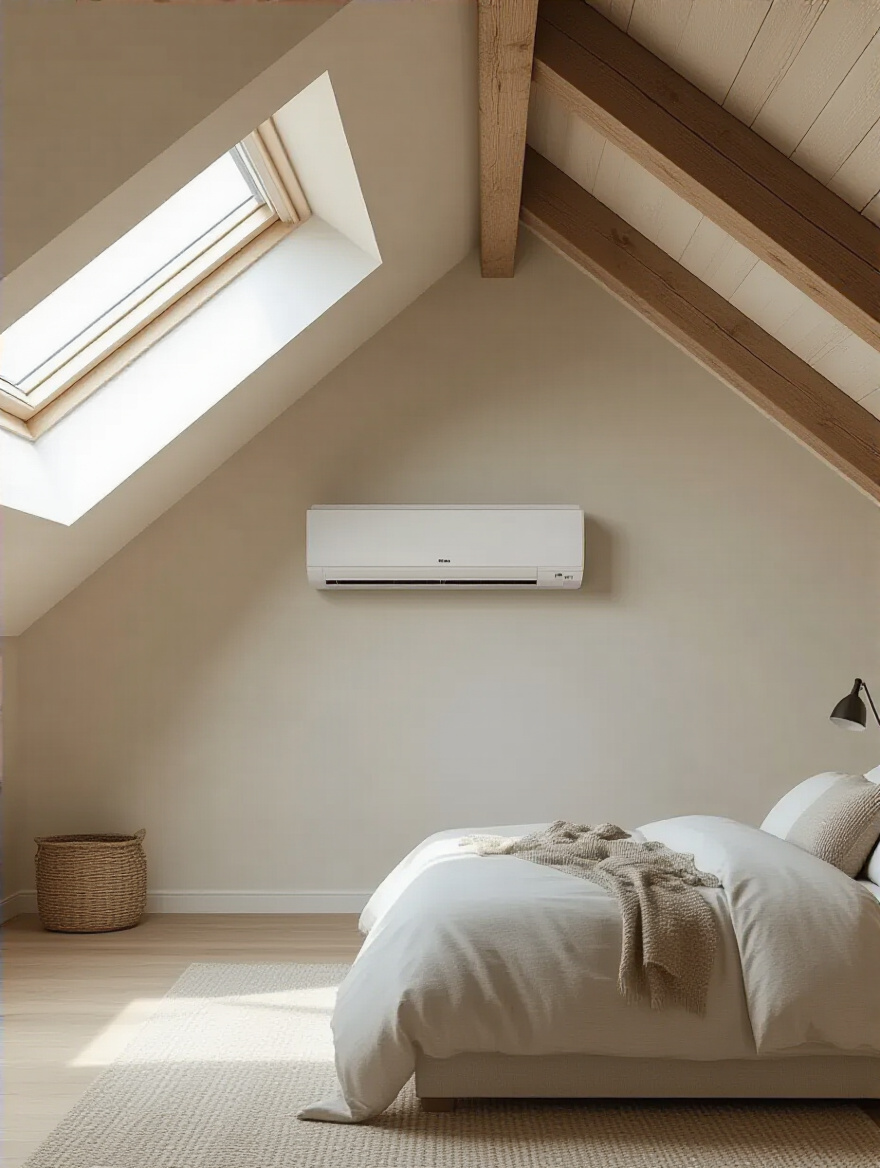
The best solution is almost always a dedicated system for the attic. A ductless mini-split is a fantastic option. It’s incredibly energy-efficient, allows for precise temperature control just for that zone, and doesn’t require bulky ductwork. A licensed HVAC professional will need to do a “load calculation” to determine the exact size you need. Don’t let a contractor just guess—insist on the calculation. It ensures the system will work efficiently without wasting energy.
With the essentials covered, you can turn your attention to making the most of every last inch of space.
10. Design Bespoke Built-In Storage to Maximize Awkward Spaces
Those awkward, low-clearance spaces that are useless for anything else are a goldmine for storage. This is where bespoke, built-in solutions absolutely shine. Instead of trying to shove a clunky dresser against a sloped wall, have a carpenter build a low row of drawers that fits perfectly into the knee wall (the short vertical wall under the eaves).
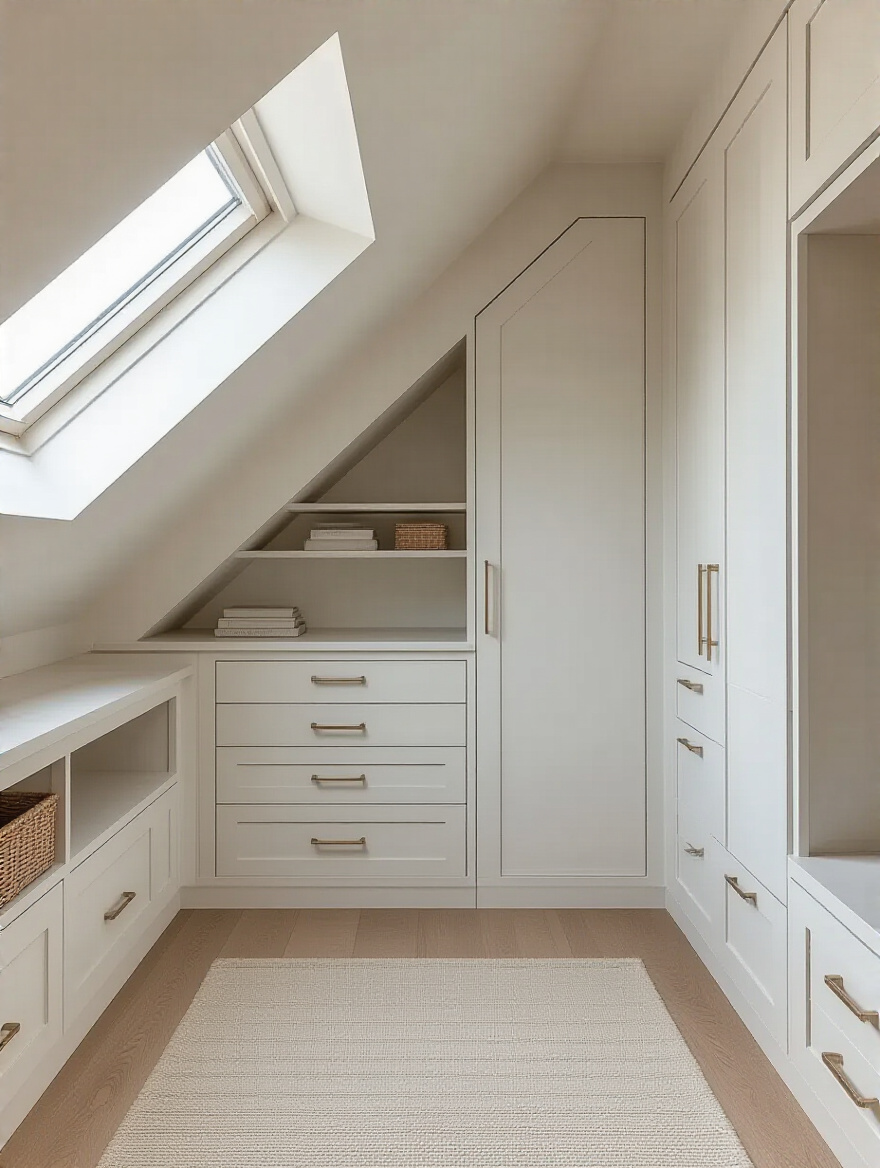
You can build bookshelves into the gable end wall, create a window seat with a lift-top storage bench in a dormer, or even design a custom headboard that incorporates hidden compartments. This approach makes the storage feel like an integral part of the architecture, not an afterthought. It’s more expensive than buying freestanding furniture, but it can double or triple your storage and makes the entire room feel more cohesive and intentional.
Now that the hard work is done, we get to the fun part: making it look amazing.
Core Design Elements and Essential Installations (Part 2)
We’ve built a safe, comfortable, and functional box. Now it’s time to turn that box into a sanctuary. This is where you can let the character of the space—the slopes, the nooks, the light—really guide your design choices to create something truly special.
11. Choose Wall Finishes and Treatments That Brighten and Enlarge
My pet peeve is when people paint an attic a dark, moody color. Unless you have massive windows, it’s going to feel like a cave. Light colors are your best friend in an attic. They reflect light, making the space feel bigger and brighter. And here’s the shortcut everyone misses: paint the sloped ceilings the same light color as the walls.
Using a single, continuous color blurs the lines where the walls end and the ceilings begin, which tricks the eye into seeing a larger, more unified volume. A contrasting ceiling color just chops up the space and draws attention to how low the ceilings are in some spots. If you want some visual interest, add it with texture. A light-colored beadboard or shiplap can add wonderful character without shrinking the room.
By using color to your advantage, you can then carve out little moments of pure charm within the larger space.
12. Create a Cozy Reading Nook with Integrated Seating and Shelving
Every attic has that one perfect spot—usually in a dormer or under a gable window—that’s just begging to be a reading nook. Don’t let that space go to waste. This is another perfect opportunity for a custom built-in. A simple window seat with a comfortable cushion and some pillows can transform an awkward corner into the most coveted spot in the house.
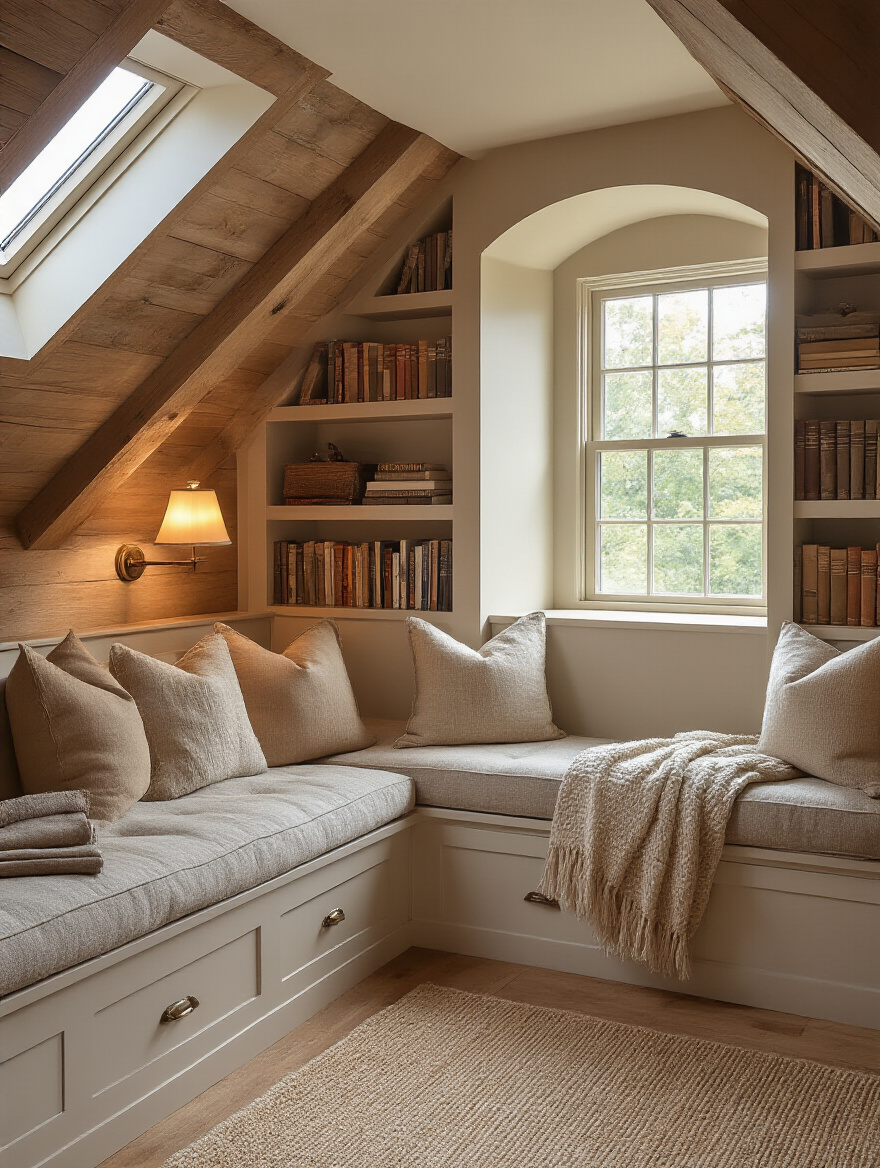
Build shelves into the surrounding walls for books, and add a wall-mounted sconce for reading light. The seat itself can be a lift-top bench, giving you another hidden spot for storage. This is how you take a potential design challenge—an odd corner—and turn it into a deliberate, charming feature that adds immense personality and value to the room.
These design choices layer on top of one another to create a cohesive whole.
Styling and Aesthetic Enhancement Strategies (Part 1)
This is about the finishing touches that elevate the room from “finished” to “designed.” We’ll talk about the furniture, colors, and clever tricks that make your attic bedroom feel polished, intentional, and uniquely yours.
13. Opt for Low-Profile and Multi-Functional Furniture Pieces
Because of the sloped ceilings, standard-height furniture often looks comically large and out of place in an attic. The key is to think low and long. Low-profile furniture keeps the sightlines open and prevents the room from feeling crowded. A platform bed, a low-slung media console, or backless benches all work beautifully.
This is also the perfect place for multi-functional pieces. An ottoman with hidden storage can serve as a coffee table, extra seating, and a place to stash blankets. A desk can double as a nightstand or console table. In a small space, every piece should work hard. This isn’t just a design trend; it’s a practical necessity for maximizing a small or awkwardly shaped footprint.
Your furniture choices should be supported by a color scheme that enhances the sense of space.
14. Employ Light Color Palettes for an Airy and Spacious Feel
We touched on this before, but it’s worth repeating. Your color palette is one of the most powerful tools you have for making an attic feel big and bright. Stick to whites, off-whites, pale grays, and soft, muted pastels. These colors recede, creating an illusion of space, while dark colors advance, making walls feel closer than they are.
This doesn’t mean the room has to be boring. You can create a rich, layered look by using different shades of the same light color and varying the textures. Think of a creamy white on the walls, a slightly deeper ivory for the trim, and a mix of linen, wool, and cotton textiles in similar neutral tones. The result is a space that feels serene, sophisticated, and surprisingly spacious.
To amplify the effect of your light color palette, you need to bring in the master of illusion: the mirror.
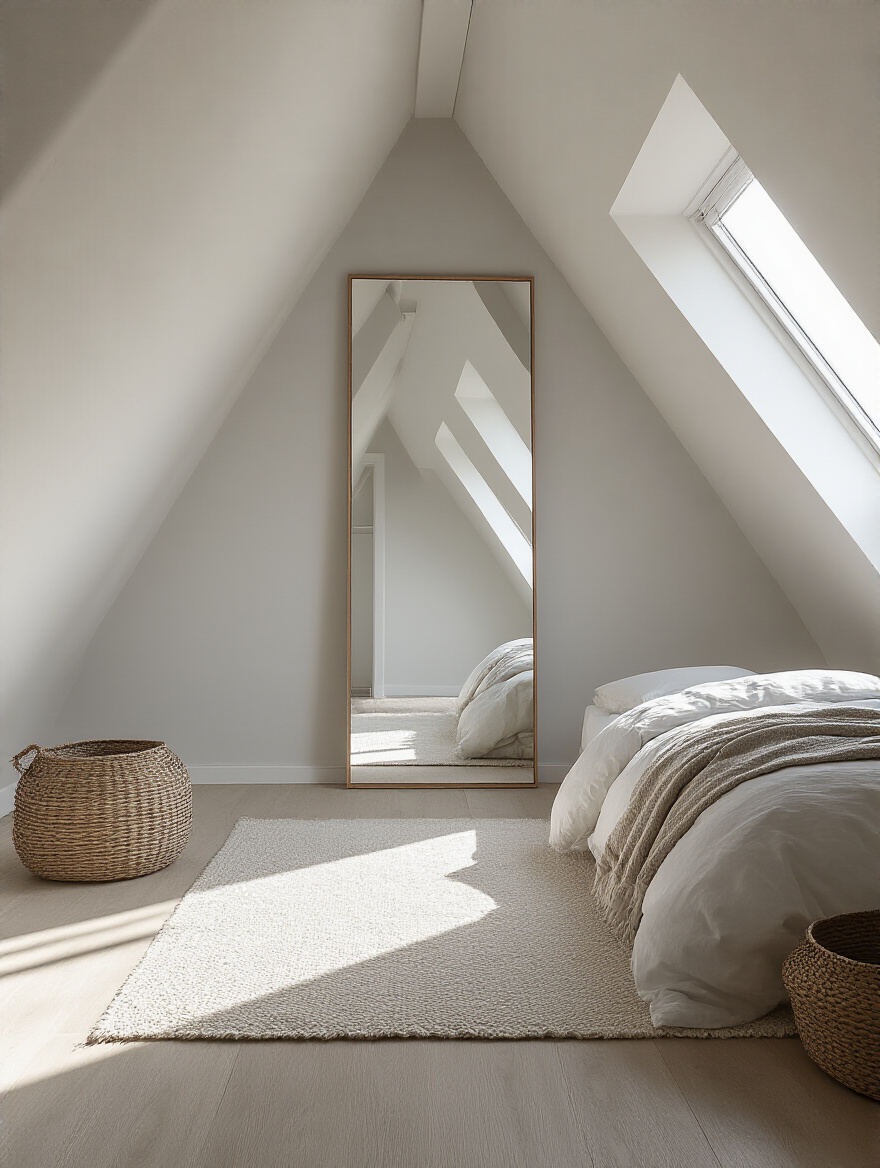
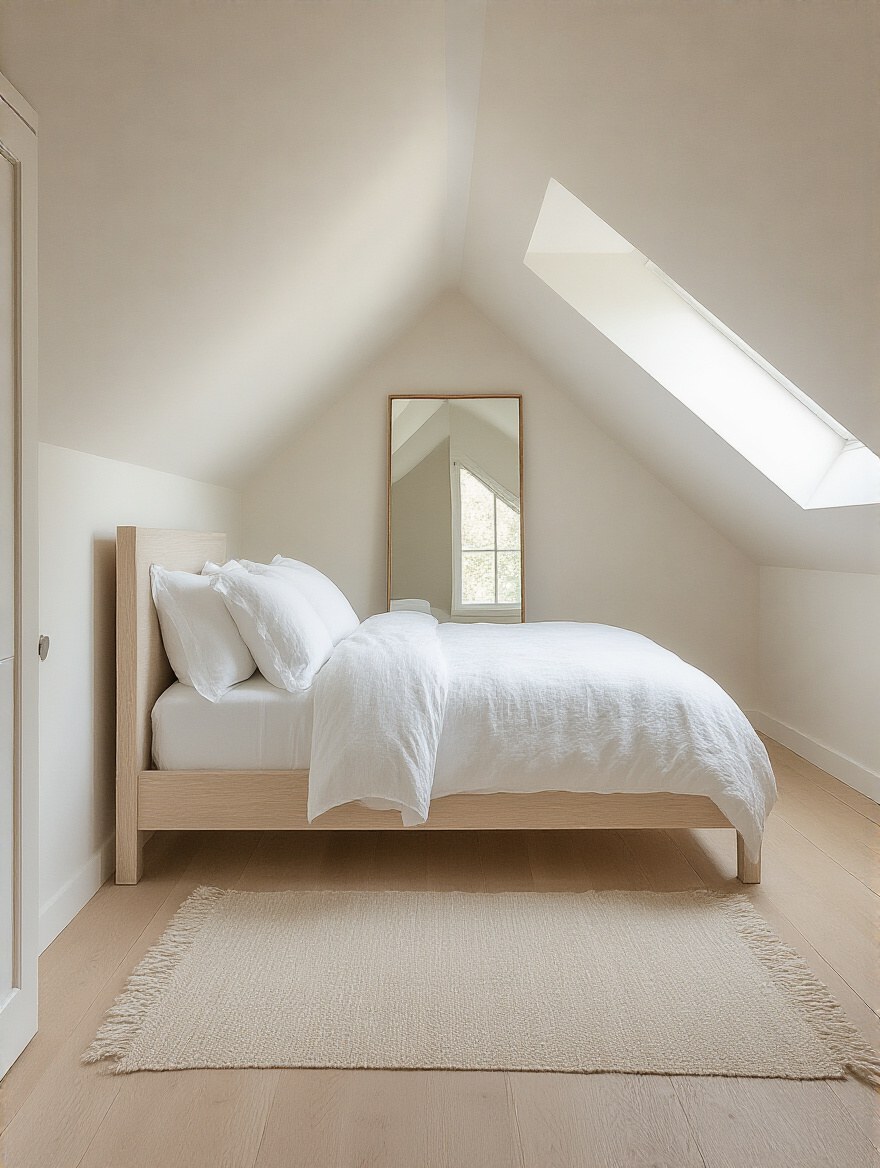
15. Utilize Mirrors Strategically to Visually Expand the Room
Mirrors are an old designer trick for a reason: they work. A large mirror placed opposite a window will bounce light around the room and create the illusion of a second window, instantly making the space feel brighter and more open. It can also reflect a beautiful view, bringing a bit of the outdoors in.
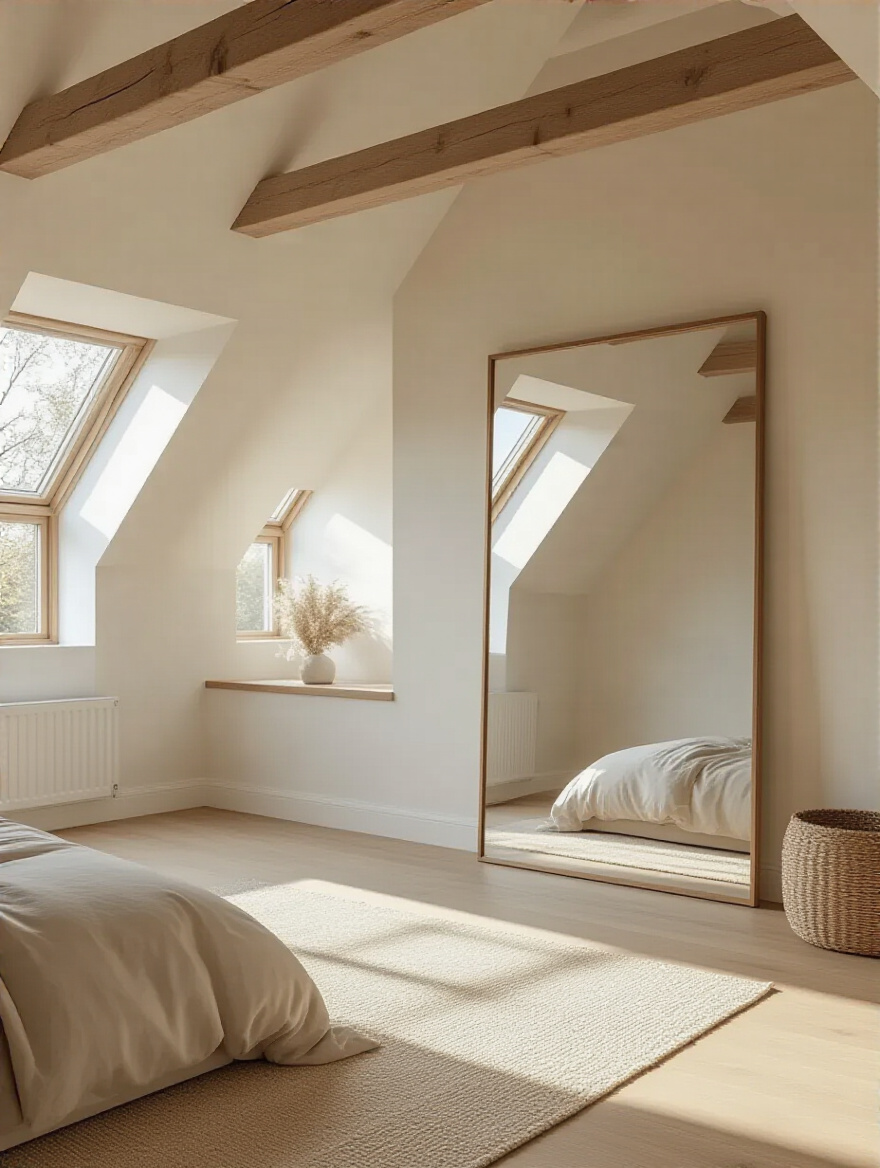
Don’t just hang a small, dinky mirror. Go big. A large, floor-to-ceiling mirror leaning against a wall can dramatically increase the perceived size of the room. You can also use mirrored furniture, like a mirrored closet door or dresser, to achieve a similar effect without taking up wall space. Just be mindful of what the mirror is reflecting—you want to double the good stuff, not a cluttered corner.
While you’re planning your window placement for mirror reflections, think about how you’ll cover those windows, too.
16. Add Smart Window Treatments for Enhanced Privacy and Style
Windows in attics—especially skylights—can be high up and hard to reach. This is where smart, motorized window treatments are a game-changer. Being able to open and close your blinds with a remote control, your phone, or even your voice isn’t just a cool party trick; it’s a massive convenience.
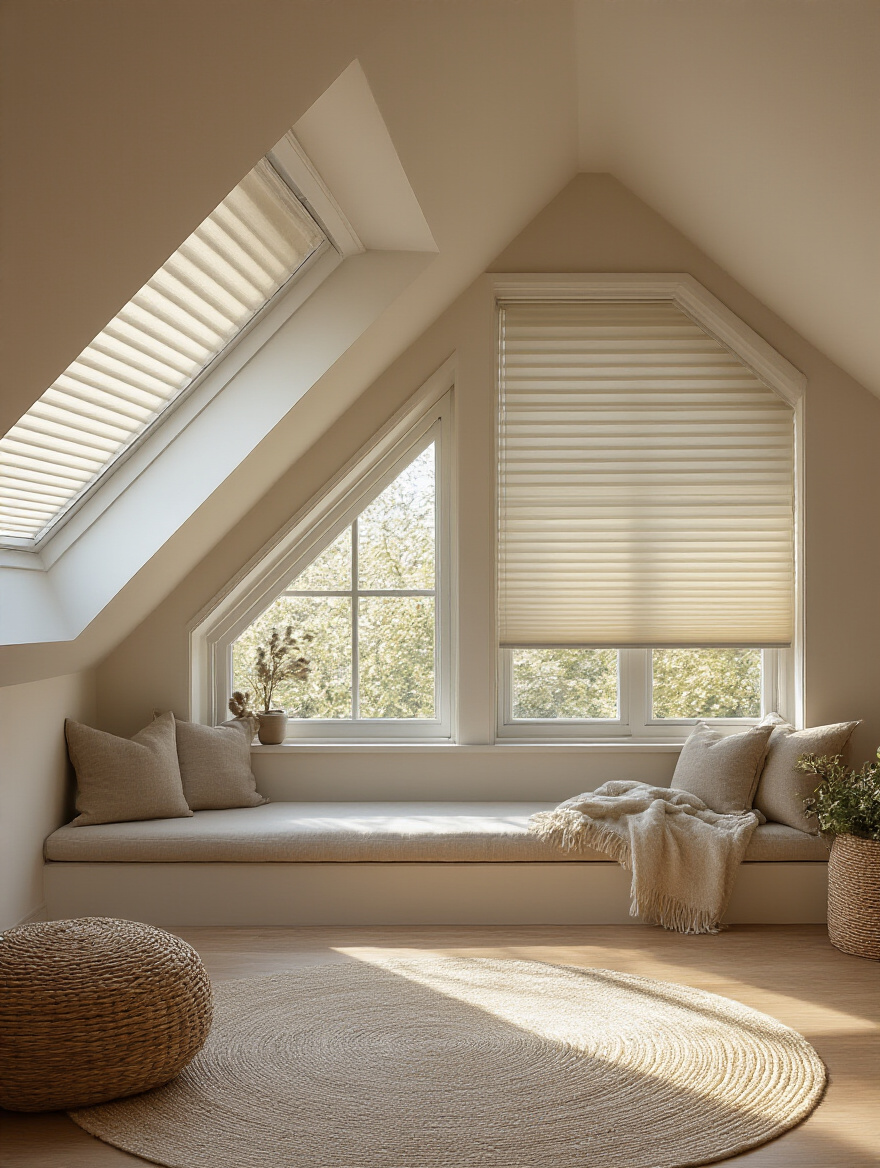
Smart window treatments also give you precise control over light and privacy. You can schedule them to open in the morning to help you wake up and close in the afternoon to block solar heat gain, which helps with energy efficiency. For a bedroom, consider blackout shades to ensure the room is completely dark for sleeping. It’s a modern touch that makes an attic room infinitely more livable.
Now let’s talk about adding that final layer of comfort that makes a room feel like a home.
Styling and Aesthetic Enhancement Strategies (Part 2)
These final strategies are about creating warmth and defining the space. An attic can sometimes feel like one big, undefined room. These ideas will help you add texture, delineate zones, and make the entire space feel cozier and more inviting.
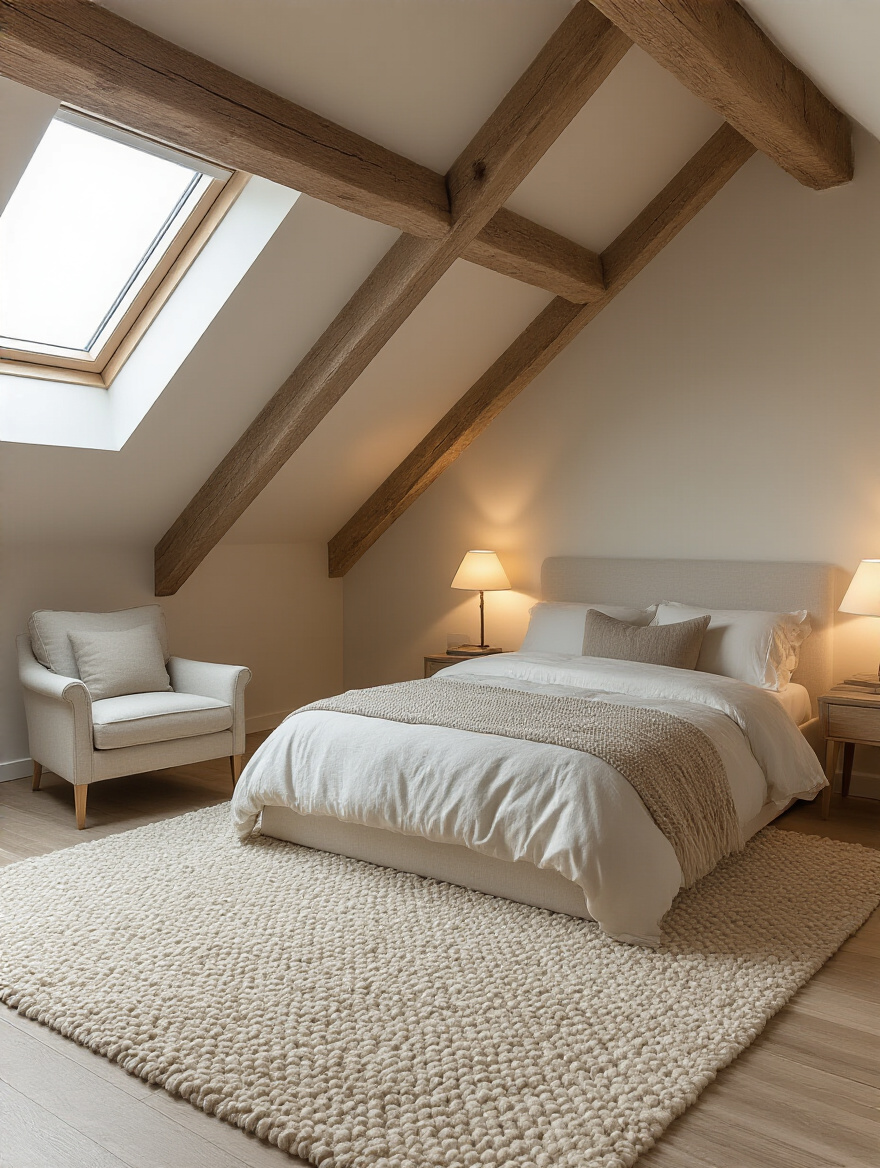
17. Incorporate Varied Textures and Soft Furnishings for Warmth
With all the hard angles of a roofline, you need to layer in a lot of softness to make an attic bedroom feel cozy. Texture is your best tool for this. Think of a plush, high-pile rug underfoot, a chunky knit throw blanket on the bed, velvet accent pillows, and soft linen curtains.

Mixing and matching these different textures adds visual depth and makes the room more inviting. Exposed brick or original wood beams are also fantastic textural elements that add warmth and character. Don’t be afraid to contrast rough with smooth, hard with soft. It’s this interplay of textures that makes a room feel rich and thoughtfully designed.
One of the most important soft furnishings you’ll choose is the one that sits on the floor.
18. Define Distinct Zones with Area Rugs and Thoughtful Lighting
If your attic bedroom is large enough to serve multiple functions—like a sleeping area and a sitting area—you need to visually separate those zones. An area rug is the easiest and most effective way to do this. A large rug placed under the bed and nightstands clearly defines the sleeping zone and anchors the furniture. A smaller, contrasting rug can then delineate a reading nook or seating area.
Layered lighting also helps define zones. You might have soft, dimmable lighting in the sleeping area, and a brighter, more focused task light in a workspace or reading corner. Using rugs and lighting in this way creates “rooms within a room,” making the entire space feel more organized, purposeful, and much larger than if it were just one open area.
Now, let’s explore some of the more advanced strategies that will make your attic a truly long-lasting and functional retreat.
Advanced Optimization and Long-Term Considerations (Part 1)
We’re moving beyond aesthetics now and into the nitty-gritty of long-term comfort and convenience. These are the elements that will make your attic bedroom a joy to live in for years to come, ensuring it’s a quiet, healthy, and seamlessly modern space.
19. Enhance Soundproofing for a Truly Quiet Retreat
I’ve already mentioned sound-dampening floors, but true peace and quiet requires a more comprehensive approach. Because the roof is directly exposed to the elements, an attic can be noisy during a rain or wind storm. You can dramatically reduce this noise by using the right kind of insulation.
Mineral wool insulation is excellent for sound absorption. For an even quieter space, you can use special sound-dampening drywall or add a second layer of drywall with a product like Green Glue in between. This viscoelastic compound converts sound energy into heat, effectively stopping it in its tracks. A quiet bedroom is crucial for good sleep, and these extra soundproofing steps are worth their weight in gold.
Along with keeping sound out, you need to manage what’s happening with the air inside.
20. Ensure Proper Ventilation to Prevent Moisture and Humidity
This is a huge one that often gets overlooked. A tightly sealed, well-insulated attic needs mechanical ventilation to stay healthy. Without a way for moist air to escape, you can end up with condensation, which leads to mold and mildew. This is especially true if you have a bathroom in your attic suite.
A high-quality bathroom exhaust fan that is properly vented to the outside (never into the attic space itself!) is non-negotiable. For the whole room, you might consider a small ERV (Energy Recovery Ventilator), which constantly exchanges stale indoor air with fresh outdoor air while recovering the energy from the air it exhausts. It’s the belt-and-suspenders approach to ensuring excellent indoor air quality.
As we’re making the space healthier and quieter, we can also make it smarter.
21. Integrate Smart Home Technology for Modern Convenience
We talked about smart window treatments, but you can take it much further. Integrating a smart thermostat (like a Nest or Ecobee with a room sensor) ensures your dedicated HVAC system is running as efficiently as possible and that the temperature is always perfect. Smart lighting allows you to create custom “scenes”—like a “relax” mode that dims the lights or a “wake up” mode that gradually brightens them.
You can also integrate smart speakers for music and voice control, or a smart lock for the attic entrance if it’s used as a guest suite. Wiring for this technology is easiest to do during the renovation phase, so think about what you might want down the road, even if you don’t install it all right away.
Even with smart tech, you’ll always need good old-fashioned smart storage.
22. Leverage Vertical Wall Space with Floating Shelves and Art
Even with sloped ceilings, you’ll have some vertical wall space, especially on the gable ends. Use it wisely. Floating shelves are perfect for attics because they provide storage and display space without the visual bulk of traditional bookcases. They keep the floor clear, which helps the room feel larger.

This vertical space is also a great place for a gallery wall. Arranging art in a vertical composition draws the eye upward, creating an illusion of height and distracting from low or sloped ceilings. It’s a powerful design trick that adds a huge amount of personality and style to the room without taking up a single square inch of floor space.
Finally, let’s cover the last two points, which are about making the space work for your lifestyle and, most importantly, keeping it safe.
Advanced Optimization and Long-Term Considerations (Part 2)
We’re at the home stretch. These final considerations are about fine-tuning your attic bedroom to perfectly suit your needs while ensuring it meets the most critical requirement of all: safety. This is where your beautiful design becomes a truly responsible and life-enhancing part of your home.
23. Designate a Dedicated Workspace or Creative Hobby Area
If you work from home or have a hobby that requires a dedicated space, an attic can be the perfect solution. Carve out a corner for a small desk or work table. Placing it directly under a skylight provides excellent natural light for tasks, which can boost both mood and productivity.
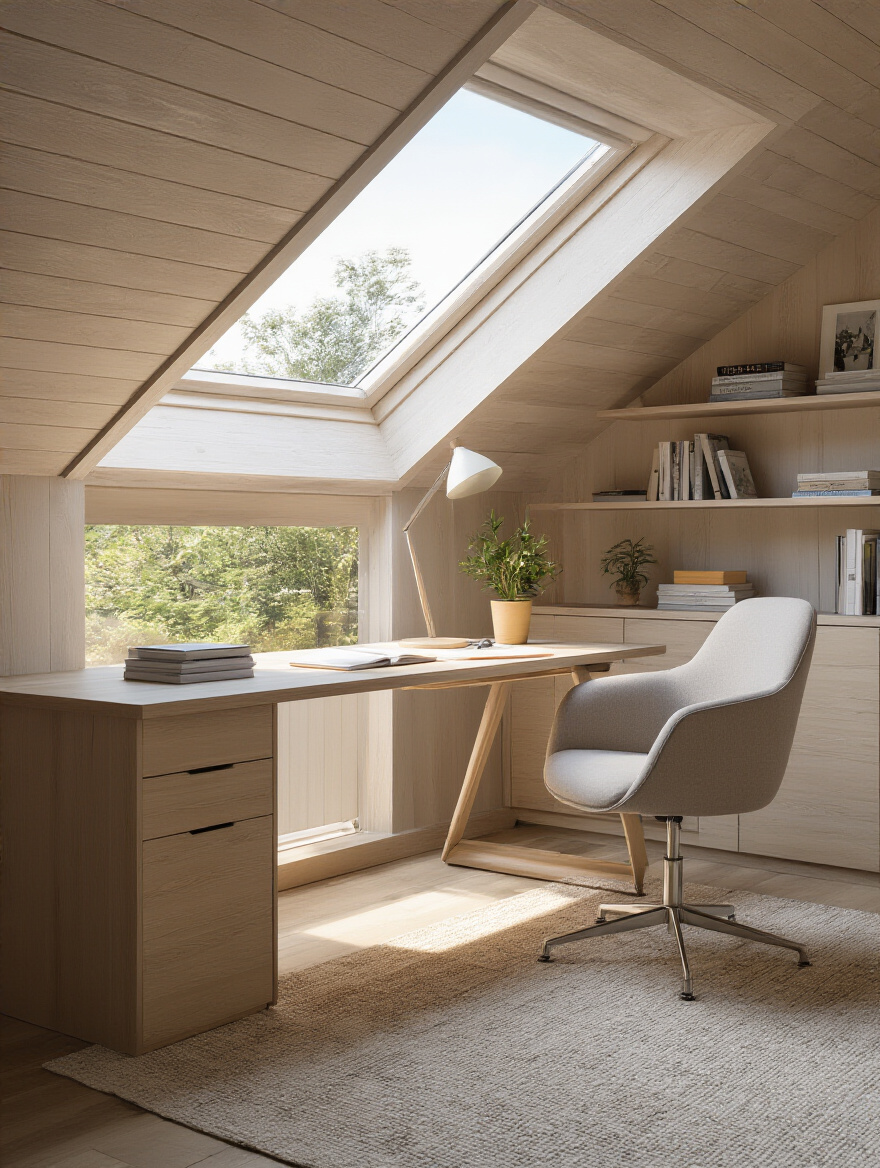
Again, defining this zone is key. Use a small rug, dedicated task lighting, and clever storage to create a self-contained workspace that doesn’t feel like it’s encroaching on your relaxation space. A custom-built desk that fits perfectly into a dormer or nook can be a beautiful and highly functional addition, turning an awkward spot into the most productive corner of your home.
This last one is the most important point in the entire article. Please don’t skim it.
24. Don’t Overlook Fire Safety and Emergency Egress Planning
I’m going to be blunt: a bedroom without a proper emergency exit is not a bedroom. It’s a death trap. Your attic must have at least one egress-compliant window. That means the window has to be a certain minimum size, a certain distance from the floor, and easy to open. This is a non-negotiable, life-safety building code requirement. Your local inspector will have the exact dimensions for your area.
You also need hardwired, interconnected smoke and carbon monoxide detectors in the attic bedroom, as well as on every other level of the home. This ensures that if a fire starts in the basement, the alarm in the attic will sound immediately. Have a fire extinguisher and an escape ladder stored near the egress window. Practice your escape plan. This isn’t the fun part of design, but it is, without a doubt, the most important.
Conclusion
So there you have it. The journey from a dusty, forgotten attic to a stunning, functional bedroom is a marathon, not a sprint. It starts with the unglamorous but critical work of engineering, permits, and planning, and ends with the creative flourishes that make the space truly yours. By respecting the unique character of the space, working with its angles instead of against them, and layering in comfort, light, and safety, you can unlock an incredible asset in your home.
The potential hiding under your roof is immense. It’s a space that can become a quiet retreat, a productive office, a cherished guest room, or a teenager’s dream escape. You have the ideas and the framework now to do it the right way. Start with a solid plan, consult with professionals, and don’t be afraid to let the soul of your historic home guide your design. The result will be more than just extra square footage—it will be your new favorite room in the house.