Most renters walk into a new apartment and immediately identify a problem: stark white walls, standard flooring, and generic fixtures. The common belief holds that this “white box” represents a creative dead end—a sterile void that feels cold, temporary, and devoid of personality. Many tenants assume that without the ability to paint walls or renovate, they remain trapped in a space that will never truly feel like their own. If you’re looking for sophisticated apartment decorating ideas, the answer lies not in renovation, but in strategic layering.
The “White Box Epiphany” challenges this mindset by reframing that sterile shell as a refined, neutral canvas. This perspective encourages you to view the space as a gallery where the minimalist backdrop actually elevates your design choices rather than hindering them.
By adopting an editor’s eye, you replace the need for wall color with layers of contrasting textures. Think bouclé, natural linen, and matte ceramics to introduce immediate warmth and visual dimension. This strategy leverages lighting as your primary architectural feature, swapping harsh overhead glare for sculptural fixtures that define the room’s atmosphere.
This guide reveals the specific techniques required to execute this intentional decorating strategy. We will look at how to anchor your rooms with large-scale statement pieces that prevent the space from feeling “bottom-heavy” or anonymous. You will discover methods to inject a personal narrative through curated artifacts, proving that a builder-grade apartment offers the perfect foundation for a sophisticated, adaptable home.
Personal anecdote: Standing in a 600-sq-ft beige rental and feeling the urge to paint the walls (but knowing I couldn’t).
I recall standing in the center of my 600-square-foot apartment, surrounded by walls of standard builder beige. The urge to apply a coat of fresh, vibrant paint was overwhelming, but the lease agreement strictly prohibited permanent alterations. This constraint ultimately forced a shift in strategy. Instead of viewing the neutral shell as a limitation, I began to treat it as a blank canvas for adaptable, non-permanent design solutions that inject personality without risking the security deposit.
The most effective method to break up the monotony involves covering the walls without actually painting them. Peel-and-stick wallpaper serves as a powerful tool here; applying it to a single area creates a high-impact accent wall that mimics a professional paint job but removes cleanly without residue.
To address the remaining neutral space, I utilized the beige backdrop to host an expansive gallery wall. By hanging oversized art and colorful prints with adhesive strips and hooks, you can introduce significant color and cover large sections of drywall without drilling a single hole.
Finally, manipulating the room’s focal points draws attention away from the wall color. I shifted the visual weight to the floor by introducing an oversized, richly colored area rug and bold furniture, which grounds the space and distracts from the perimeter. Vertical space was managed by hanging floor-to-ceiling textiles, such as vibrant curtains or tapestries, to add texture and hide bland surfaces.
For a sophisticated finish, leaning large mirrors or framed art against the wall on top of consoles adds architectural interest without requiring hardware. These tactics transform a temporary rental into a custom home while keeping the lease terms intact. For more tailored guidance on maximizing your main space, explore these 18 Must-Know Apartment Living Room Decor Secrets.
The realization: Constraints aren’t limits; they are the ultimate creative prompt for adaptable design.
Think of constraints—like tight square footage or strict rental agreements—as invitations for ingenuity rather than roadblocks. In apartment living, limited floor space demands efficiency, and this pressure creates a creative prompt for smarter design. Every item you select must earn its place in the room.
This necessity drives you toward multi-functional furniture that adapts to your needs. Invest in pieces like storage ottomans for hidden organization or nesting tables that expand only when guests arrive. Modular seating allows you to reconfigure your layout instantly, while a sofa bed transforms a living area into a guest suite without requiring an extra room.
When floor space runs out, force your design perspective upward. Vertical space often remains underutilized in smaller homes. Install floating shelves or wall-mounted desks to keep the ground clear and create a sense of openness. Utilize tall, narrow bookcases to draw the eye toward the ceiling and maximize storage volume. This strategy organizes your essentials and visually heightens the room, solving the problem of clutter without sacrificing utility.
Finally, treat “no-drill” or “no-paint” policies as an opportunity to master the art of impermanent decor. Instead of viewing these rules as barriers to personalization, shift your focus to high-impact, removable elements. Use damage-free adhesive hooks to secure gallery walls or large decor pieces. Introduce color and texture through vibrant rugs or statement art. Removable accents, such as peel-and-stick wallpaper or tiles, allow you to customize surfaces without risking your security deposit. These solutions ensure your space feels curated and personal, yet remains entirely adaptable for your next move.
Thesis: Transforming a temporary apartment into a permanent-feeling home requires a progressive approach to layering personality.
Transforming a rental begins with foundational layers that soften harsh, builder-grade finishes. You must address architectural drawbacks immediately by hanging stylish draperies; this simple addition brings luxury and texture to standard windows while masking generic blinds.
Simultaneously, replace clinical overhead lighting with a layered scheme featuring task lamps, ambient accent lights, and candles to cultivate warmth. Once the shell is softened, anchor the room with portable investments. Rather than sinking money into permanent fixtures, select striking statement furniture or layer a large, neutral area rug with a smaller, patterned vintage rug on top. These elements define the space and remain yours even when you move.
After establishing the groundwork, apply high-impact, non-permanent treatments to vertical surfaces. You can inject personality without risking your security deposit by applying removable wallpaper to a focal wall or curating a dynamic gallery wall using removable hanging strips. Staggered floating shelves also offer a vertical solution for displaying mementos without damaging drywall.
Finally, complete the transformation with “soulful” details that distract from generic apartment features. Incorporate vintage conversation pieces and lush greenery to make the environment feel curated. This progressive layering turns a temporary stopover into a genuine, permanent-feeling sanctuary.
Phase 1: The Adaptable Foundation (Layout & Function)
Building a flexible home requires a strategic approach to the floor plan before you introduce any decorative elements. Start by establishing a clear traffic flow to prevent the room from feeling cramped. Maintain comfortable walkways—approximately 36 inches for major paths or at least 60 to 75 cm between items—to ensure easy movement.
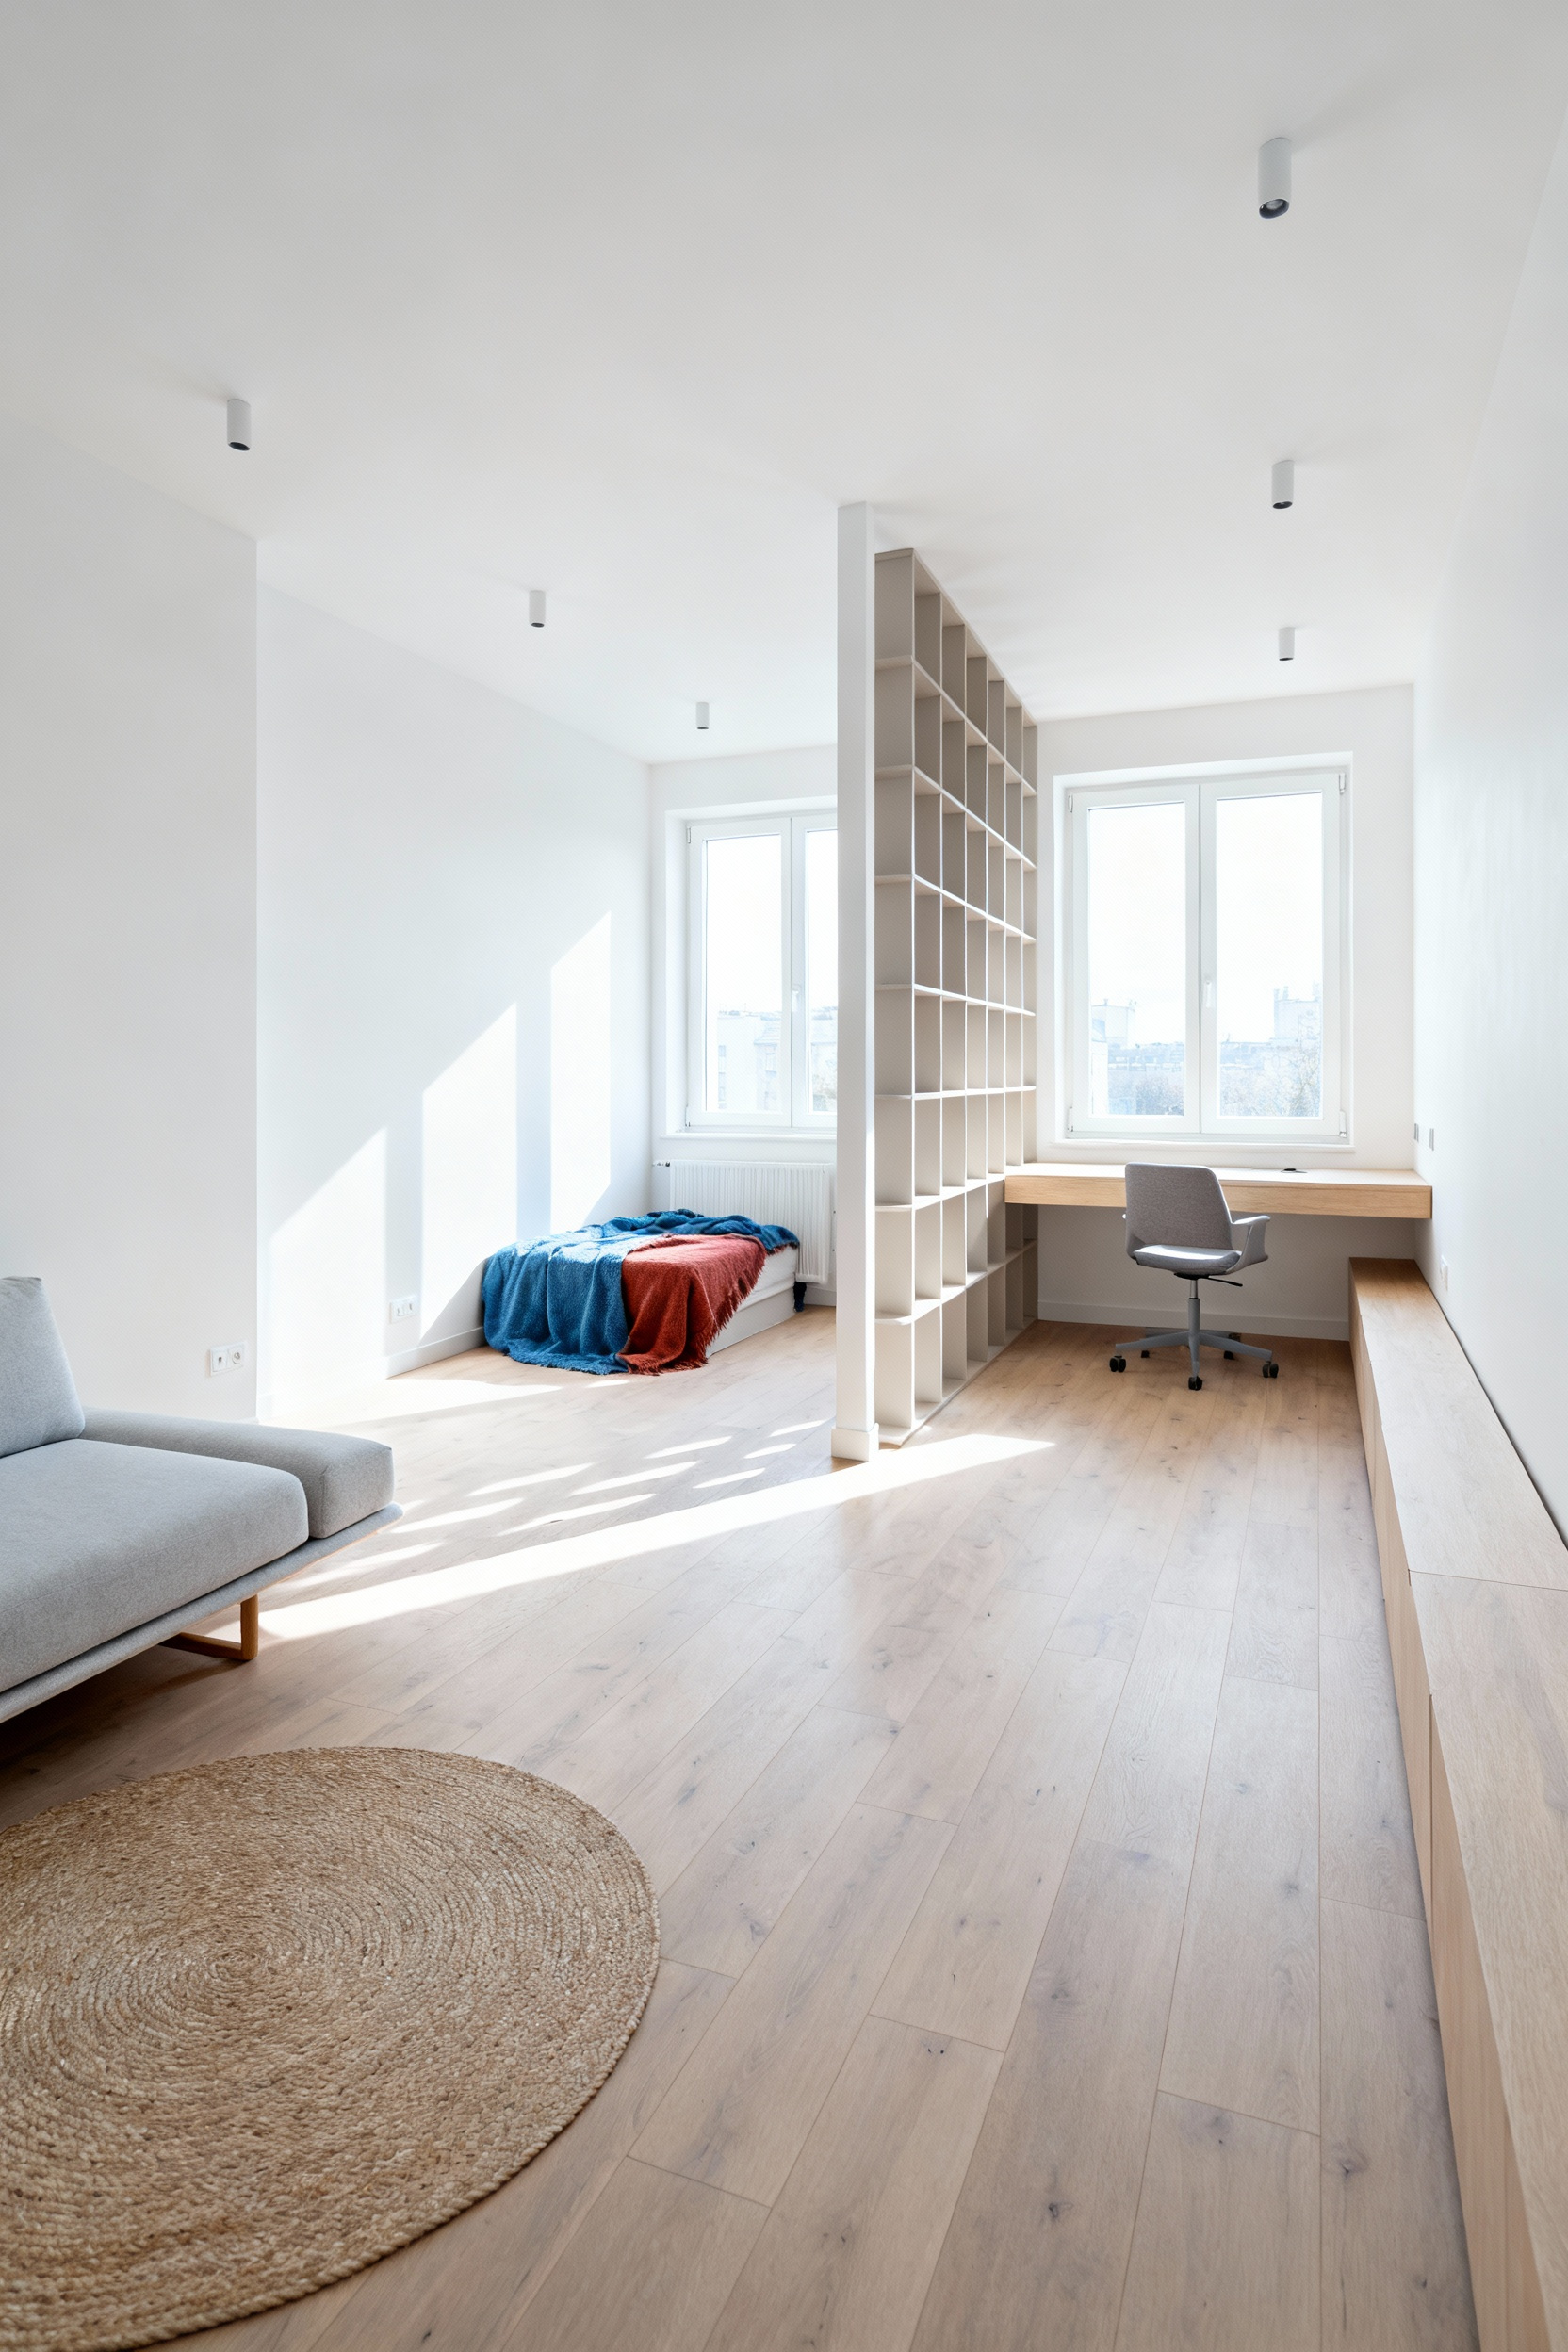
Once the flow is set, map out distinct functional zones. Even in an open-plan studio, you can separate your workspace from your relaxation area using non-permanent elements like area rugs, differentiated lighting, or strategically placed shelving. This creates visual boundaries and psychological separation without the permanence of walls.
To maximize utility within this layout, select furniture that serves more than one purpose. Invest in pieces like storage ottomans, nesting side tables, or drop-leaf dining tables that expand for guests and contract for daily use.
Complement these flexible choices by utilizing the full height of your walls. Install floating shelves or choose tall, slim shelving units to draw the eye upward. High-level storage frees up valuable floor space, keeping the foundation of your room uncluttered and ready to adapt to new seasons or occasions.
1. Define ‘Rooms’ Without Walls: Using Area Rugs to Zone Open Spaces
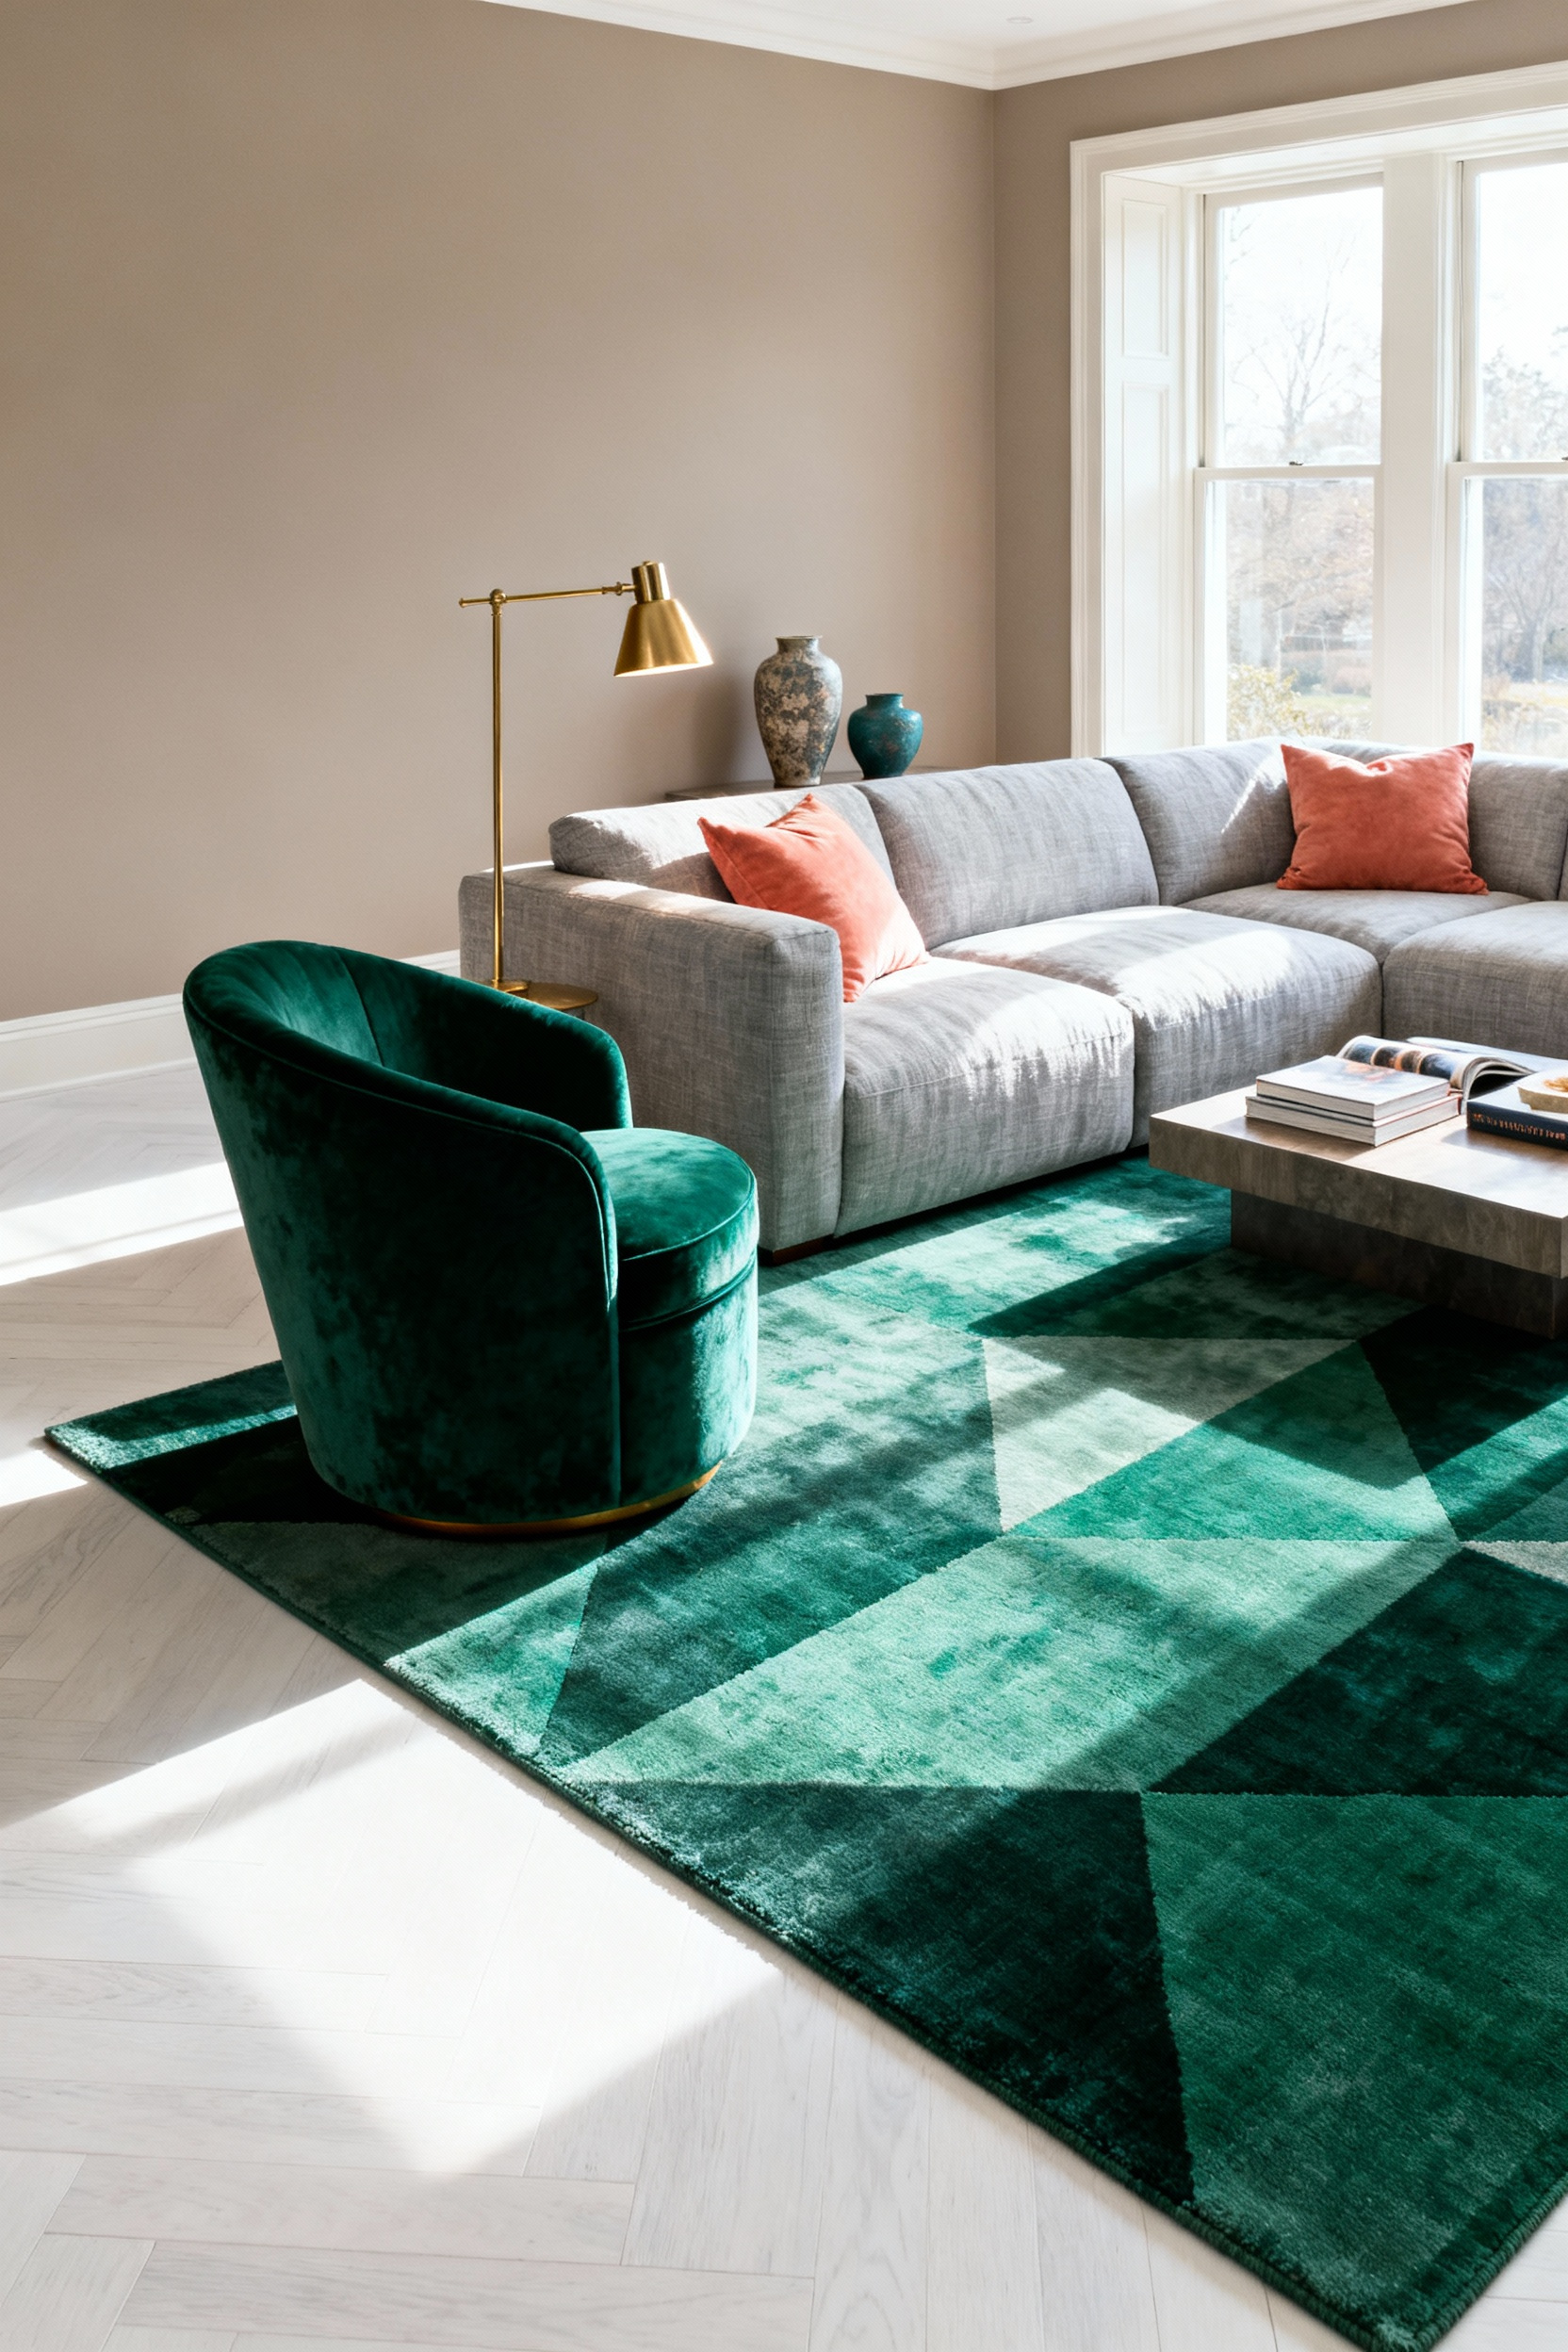
In open-plan layouts, the lack of physical barriers can often lead to visual clutter and undefined purposes. To counter this, treat area rugs as “invisible walls” that establish distinct functional zones within the larger space. The success of this strategy relies heavily on the “Anchor Principle.” Your rug must be large enough to accommodate the front legs of all major seating pieces. This grounding technique visually unifies the furniture arrangement, preventing the zone from feeling disjointed or as if the pieces are floating in an empty void.
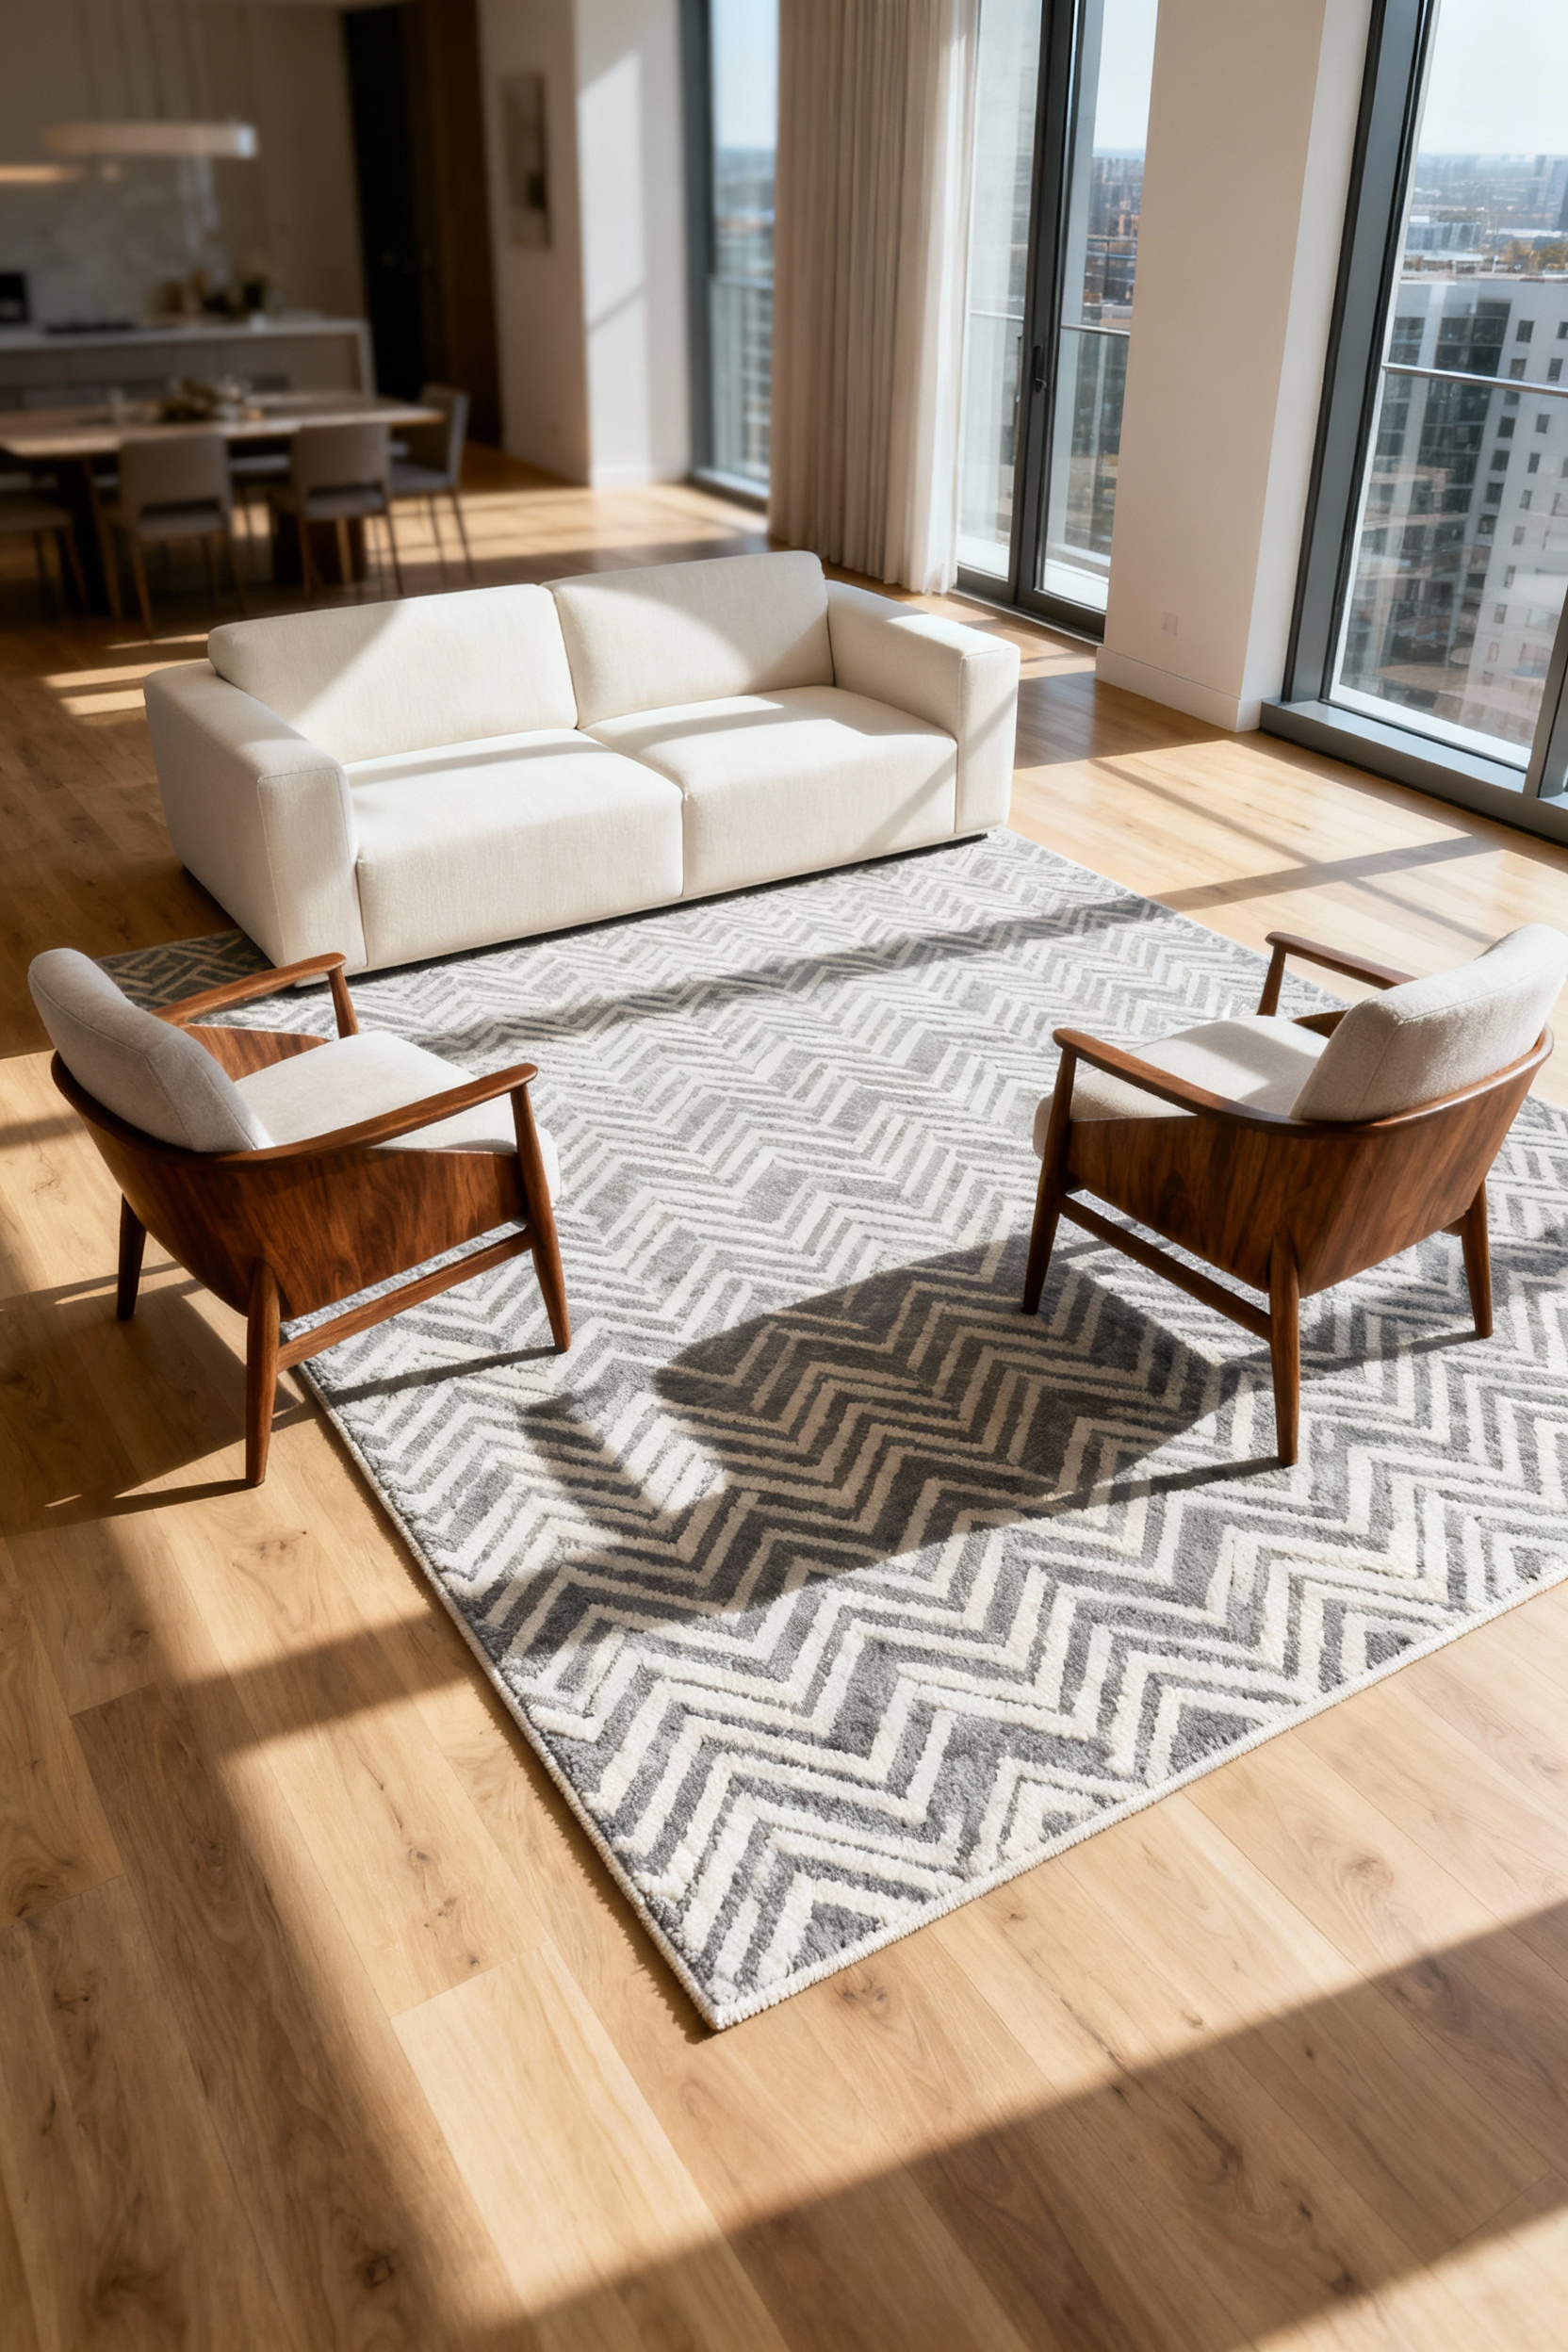
Once the boundaries are set, differentiate your zones through “cohesive contrast.” Select specific textures and materials to signal a shift in function while maintaining a consistent color palette for overall flow. For a relaxed living area, a plush, high-pile rug invites comfort, whereas a dining nook requires a flat, durable weave for easy cleaning. Specifically for dining areas, ensure the rug extends at least 24 inches beyond the table on all sides; this keeps chairs grounded on the texture even when pulled out for use.
To elevate the design further, incorporate the trend of layering rugs to add depth and focus. Place a smaller, patterned, or highly textured rug atop a larger, neutral base like jute or sisal. This technique not only adds visual richness but also delineates specific focal points, such as a coffee table or a cozy reading corner. By layering textures and defining perimeters, you transform a vast, open room into a series of purposeful, structured environments.
2. Vertical Velocity: Installing High Floating Shelves (The Renter-Friendly Way)
Maximizing vertical space often intimidates renters due to the fear of losing a security deposit, but modern mounting systems provide secure solutions with minimal impact. For truly no-drill installations, prioritize adhesive mounting systems using heavy-duty strips or picture ledges. This method leaves zero damage upon removal, making it perfect for strict lease agreements.
If you require support for moderate weight, opt for minimal-hole pin shelving. These units utilize small steel pins that create holes barely larger than a thumbtack, which are significantly easier to patch than the damage left by large drywall anchors and screws.
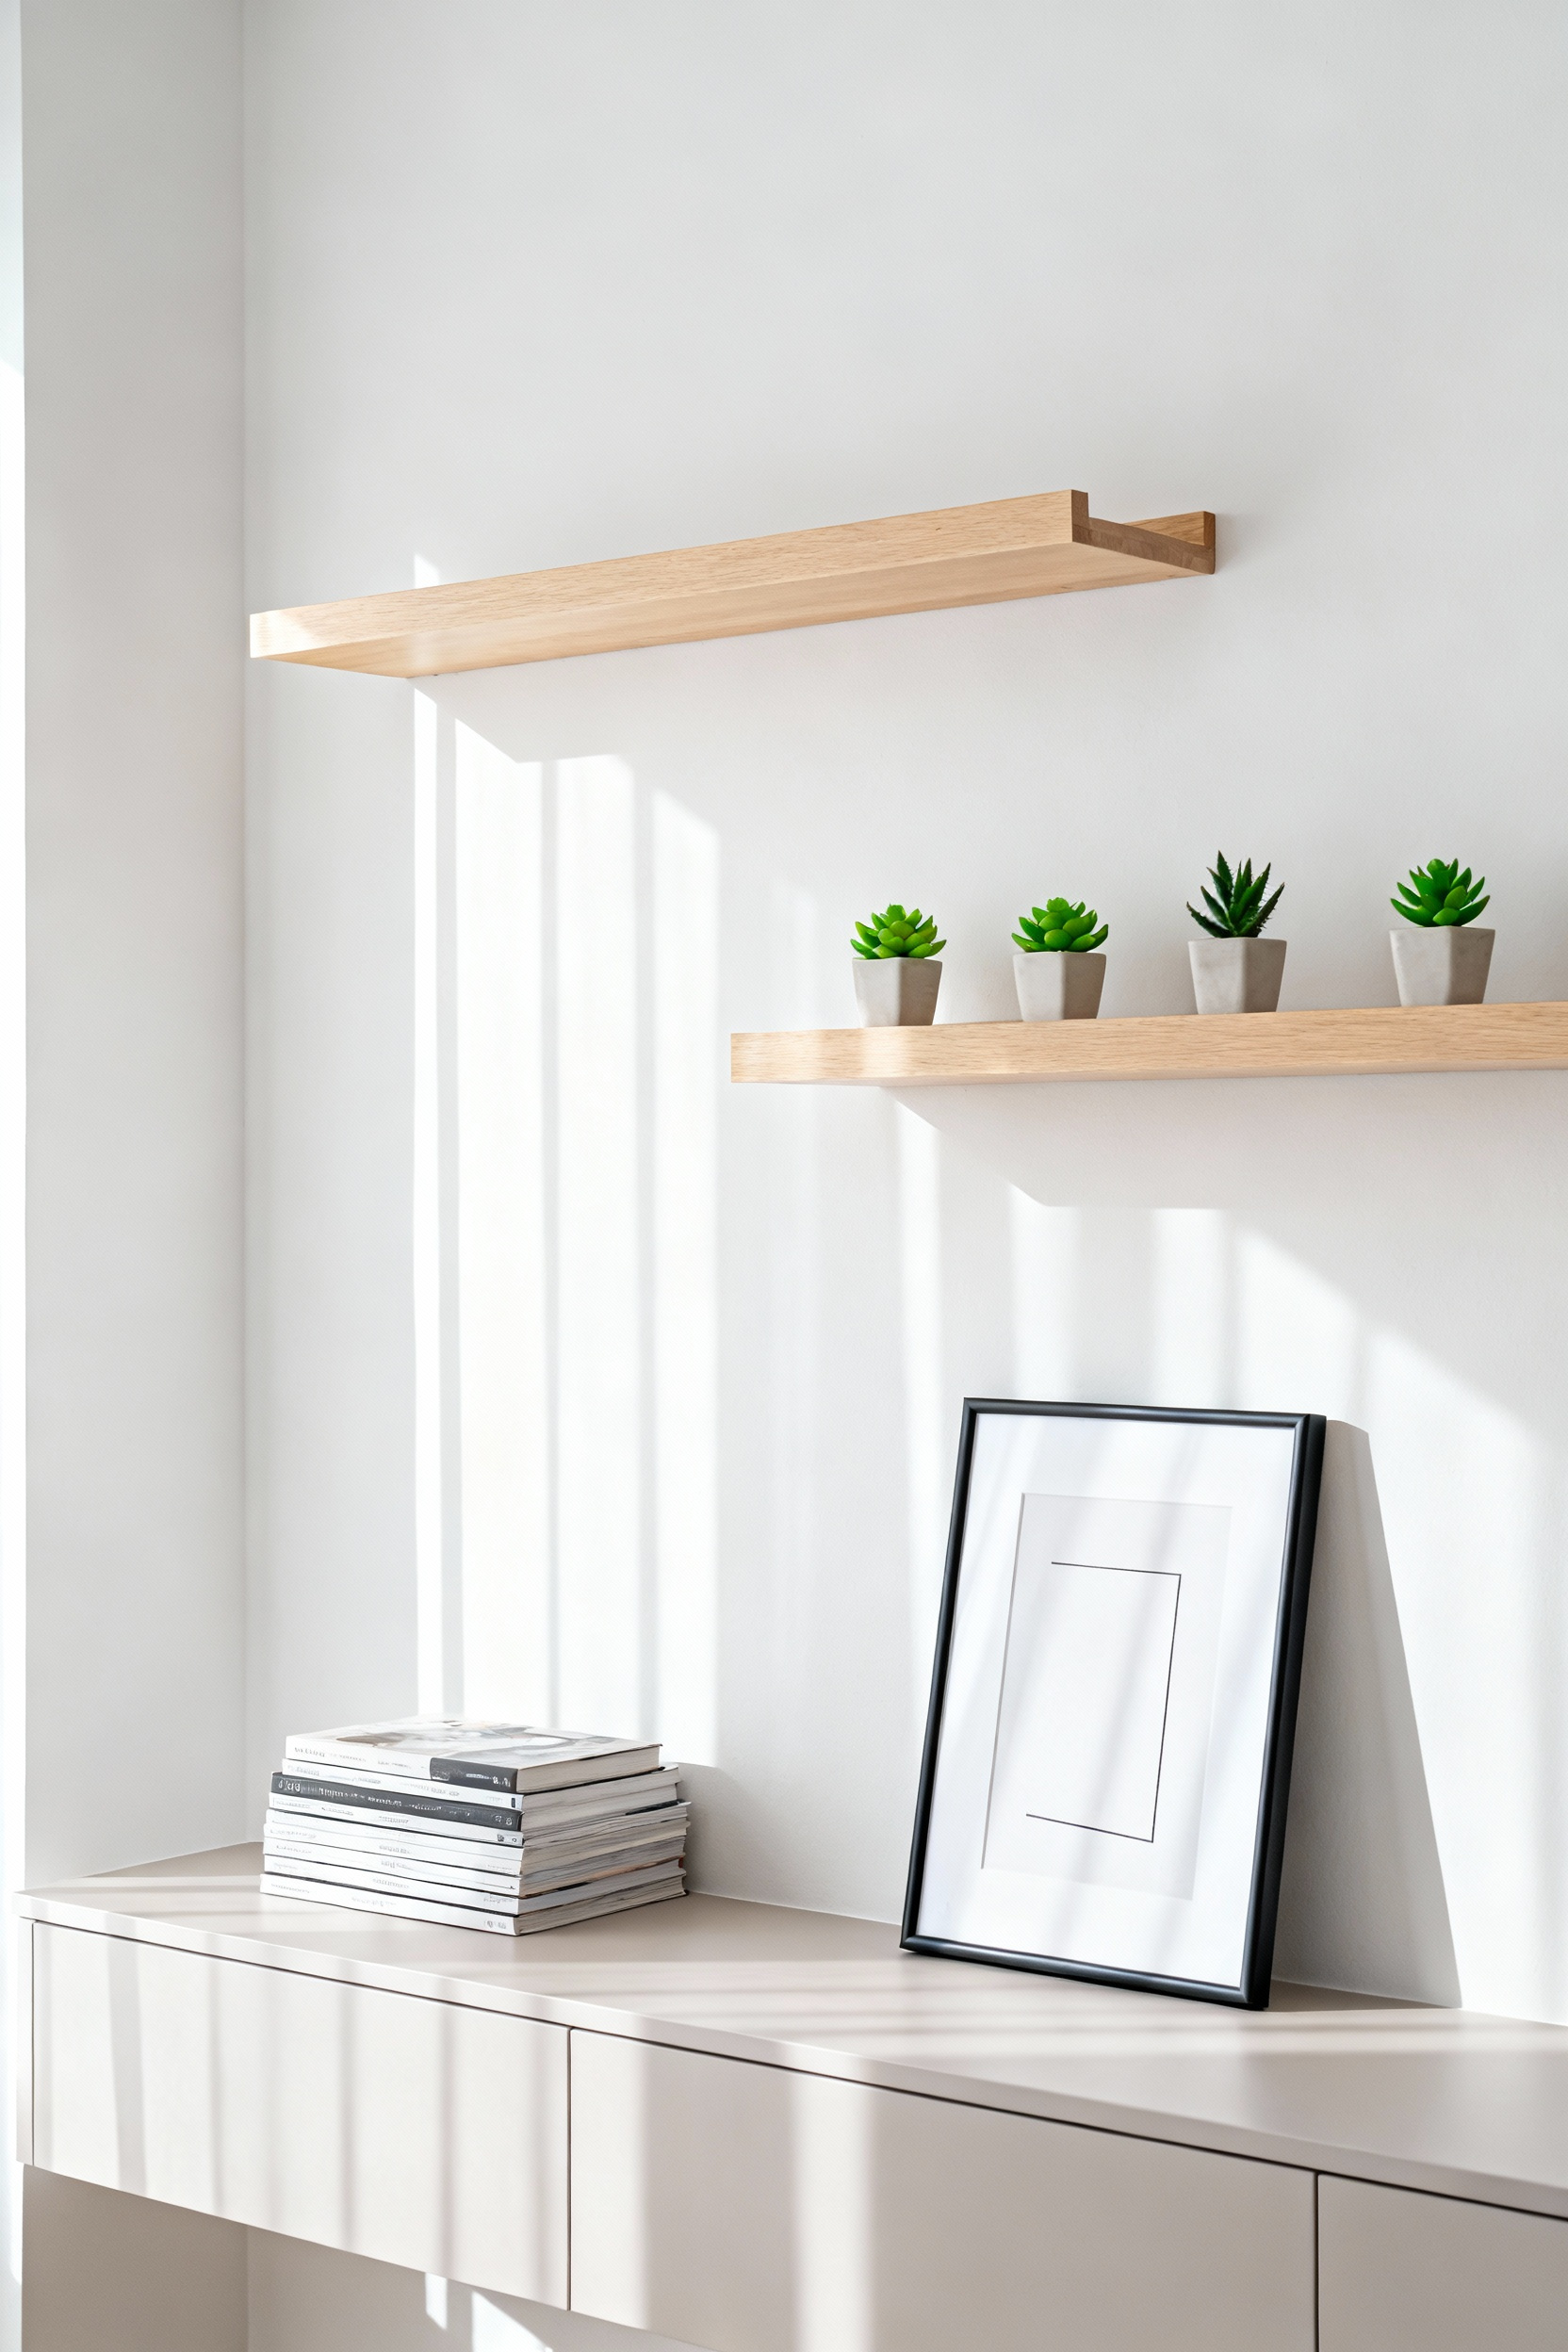
Strategic placement plays a crucial role in transforming the feel of a room. Utilize “vertical velocity” by installing two or more shelves in a staggered, asymmetrical configuration rather than a uniform straight line. This styling technique draws the eye upward, creating visual interest and effectively tricking the eye into perceiving higher ceilings. This approach turns functional storage into a dynamic architectural feature without requiring permanent structural changes.
Be mindful of weight limitations when styling these floating units. Since renter-friendly mounts generally possess lower weight capacities than stud-mounted counterparts, use these high shelves strictly for display rather than utilitarian storage. Arrange lightweight decorative items such as small framed art, souvenirs, or petite succulents to add personality to the space. Avoid placing heavy stacks of books or dense kitchenware on these surfaces to ensure the stability of the shelf and the integrity of your wall.
3. The Double-Duty Ottoman: Hidden Storage Meets Guest Seating
In apartment living, versatility is paramount. A double-duty ottoman acts as a space-saving hero by offering 4-in-1 functionality. It serves simultaneously as a cushioned footrest, an extra seat for unexpected guests, a coffee table, and a hidden storage unit. By replacing multiple bulky pieces with one compact item, you maximize your usable square footage without sacrificing comfort or utility.
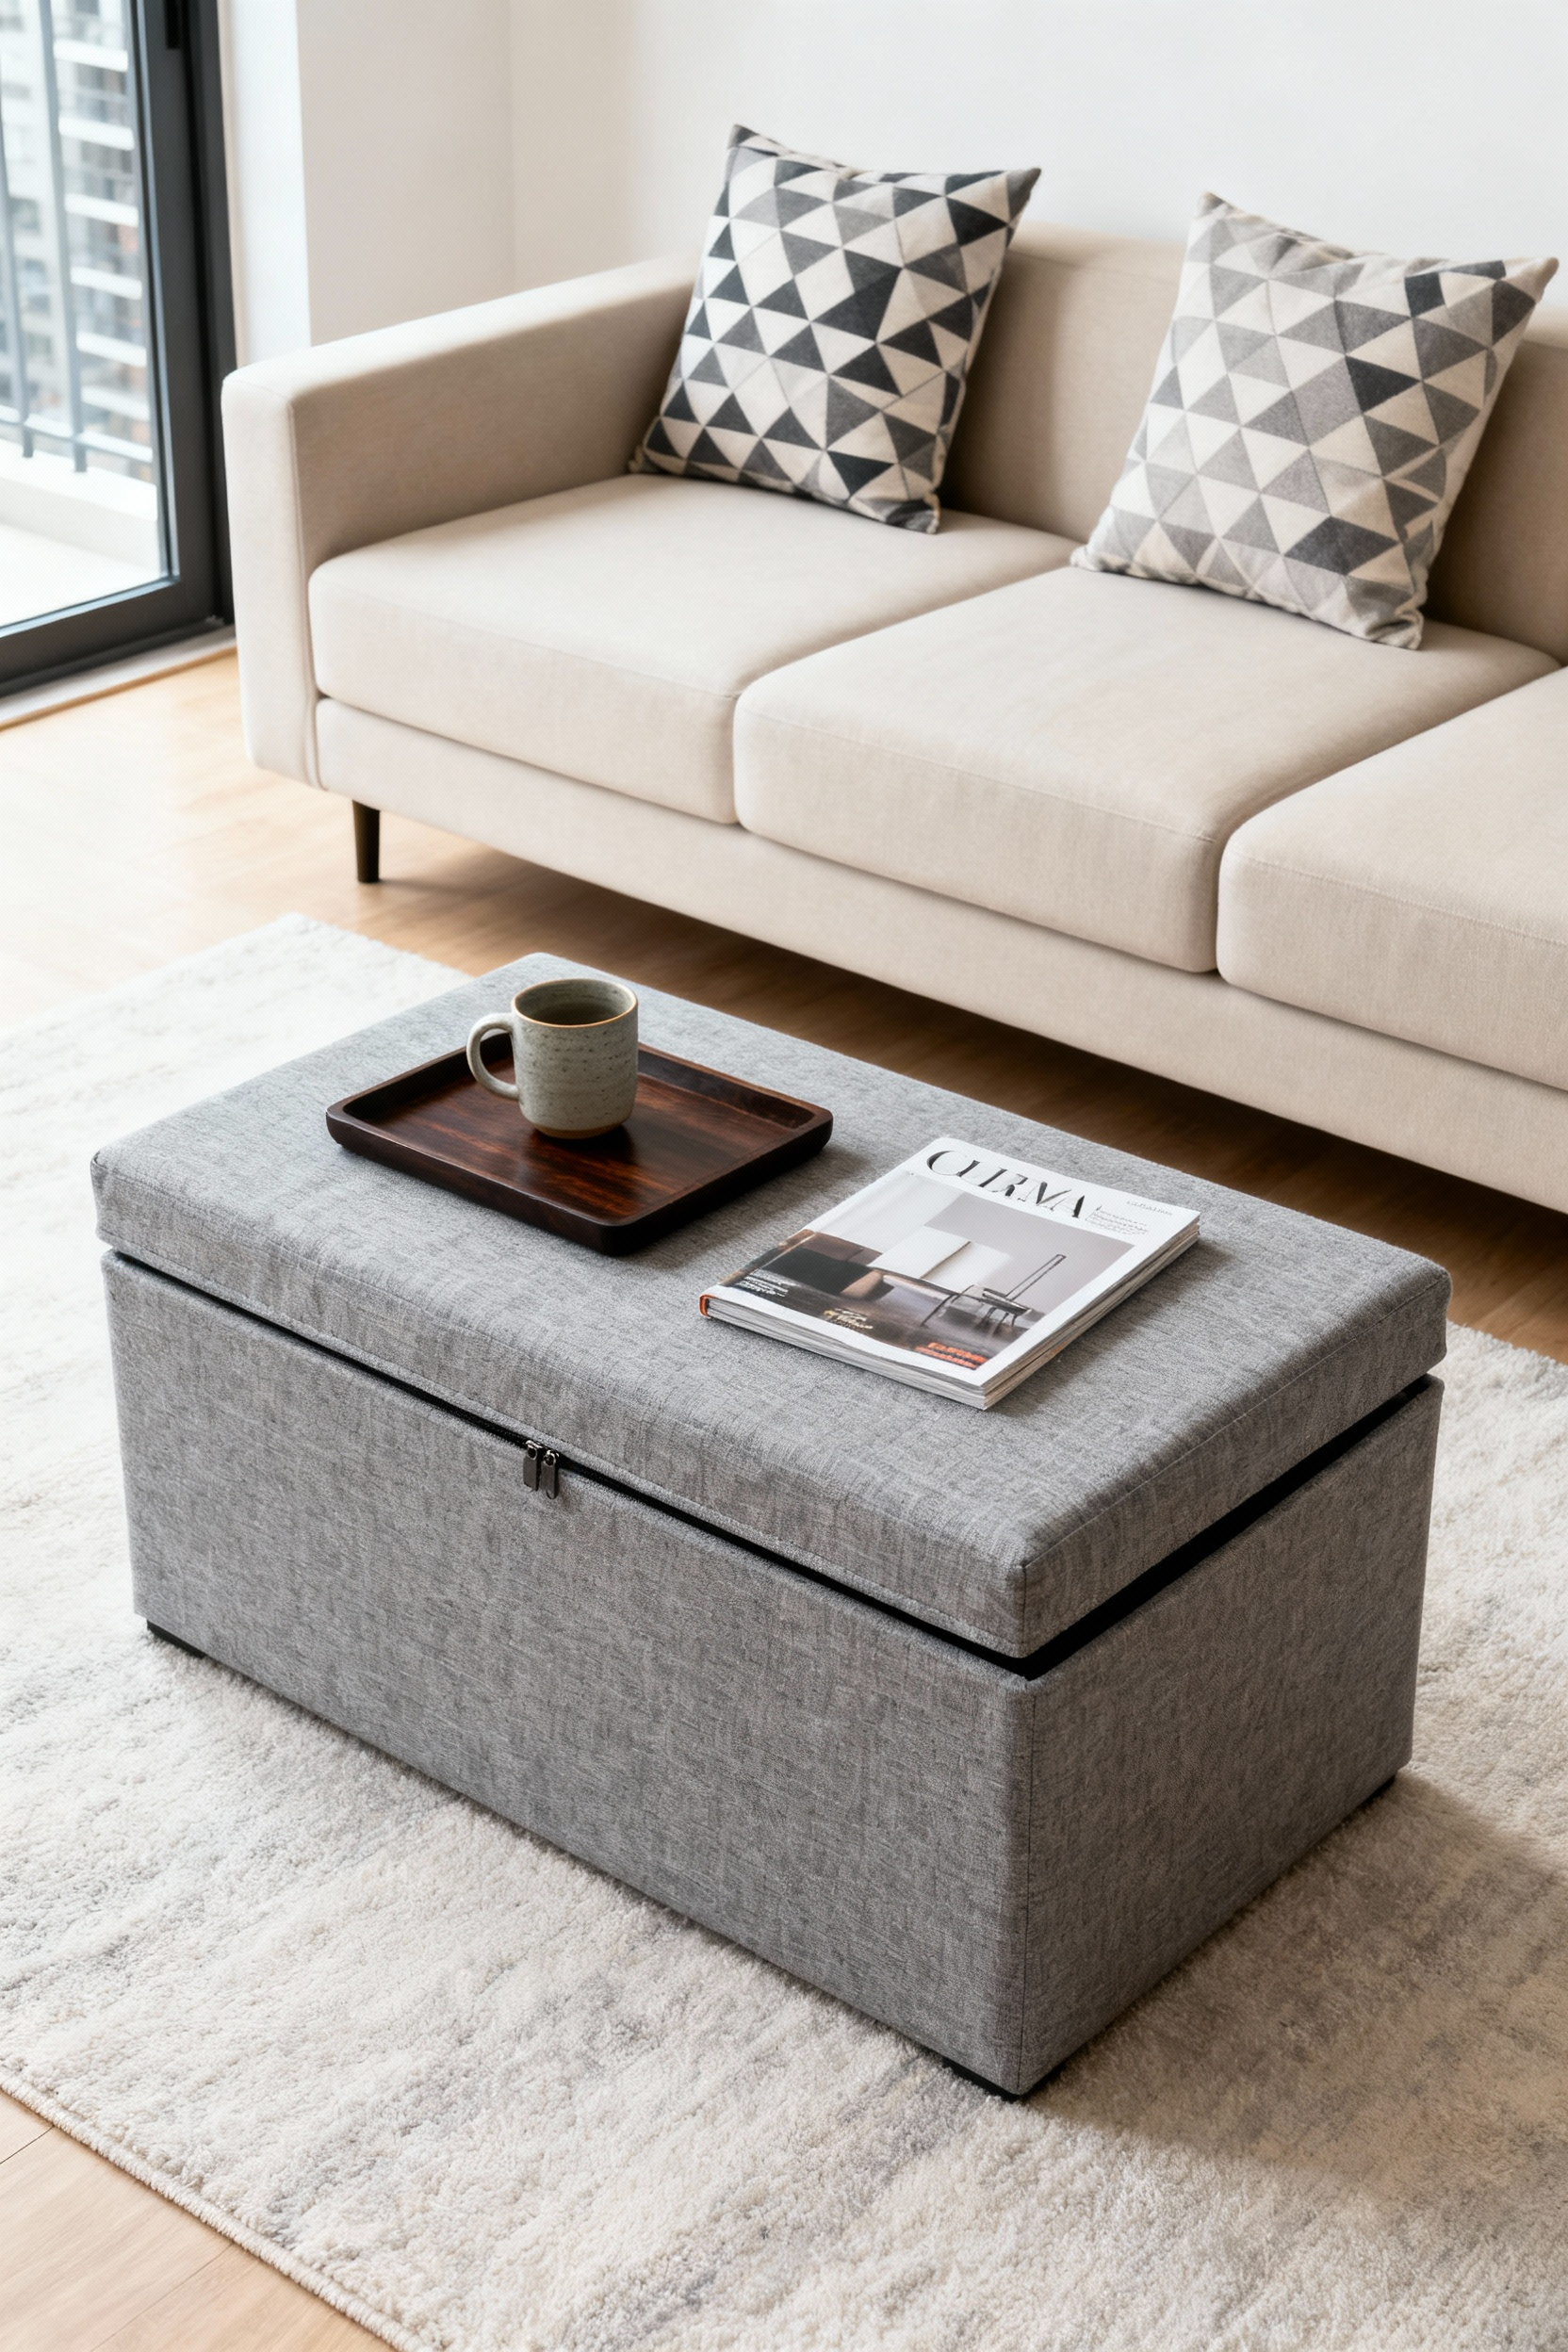
To fully leverage this piece, focus on its dual nature as both a surface and a storage bin. Place a sturdy wood, metal, or lacquer tray on the upholstered lid to create a stable coffee table for drinks and vases. Inside, target high-clutter items like extra seasonal throws, charging cables, or remote controls. This strategy creates an immediately tidier room and ensures your living area remains adaptable for both daily relaxation and entertaining.
Strategic selection of shape and style enhances the flow of a small room. Choose a round ottoman over a rectangular one for narrow layouts; the lack of sharp corners allows for smoother movement around the piece. For even greater flexibility, opt for nesting ottomans or compact cubes. You can pull these out for temporary seating during gatherings and then tuck them neatly under a console table to keep walkways clear when the guests leave.
4. Creating an Entryway Out of Thin Air: Hooks, Consoles, and Mirrors
Many apartments lack a formal foyer and open directly into the living area, but you can manufacture a sense of arrival with the right furniture dimensions. Begin by installing an ultra-slim console table or a floating shelf that is only 10 to 12 inches deep. This creates a functional “landing strip” for mail and keys without obstructing the flow of traffic.
Pair this surface with an oversized mirror mounted directly above it. The mirror reflects light to visually expand the cramped area, making this “faux foyer” feel deliberate and open rather than an afterthought. For maximum efficiency, select a mirror with built-in lower shelving to combine two functions in one footprint.
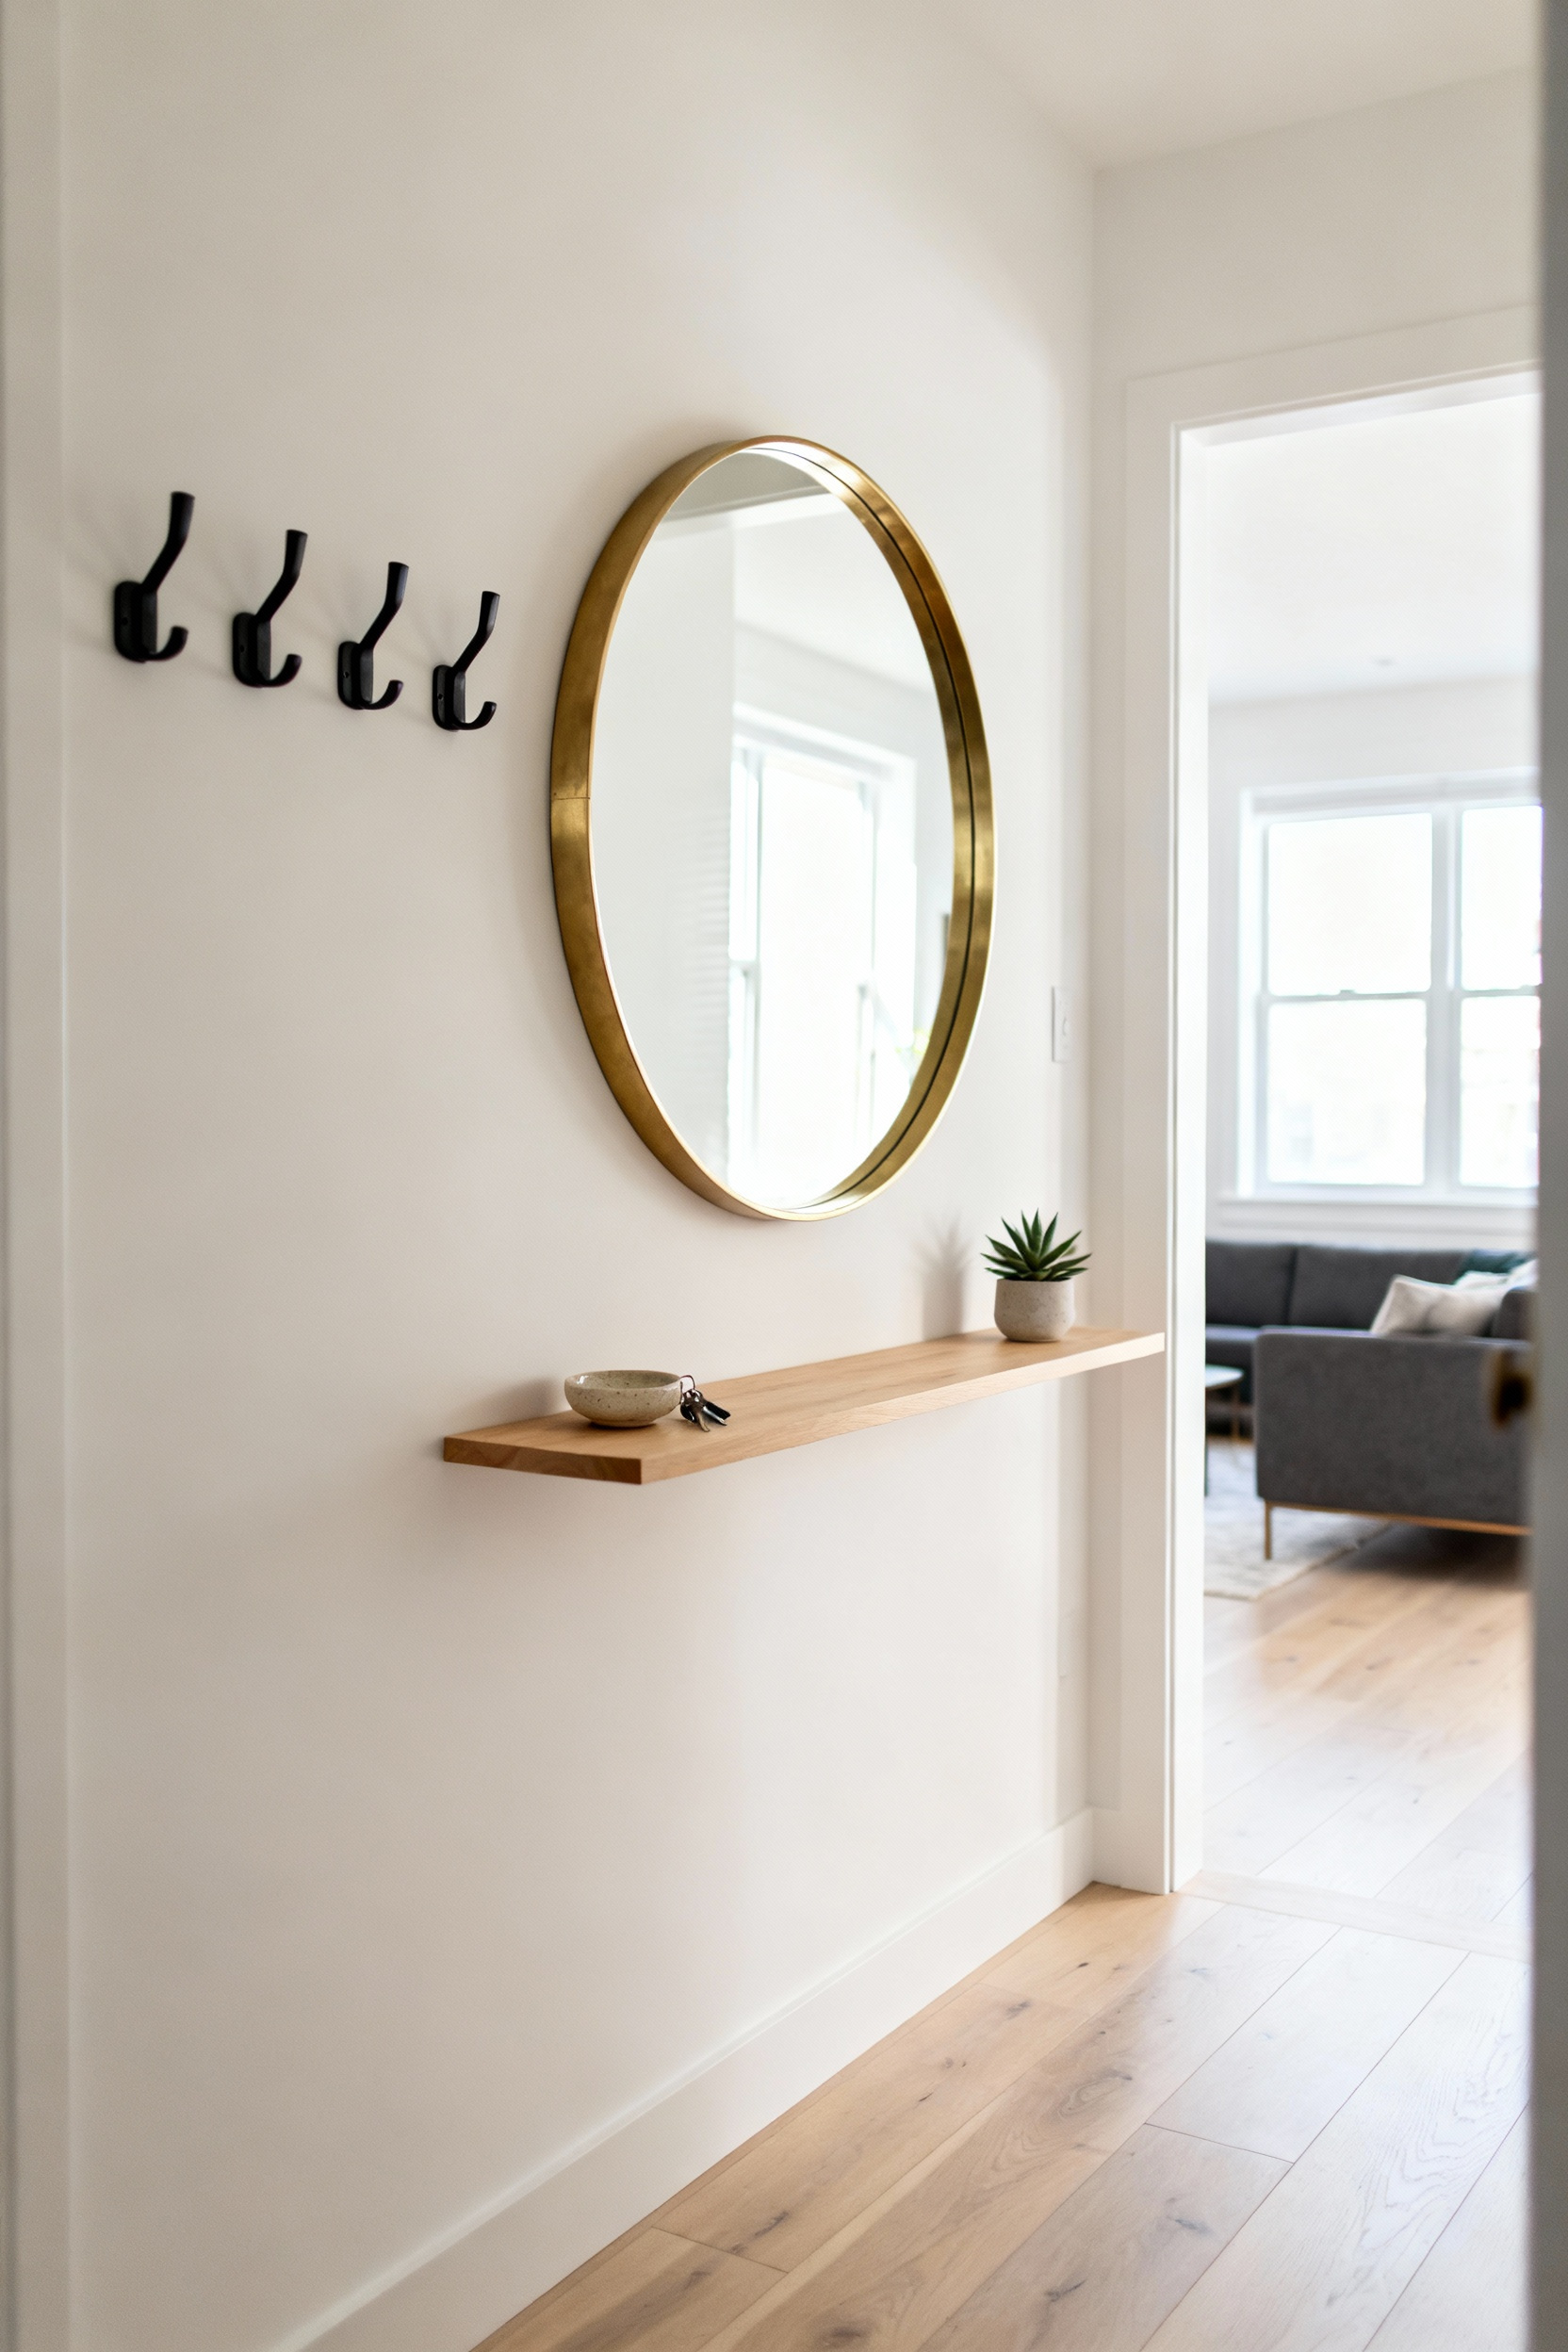
Once the foundation is set, utilize vertical space to keep the floor clear. Install distinct wall-mounted hooks for coats and bags, or place an over-the-door rack on the entrance door itself for out-of-sight storage. To manage lower-level clutter, slide decorative baskets or cubes underneath the open base of your console. These bins should match the depth of the table to maintain a streamlined look while concealing shoes, dog leashes, and seasonal accessories.
To fully define this new zone, apply intentional styling cues that separate the entry from the living room. Lay down a narrow runner rug to visually “carve out” the area and anchor your furniture arrangement. Finally, place a small tray on the console surface to corral loose items like change and keys. This prevents clutter from spreading and reinforces the distinction between your entryway storage and your living space.
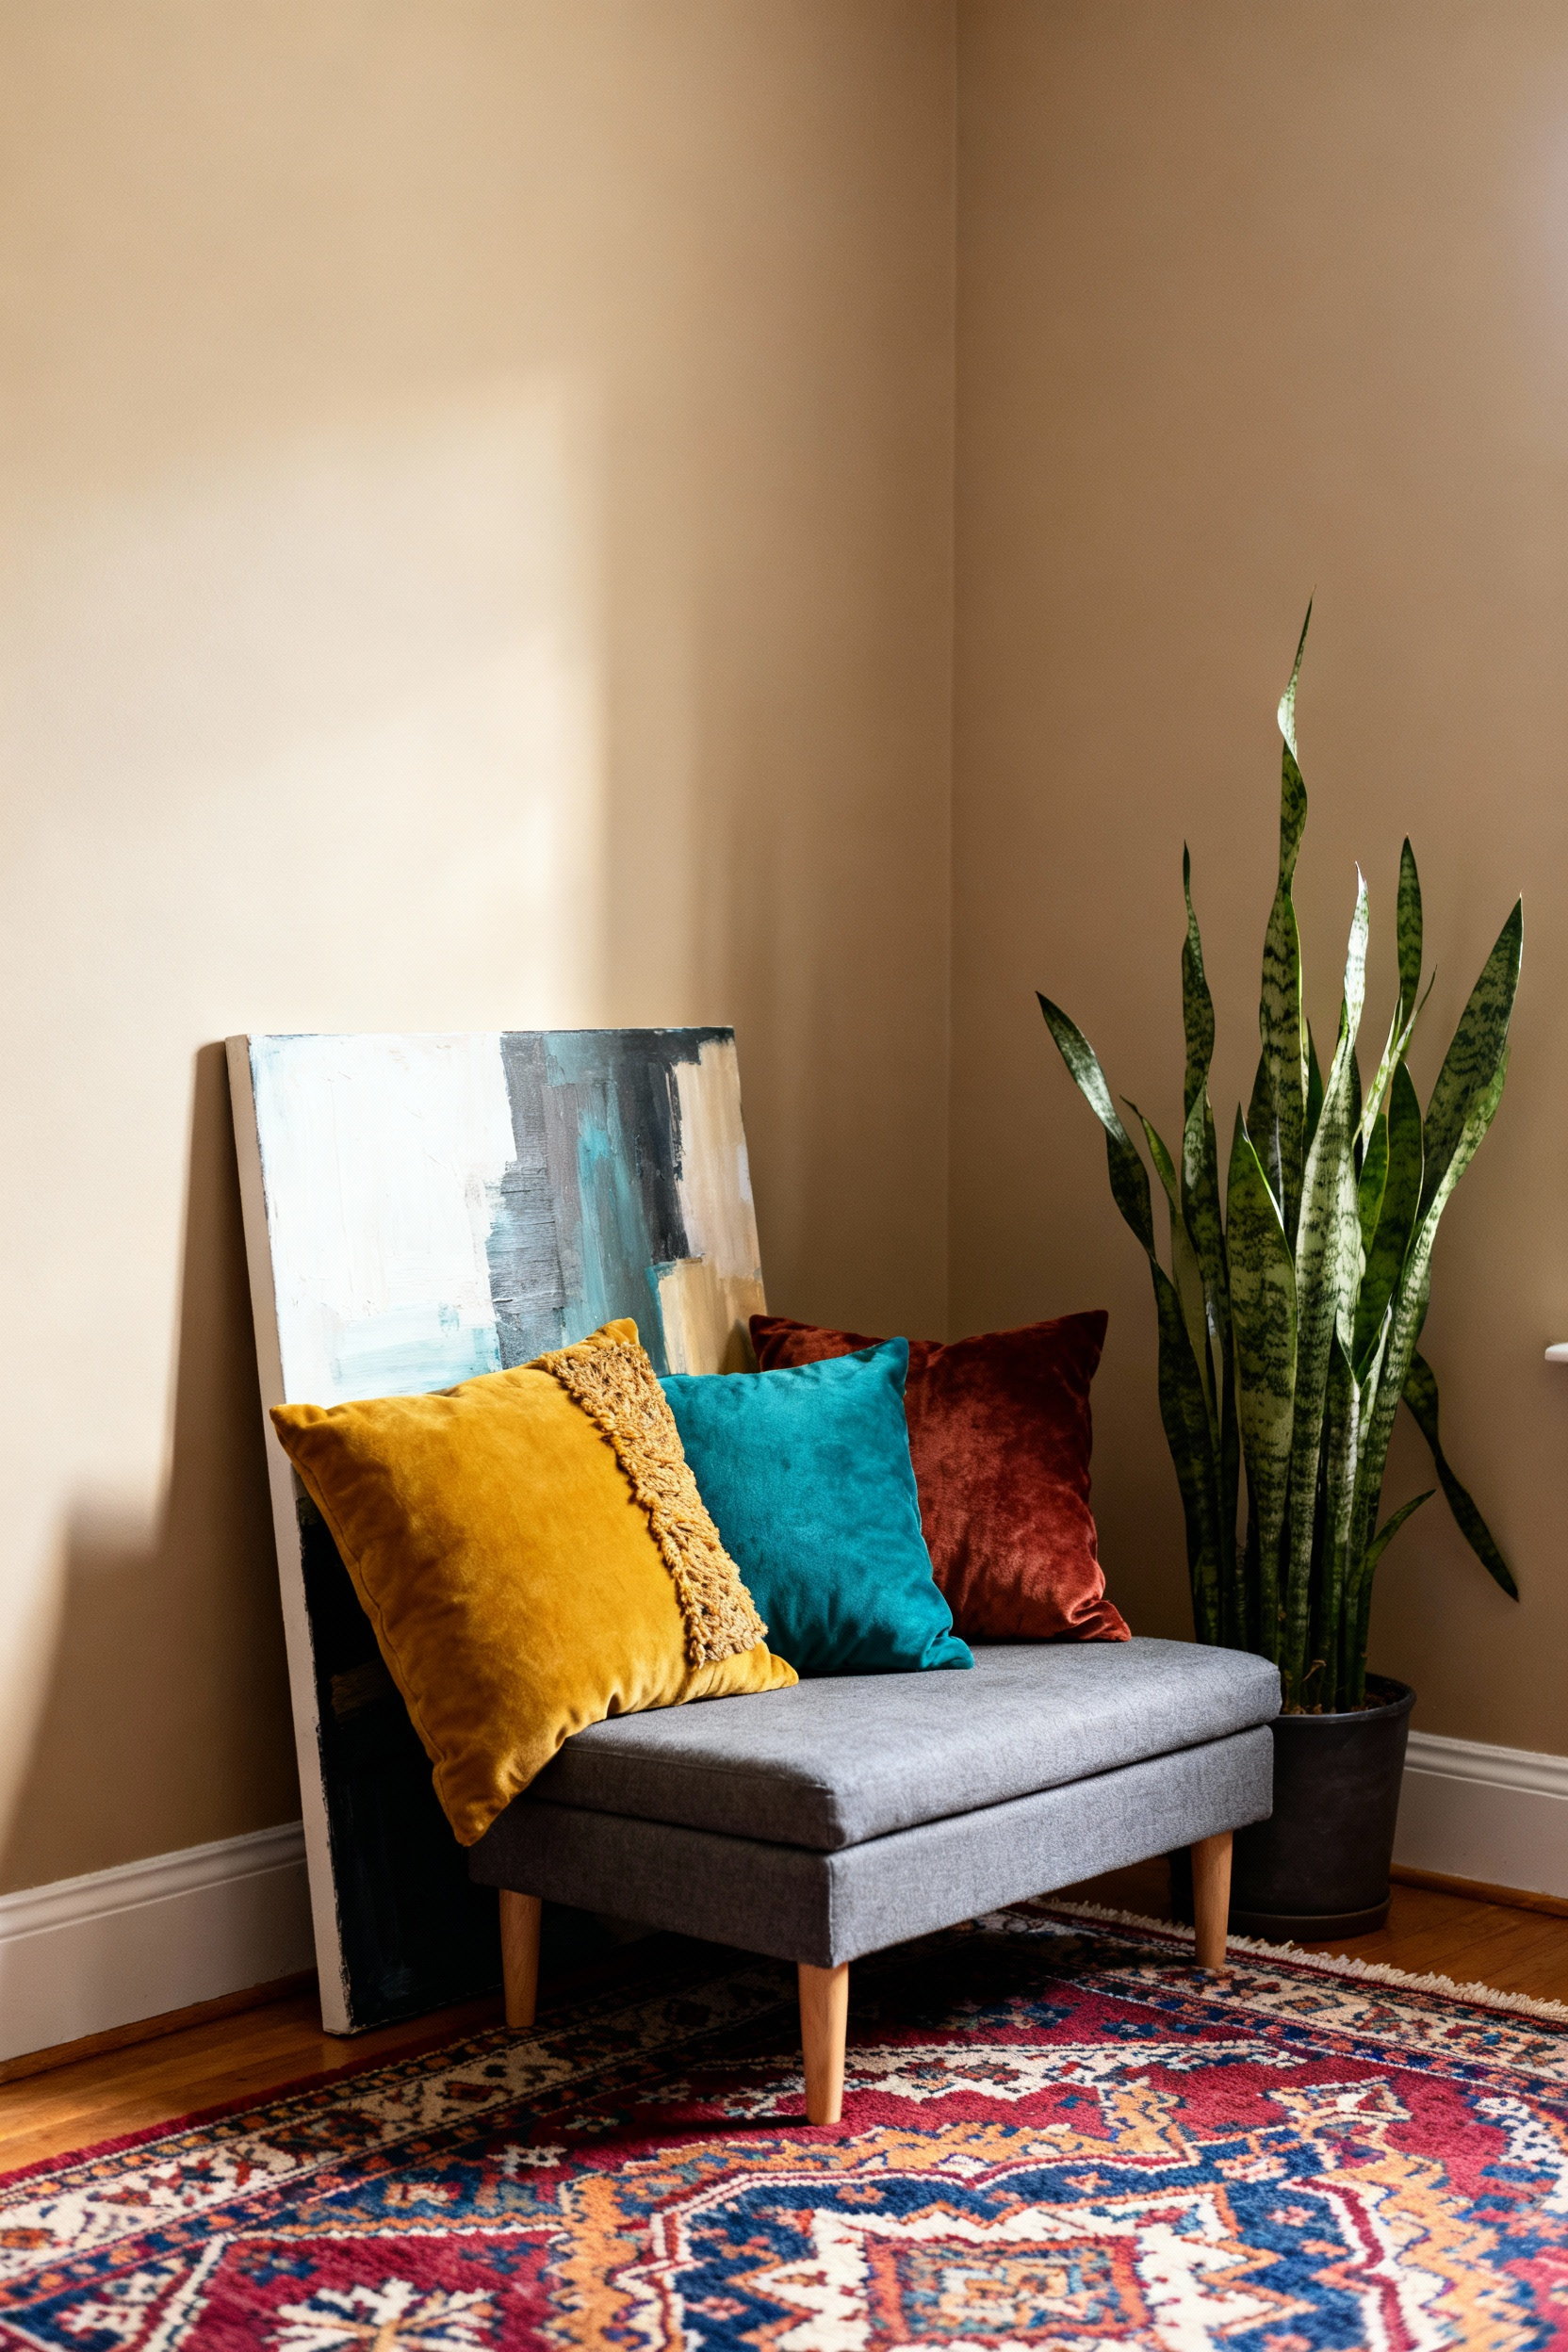
5. The ‘Unusable’ Corner Conversion: constructing a Micro-Reading Nook
Identify a secluded area in your home, such as a quiet bedroom corner or an awkward alcove, to serve as the foundation for your sanctuary. Ensure this spot sits near a window for natural light or, more critically, close to an electrical outlet to power necessary lamps.
Once you establish the location, select seating that maximizes the limited square footage. Avoid bulky armchairs that dominate the floor plan. Instead, opt for small-scale options like a slipper chair, an armless accent chair, or plush floor cushions. These choices provide the necessary comfort for relaxation without overcrowding the micro-environment.
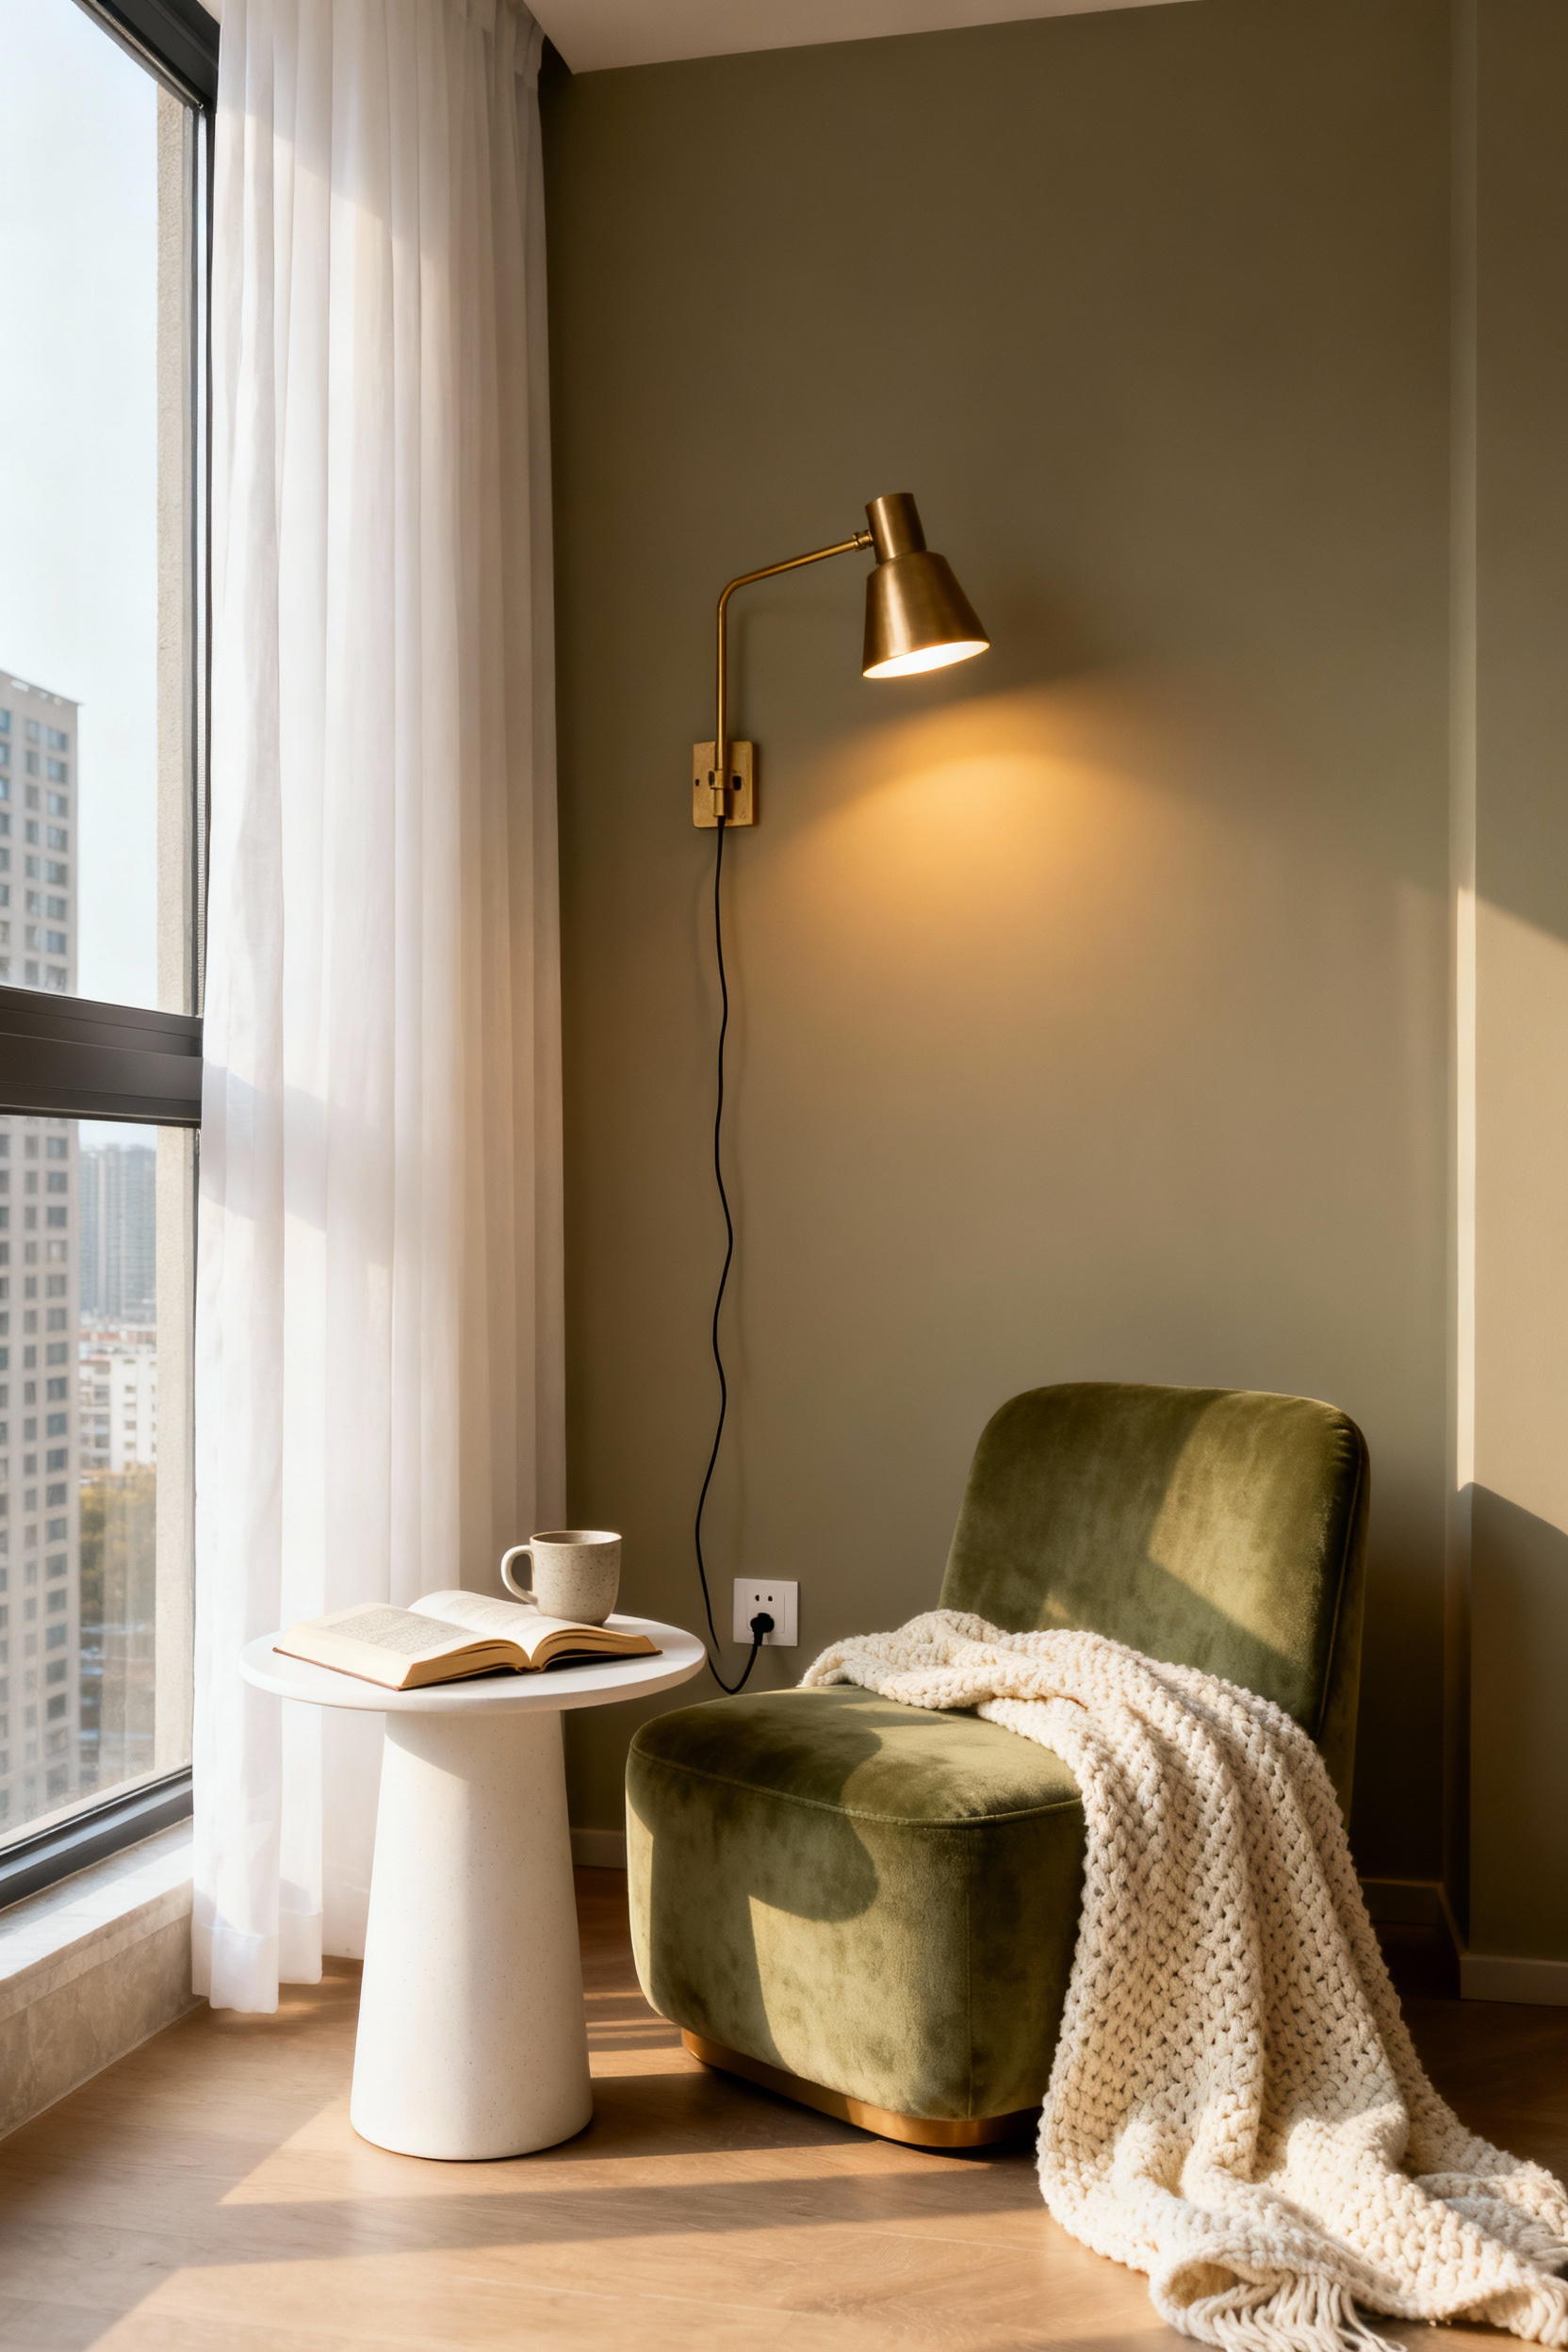
Functionality relies heavily on how you integrate lighting and storage. Install adjustable task lighting, such as a wall-mounted sconce or a clip-on reading fixture, to ensure the space is usable at any hour. Pair this with soft, ambient sources like string lights or warm-toned LED bulbs to create a distinct mood. For book storage, utilize vertical space to keep the footprint clear. Mount narrow wall shelves or use a repurposed wooden crate that functions simultaneously as a book bin and a side table. This multifunctional approach ensures you have a place for your current read and a beverage without wasting space.
Finally, you must visually define the nook to separate it from the main room. Creating a visual boundary helps the corner feel like a private escape rather than just extra furniture. Use temporary but effective methods to zone the area:
- Apply peel-and-stick wallpaper or a contrasting paint color to the two intersecting corner walls to anchor the space.
- Position a bookshelf perpendicular to the wall to act as a physical room divider.
- Add a small area rug to outline the specific footprint of your reading zone.
Phase 2: Layering Personality (Color & Texture)
Start by establishing a neutral foundation to serve as your design canvas. Use calming shades like soft whites, grays, or taupes for large surface areas, including walls and main furniture pieces. This prevents subsequent layers from becoming overwhelming.
Once this base is set, apply the 60-30-10 rule to introduce color structure. Your neutral foundation covers roughly 60 percent of the room. Dedicate 30 percent to a dominant color anchored in at least three areas, such as a statement chair, art, or rug. Reserve the final 10 percent for bold accents to inject energy without creating clutter.
Build visual and physical depth by mixing contrasting textures. A flat room feels sterile, so combine smooth, shiny surfaces like glass or velvet with rougher, natural materials like jute, linen, and leather. Introduce these tactile fabrics through distinct layers:
- Soft Goods: Drape wool throws over leather armchairs or place silk pillows on a linen sofa.
- Pattern Play: Select one large-scale pattern as a focal point and layer in smaller, subtler prints that share a common color for harmony.
- Surface Decor: Group accessories of varying heights and materials, such as ceramic vases or metal trays, to break up flat surfaces.
Finalize the space with accessories that create a lived-in atmosphere. This final layer bridges the gap between a showroom look and a personal home. Arrange objects like woven baskets and plants on shelves or coffee tables to add organic movement. By focusing on moveable layers like textiles and small decor, you create an adaptable environment that is easy to update seasonally without altering the room’s core structure.
6. The Renter’s Holy Grail: Peel-and-Stick Wallpaper Accent Walls
Peel-and-stick wallpaper creates a high-impact, personalized aesthetic without jeopardizing your security deposit. This product features a self-adhesive backing designed to adhere securely yet remove cleanly, leaving no sticky residue or paint damage behind.
To achieve a designer look that respects a modest budget, apply the wallpaper to a single focal wall rather than an entire room. This strategy works exceptionally well behind a headboard, in a home office niche, or defining a dining area, anchoring the space without overwhelming the room’s dimensions.
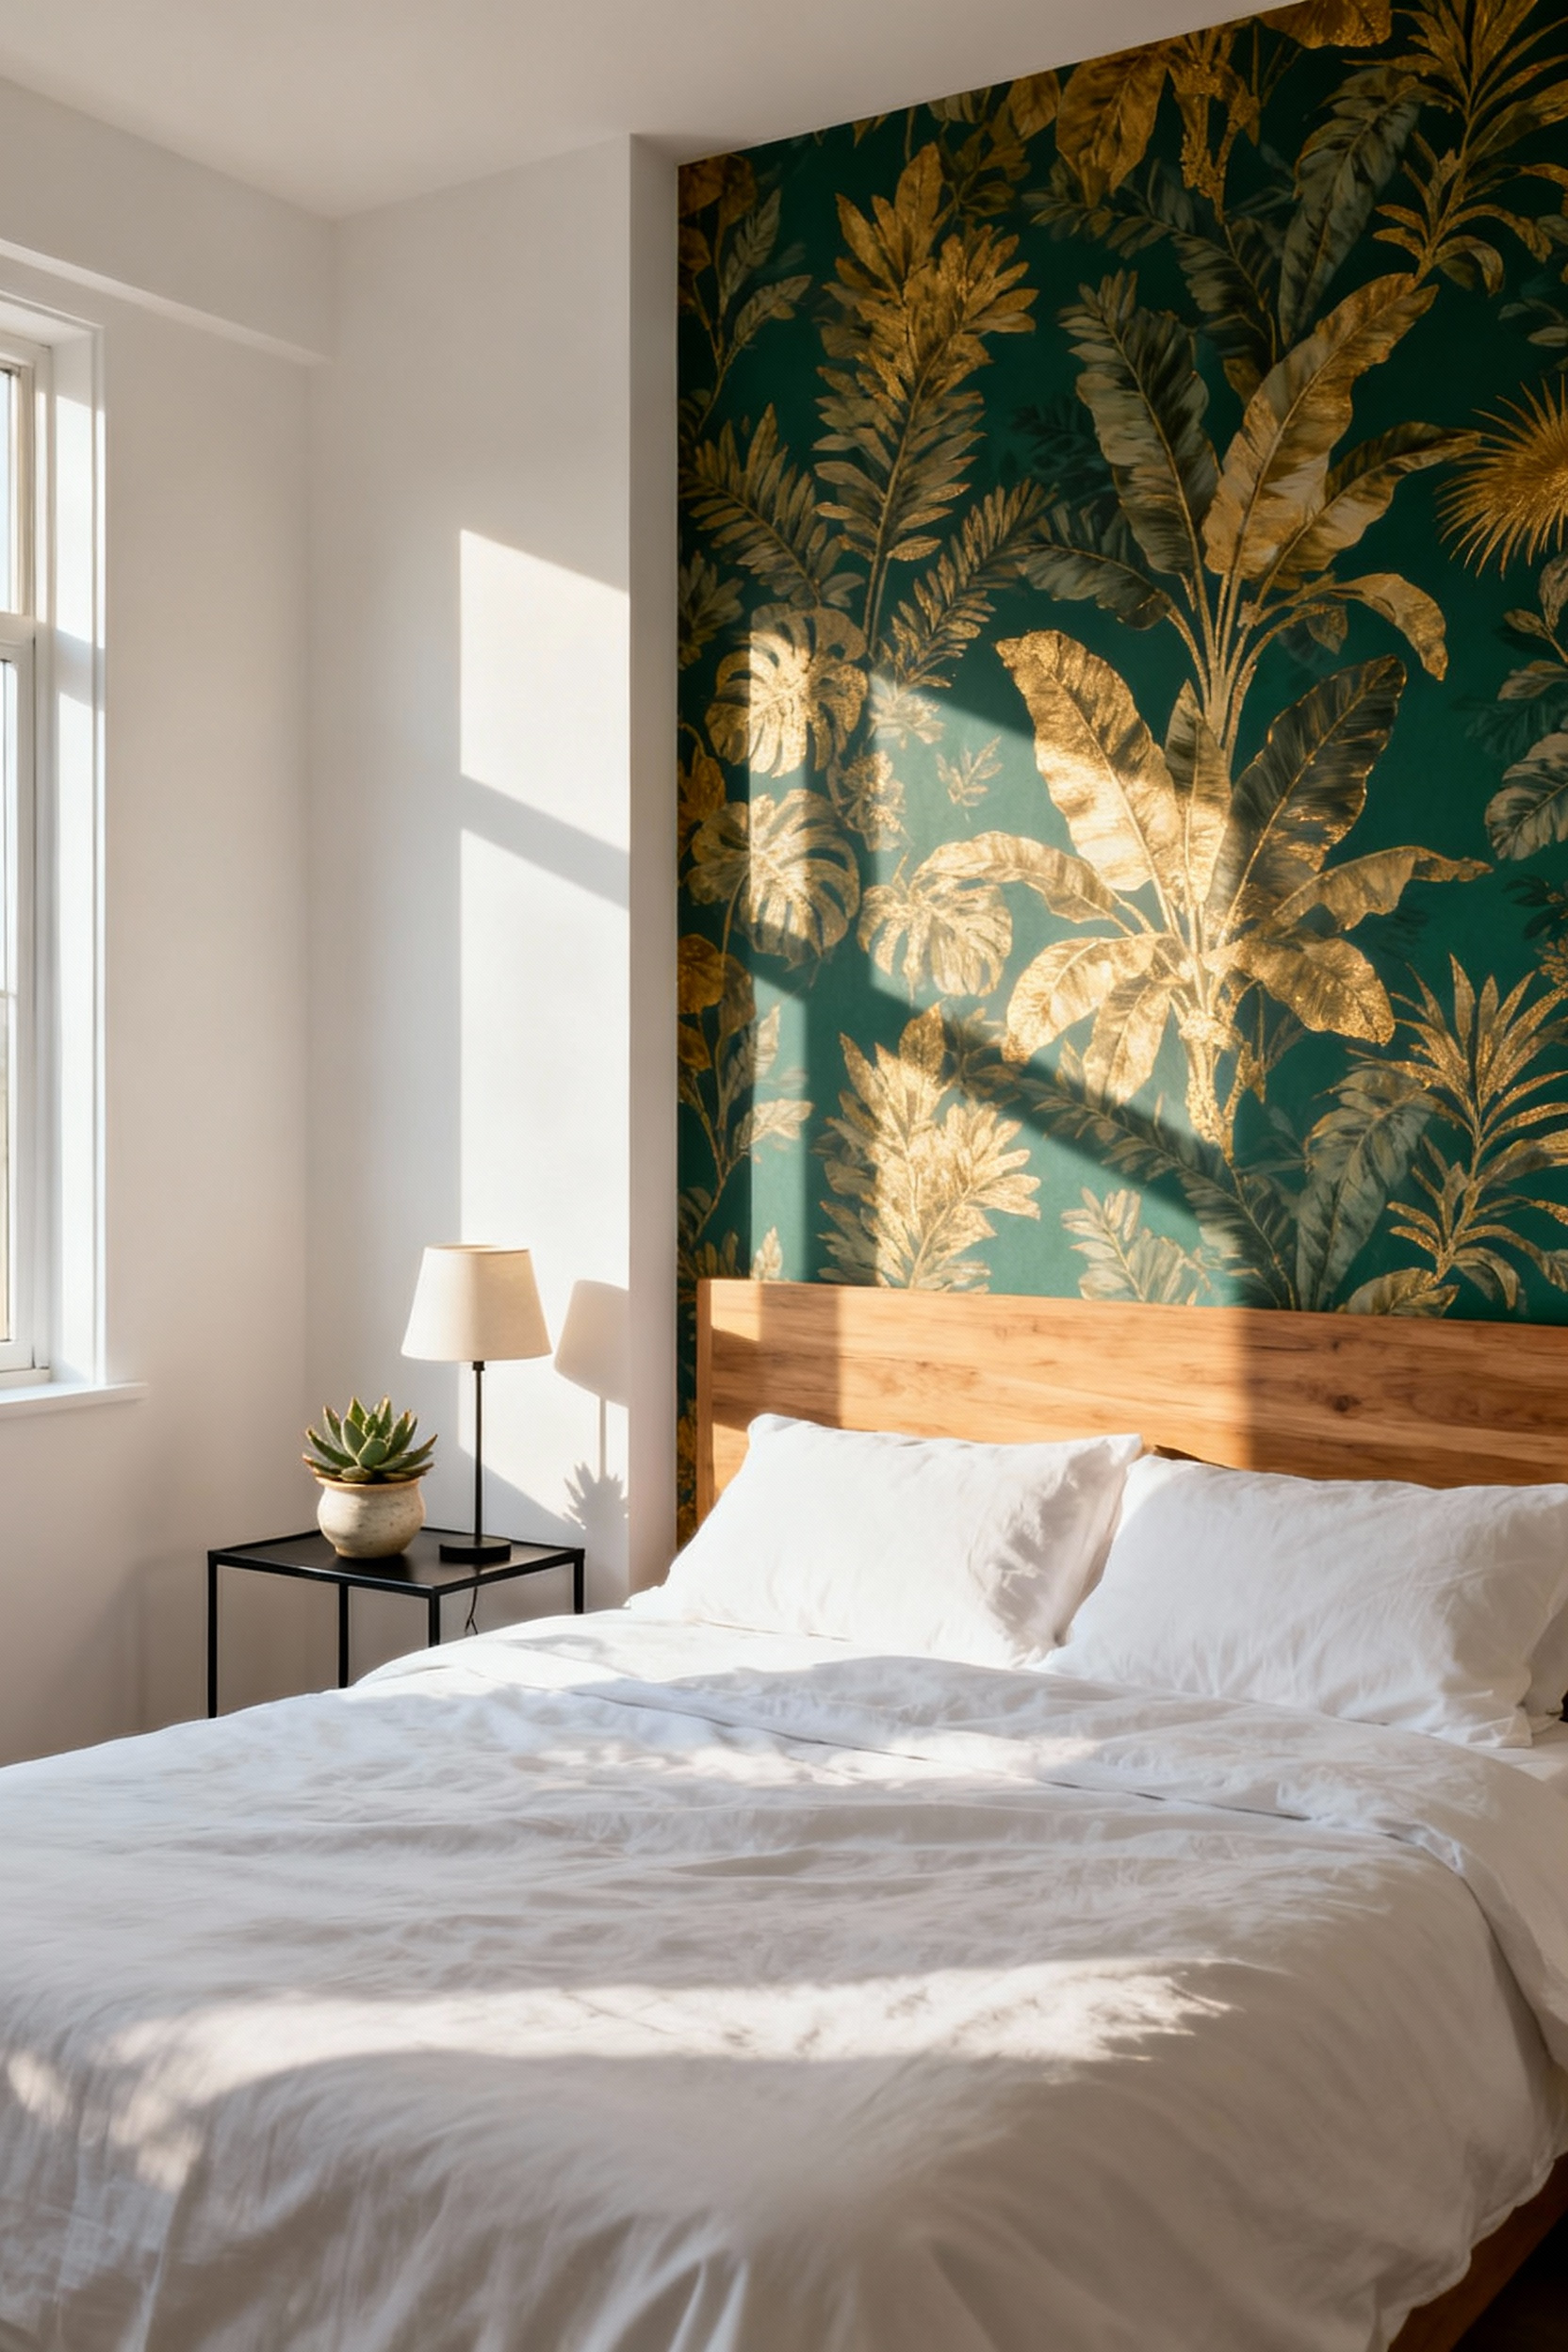
Success with this material relies heavily on surface texture. You must apply the wallpaper to smooth, clean walls for optimal results. Avoid highly textured surfaces, brick, or uneven plaster, as these textures prevent the adhesive from bonding correctly and often result in peeling or bubbling. Once you identify a suitable surface, you can embrace bold trends with zero commitment. Current styles, such as large-scale botanicals, geometric prints, and faux textures like grasscloth, allow you to adapt your interior styling to the season or your evolving taste.
Maximize the utility of your purchase by repurposing leftover material for cohesive design accents. Scraps provide an excellent opportunity to line bookshelves, refresh dull cabinet fronts, or create a temporary backsplash. You can even frame a large section of the pattern to serve as instant, coordinating artwork. These small, adaptable updates unify the room’s design and ensure you utilize every inch of your investment.
7. High and Wide: Hanging Curtains to Fake High Ceilings
To instantly elevate a room, look beyond the window frame itself. Mount your curtain rod as close to the ceiling or crown molding as possible, rather than directly above the trim. This placement forces the eye to travel the full height of the wall, creating a strong vertical line that visually elongates the space.
Enhance this effect by selecting fabrics with vertical patterns, such as subtle stripes, or light solid colors. These choices guide the gaze upward and maintain an unbroken, airy aesthetic that contributes to the illusion of height.
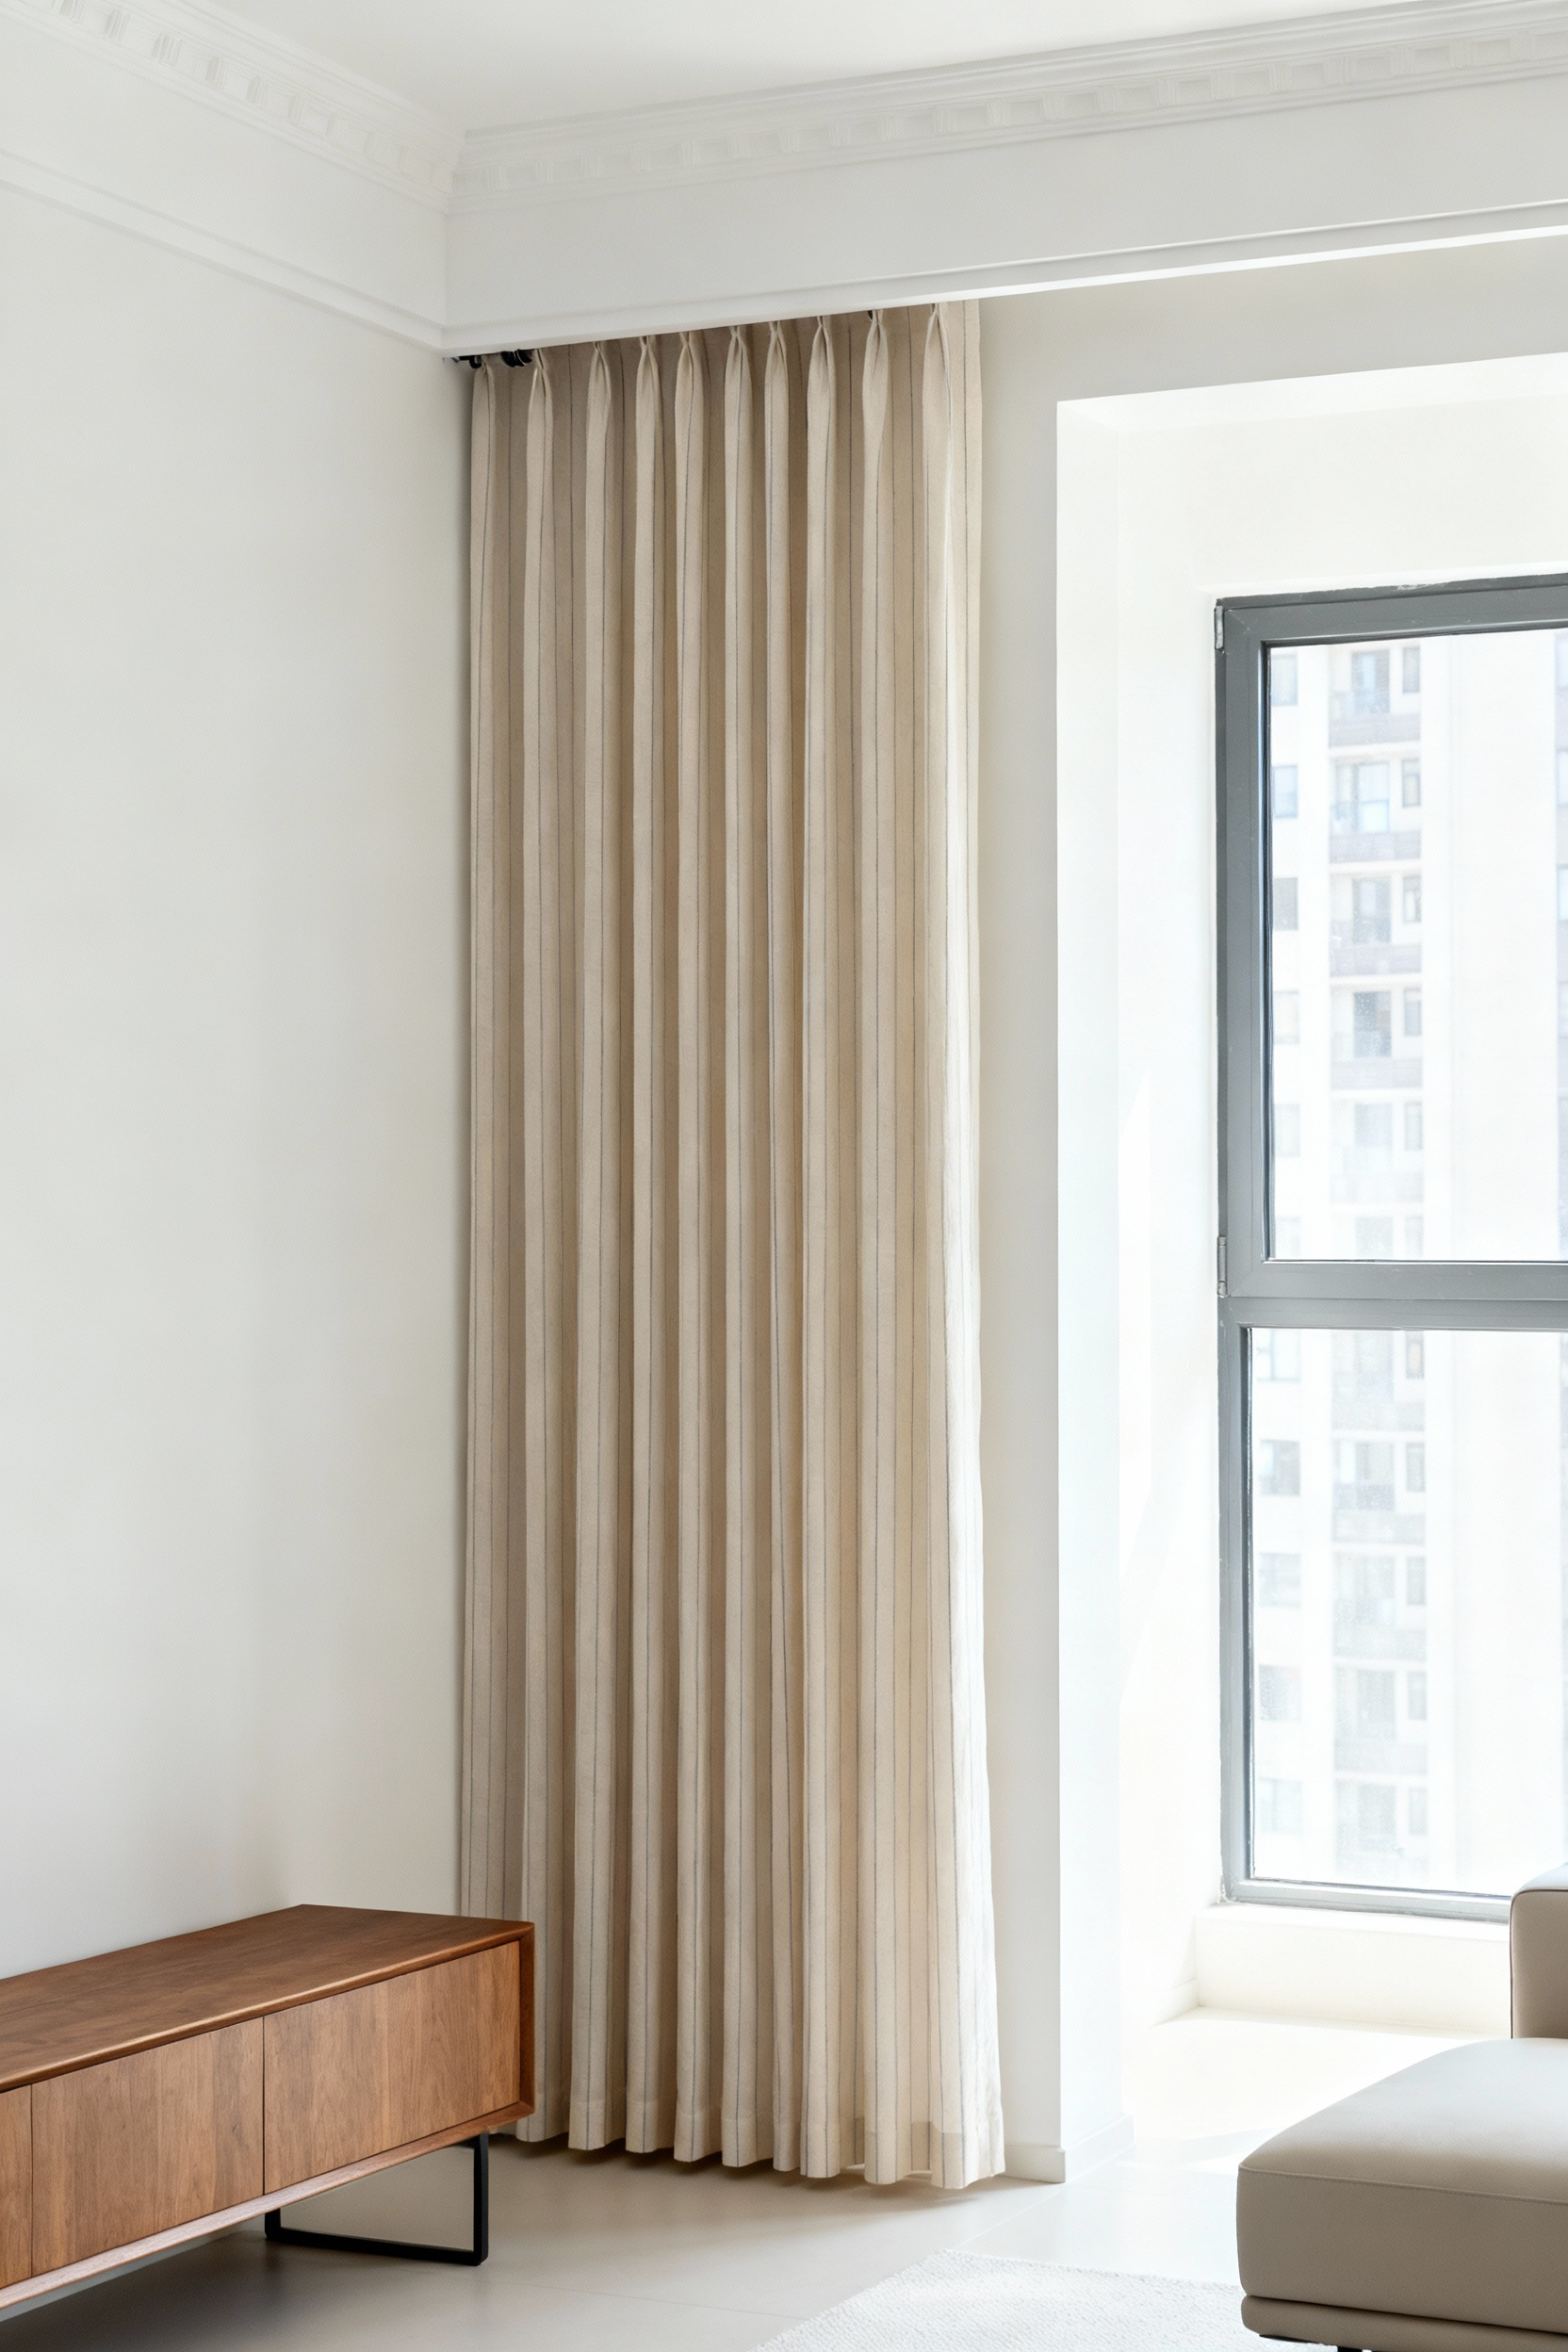
Maximize the perceived size of the window by extending the rod 8 to 12 inches beyond the frame on each side. This extra width allows the curtain panels to rest against the wall when open, rather than obscuring the glass. The result is an influx of natural light and the illusion of a much grander architectural feature.
Finally, commit to floor-length panels. Ensure the fabric grazes the floor for a tailored look or puddles slightly for a luxurious feel. Avoiding short curtains that stop at the sill preserves the vertical line and prevents the ceiling from appearing lower than it actually is.
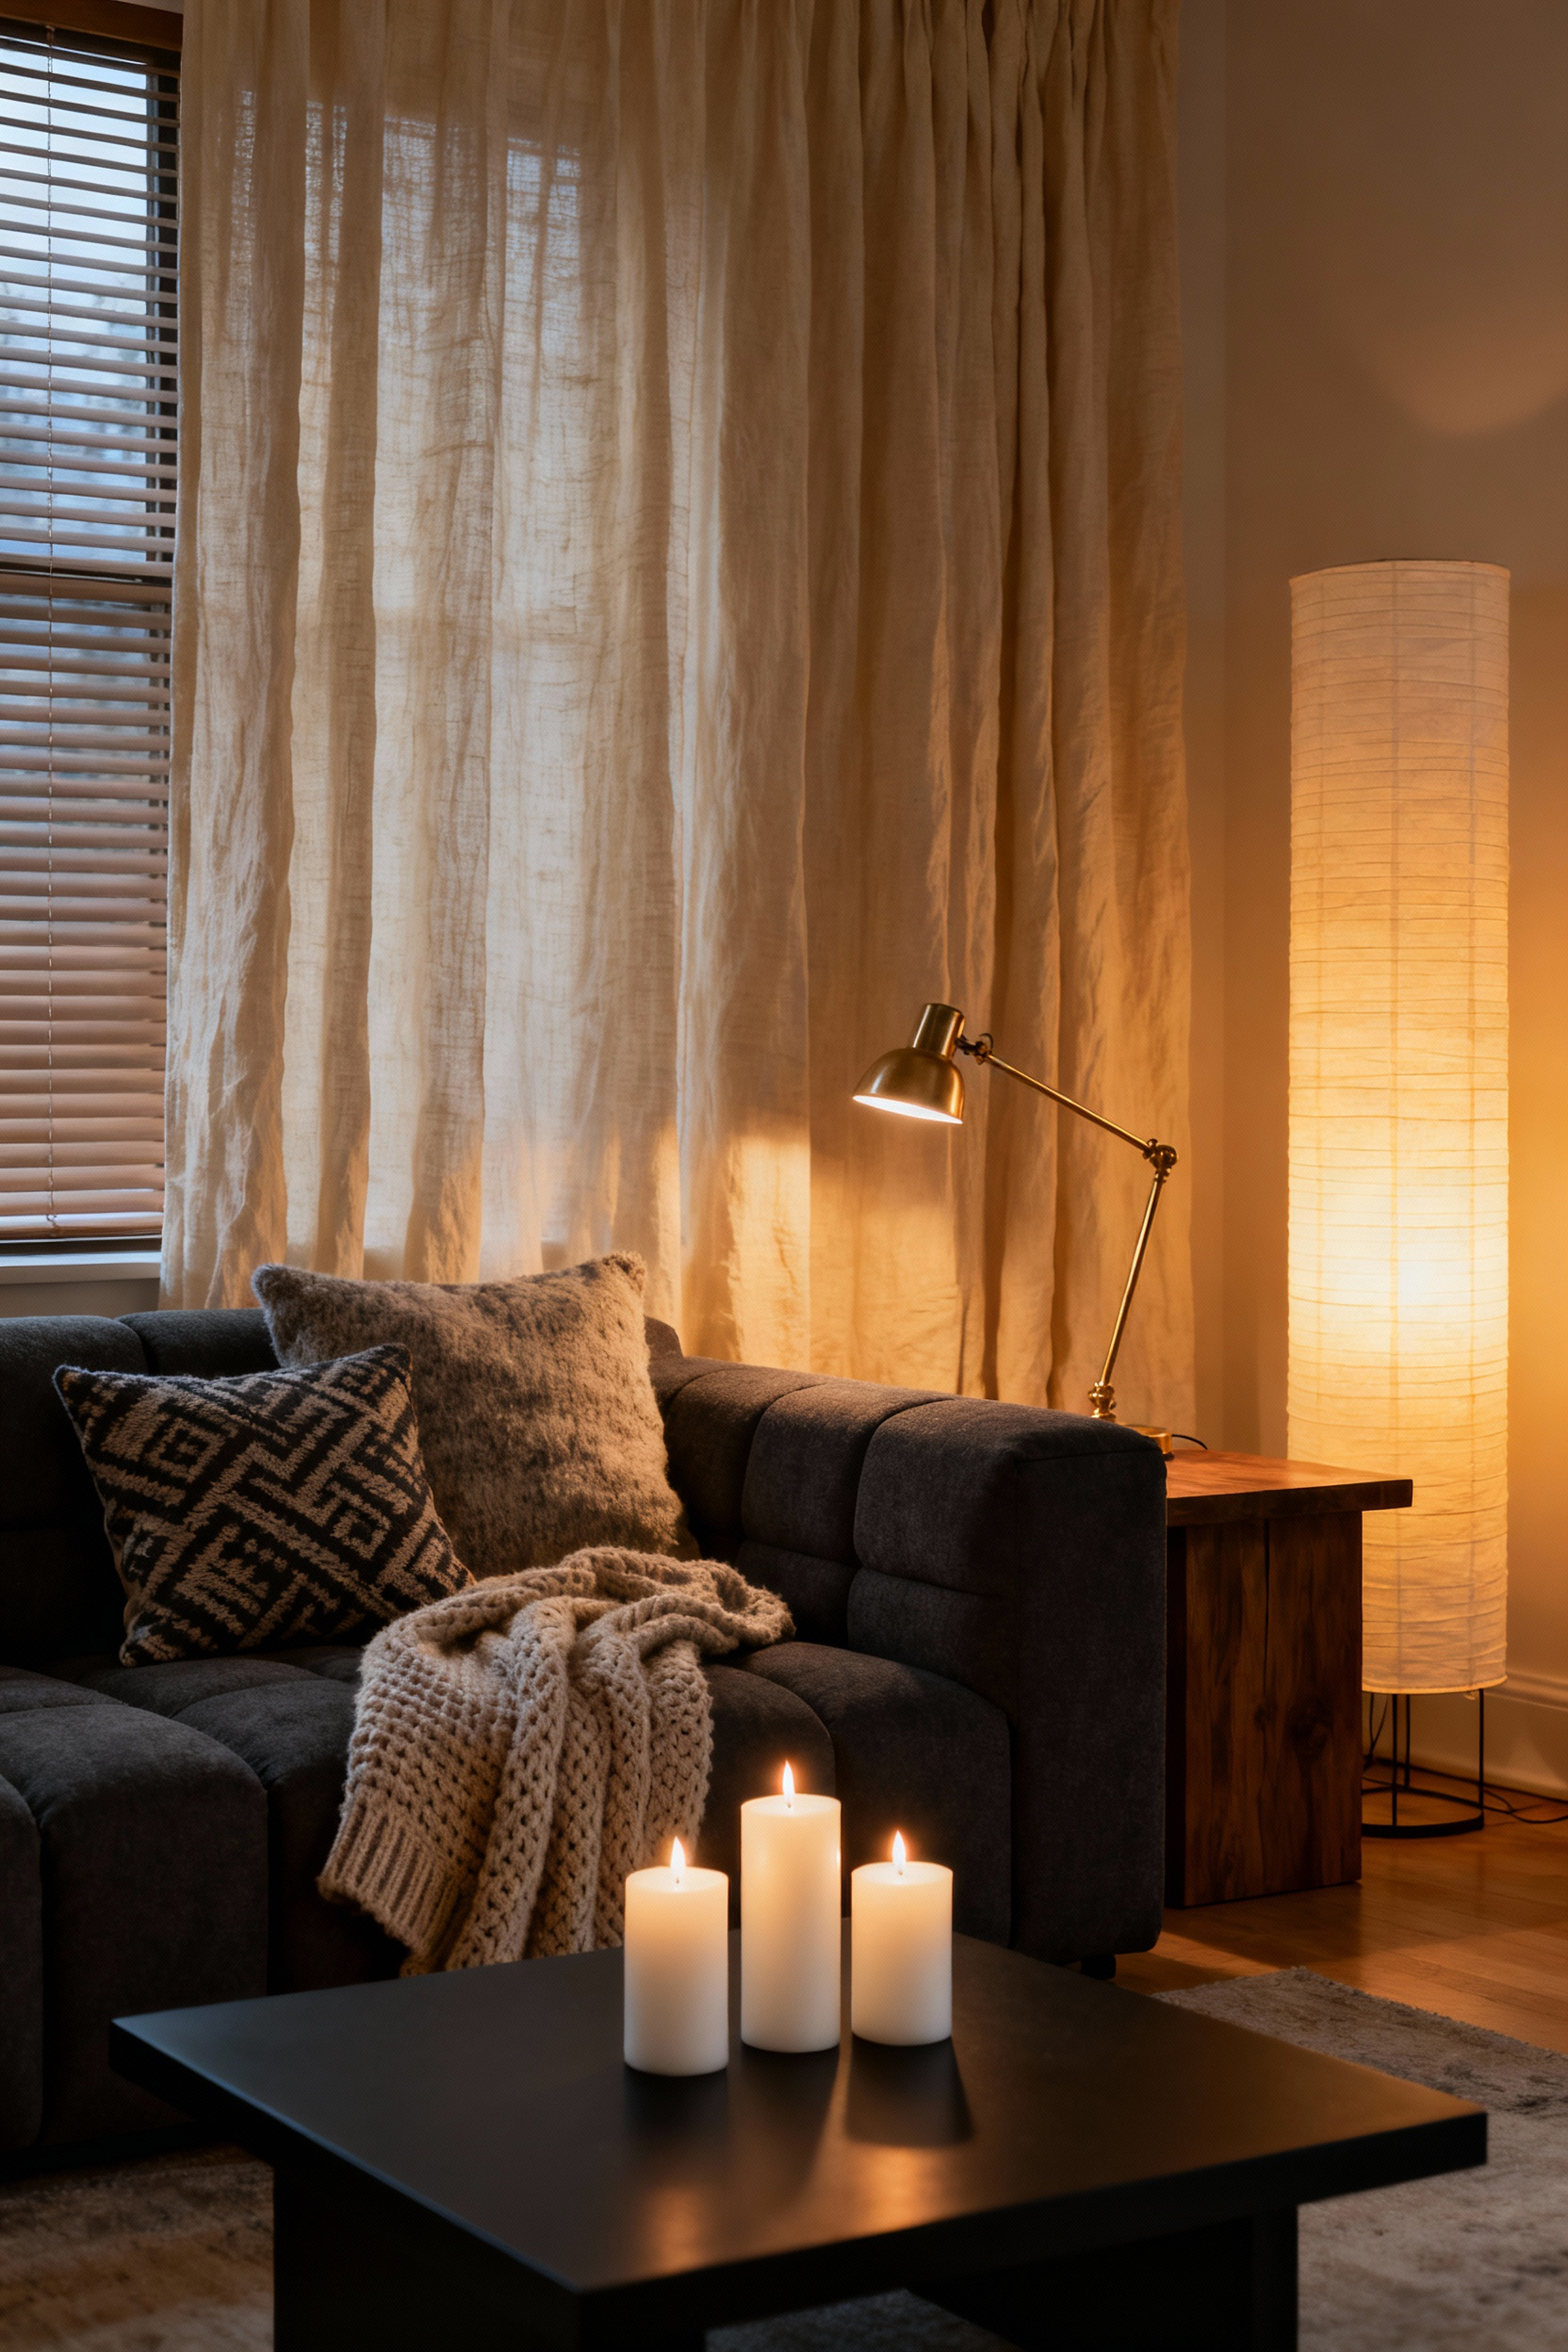
8. Lighting Layering: Ditching the Harsh Overhead for Warm Floor Lamps
Relying solely on overhead lighting often results in a sterile, flat atmosphere that feels clinical rather than comfortable. To instantly transform the mood, transition to a layered lighting scheme that utilizes floor lamps to add depth and eliminate harsh shadows.
The most critical technical adjustment is the color temperature of your bulbs. Swap your current bulbs for those in the “soft white” or “warm white” range, specifically between 2700K and 3000K. This spectrum mimics a cozy, inviting glow that is essential for relaxing living spaces and bedrooms.

Strategic placement of these fixtures changes the perceived architecture of the room. Place floor lamps in corners to soften edges, or use adjustable arc lamps beside seating areas to provide focused, intimate task lighting. In smaller spaces or apartments, prioritize torchiere or uplight styles. By directing light upward to bounce off the ceiling, you draw the eye up and create a visual illusion of greater height, making the room feel more spacious.
Finally, the fixture’s material plays a significant role in the quality of light. Choose lampshades made from linen, fabric, or opaque glass to diffuse the beam effectively. These materials filter the light to prevent harsh glare, resulting in a mellow, uniform warmth throughout the room. This combination of proper bulb temperature, strategic placement, and diffusive materials allows you to create an adaptable, professionally styled atmosphere.
9. The Hardware Swap: Replacing Standard Cabinet Knobs (and Storing the Originals)
Think of cabinet hardware as the jewelry of your kitchen or bathroom. Swapping out standard, builder-grade fixtures for pieces in bold materials like brass or matte black instantly elevates a room and makes it feel custom-designed. Because this modification must be temporary for renters, prioritize reversibility by choosing new hardware that fits the existing screw holes perfectly. This approach ensures you avoid drilling new holes or requiring paint touch-ups when it is time to move.
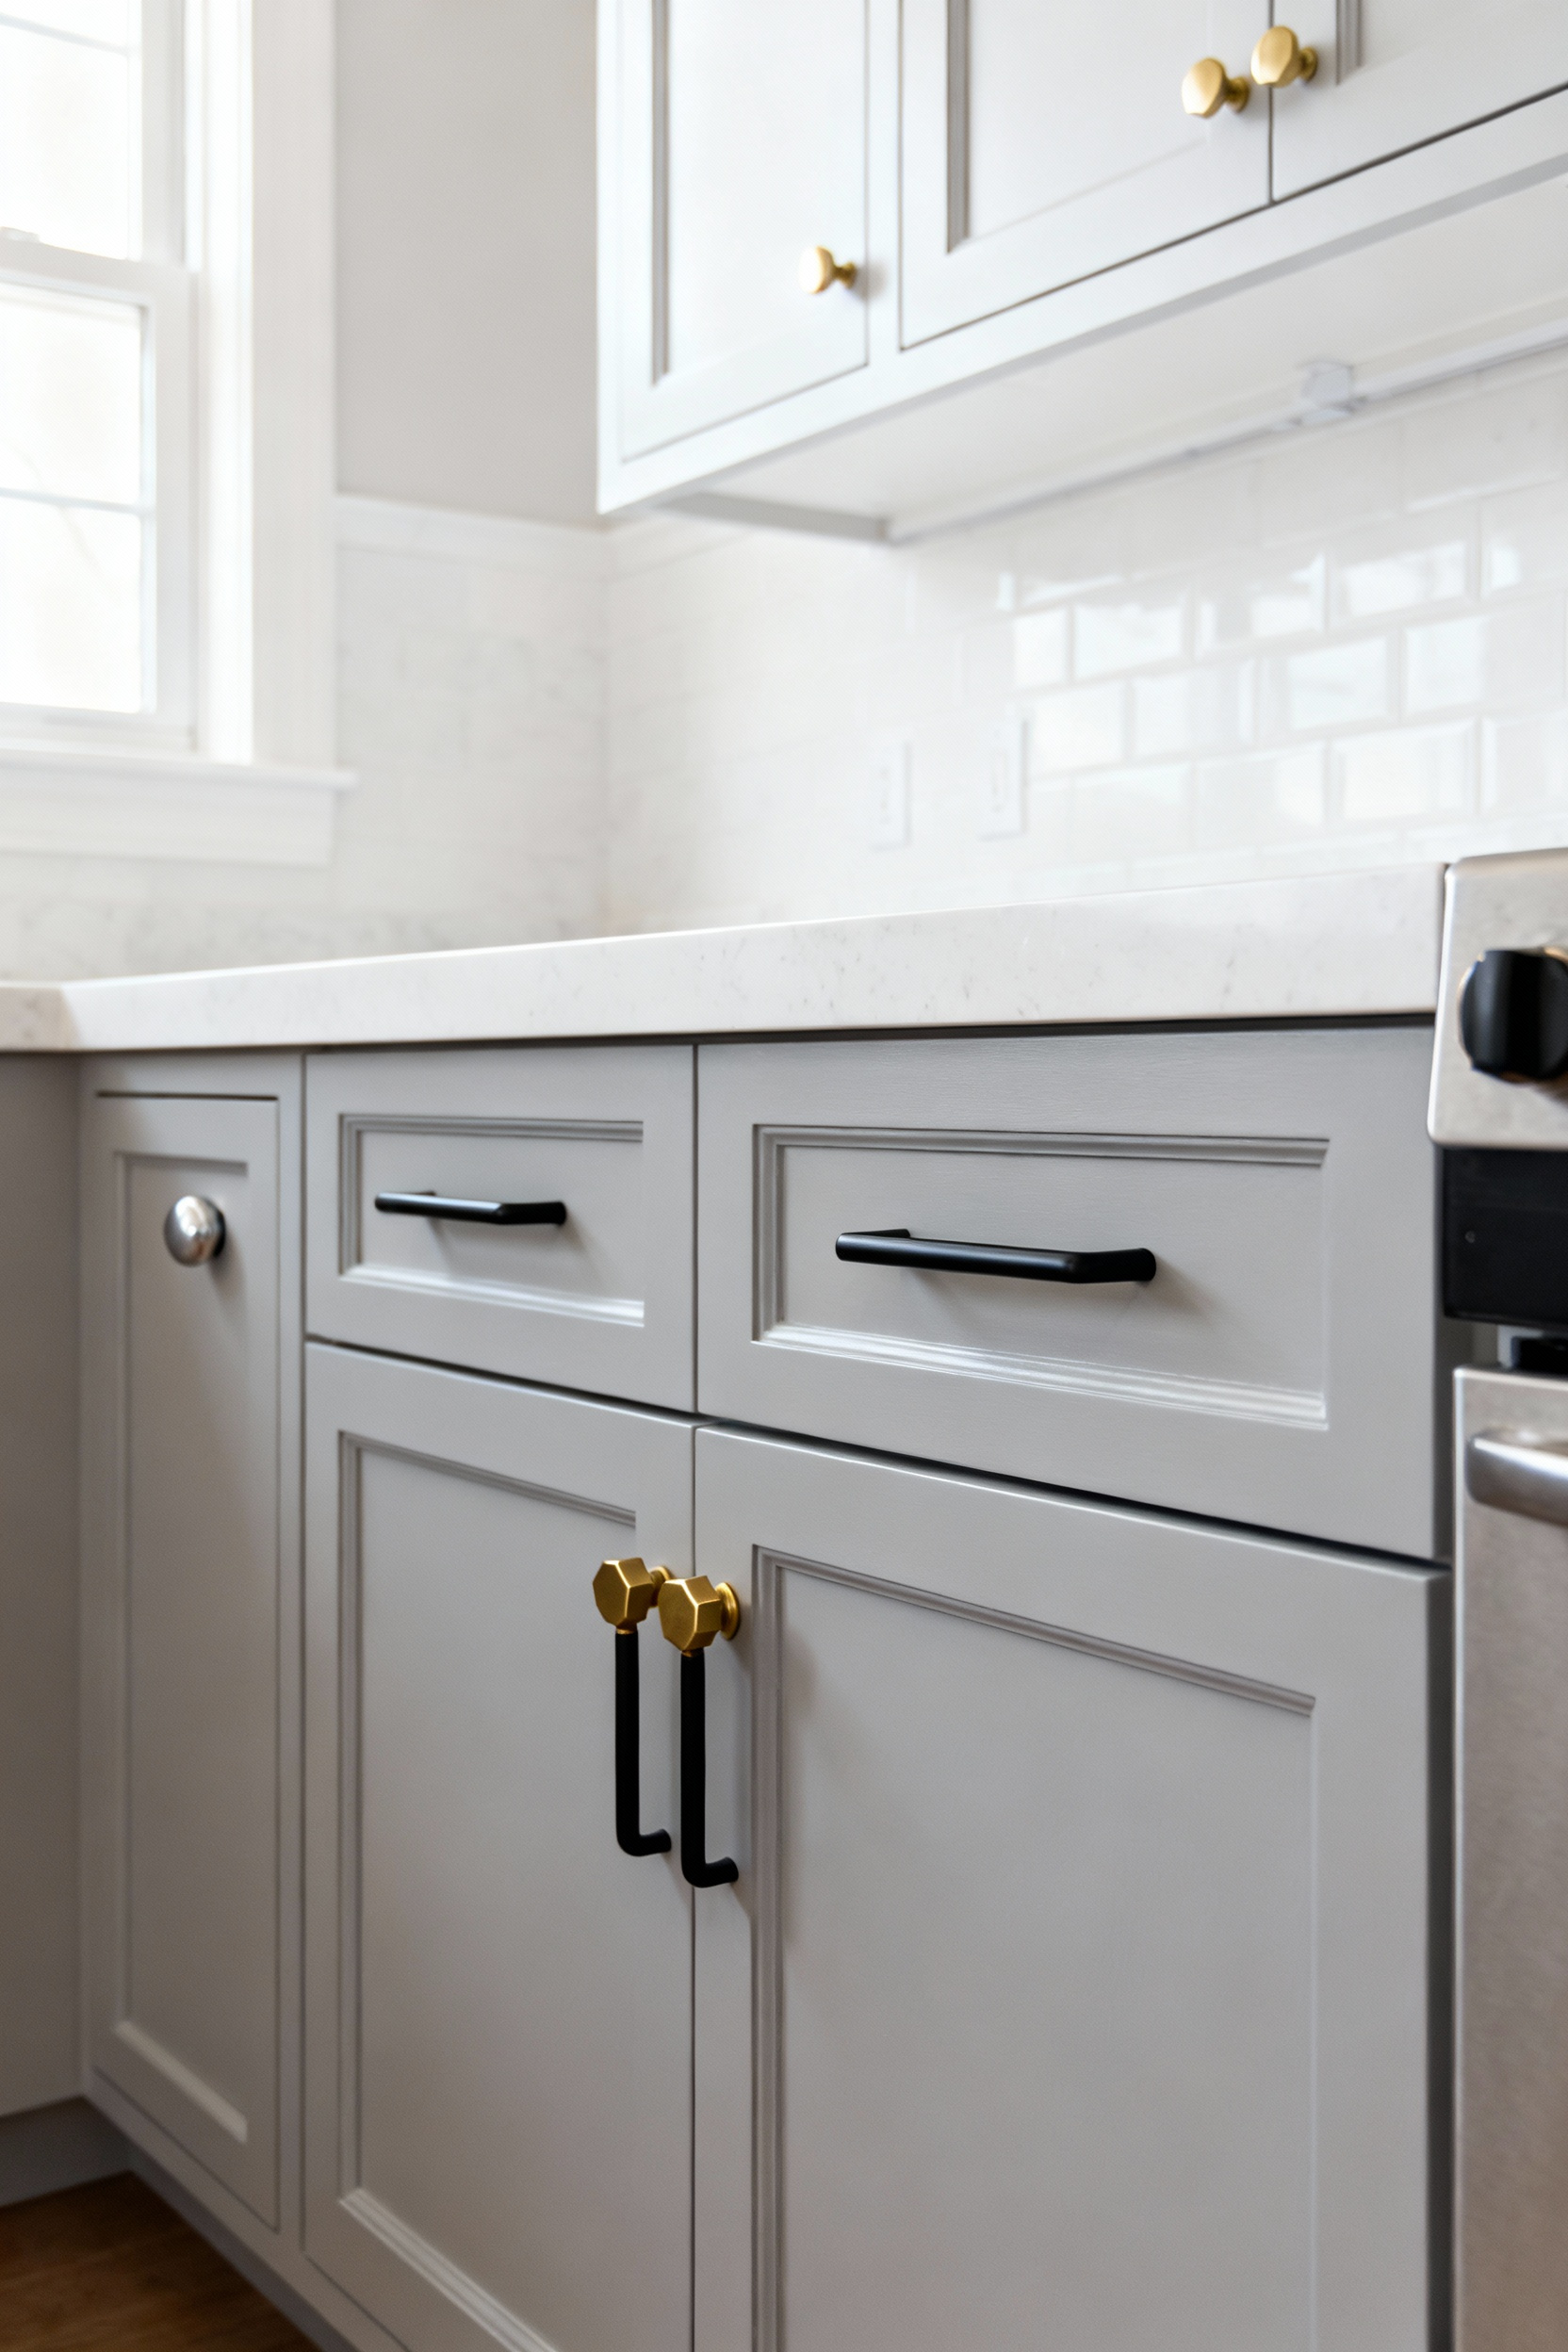
Verify your measurements before purchasing to ensure a seamless installation. If your cabinets currently use knobs, the process is straightforward since they typically require only a single hole. However, replacing pulls (handles) demands precision. You must carefully measure the “center-to-center” distance between the two existing screw holes. Matching this measurement guarantees your new hardware fits the current footprint, maintaining the integrity of the cabinet doors. For further enhancements, consider these 12 Effortless Kitchen Decorating Hacks for Apartment Dwellers.
Establish a storage system for the original hardware immediately upon removal. Place the old knobs, pulls, and their corresponding screws into a zip-top bag or the packaging from your new purchase. Label this container clearly, such as “Original Kitchen Knobs,” and store it in a secure, out-of-the-way location like the back of a utility cabinet. This simple step ensures you can easily restore the apartment to its original state and reclaim your security deposit upon moving out.
10. Command Strip Gallery Walls: Art Without the Spackle Anxiety
For renters, creating a personalized gallery wall should not come at the cost of a security deposit. Command strips offer a reliable solution for adaptable decorating, but the bond is only as strong as your surface preparation. Before application, clean both the specific wall area and the back of the frame with rubbing alcohol to remove dirt and oils. Avoid using standard household cleaners for this step, as they often leave a slippery film that weakens the adhesive and causes frames to fall.
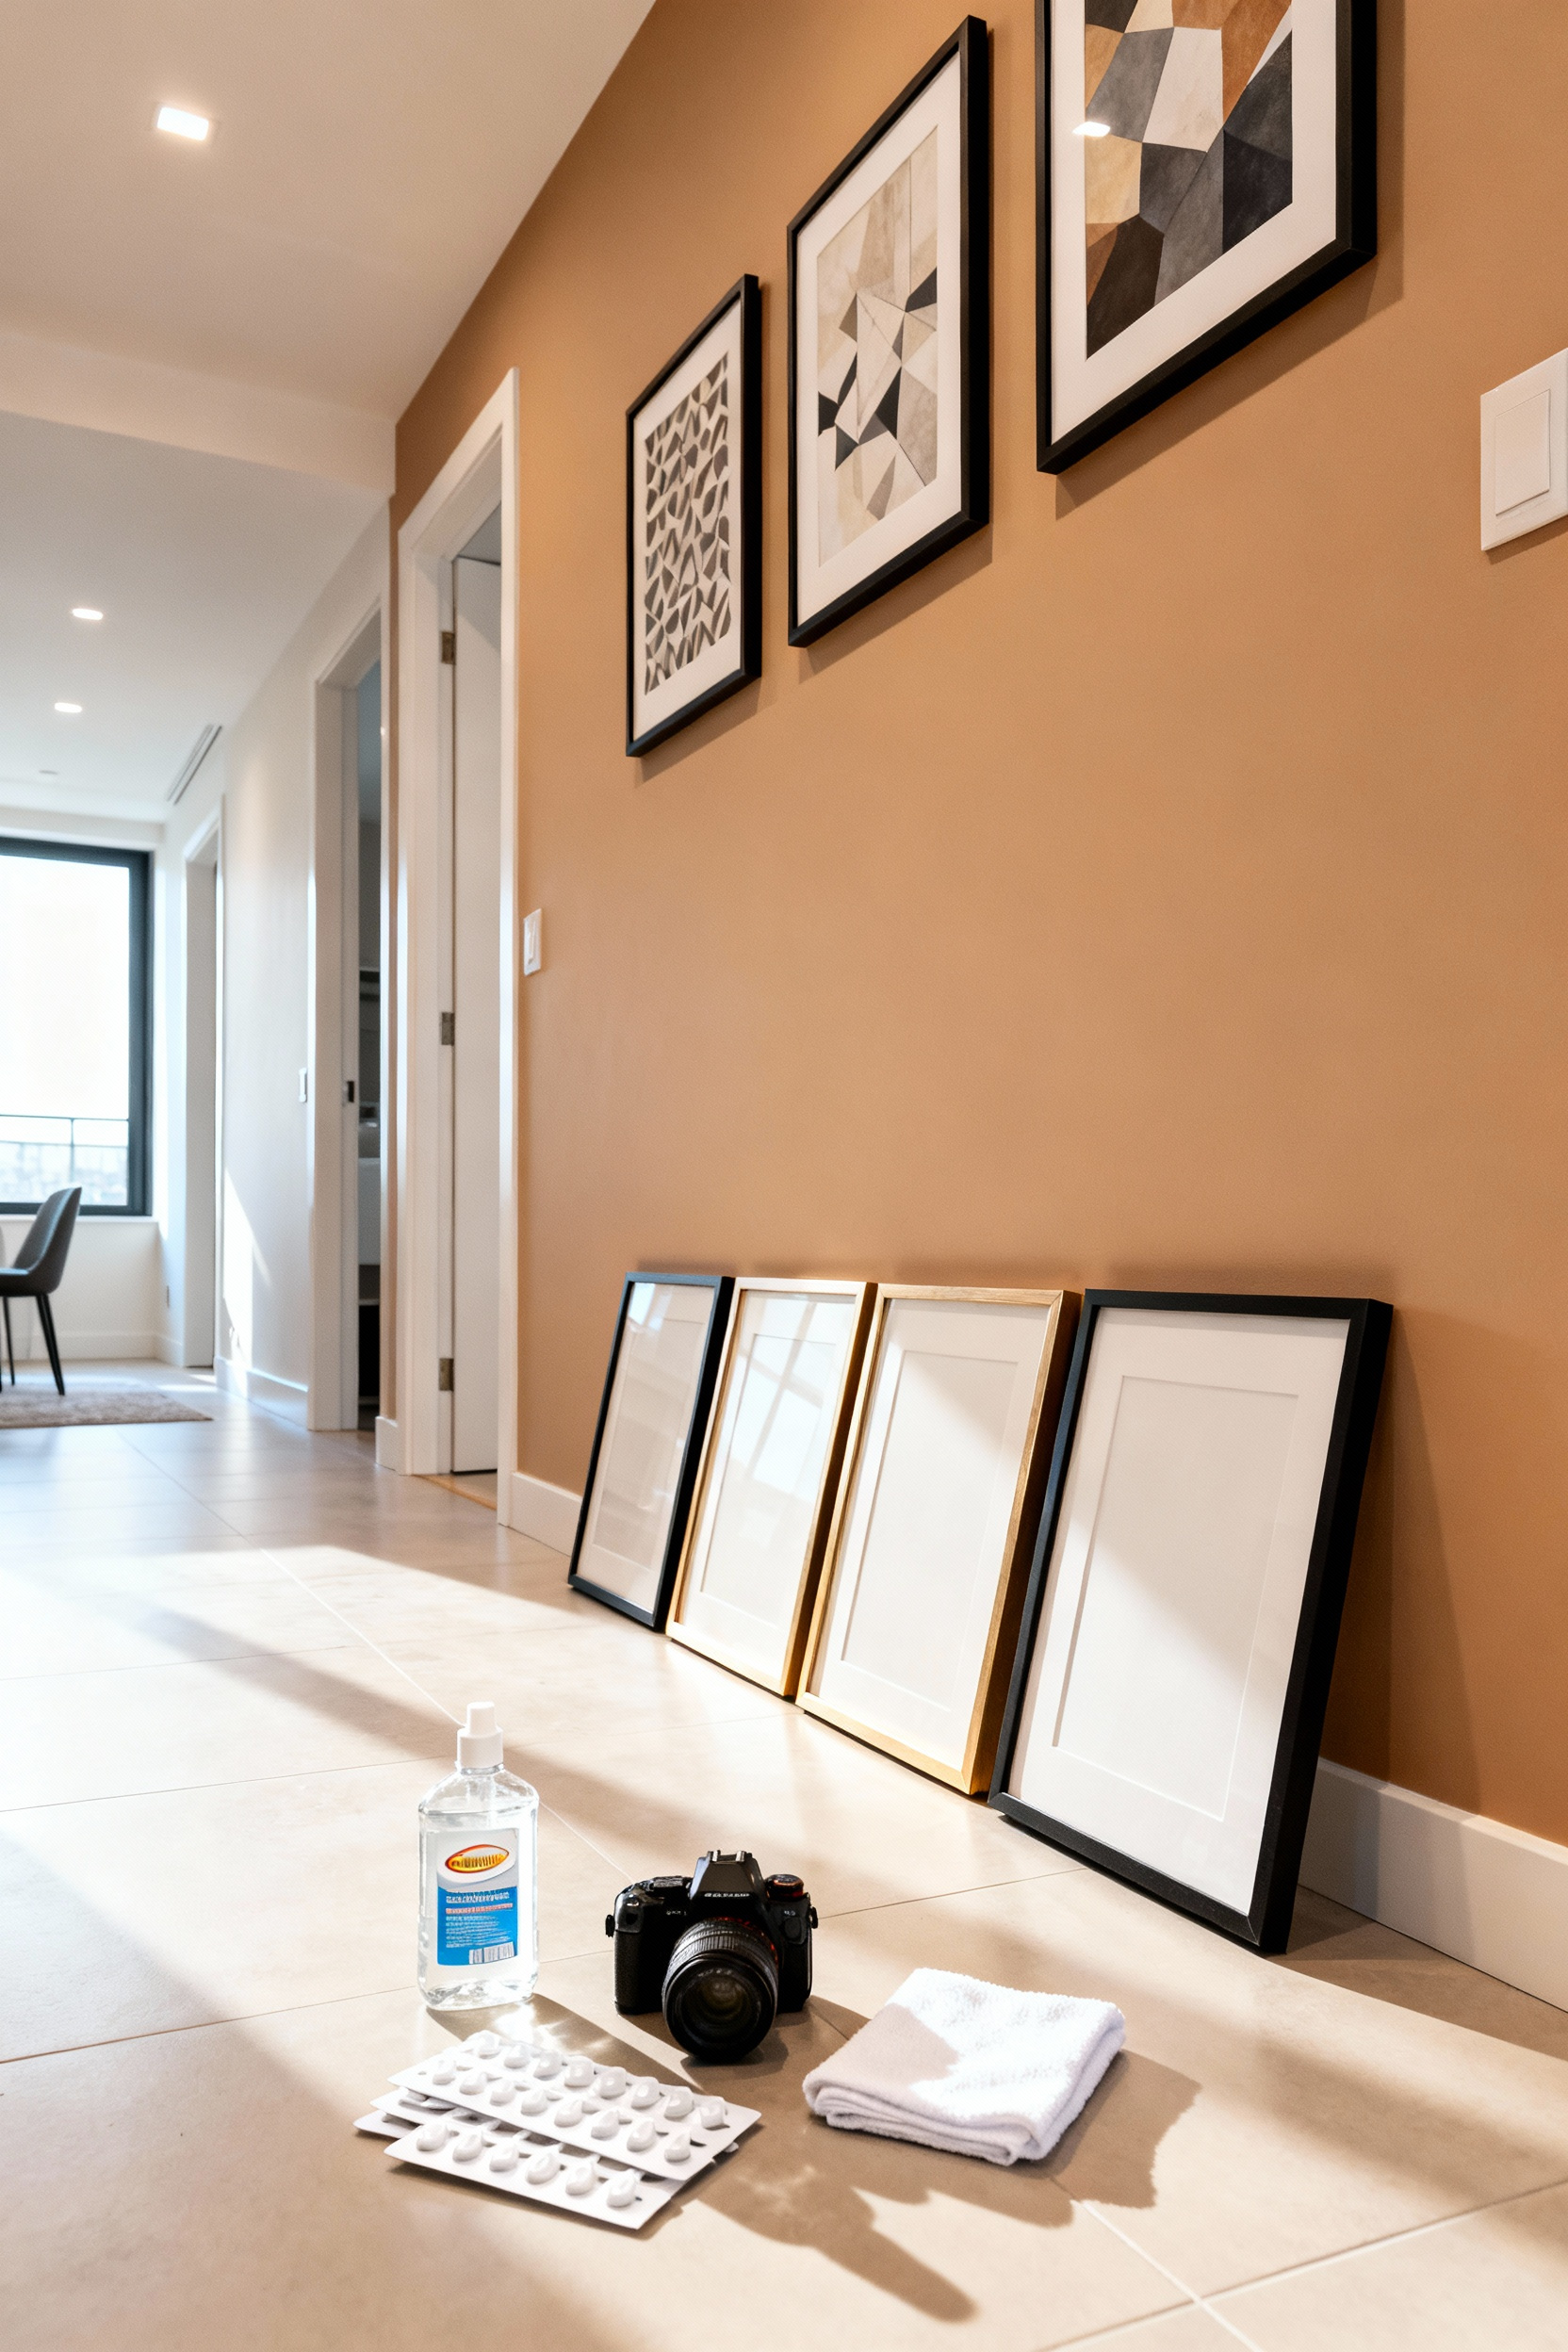
To ensure a professional look without alignment errors, mock up your design before applying any strips. Create templates of your frames using brown paper, adhere them to the wall with painter’s tape, and adjust the arrangement until it is perfect.
Once you are ready to install, select the correct strip size for your frame’s weight; velcro-style hanging strips are robust options that can hold up to 16 pounds. Press the frame firmly to the wall for 30 seconds, then remove the frame and allow the wall-side strips to cure for one hour before final hanging.
When it is time to update your space or move out, the removal technique is critical to prevent paint damage. Never pull the tab away from the wall. Instead, hold the strip at the base and slowly stretch the tab straight down along the wall. Keep your hand flush against the surface as you pull until the adhesive releases completely. This method ensures your walls remain pristine and spackle-free.
11. Mirror Magic: Strategic Placement to Double Visual Square Footage
Mirrors serve as the most effective non-structural tool for expanding an apartment’s footprint. To instantly maximize brightness, position a large mirror directly across from a window or patio door. This placement captures natural light and the outdoor view, bouncing them back into the room to create the illusion of a second window.
When selecting your piece, prioritize scale over quantity. Choose a single oversized mirror or a floor-to-ceiling panel instead of a grouping of small frames. An uninterrupted reflective surface provides a continuous visual line, offering the strongest sense of depth to visually double the room’s size.
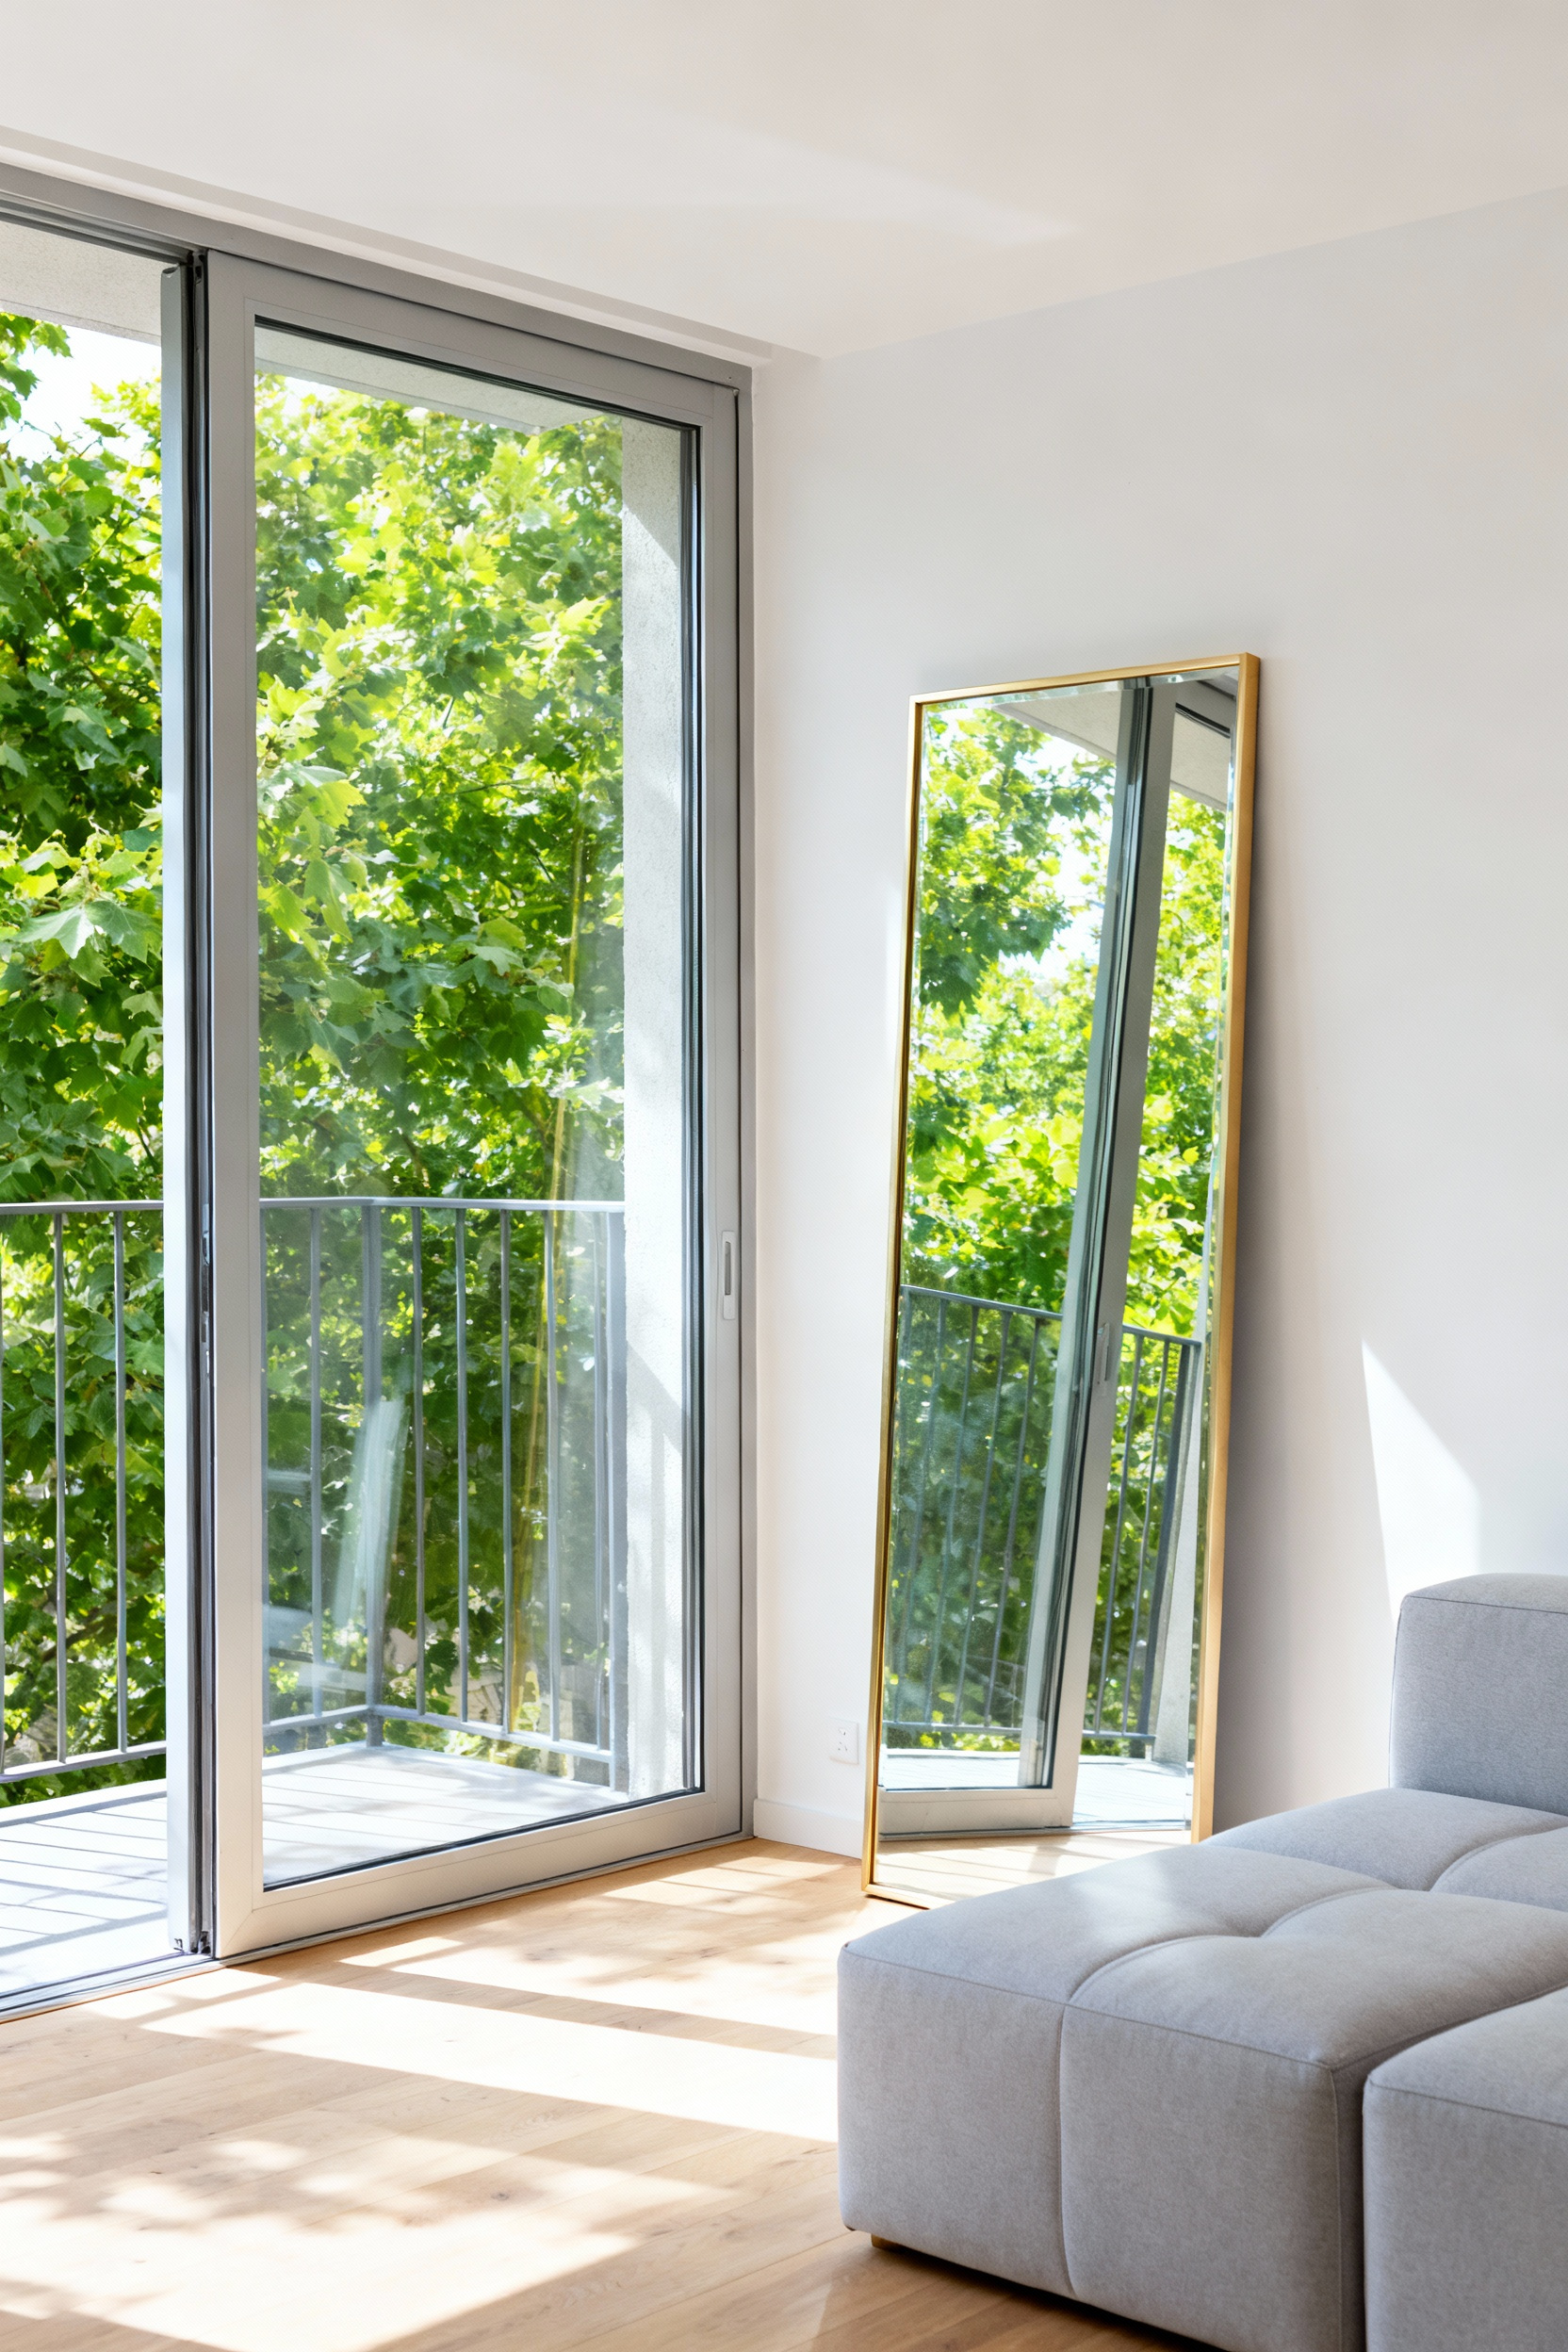
You can also manipulate the perceived dimensions of a room through the mirror’s shape. Use a tall, vertical mirror to draw the eye upward, which makes standard ceilings feel significantly higher. Conversely, utilize a wide, horizontal mirror on a narrow wall to elongate the space and make the room appear wider. Be intentional about what the glass captures; position your mirror to reflect a specific focal point, such as a piece of art or a statement light fixture. This doubles the impact of your decor without adding physical clutter.
For tight areas where wall space is limited, such as hallways or entryways, incorporate mirrored furniture. A mirrored console table or a floor-length mirror leaned against a wall adds necessary depth without the visual heaviness of solid wood. This approach maintains an airy atmosphere while serving a functional purpose, proving that adaptability in design often relies on tricking the eye rather than changing the architecture.
Phase 3: The Seasonal & Social Shift (Carley’s Advanced Styling)
Advanced styling requires moving beyond static furniture layouts to embrace a fluid, evolving environment. Master the art of the bi-annual refresh by treating the transition between warm and cold seasons as a major design opportunity rather than a minor holiday update.
Alter the mood of your apartment instantly by swapping distinct elements to match the time of year. Replace heavy wool throws and moody artwork with lightweight linens and vibrant prints as the weather warms. Incorporate natural elements, such as oversized branches or seasonal blooms, to ground the space in the present moment. This approach ensures your home feels dynamic and responsive to the natural world.

Elevate your interior narrative by distinguishing between styling for functionality and styling for the lens. While your home must remain livable, creating “emotive vignettes” adds a layer of visual storytelling that translates beautifully in person and on social media. Focus on surface styling—console tables, nightstands, and shelves—to curate small scenes that evoke specific feelings.
To execute this effectively, maintain a flexible styling toolkit. Invest in high-quality, versatile items like sculptural lamps, ceramic bowls, and vintage books. Rotate these pieces throughout your rooms to refresh your composition without purchasing new furniture, allowing your space to constantly evolve with your social and aesthetic needs.
12. The Mobile Host: Styling a Rolling Bar Cart for Flexible Entertaining
A rolling bar cart serves as the ultimate solution for flexible apartment living, bridging the gap between storage needs and entertaining style. Its primary advantage lies in mobility; you can roll the cart into the center of the action during a party for guest self-service, then easily move it aside when the event concludes.
Embrace multi-functionality by repurposing the cart when you are not hosting. It transitions seamlessly into a stylish side table, a morning coffee station, or a curated display shelf for books, maximizing the utility of your floor space year-round.
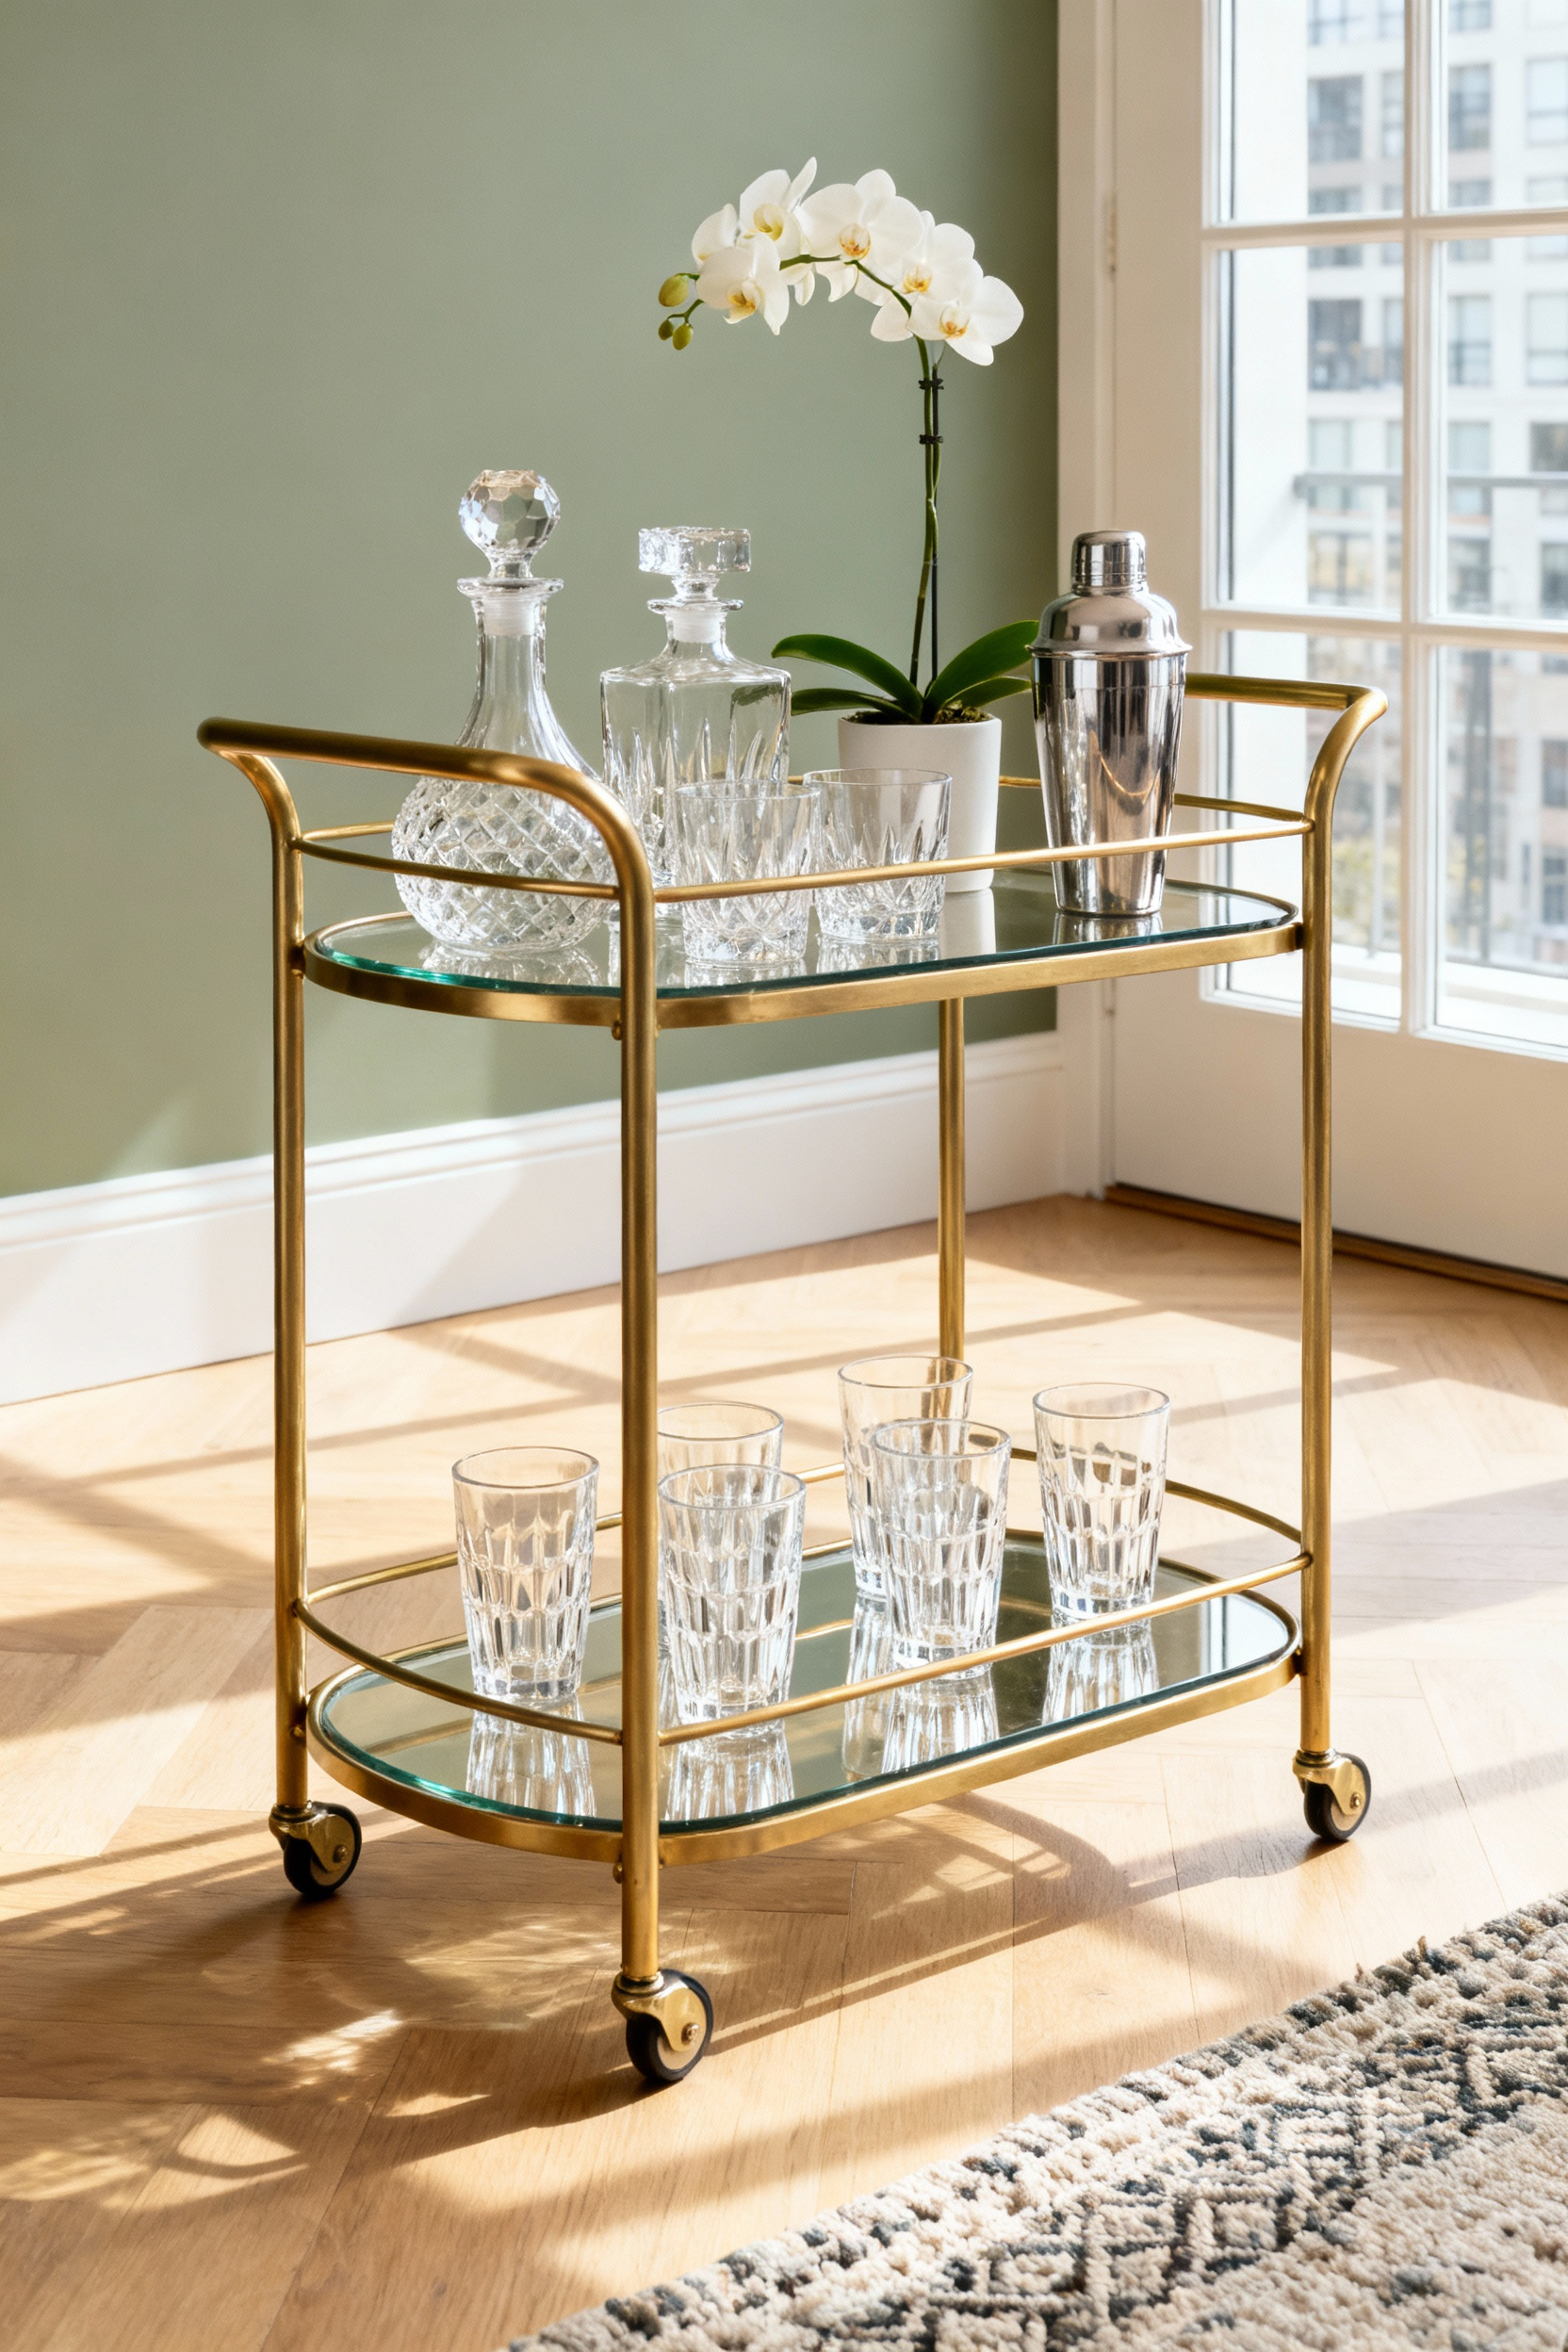
To maintain a polished look, effective organization is key. Utilize a decorative tray made of mirror, marble, or wood on the top tier to group smaller items like shakers, glassware, and napkins. This technique corrals clutter, introduces texture, and allows you to quickly clear the surface if necessary. Visual flow also matters; avoid overcrowding the shelves. Instead, display a limited collection of essential bottles—perhaps decanted for elegance—and arrange them by height, placing taller vessels in the back and shorter accessories in the front.
Finalize your styling with elements that offer both beauty and utility. incorporate fresh greenery, such as a potted herb plant or a bowl of citrus, to add a pop of color while keeping garnishes within arm’s reach. For a personal touch that simplifies your hosting duties, frame a printed recipe for a signature cocktail and place it on the cart. This chic detail creates a focal point and encourages guests to serve themselves, allowing you to focus on enjoying the company.
13. Seasonal Textile Swaps: Changing Pillow Covers to Match the Month
One of the most effective space-saving techniques for apartment living involves investing in high-quality pillow inserts and simply swapping out the covers. Storing bulky pillows requires closet space you likely do not have, but folded fabric covers fit easily into a single drawer.
To make this system work effortlessly, establish a neutral foundation on your sofa or bed. Keep two or three large, solid-colored pillows in cream, beige, or gray year-round to anchor your design. This base layer allows you to rotate smaller accent pillows without clashing with your existing furniture.

Textile swaps provide an opportunity to control the room’s ambiance through texture, not just color. During cooler months, introduce heavier, tactile fabrics like velvet, faux fur, or chunky knits to create a cozy, rich atmosphere. As the weather warms, transition to lighter, airier materials such as linen and cotton. You can also adopt a rotating schedule that reflects specific months, utilizing olive and terracotta for September or coastal blues for July.
To ensure your arrangement looks professional rather than chaotic, follow a purpose-driven mixing formula for your monthly set:
- Start with a Solid: Use your permanent neutral base layer to ground the arrangement.
- Add a Geometric: Introduce one cover with a structured pattern, like stripes, checks, or a simple repeat.
- Finish with an Organic: Select a final cover featuring a floral or abstract print that shares at least one color with the rest of your decor.
14. Dining in Detail: Centerpieces for Small Round Tables
Select one striking piece rather than multiple small, scattered items to anchor your dining space effectively. When styling a small round table, prioritize low and proportionate designs to prevent a cluttered appearance. Keep your arrangement under 12 to 15 inches in height. This restriction ensures unobstructed sightlines, allowing guests to converse comfortably without leaning around a massive bouquet or decoration.
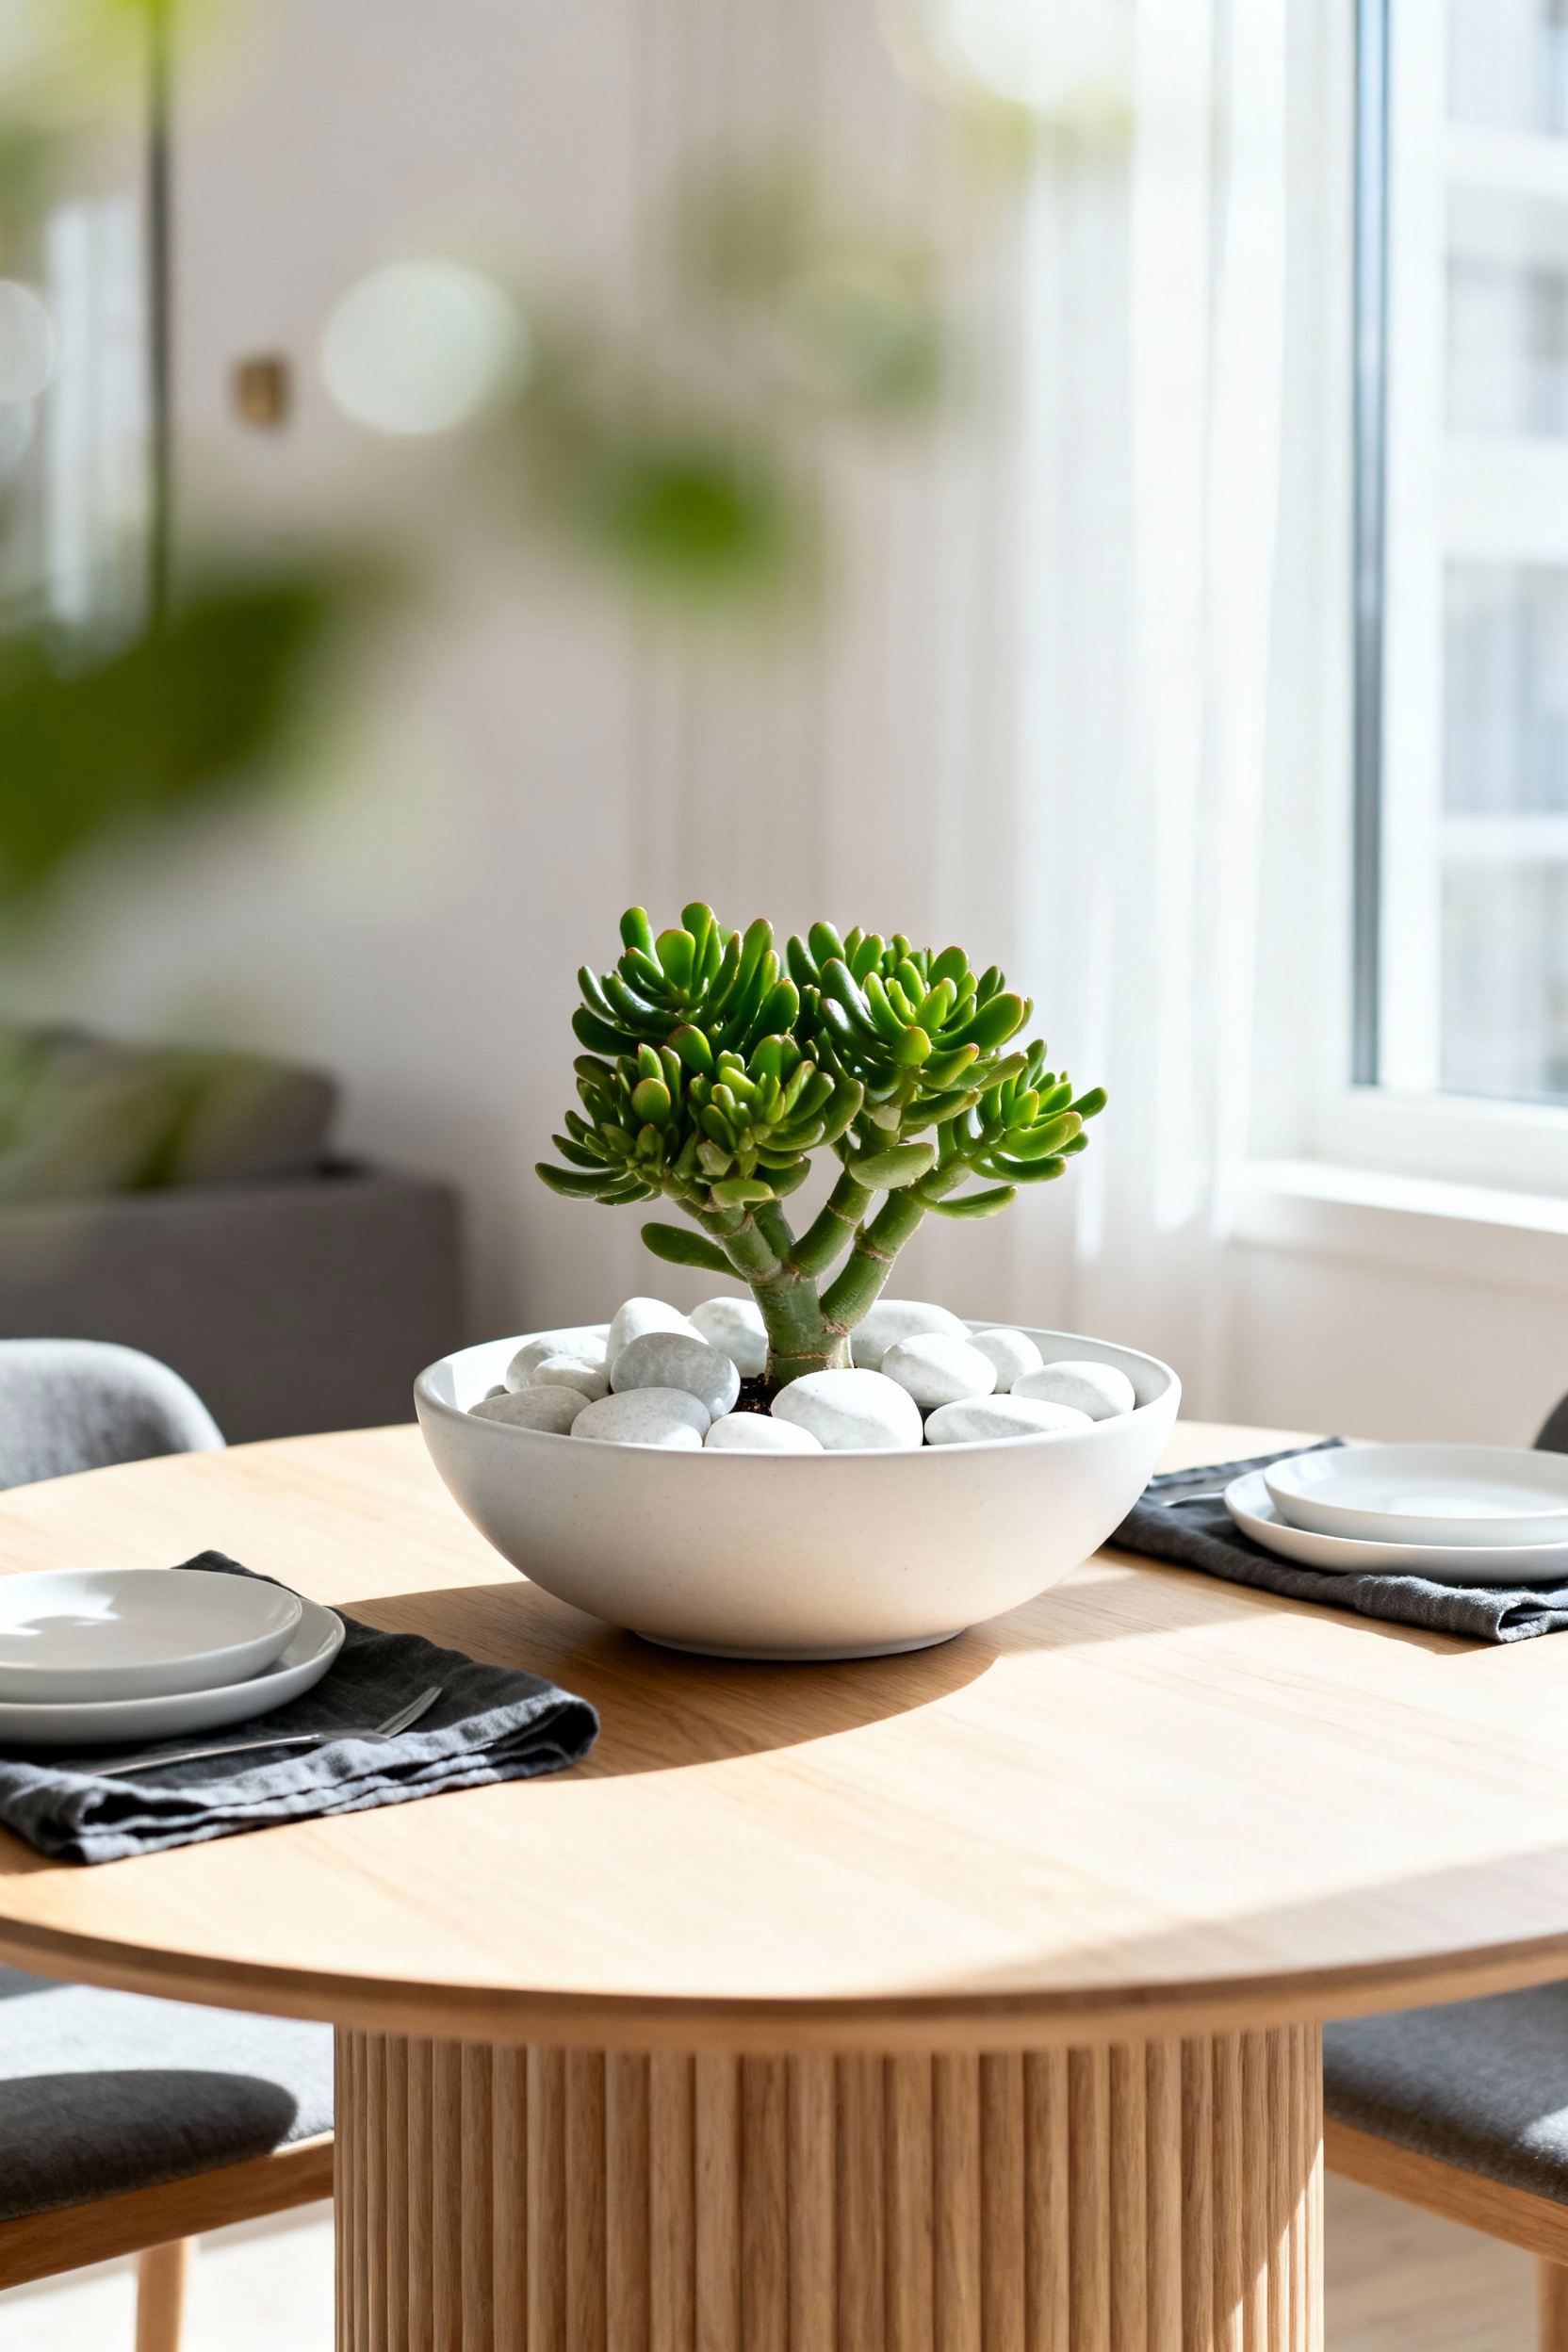
Contain your decorative elements within a round tray, wooden bowl, or woven basket to create a cohesive focal point. This method allows you to group items like candles or a small potted plant into a singular visual unit. For maximum versatility, use a decorative Lazy Susan as your base. This serves as both a styling anchor and a practical serving tool, keeping necessities accessible without consuming valuable table real estate. When you need the full table for dining, these contained arrangements are easy to move in one motion.
Introduce visual interest through specific shapes if you desire height or modern flair. utilize slimline pieces, such as tapered candlesticks or a sleek vase with a single stem, to draw the eye upward without blocking eye contact. Alternatively, choose a single sculptural object or a geometric terrarium. These items function as abstract art that doubles as a conversation starter, providing a sophisticated aesthetic that respects the limited surface area of an apartment dining table.
15. Biophilic Accents: Using Large Scale Plants as Living Sculptures
Treat a single, large-scale plant as a primary piece of organic art rather than a simple accessory. This approach avoids the visual clutter of grouping many small pots and instead creates a commanding focal point. Look for varieties with dramatic, architectural forms to draw the eye upward. The sword-like leaves of a Snake Plant or the branching stems of a tall Dracaena act as living sculptures, instantly adding perceived height to a compact room.
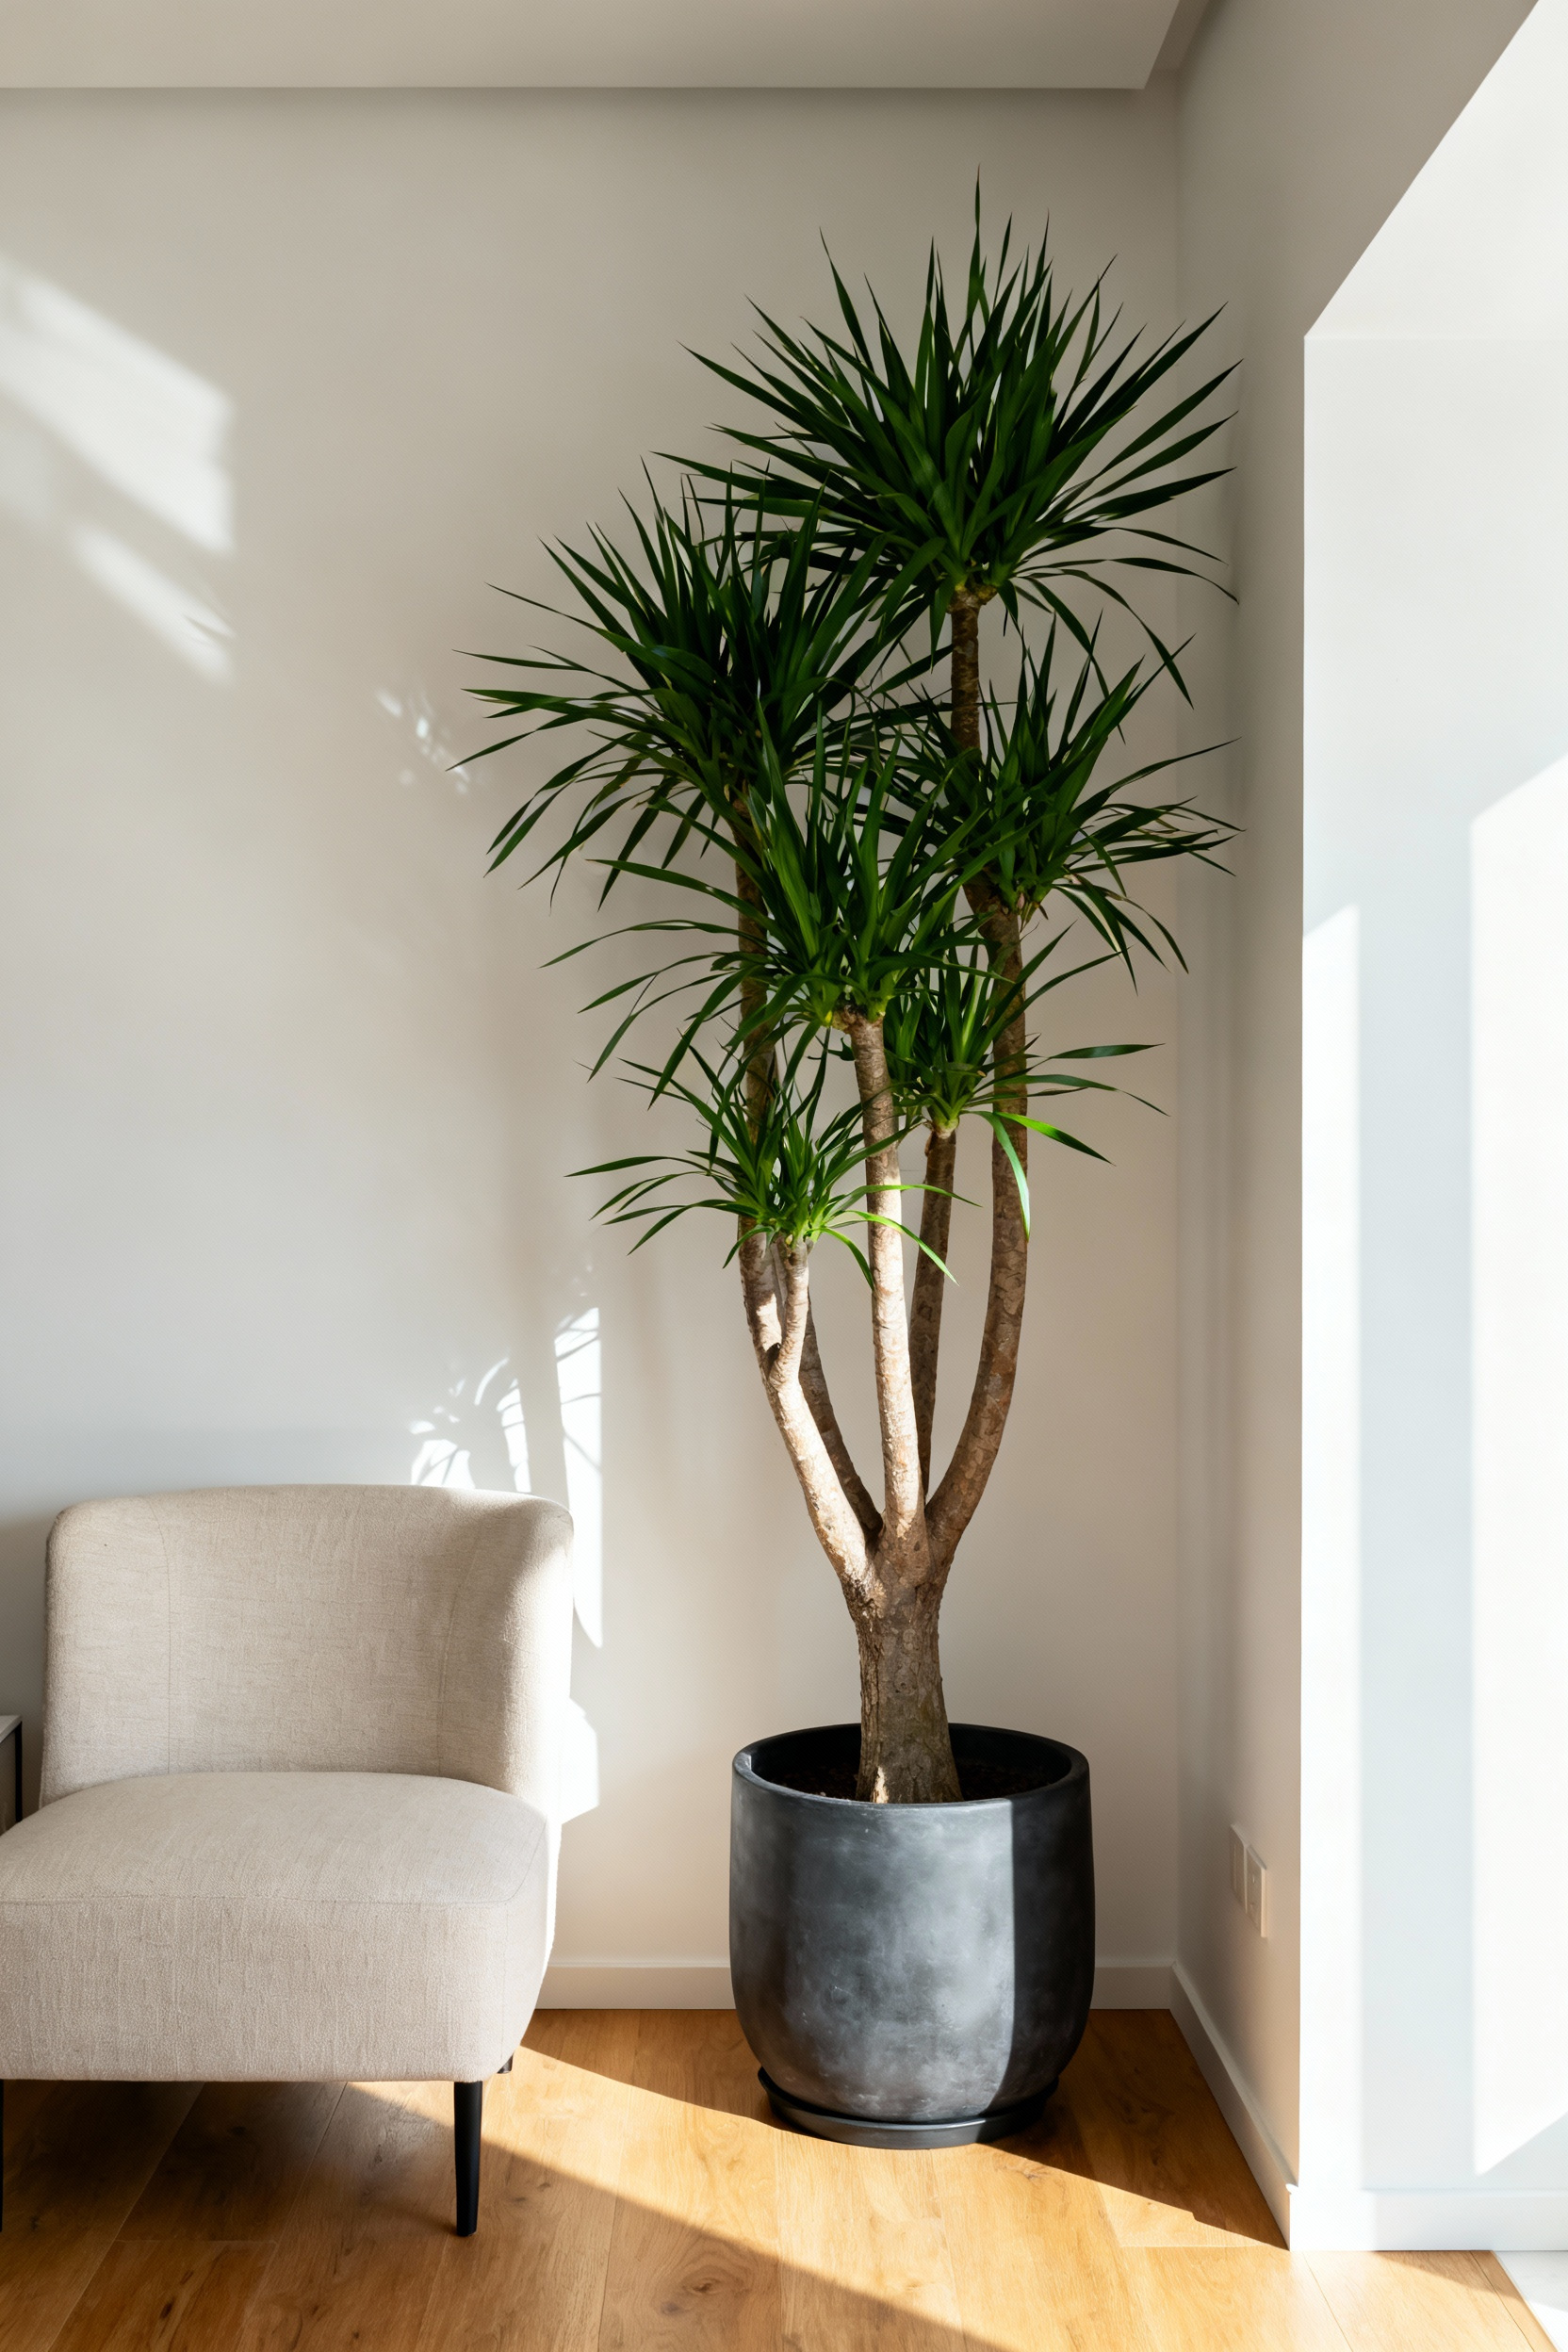
Prioritize verticality to respect your apartment’s limited floor plan. Select plants with a high height-to-footprint ratio, such as a tall, narrow Kentia Palm or Lucky Bamboo. These options provide a grand presence without sprawling horizontally into walkways. For sunny spots, consider the geometric lines of an Agave or Spiral Cactus. If you prefer a customizable shape, a Jade Plant allows you to prune and train its growth like a bonsai, merging horticulture with design.
Complete the look by selecting the right vessel; think of the planter as the frame for your art. Use a substantial matte ceramic pot or a woven basket to ground the plant and establish the combined unit as a deliberate piece of furniture. Position your living sculpture in a corner or beside a sofa to revitalize dead space. If possible, place it near a mirror to reflect light and double the visual depth of the greenery, making the entire apartment feel more open.
16. Scent-Scaping: Using Diffusers to Define the Mood of Each Zone
In open-concept apartments, fragrance acts as an invisible divider that signals a shift in activity. This technique, known as scent-scaping, allows you to distinguish between productivity and relaxation without physical barriers.
Select the right tool for each area. Main living spaces benefit from ultrasonic diffusers that offer consistent, wide distribution, while smaller zones like bathrooms or closets are better suited for low-intensity reed diffusers or fragrance tags. Treat these devices as functional decor by choosing models in ceramic, natural wood, or glass that integrate seamlessly with your existing interior styling.
Application in compact spaces requires restraint and strategy. Fragrance concentrates quickly in smaller footprints, so adopt the “50% Rule” by starting with half the recommended essential oil drops to avoid overwhelming the room. Place electric diffusers in a central, open location at waist-to-head level to utilize ambient airflow, keeping them away from windows or fans that dissipate the aroma. Once positioned, curate specific scents to define the mood of each distinct zone:
- Work Zone: Use stimulating scents like peppermint, rosemary, or citrus to create clarity and focus.
- Entryway and Living Area: Introduce welcoming, communal scents like bergamot, vanilla, or soft woods to establish an inviting atmosphere.
- Sleep Zone: Switch to calming notes such as lavender, chamomile, or sandalwood to signal the brain that it is time to rest.
This holistic approach supports the idea of cultivating serenity and style, which you can read more about in 20 Holistic Apartment Decor Inspirations for Cultivating Serenity & Style.
17. Bedding as Art: Hotel-Style Layering for The Bedroom Sanctuary
Your bed is the room’s visual anchor. To achieve a sanctuary-like atmosphere, build a crisp foundation with high-quality, breathable cotton or linen sheets in white or muted tones. Master the “hospital corner” fold to create the sharp, taut edges characteristic of five-star hotels.
For that signature cloud-like aesthetic, use a duvet insert one size larger than your cover—such as a King insert in a Queen cover. Fold the top third of the duvet down to expose the sheets, creating inviting layers of volume. If you are looking for more high-impact transformations, review these 24 Apartment Bedroom Decor Ideas That Maximize Style.

The “art” of the bed lies in its vertical structure and tactile finish. Arrange your pillows in distinct tiers: start with large Euro shams against the headboard for height, place sleeping pillows in the middle, and finish with a decorative lumbar pillow. Avoid a sterile look by introducing textural contrast into these top layers. Pair smooth sheeting with a chunky knit throw or velvet accents. This mix of materials adds necessary depth, transforming your sleeping area into a cohesive, professionally styled retreat.
Frequently Asked Questions (FAQ)
How can I decorate my apartment without damaging the walls or losing my security deposit?
The key is using non-permanent, damage-free methods. Utilize adhesive hanging solutions like Command strips for gallery walls, choose peel-and-stick wallpaper or vinyl decals for high-impact accent walls, and use leaning mirrors or oversized framed art instead of drilling large holes for heavy items. Always store original hardware (like cabinet knobs) when performing temporary swaps.
What is the easiest way to make a small apartment look luxurious?
Focus on texture, lighting, and strategic layering rather than expensive renovations. Invest in high-quality textiles (velvet, linen, bouclé), swap harsh overhead lighting for warm, layered floor and table lamps (2700K), and use one large, architectural plant as a living sculpture to elevate the design instantly.
How do I create functional zones in an open-concept studio apartment?
Use large area rugs as “invisible walls” to anchor seating arrangements and define specific zones (living, dining, sleep). You can also use strategically placed items like low shelving units or freestanding screens perpendicular to the walls to create visual separation without blocking light or traffic flow. Multi-functional furniture, such as storage ottomans, further supports efficiency in these spaces.
Conclusion: Your Home is a Living Canvas (Even if You Don’t Own the Walls)
Think of your rental as a dynamic backdrop rather than a restrictive enclosure. By prioritizing mobile layers—such as statement lighting, plush textiles, and leaning mirrors—you effectively separate your personal style from the building’s permanent architecture. Integrating reversible innovations like peel-and-stick finishes allows you to experiment boldly without compromising your security deposit or the landlord’s property. This strategy shifts the definition of ownership from possessing the walls to curating the atmosphere within them, proving that a temporary residence can still offer a deeply personal living experience.
Adopting this flexible mindset ensures your environment remains responsive to your evolving tastes and seasonal needs. The collection of adaptable decor you build now will travel with you, providing a sense of continuity and sophistication in any future dwelling.
Begin by auditing your living room to identify one blank vertical surface that currently lacks character. Commit to transforming it this weekend with a leaning gallery piece or a removable texture, instantly turning a borrowed room into a curated sanctuary. If you are ready to elevate your space, these apartment decorating ideas provide the actionable guidance you need to make your rental feel permanently yours.