Can we talk about why everyone gets bathroom cabinets wrong? They see a picture in a glossy magazine of some minimalist floating vanity and think, “That’s it. That’s the one.” They spend a fortune, rip out their old bathroom, and install this thing… only to realize it holds three rolls of toilet paper and a bottle of hand soap. Suddenly their countertops are a war zone of hair dryers, half-empty bottles, and electric toothbrush chargers.
Here’s the real story: choosing the right cabinets isn’t about chasing trends. It’s a strategic move that dictates how your bathroom will actually feel and function for the next 20 years. This is especially true in an older home, where space is quirky and every decision impacts the soul of the house. You have to balance the character you fell in love with against the reality that you own more stuff than someone from 1920 ever dreamed of. So, let’s talk about how to do this right, blending history with modern life, and avoiding the expensive mistakes I see people make all the time.
Foundations for Effective Cabinet Planning
Before you even think about wood grain or fancy knobs, we need to lay the groundwork. This is the unglamorous part that makes or breaks the entire project. In a historic home, planning isn’t just about measuring; it’s about anticipating the surprises lurking behind the walls. Getting this stage right is the difference between a seamless, beautiful result and a renovation that spirals into a budget-busting nightmare.
2. Define Storage Needs: Match Cabinetry to Personal Essentials
You know what people always ask me? “What kind of cabinet should I get?” Wrong question. The first question is, “What crap do you actually need to store?” I’m serious. Before you even open a single catalog, you need to conduct a brutal audit of your bathroom belongings. Empty every drawer, every cupboard, every basket. Put it all on the floor and stare into the abyss. You’ll be horrified. This is good. It’s the first step toward sanity.
This inventory isn’t just about counting bottles. It’s about knowing their shape. How tall is that economy-sized shampoo? How much space does your ridiculous collection of skincare products actually take up? The goal here isn’t just to hide your stuff; it’s to give everything a logical, accessible home so you stop buying a new tube of toothpaste every week because you can’t find the three you already own. Most people just buy a standard vanity and hope for the best. That’s how you end up with countertops that look like a drugstore aisle exploded.
Once you know exactly what needs a home, you can start designing the box around it, which is how we’ll ensure the cabinet fits the space as well as it fits your life.
3. Measure Available Space Precisely: Prevent Installation Headaches
Now that you know what you’re storing, we need to figure out where. And I mean precisely. In an old house, “measure twice, cut once” is for amateurs. We measure three, four, even five times. Walls are never plumb. Floors are never level. That 36-inch gap you measured at eye level might be 35.5 inches at the floor thanks to a century of settling. Guess what? Your stock 36-inch vanity isn’t going to fit.
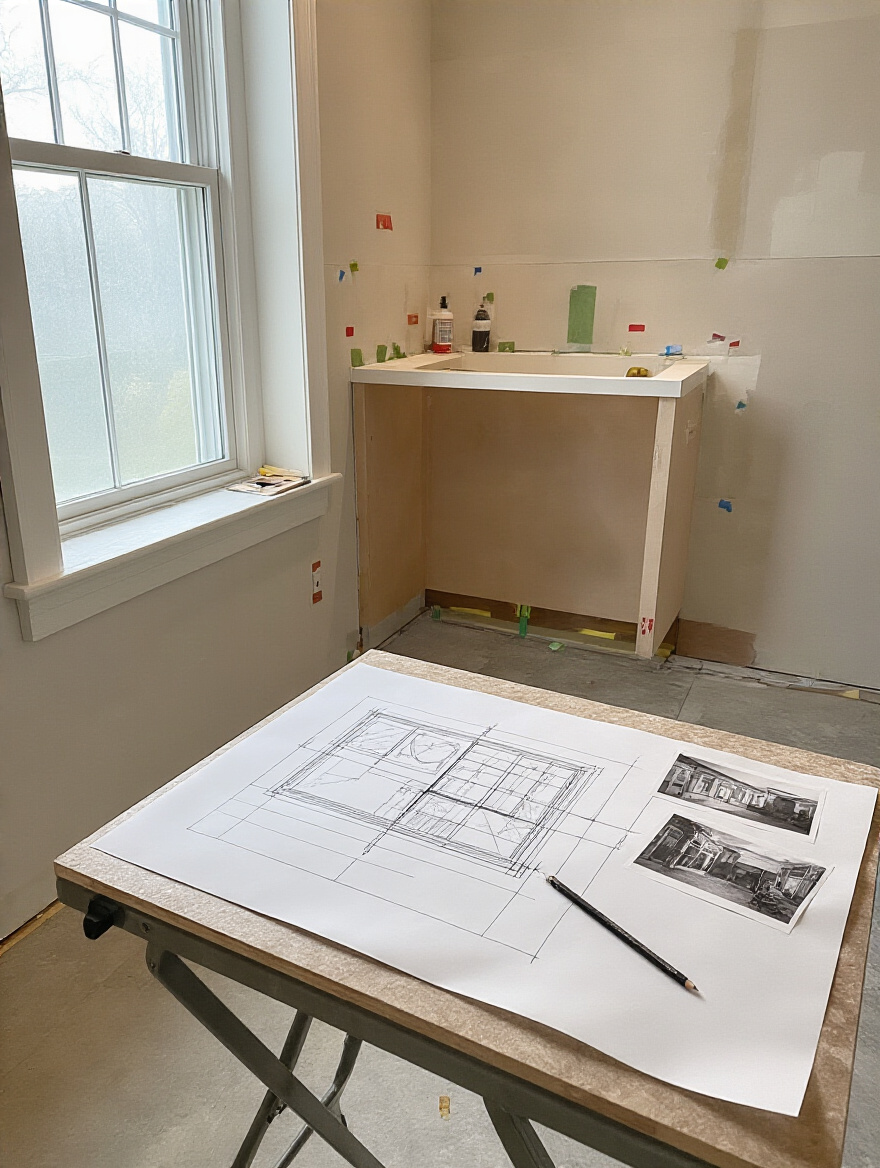
I once watched a client try to install a gorgeous, custom-ordered vanity. They’d measured the wall space perfectly. What they didn’t measure was the clearance for the beautiful old five-panel door to swing open. They had two choices: send back the vanity and eat a 50% restocking fee or re-hang the door to swing out into the hallway, which would have violated code. It was a $2,000 mistake that a roll of painter’s tape could have prevented. So get a good tape measure, a level, and mark everything—door swings, window trim, the center of your existing plumbing, and all your outlets.
With these exact, and likely crooked, measurements in hand, we can move on to deciding how your cabinets will actually fill that vertical space.
4. Determine Cabinet Depth & Height: Maximize Wall Utilization
Standard cabinet depth is typically 21 inches for a vanity. But “standard” is a word we use carefully in old homes. A 21-inch-deep vanity might turn a charming-but-small powder room into an impassable hallway. This is where you get creative. Sometimes, a shallower 18-inch-deep vanity is the perfect solution, freeing up crucial floor space so you can open a drawer without jamming your hip into the toilet. You trade a little under-sink storage for the ability to move freely. It’s a trade worth making every time.
Then think vertically. Ceilings in older homes are often higher, so why stop your storage at waist level? A tall, slender linen tower can provide an incredible amount of storage without a huge footprint. I love using them to tuck away towels, extra TP, and cleaning supplies. You can also play with height to create visual interest. Maybe you pair a lower, furniture-style vanity with a tall, recessed medicine cabinet to draw the eye upward and make the room feel grander. It’s all about using every cubic inch, not just the square footage.
This balance between space and storage is guided by one simple, unromantic factor: money.
5. Establish Budget Realistically: Guide Material & Style Choices
Let’s be real. Renovations always cost more and take longer than you think, especially in old houses. Your budget is the single most important tool you have. It’s not a suggestion; it’s the law. The biggest BS I hear is when a contractor gives a vague, lowball estimate to get the job. Then, once the walls are open and they’ve “discovered” plumbing that needs moving or rotted subfloor, the costs start climbing.
Here’s the shortcut you need: Whatever you think your budget is, immediately set aside 15-20% as a contingency fund. Don’t touch it. Don’t even look at it. This is your “oh-crap-the-plaster-wall-just-crumbled” insurance. With the remaining 80%, you can plan. This is where you make the hard choices. Do you want the fancy solid wood construction with the cheaper hardware, or the more budget-friendly plywood box that allows you to splurge on that unlacquered brass faucet you’ve been dreaming of? A realistic budget doesn’t limit you; it empowers you to make smart, deliberate choices that you won’t regret later.
Now that we’ve got the boring (but critical) foundation set, we can get to the fun part: figuring out how these cabinets will actually work for you day-to-day.
Mastering Storage and Functional Layouts
This is where the magic happens. A cabinet is just a box until you give it a purpose. In this section, we’re moving beyond basic measurements and budgets to talk about the mechanics of good storage. This is how you create a bathroom that not only looks period-appropriate and beautiful but also functions with an efficiency that would make a modern minimalist jealous.
6. Choose Cabinet Mount Type: Wall-Mounted, Freestanding, or Recessed for Efficiency
How a cabinet attaches to the room (or doesn’t) fundamentally changes its feel. Freestanding vanities are my go-to for many historic homes because they feel like furniture. Think of an old washstand, just with modern plumbing. It’s a classic, timeless look that honors the history of the bathroom as a room with furniture in it, rather than just sterile built-ins. Plus, they can be a forgiving choice if your floors are a bit wonky.
Wall-mounted or “floating” vanities, on the other hand, are a very modern statement. They can look fantastic in a Mid-Century Modern home, but I cringe when I see one slapped into a Victorian. The exception? Super tiny bathrooms where seeing the floor underneath creates an illusion of space. The real hero for old homes, though, is the recessed cabinet. Lath and plaster walls are often thicker than modern drywall, giving you a 4- to 6-inch deep cavity that’s perfect for a hidden medicine cabinet. You get valuable storage without taking up a single inch of room space.
This decision between freestanding furniture and built-in efficiency directly influences our next choice: the age-old battle of drawers versus doors.
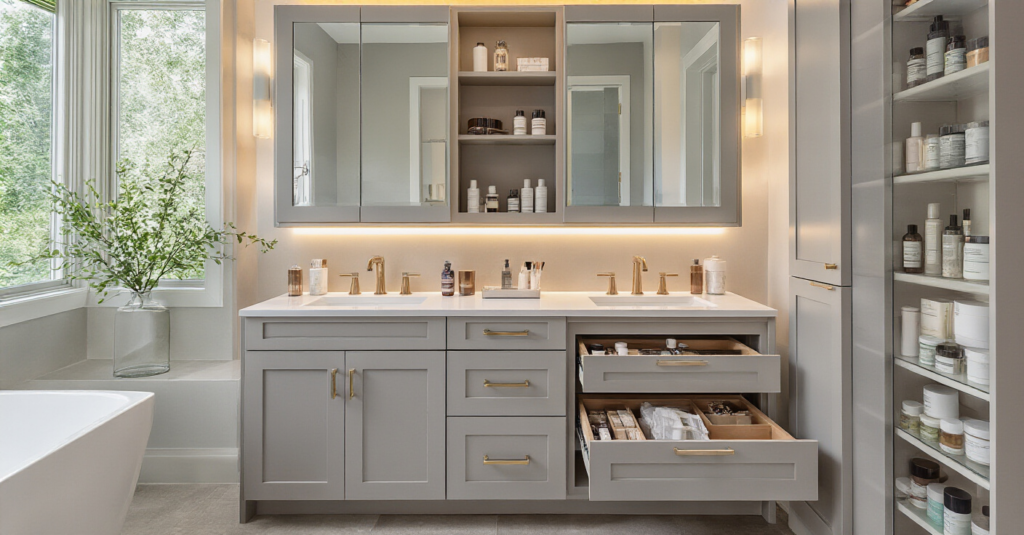
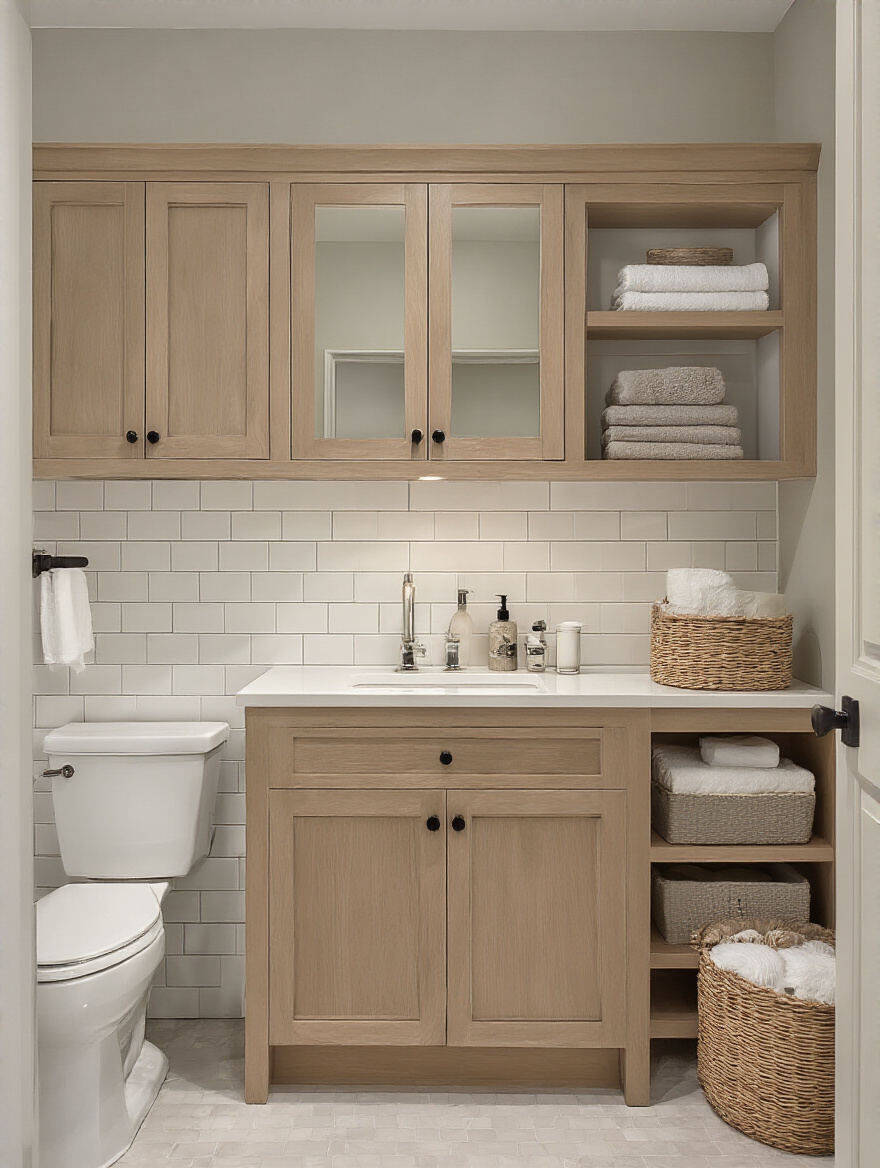
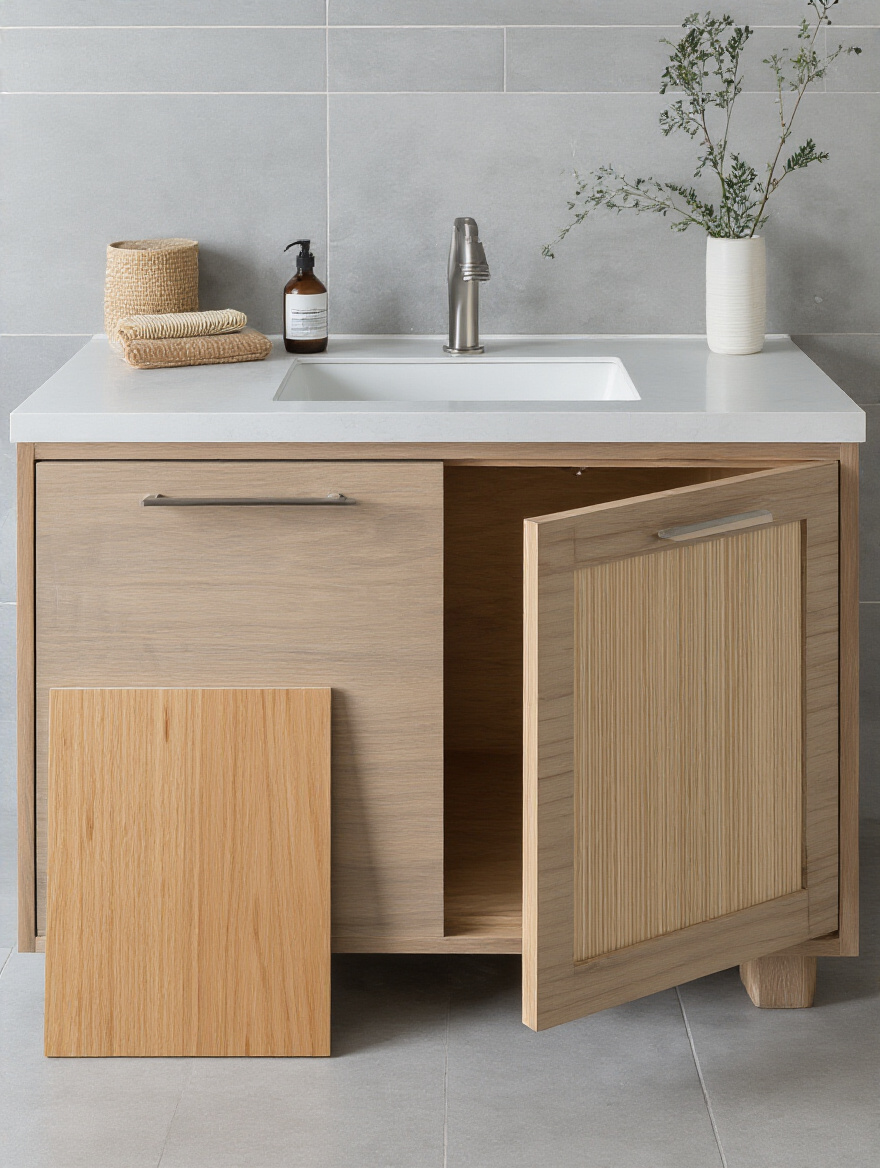
7. Integrate Drawers vs. Doors: Access Small Items Easily
Doors are for hiding large, ugly things you don’t use often, like giant bottles of toilet cleaner or a stack of towels. Drawers are for everything else. I will die on this hill. A deep cabinet behind a door is a dark cavern where bottles of expired medicine and half-used lotions go to die. You have to get on your hands and knees with a flashlight just to find anything. It’s inefficient and infuriating.
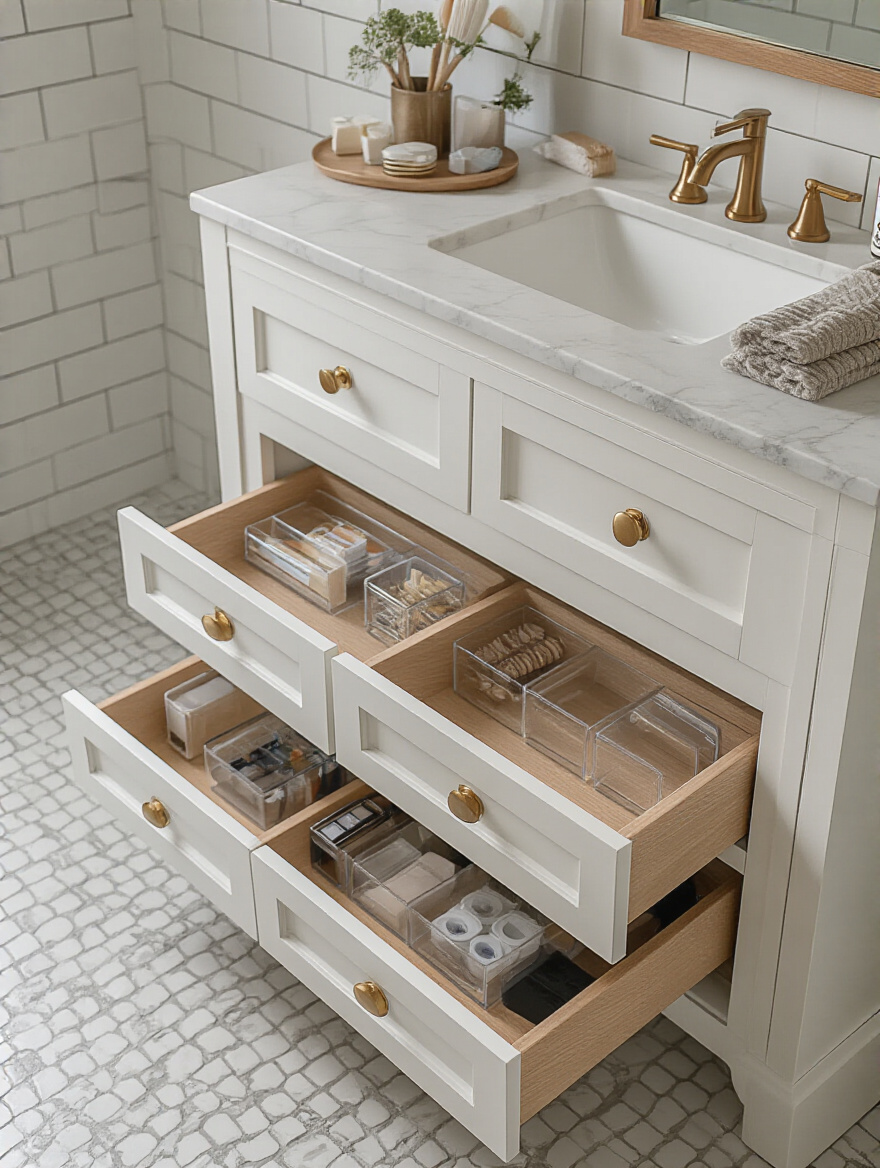
Drawers, especially full-extension drawers that let you see everything right to the back, are a revelation. Use shallow top drawers for daily items—your toothbrush, makeup, contact lenses. Everything is visible and within reach. Use deeper bottom drawers for bulkier things like hair dryers. This isn’t a new idea; think of a beautiful old dresser. It used drawers for a reason. They work. A vanity with a bank of drawers instead of two big doors will change your morning routine forever.
And once you’ve committed to the superiority of drawers, you can make them even better with some internal customization.
8. Select Adjustable Shelving: Customize Storage for Varying Heights
Okay, confession time. Historically, fine cabinetry often had fixed shelves. But let’s be practical. The giant Costco-sized bottle of mouthwash you just bought isn’t going to fit on that dainty, historically-accurate shelf. This is where we make a smart, hidden compromise. Adjustable shelving, hidden behind a beautifully crafted, period-appropriate door, is the perfect marriage of form and function.
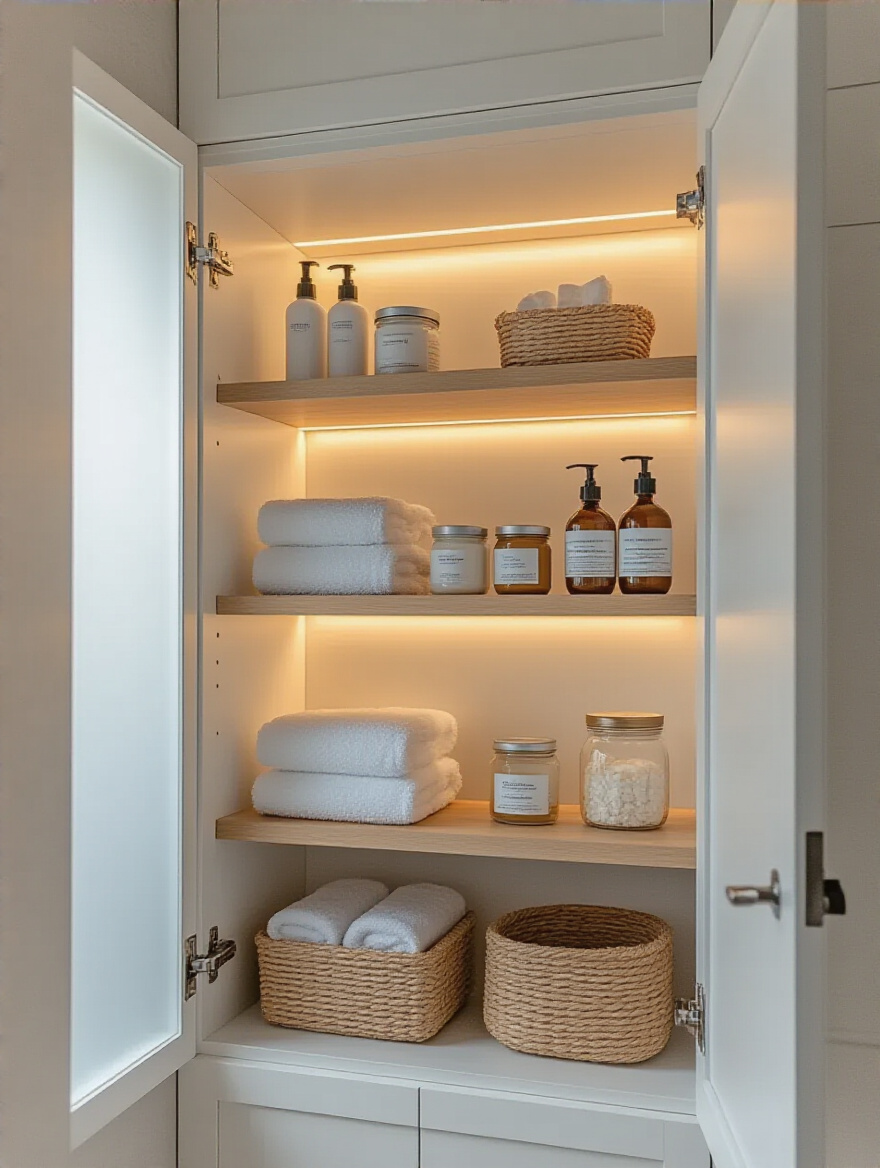
The key is to insist on cabinets with shelf-pin holes drilled the full height of the interior. This gives you maximum flexibility. You can set a shelf low for short jars and another high for tall aerosol cans, eliminating all that wasted “air space” you get with fixed shelving. I once helped a client reclaim nearly 30% more usable space in their linen tower just by re-drilling the shelf pins to match the actual height of their towels and toiletries. It’s a simple, five-minute job that can revolutionize your storage.
While adjustable shelves help you conquer vertical space, our next trick is about conquering the deep, dark back of the cabinet.
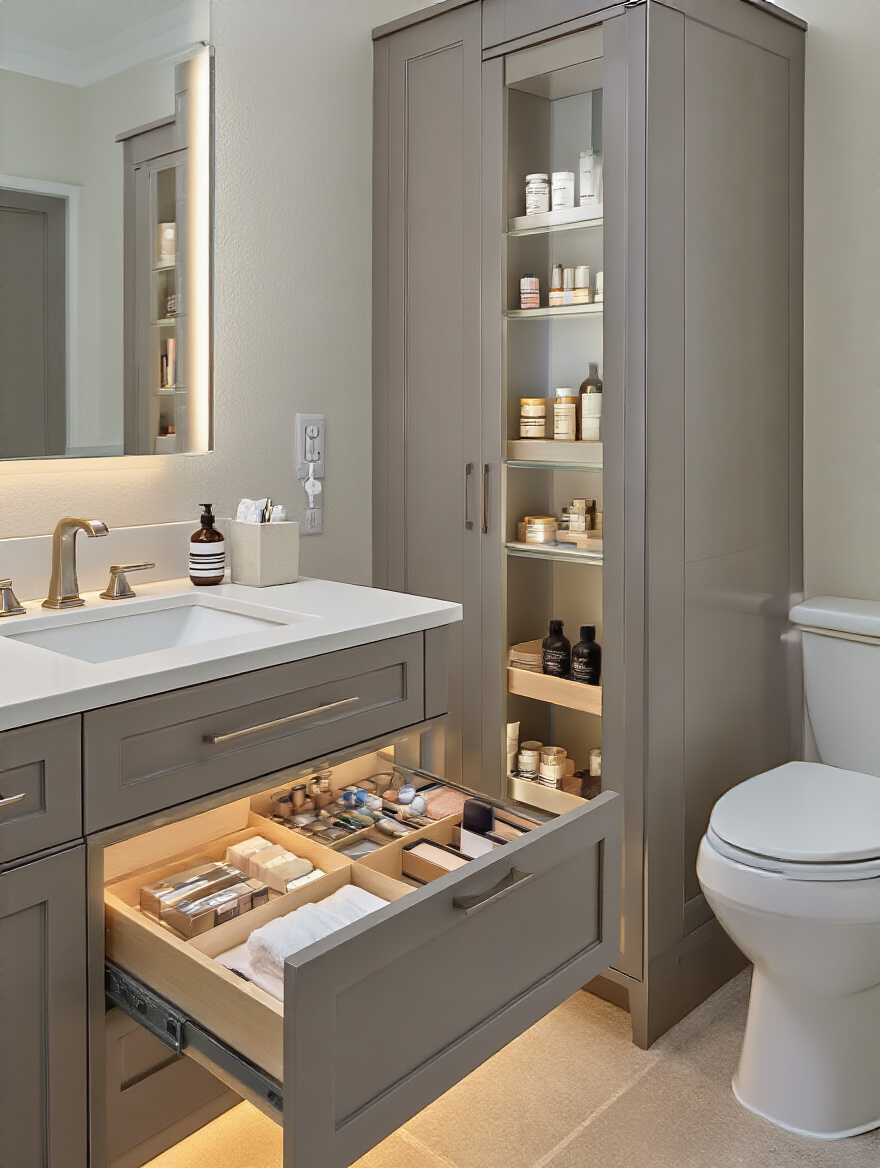
9. Utilize Pull-Out Organizers: Maximize Inner Cabinet Accessibility
If a standard cabinet is a dark cavern, a pull-out organizer is the mining cart that brings all the treasure out into the light. These are one of the best modern inventions you can hide inside a historic-looking cabinet. Instead of kneeling and blindly groping for something at the back of your vanity, you give a gentle tug, and the entire shelf glides out to meet you.
This is particularly brilliant for the awkward space under the sink. You can get U-shaped pull-outs designed to fit around the plumbing, turning that cluttered, chaotic zone into two tiers of perfectly organized, easily accessible storage. I worked on a 1930s bungalow where the homeowner wanted to keep the original, charming but impractical pedestal sink. Our solution? We built a very narrow, custom “linen tower” next to it, and outfitted the entire interior with full-extension pull-out shelves. It looked like a piece of period furniture but functioned with futuristic efficiency.
Pull-outs are especially heroic when dealing with one of the most awkward parts of any room: the corner.
10. Consider Corner Cabinet Solutions: Reclaim Unused Nooks Efficiently
Corners are the Bermuda Triangle of bathroom design—space that mysteriously disappears and becomes useless. In a large bathroom, you might just ignore it. But in a small or oddly shaped one, every inch is sacred. This is where specialized corner cabinets become your secret weapon. You can get vanities designed to fit right into the corner, which can sometimes open up a surprising amount of counter space and floor area.
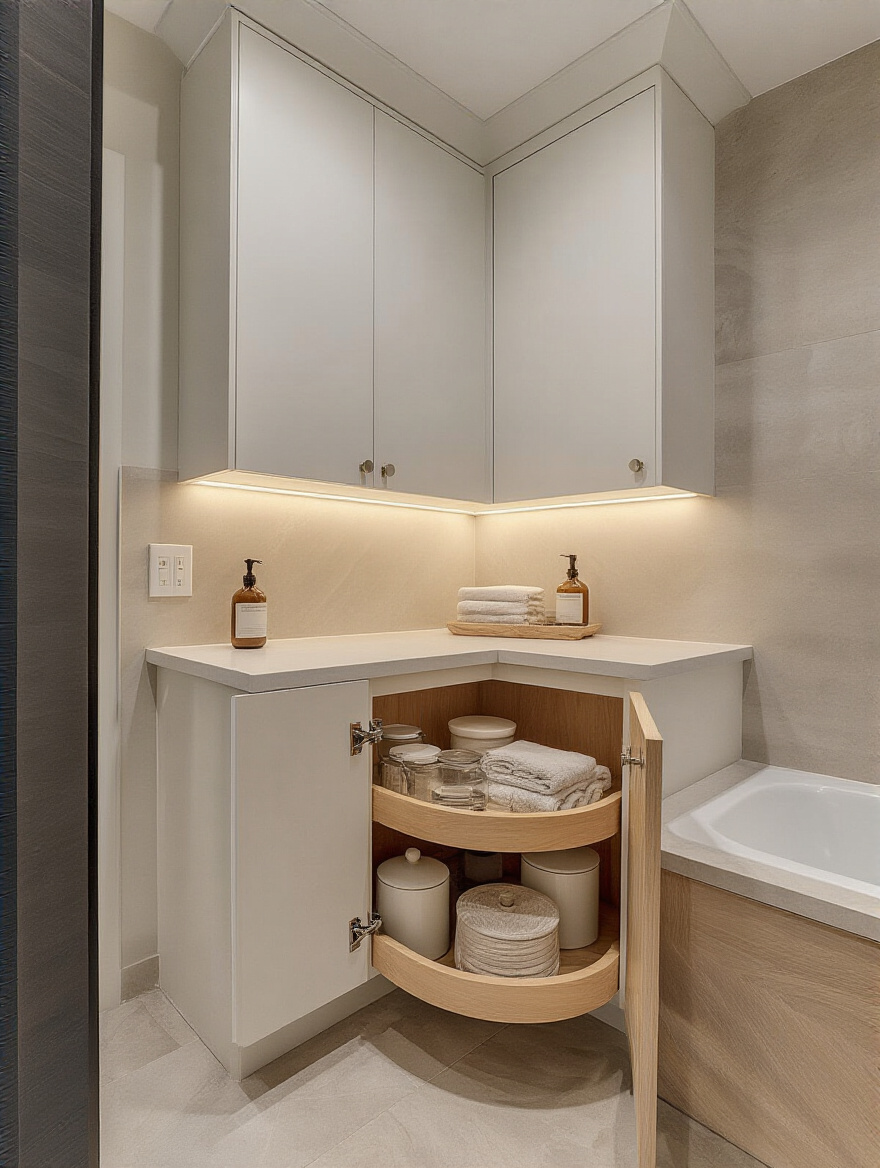
But the real magic is in the hardware. Lazy Susans are the classic solution, but modern hardware is even better. Things like “Magic Corner” or “LeMans” units are articulated pull-outs that swing and glide out of the blind corner, presenting all the contents to you. I recently specified one for a master bathroom that had a long L-shaped vanity. The corner was basically a black hole. We installed a LeMans unit, and suddenly the client had the perfect, accessible spot for all her tall hairspray cans and bulky styling tools. It turned the worst part of her vanity into the most useful.
Now that we’ve made the inside of your cabinets work like a well-oiled machine, let’s make the outside look just as good.
Elevating Bathroom Aesthetics with Cabinetry
Function is king, but that doesn’t mean we sacrifice beauty. The cabinets are the most significant piece of furniture in your bathroom. Their style, finish, and hardware set the tone for the entire room. This is your chance to either honor the home’s architectural heritage or create a deliberate, beautiful contrast. Let’s talk about getting the visuals right.
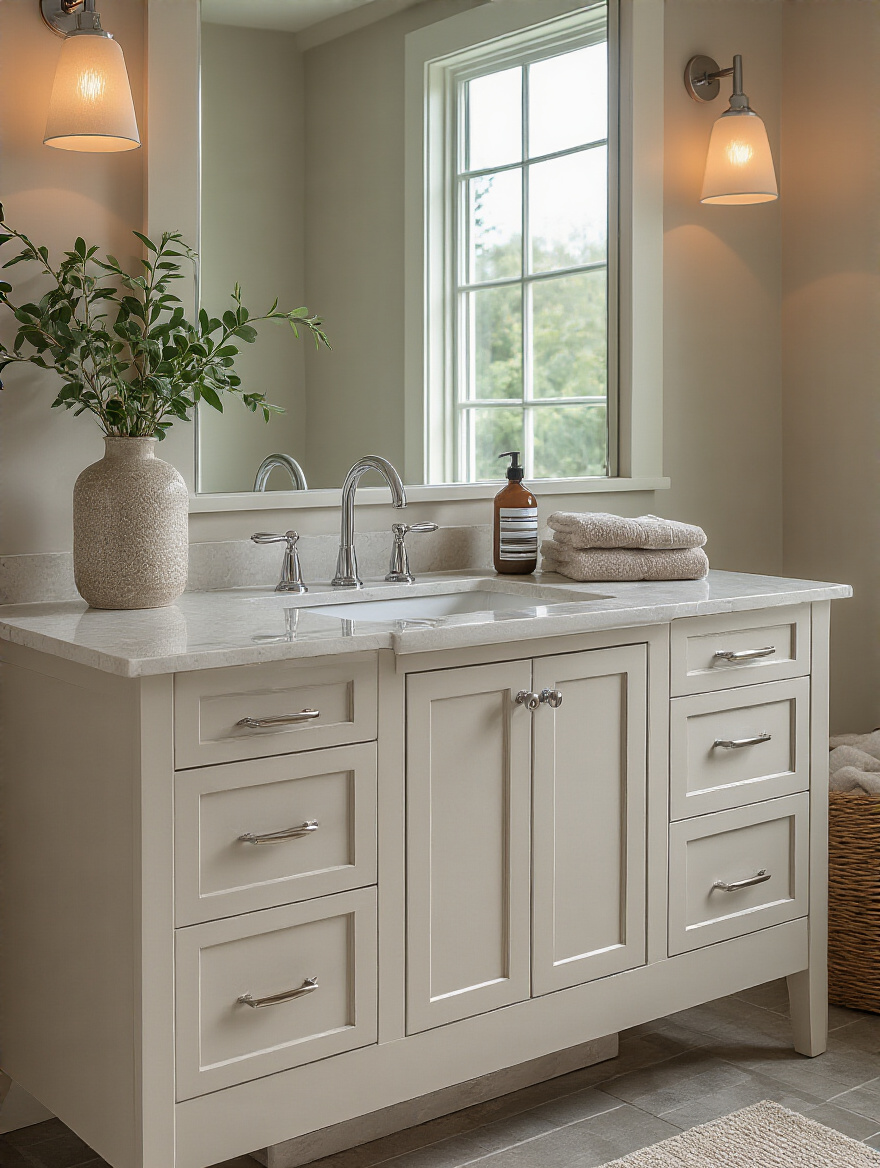
11. Coordinate Cabinet Finishes: Complement Overall Bathroom Decor Seamlessly
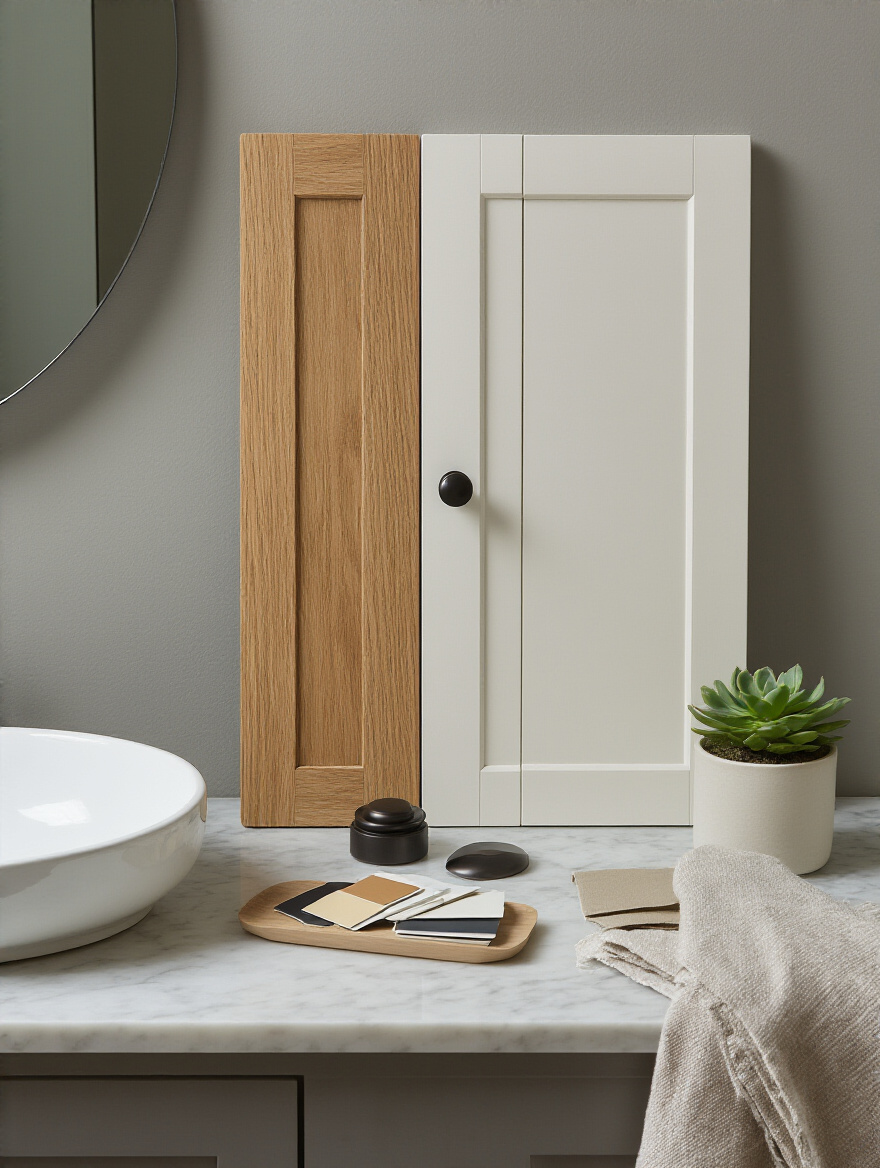
The finish is the first thing you see. It needs to speak the same language as your tile, your fixtures, and your wall color. In a historic home, this is paramount. A high-gloss, thermofoil cabinet will look jarring and cheap next to original hexagonal floor tile. Instead, think about what’s appropriate for the era. A simple, painted finish (like a soft white, grey, or even a dark green) with a satin or eggshell sheen often feels right. For a Craftsman home, a warm, quartersawn oak is perfect.
My advice is to stop looking at tiny paint chips online. Get physical samples. Take a sample door and set it in your bathroom. Look at it in the morning light, in the afternoon, and under artificial light at night. The color can and will change dramatically. Create a “storyboard” with a piece of your floor tile, your countertop sample, a paint swatch for the wall, and the cabinet finish sample. If they look good together on the board, they’ll look good together in the room. This simple step prevents incredibly expensive color mistakes.
Of course, a beautiful finish is useless if it peels off in a year, which brings us to the materials underneath.
12. Select Durable Material Options: Ensure Long-Lasting Beauty & Resilience
The bathroom is a cabinet’s worst enemy. It’s a perpetual cycle of steam, humidity, and splashes. Using the wrong materials is a guaranteed path to warped doors, peeling finishes, and swollen cabinet boxes. The number one rule: avoid particle board like the plague, especially for the cabinet box. It’s basically sawdust and glue, and it acts like a sponge in a humid environment. Once it gets wet, it swells up and never goes back.
Your best bet for the cabinet box is plywood. It’s made of layered wood veneers, which makes it far more structurally stable and water-resistant. For the doors, solid wood is beautiful and traditional, but you can also get a great result with high-quality MDF (Medium-Density Fiberboard) doors if they’re being painted. The key, no matter the material, is the finish. It needs to be a conversion varnish or a two-part polyurethane that completely seals the wood from moisture. Ask the manufacturer to be specific about what they use. It matters more than almost anything else.
Once you have a durable, beautifully finished cabinet, you get to add the jewelry.
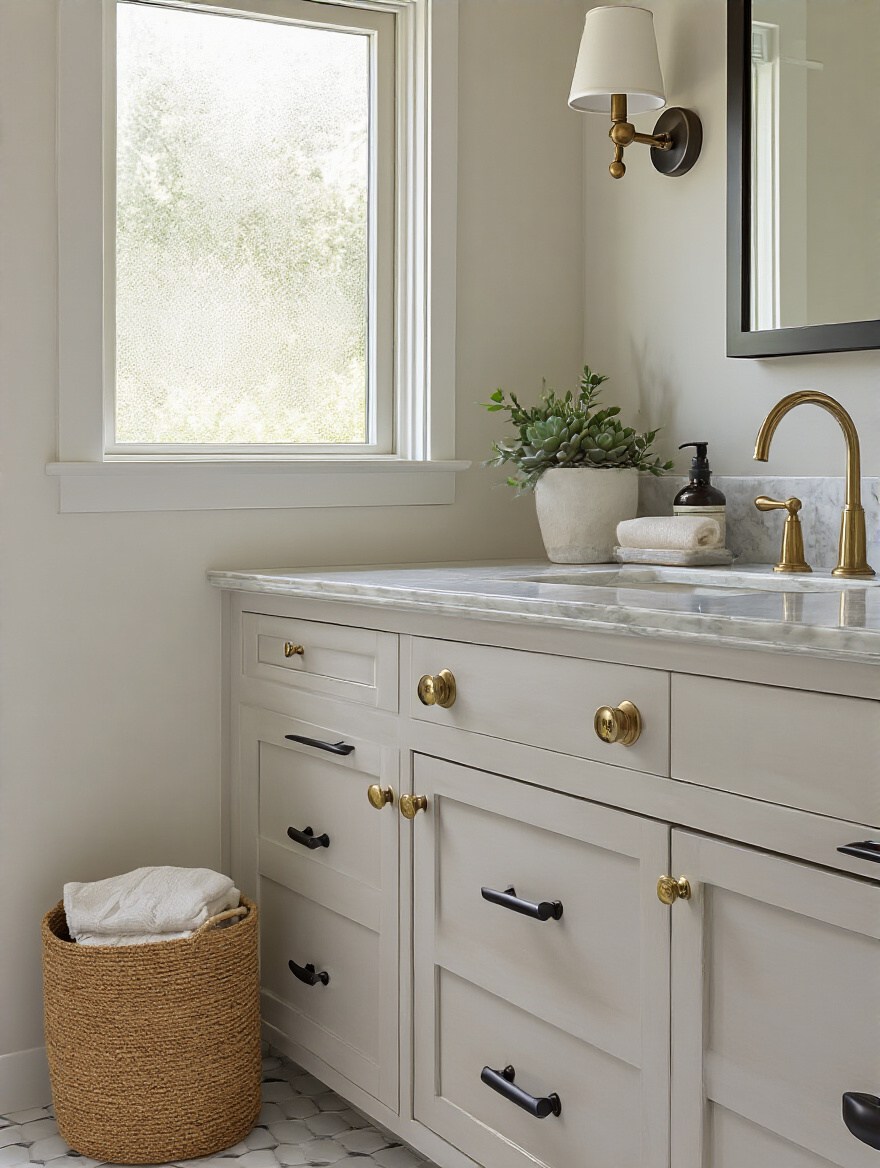
13. Choose Hardware & Knobs: Elevate Cabinet Aesthetics Affordably
Hardware is the fastest, cheapest, and easiest way to telegraph the style of your bathroom. It’s an incredibly powerful detail. Swapping out boring, builder-grade knobs for something period-appropriate can completely transform the look of a vanity. For a 1920s Colonial Revival, think about glass or simple polished nickel knobs. For a 1940s home, chrome might be more appropriate. For a Craftsman, oil-rubbed bronze or antiqued brass bin pulls are a classic choice.
This is an area where you can have a lot of fun. I once worked on a Tudor home where we used simple, hand-forged iron pulls on a dark-stained vanity. It cost less than $150 for the hardware, but it made the stock cabinet look like a priceless antique. Don’t be afraid to check out salvage shops or specialty reproduction hardware sites. Just make sure you measure the “center-to-center” distance on any existing holes for pulls, so you don’t have to drill new ones.
Hardware works hand-in-hand with another functional and aesthetic element: the mirror.
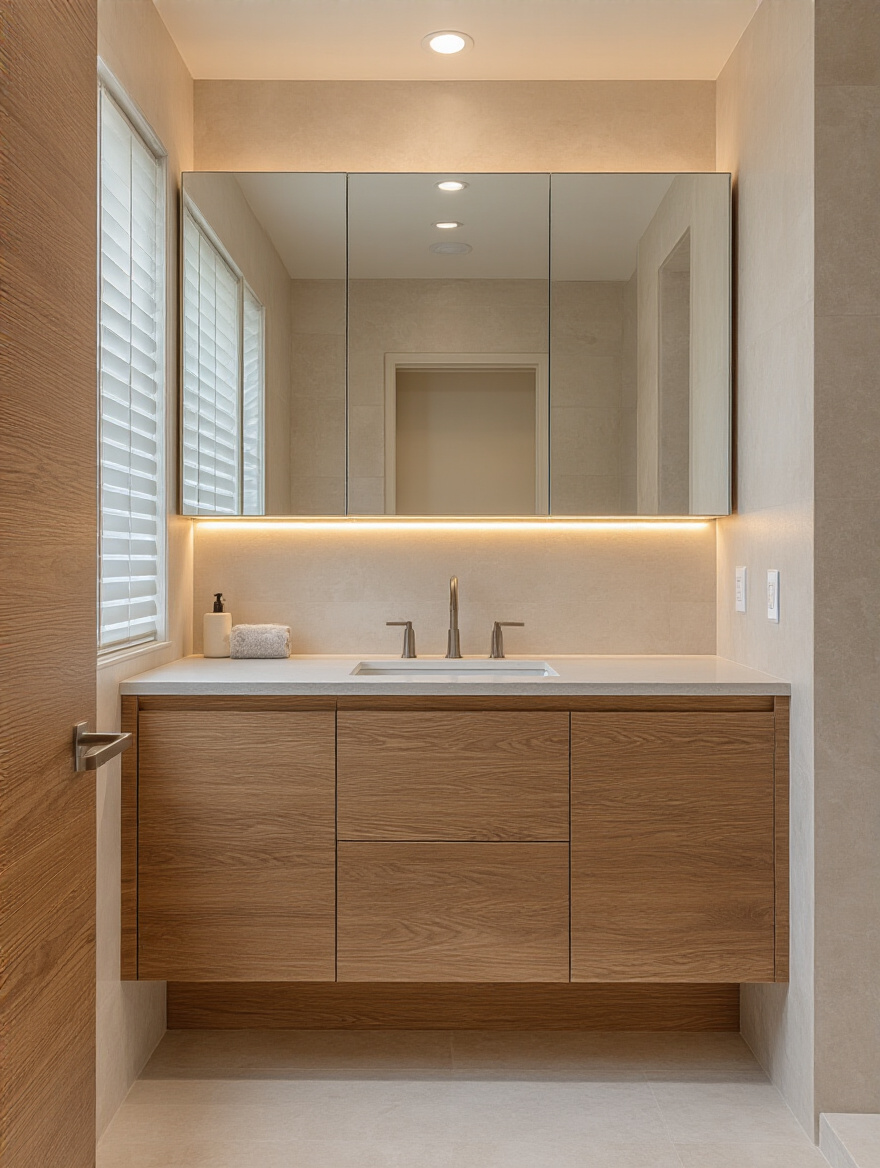
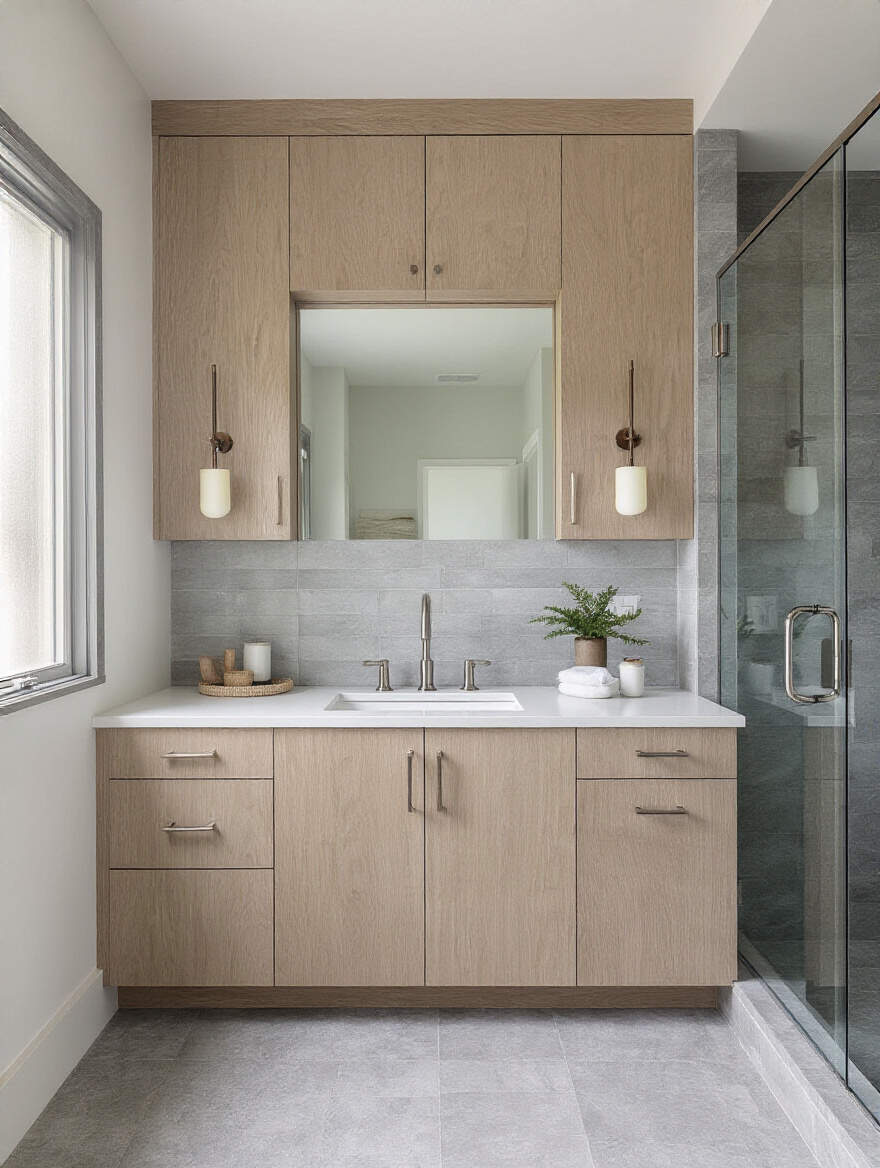
14. Incorporate Mirror Cabinets: Combine Storage with Daily Utility
The classic recessed medicine cabinet is a brilliant, space-saving invention that’s been around for over a century for a reason. It combines two essential functions—a mirror and storage for small daily items—into one package. It keeps your countertops clear and your essentials right at eye level where you need them.
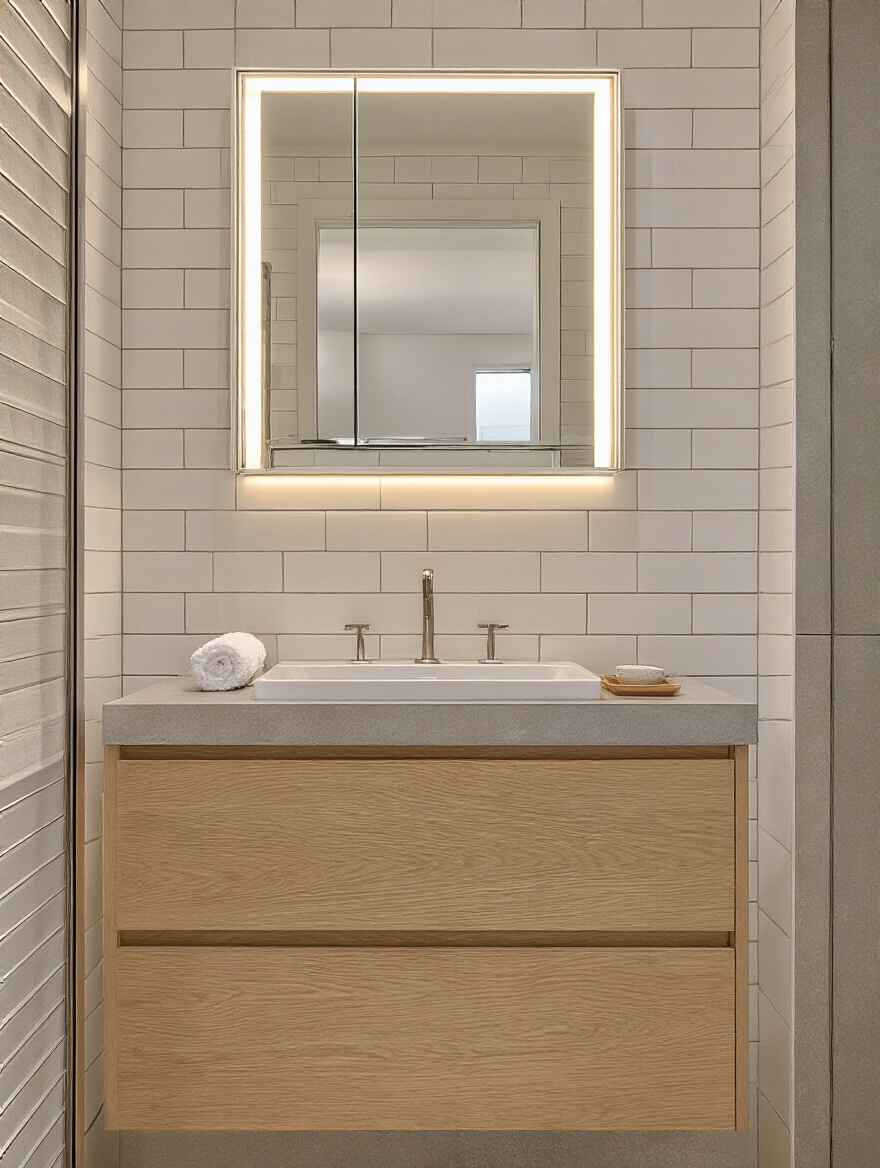
In an older home, I almost always advocate for a recessed model if the wall construction allows for it. It creates a clean, built-in look that feels authentic. Surface-mounted ones can work, but they can feel a bit bulky. Look for simple designs. Maybe it’s a frameless mirror for a more modern feel or one with a simple wood frame painted to match your trim for a more traditional look. The goal is seamless integration, turning a utilitarian object into a quiet, purposeful part of the room’s design.
The mirror is also the perfect place to integrate our next critical element: lighting.
15. Plan for Task & Accent Lighting: Enhance Cabinet Visibility & Ambiance
Please, for the love of all that is holy, do not rely on a single, sad ceiling light in the middle of your bathroom. It casts shadows on your face, making you look like a monster in the mirror, and it does nothing to illuminate your storage. Good bathroom lighting is layered. You need ambient light (from that ceiling fixture), but you also need task lighting. This means wall sconces on either side of the mirror at eye level. This provides even, shadow-free light right where you need it for grooming.
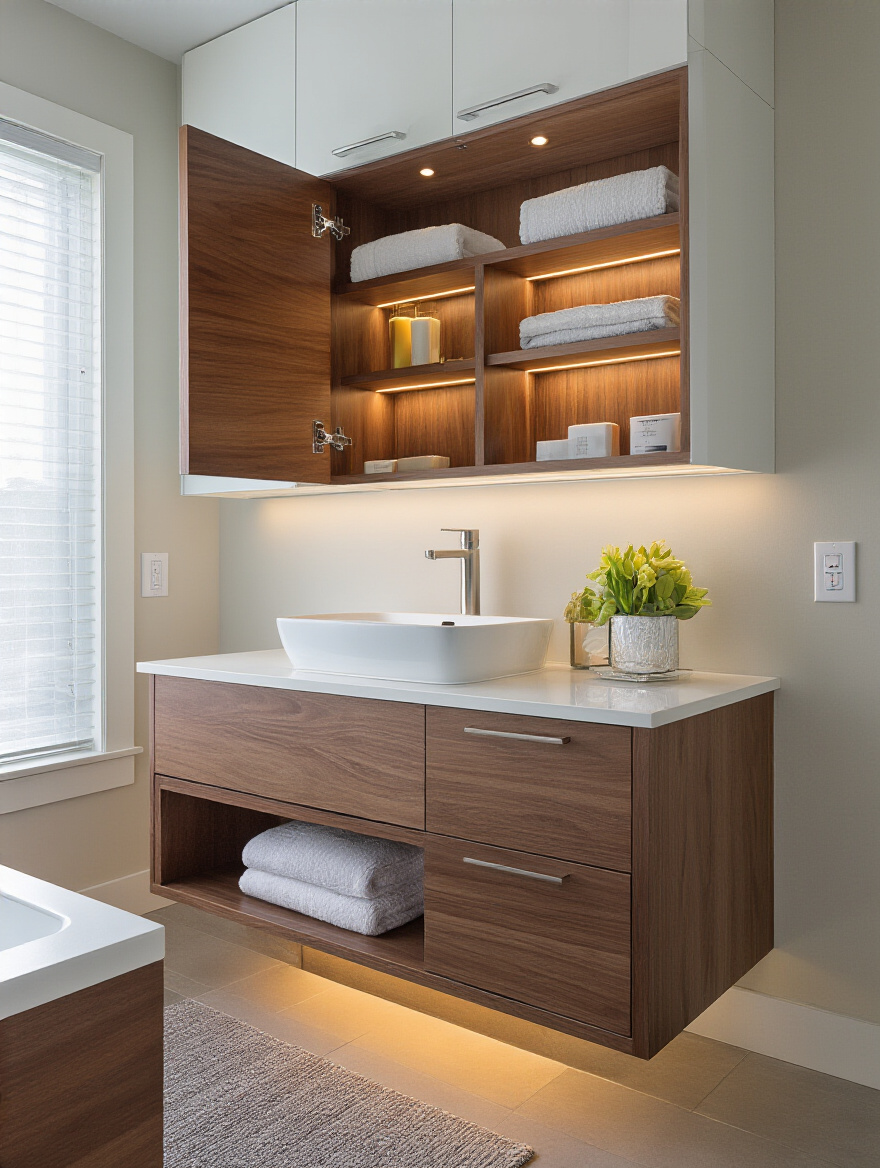
Then there’s accent lighting. This is the secret to making your bathroom feel luxurious. Think about putting a small LED strip on a motion sensor inside a deep drawer or a linen cabinet. It’s a tiny detail that feels incredibly high-end. Or consider toe-kick lighting under a freestanding or floating vanity. It provides a soft, gentle glow that’s perfect for a late-night trip to the bathroom without blinding you. Lighting isn’t just about seeing; it’s about setting a mood.
This brings us to the final frontier, where we can seamlessly integrate modern technology without compromising historic charm.
Innovations & Smart Upgrades for Cabinets
I know “smart cabinet” can sound a little ridiculous. But we’re not talking about a cabinet that orders toilet paper for you. We’re talking about thoughtful, hidden technologies that solve modern problems. The trick in a historic home is to integrate these features so discreetly that no one would ever know they’re there until they need them.
16. Add Integrated Electrical Outlets: Conveniently Power Devices Inside
Nothing ruins a beautiful, historically-inspired bathroom faster than a tangle of charging cords for your electric toothbrush and shaver. The solution is brilliant and simple: put the outlets inside the cabinet. Hiding an outlet inside your recessed medicine cabinet or in the back of a vanity drawer is a total game-changer. Your devices can stay plugged in, charged, and completely out of sight.
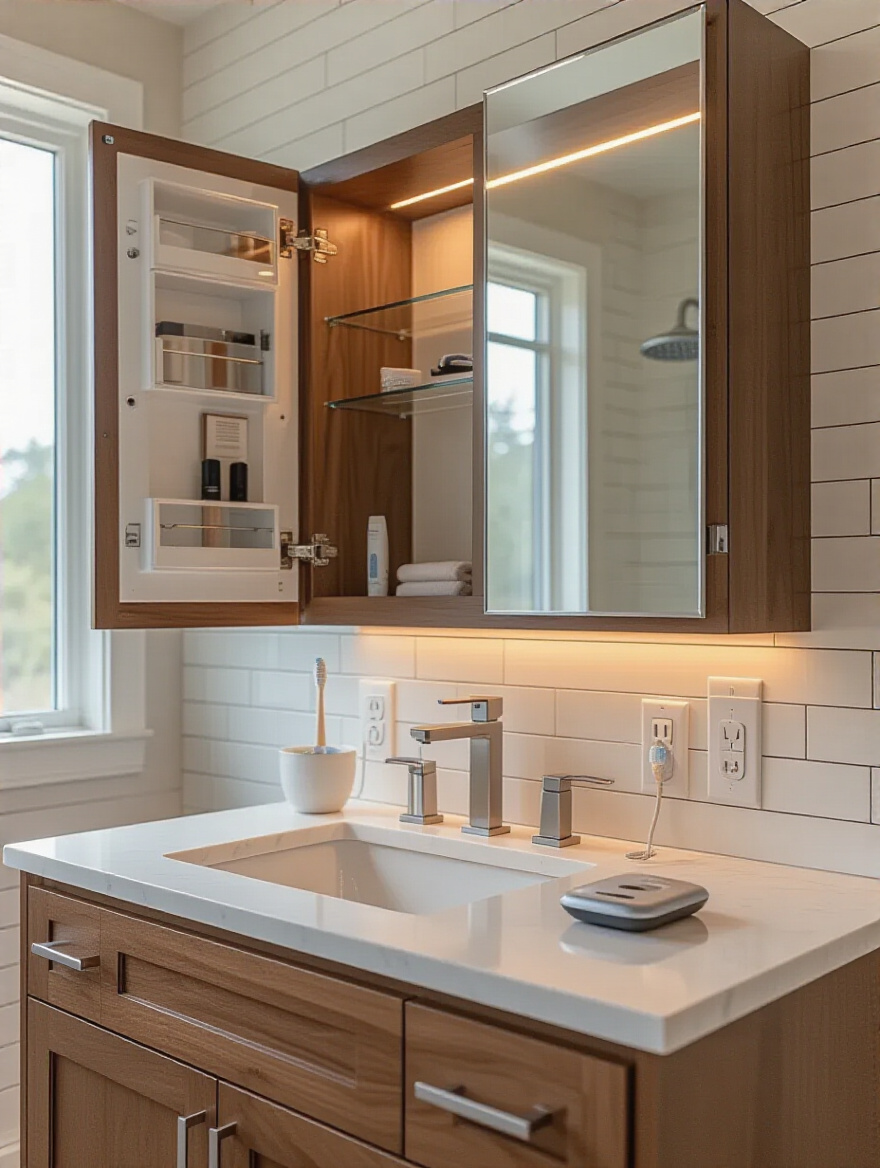
This is a job for a licensed electrician, no exceptions. The outlet must be GFCI-protected for safety. I once saw a DIY job where someone just drilled a hole in the back of a cabinet and ran an extension cord. It’s not just ugly; it’s an incredible fire hazard. Done properly, it’s the most elegant way to solve a modern problem. You get all the convenience with none of the visual clutter.
And if you’re putting power in your cabinets, why stop at a simple outlet?
17. Explore Smart Cabinet Features: Enjoy Built-in Charging & Defogging
This is where things get really clever. Imagine a medicine cabinet that not only has outlets but also a defogging pad built into the mirror door. You step out of a hot shower, and your mirror is perfectly clear. It feels like magic, but it’s just a simple heating element. This feature is a small luxury that makes a huge difference in your daily routine.
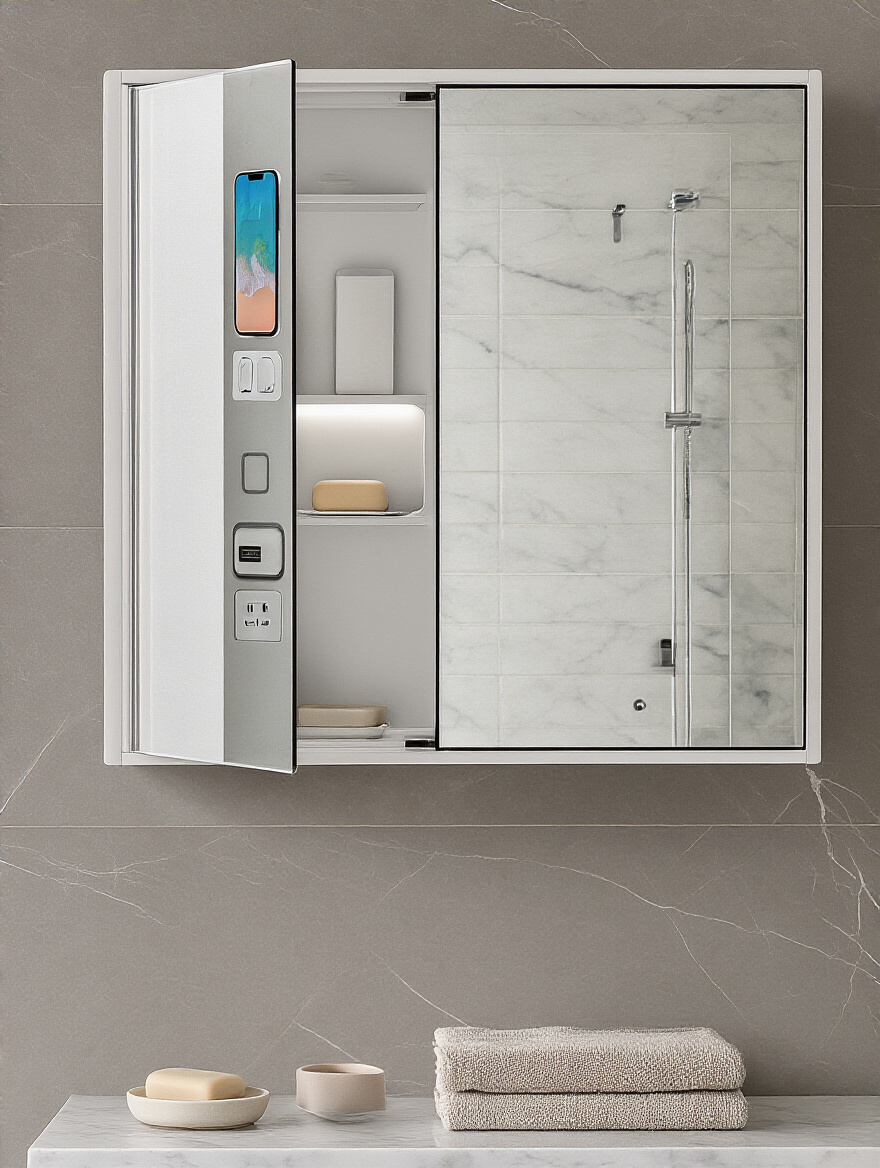
Again, the key is subtlety. These features should be invisible. No one needs to see a glowing blue light or a digital clock on their mirror. The best smart features are the ones that work in the background to make your life easier without screaming “I AM A GADGET!” For me, a defogger is a must-have. USB ports hidden inside are a close second. It’s all about enhancing function without sacrificing form.
The biggest threat to all this beautiful cabinetry, smart or not, remains the same: moisture.
18. Invest in Moisture-Resistant Finishes: Prevent Warping & Mold Growth
I’m going to repeat this because it is that important. Your bathroom is a hostile environment. A beautiful cabinet with a poor finish will be a peeling, bubbling wreck in just a few years. I had a client who bought beautiful, expensive solid maple cabinets for their master bath. But the manufacturer used a standard lacquer finish meant for kitchens. After three years in their steamy, poorly ventilated bathroom, the finish was failing and the wood on the sink base was starting to warp. They had to replace the entire thing.
Insist on a high-quality, moisture-resistant finish like a conversion varnish. And make sure all sides are sealed, especially raw cutouts for plumbing. I always run a bead of clear silicone caulk around any cutout in a vanity base to create one final, waterproof barrier. It’s a ten-minute step that can add years to the life of your cabinet. No amount of fancy hardware or smart features can save a cabinet that has been destroyed by water.
This level of quality and foresight is easiest to achieve when you aren’t limited by what’s on the shelf at a big-box store.
19. Consider Custom Built-Ins: Maximize Unique Space Potential
Old houses are full of quirks: sloping ceilings, weird little alcoves, walls that meet at a 92-degree angle. You are never going to find a stock cabinet that fits these spaces perfectly. This is where custom built-ins become your greatest ally. A good cabinet maker can turn a useless nook into a floor-to-ceiling linen cabinet or build a vanity that scribes perfectly to a crooked, lumpy plaster wall.
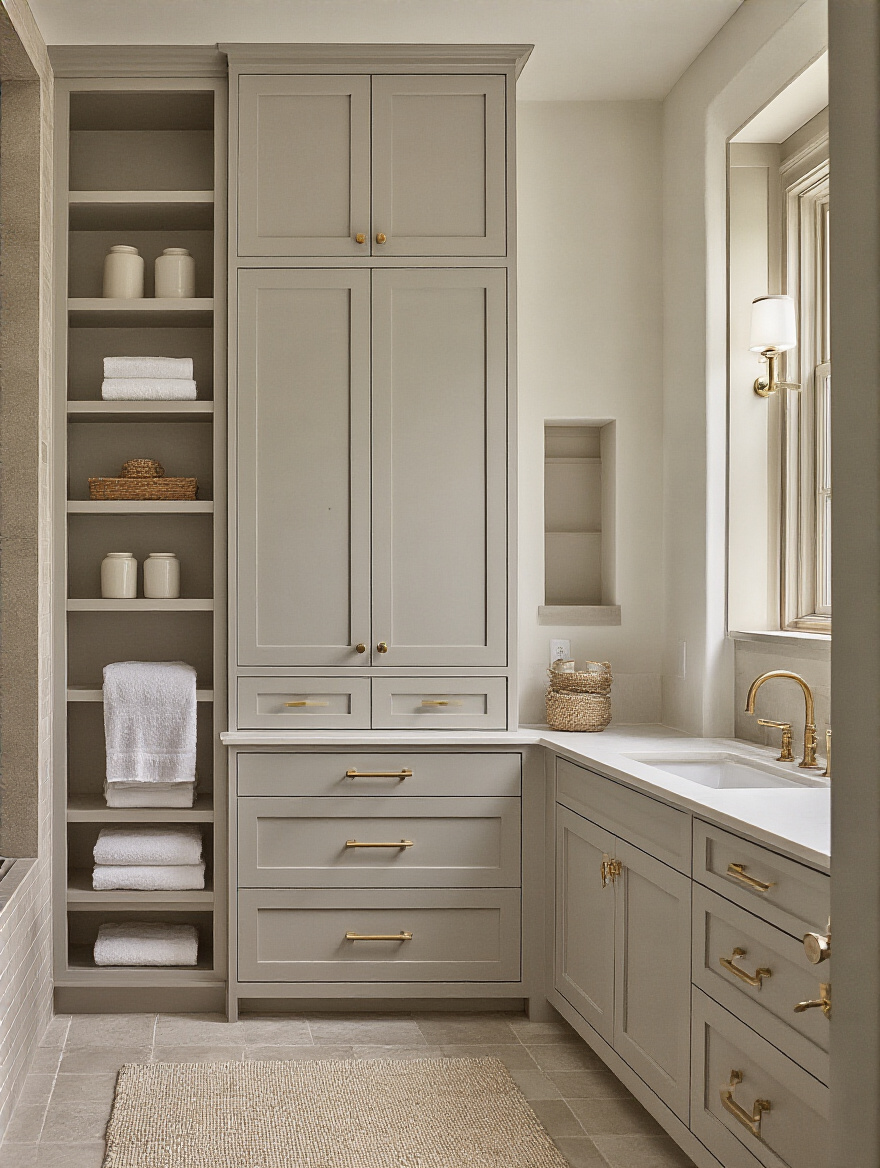
It’s often more expensive upfront, but the result is a solution that maximizes every single inch of storage and looks completely integrated into the architecture of your home. It feels like it has always been there. This is how you achieve a truly high-end, bespoke result. For a bathroom under a dormer, we once built a custom low-slung vanity with drawers that followed the slope of the ceiling. It was the only way to get functional storage in the space, and it ended up being the most charming feature in the room.
Finally, when choosing these materials, whether stock or custom, we have a responsibility to think about where they come from.
20. Evaluate Eco-Friendly Cabinet Materials: Reduce Environmental Impact Responsibly
The idea of “sustainability” isn’t new. In fact, it’s a very old idea. It’s about craftsmanship, durability, and using resources wisely. A well-made cabinet from solid wood or high-quality plywood that lasts for 50 years is infinitely more “eco-friendly” than a cheap particle board cabinet that ends up in a landfill after five. Longevity is sustainability.
But we can also do better in our material choices. Look for plywood made with no added urea-formaldehyde (NAUF) glues to protect your indoor air quality. If you’re using solid wood, look for FSC-certified lumber, which ensures it comes from responsibly managed forests. Even simple things like using low-VOC (Volatile Organic Compound) paints and finishes contribute to a healthier home for you and a healthier planet for everyone. It’s not about sacrifice; it’s about making conscious, informed choices.
Conclusion: Crafting Your Ideal Bathroom Oasis
Look, at the end of the day, renovating a bathroom in an old house is a big undertaking. It’s easy to get overwhelmed by the choices. But as we’ve walked through, it’s not about finding one “perfect” cabinet. It’s about a series of small, smart, deliberate decisions. It starts with an honest look at your junk, a healthy respect for the quirks of your old walls, and a realistic budget.
From there, it’s about building a functional masterpiece, hiding modern convenience behind timeless design. It’s in choosing drawers over doors, using pull-outs to conquer dark corners, and picking hardware that feels like it belongs. And it’s in investing in quality materials and finishes that will stand up to the unique challenges of a bathroom, protecting both your investment and the soul of your home. You’re not just installing cabinets; you’re becoming a steward of your home’s history while making it work for your life today. And that’s a project worth doing right.