Creating a functional, beautiful kitchen in a compact space feels like solving an impossible puzzle. You’re constantly battling limited counter space, overflowing cabinets, and that frustrating feeling of bumping into everything while trying to cook a simple meal. Every inch matters when you’re working with minimal square footage, yet you still want a space that inspires culinary creativity and brings joy to daily routines.
The secret lies in understanding that small kitchens aren’t about having less—they’re about being smarter. Professional designers who specialize in compact spaces know that strategic planning, clever storage solutions, and thoughtful material choices can transform even the tiniest galley into a highly functional culinary workspace. When you approach kitchen design small with the right strategies, limitations become opportunities for innovation.
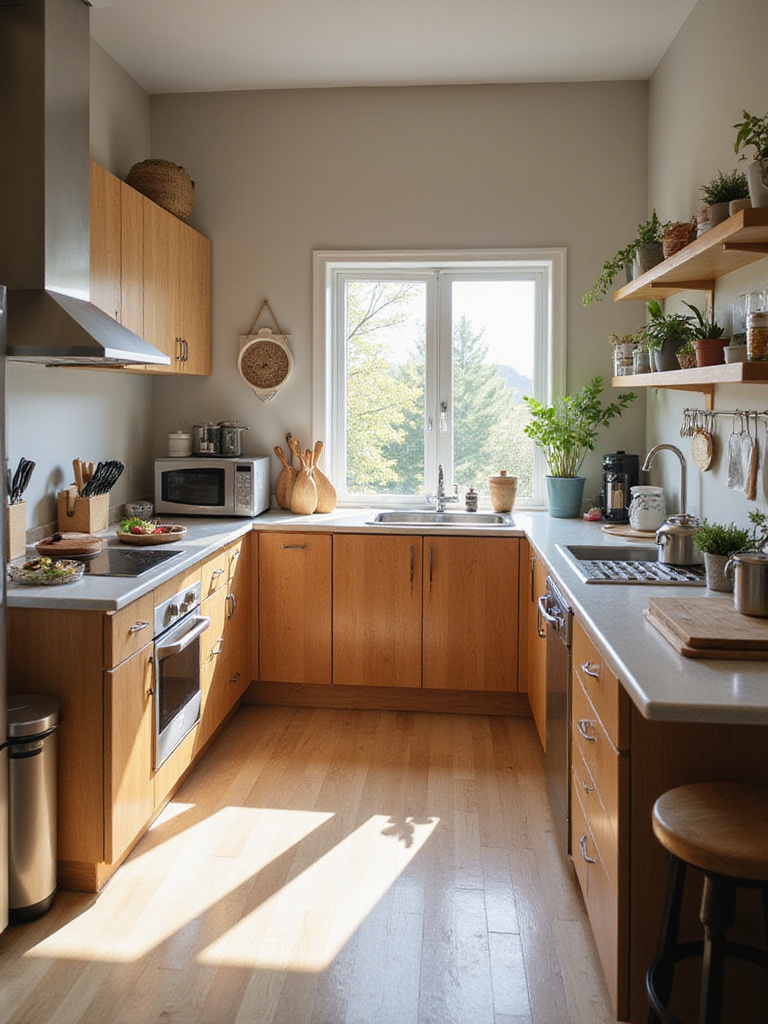
These 22 genius solutions will help you maximize every square inch while creating a space that feels open, organized, and surprisingly spacious. From revolutionary storage hacks to layout optimizations that improve workflow, each idea addresses the unique challenges of compact cooking spaces while maintaining style and functionality.
1. Ruthlessly Declutter Before Planning Your Layout
Before sketching layouts or selecting finishes for your kitchen design small project, the most transformative step involves clearing everything out and making honest decisions about what truly deserves space in your compact kitchen. This process goes far beyond simple tidying—it’s about accurately assessing your actual cooking habits and eliminating items that consume valuable real estate without adding meaningful functionality.
The benefits of thorough decluttering extend beyond just creating space. Professional organizers report that clients typically discard 30-40% of their kitchen inventory during this process, which dramatically reduces storage requirements and allows for more efficient layout planning. When you remove duplicate gadgets, expired pantry items, and tools you rarely use, you can design storage solutions that perfectly match your actual needs rather than accommodating imaginary cooking scenarios.
Implementation involves four strategic steps:
- Empty every cabinet, drawer, and storage area completely
- Sort items into Keep, Donate, Discard, and Relocate categories
- Apply strict criteria: used weekly, essential function, good condition
- Remove non-keep items immediately to see your true space potential
As morning light filters through your newly organized space, you’ll discover hidden potential you never knew existed.
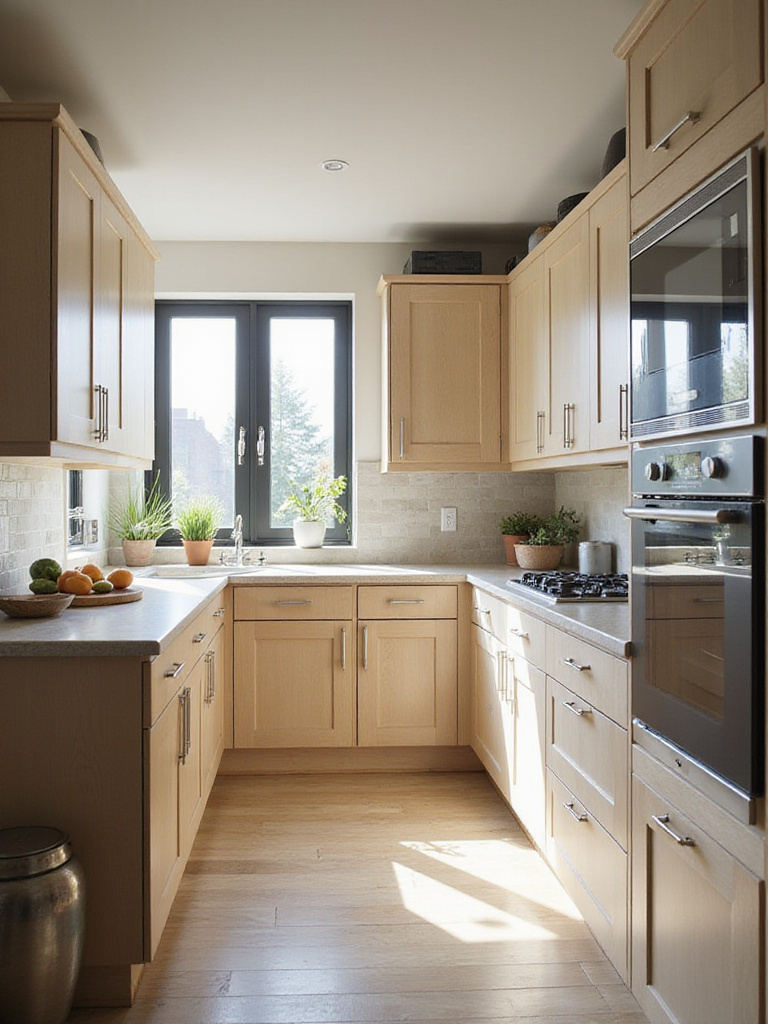
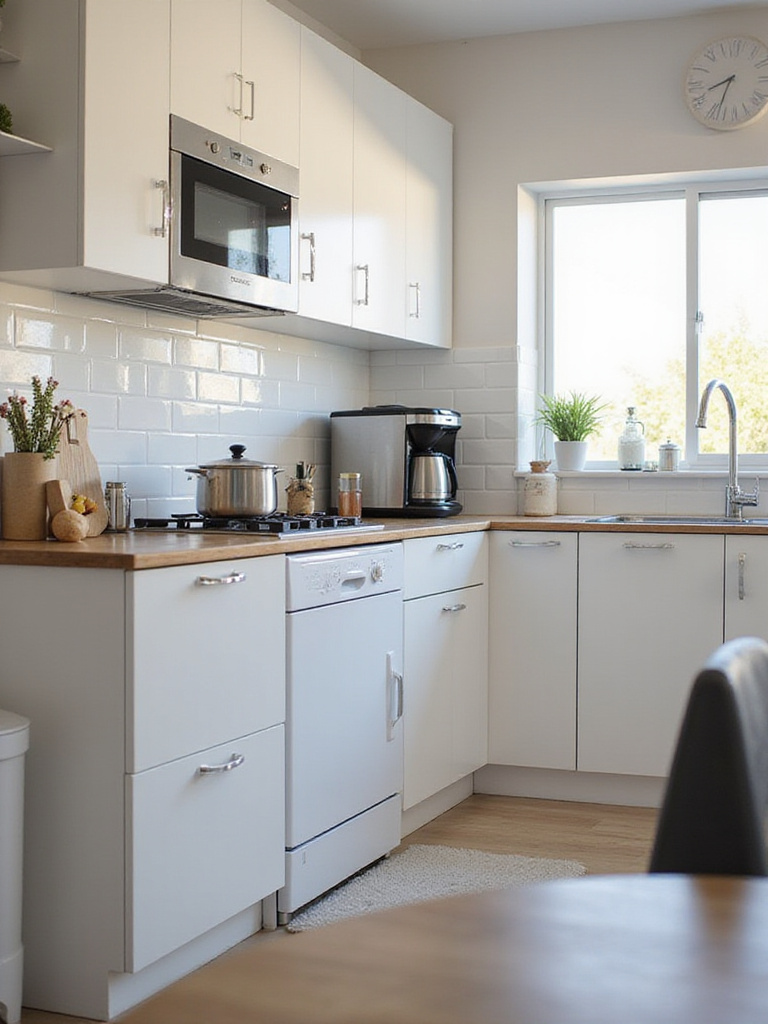
2. Optimize Single-Wall Layouts for Maximum Efficiency
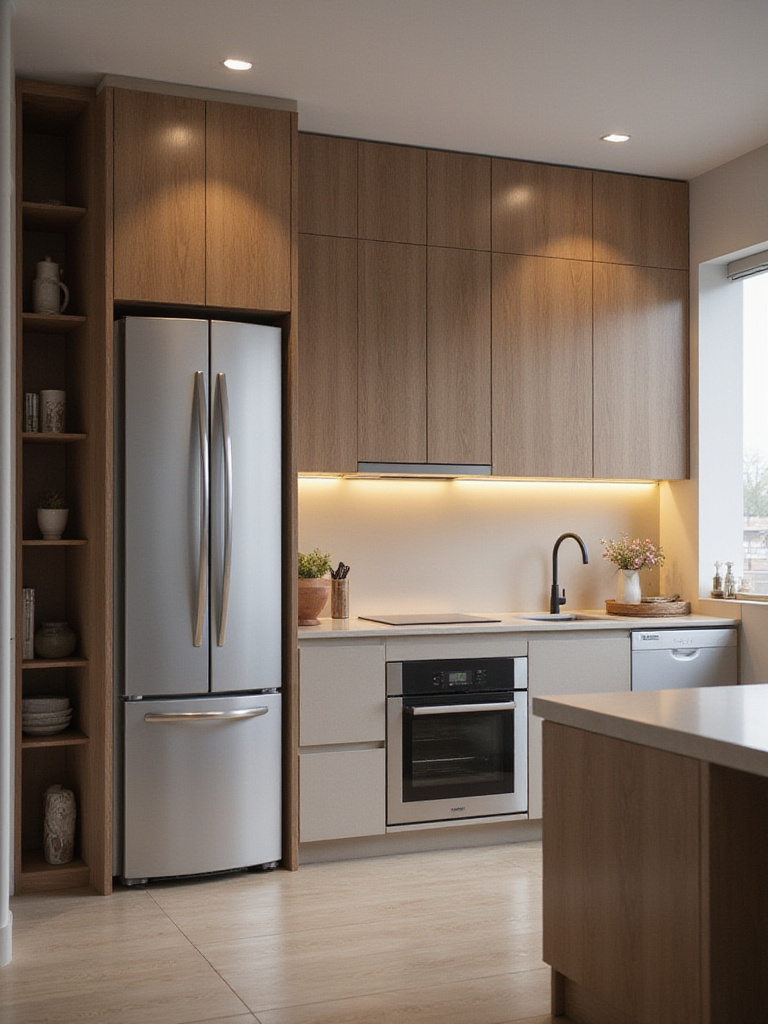
Single-wall configurations represent one of the most space-efficient approaches to kitchen design small, consolidating all major elements—sink, stove, refrigerator, and storage—along one continuous wall. This linear arrangement maximizes open floor space while creating a streamlined workflow that can be surprisingly functional when properly planned.
The key to success lies in meticulous vertical planning and smart appliance sequencing. By arranging elements in logical order (typically refrigerator, prep area, sink, cooking zone), you create an efficient workflow that minimizes steps between tasks. Tall cabinets extending to the ceiling can increase storage capacity by 25-30% compared to standard-height installations, while pull-out pantries and deep drawers ensure nothing gets lost in the back corners.
Essential single-wall strategies include:
- Position sink centrally with refrigerator and stove flanking it
- Utilize full wall height with stacked or extra-tall cabinets
- Incorporate pull-out pantry systems for maximum accessibility
- Install under-cabinet lighting to enhance workspace functionality
The interplay between vertical storage and horizontal workflow creates a surprisingly efficient culinary workspace.
3. Explore L-Shape Layouts to Utilize Corner Space
L-shaped configurations excel in kitchen design small scenarios by efficiently utilizing two adjacent walls while maintaining open floor space for traffic flow. This layout naturally forms a compact work triangle between major appliances while providing significantly more counter space than single-wall arrangements.
The corner area, often problematic in kitchen design, becomes a valuable asset when equipped with specialized storage solutions. Lazy susans, magic corner pull-outs, and blind corner organizers can transform this potentially dead space into highly functional storage that’s easily accessible. Professional designers often recommend extending upper cabinets to the ceiling in L-shaped layouts to maximize vertical storage without compromising the open feel.
Corner optimization techniques:
- Install lazy susan systems for easy access to deep storage
- Use magic corner pull-outs to maximize blind cabinet utility
- Position primary work zones within the L for efficient workflow
- Consider corner sinks to free up straight-wall counter space
What makes this layout special is the way it balances efficient storage with natural traffic patterns.
4. Maximize Wall Height with Vertical Cabinetry Storage
Vertical space represents the greatest untapped storage potential in most kitchen design small projects. Extending cabinetry to the ceiling can increase total storage volume by 20-40% without expanding the kitchen’s footprint, providing essential homes for items that might otherwise clutter limited counter space.
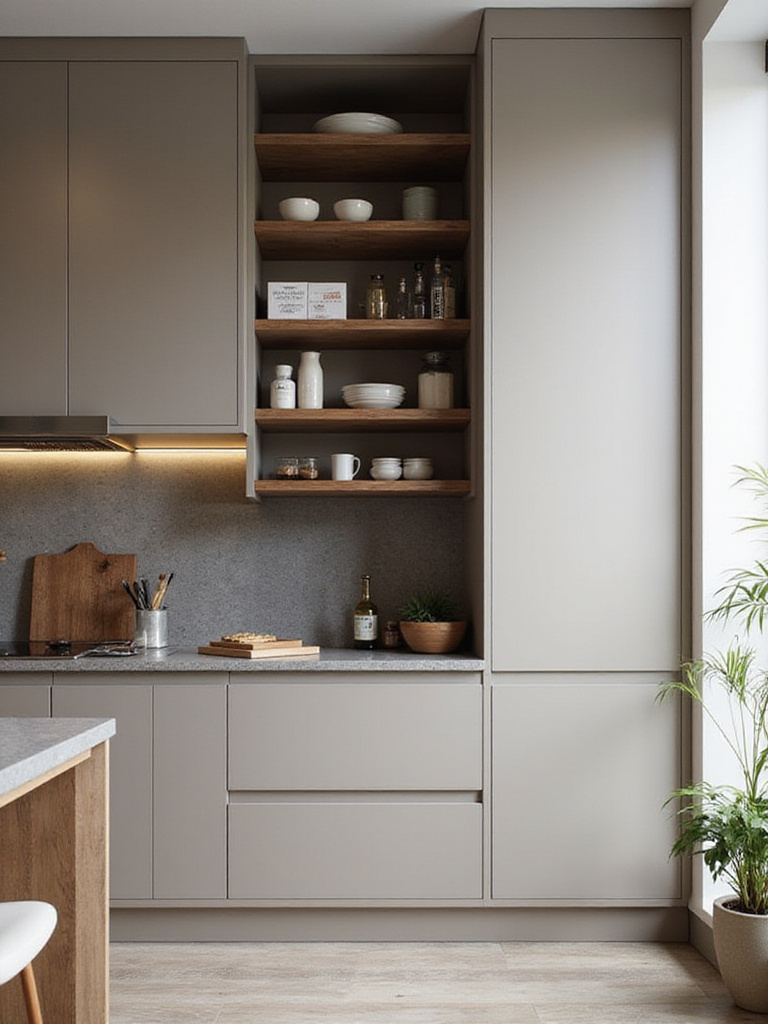
The psychological impact of tall cabinetry extends beyond storage benefits. Floor-to-ceiling installations create clean, unbroken lines that draw the eye upward, enhancing the perception of height and spaciousness. Professional installers recommend using the uppermost shelves for seasonal items or lightweight, bulky goods like paper products, keeping frequently used items within comfortable reach.
Vertical storage considerations:
- Measure ceiling height accurately before ordering custom cabinets
- Plan upper shelves for seasonal or lightweight items
- Consider pull-down shelf systems for high cabinet accessibility
- Use consistent door styles to maintain visual continuity
The craftsmanship in floor-to-ceiling installations tells a story of maximized potential in minimal space.
5. Install Slim Pull-Out Pantries for Hidden Storage
Narrow gaps between appliances and cabinets, often considered unusable space, can become highly functional storage areas with slim pull-out pantries. These units, typically 6-12 inches wide, slide out completely to reveal multiple shelves perfect for spices, oils, canned goods, and cleaning supplies.

The accessibility factor makes these pantries particularly valuable in kitchen design small applications. Unlike deep cabinets where items get lost in the back, pull-out pantries provide full visibility and easy reach to everything stored inside. A 6-inch wide unit can provide 6-8 linear feet of shelving space, effectively doubling the storage capacity of that narrow area.
Installation essentials include:
- Accurate measurement of available width, height, and depth
- Heavy-duty full-extension slides for smooth operation
- Custom or adjustable shelving to accommodate various item heights
- Matching door panels for seamless integration with existing cabinetry
Running your hand across the smooth operation reveals how efficiently narrow spaces can be transformed.
6. Utilize Toe-Kick Space for Concealed Drawers
The recessed area beneath base cabinets, typically 4-6 inches high, represents overlooked storage potential in kitchen design small projects. Converting this toe-kick space into concealed drawers provides valuable storage for flat items like baking sheets, cutting boards, or serving platters without consuming any additional floor space.

These hidden drawers offer surprising storage capacity—approximately 1-2 cubic feet per linear foot of cabinetry. The low profile makes them perfect for items you use regularly but don’t need at eye level. Professional installers emphasize the importance of using low-profile drawer slides specifically designed for toe-kick applications to ensure smooth operation and adequate clearance.
Key implementation factors:
- Minimum 4-inch height clearance for standard hardware
- Soft-close mechanisms to prevent slamming
- Non-slip drawer liners to prevent items from shifting
- Push-to-open latches for seamless cabinet face integration
The unexpected storage reveals itself when you realize how much unused space exists right beneath your feet.
7. Free Up Drawer Space with Magnetic Knife Strips
Drawer space in compact kitchens is precious real estate often consumed by bulky knife blocks or trays. Magnetic knife strips mounted on walls or under cabinets relocate knife storage to vertical surfaces, instantly reclaiming 0.5-1 cubic foot of drawer space for other essential items.
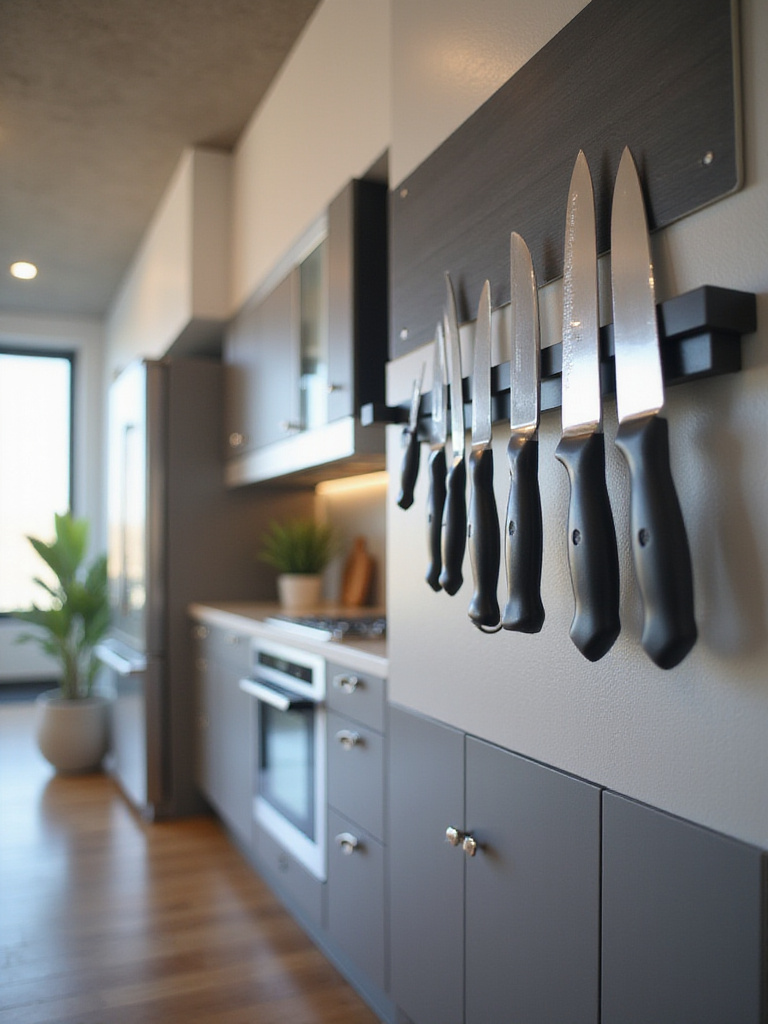
Beyond space savings, magnetic strips improve kitchen hygiene by allowing knives to air-dry completely and preventing blade damage from contact with other utensils. The visual accessibility makes selecting the right knife quick and efficient during cooking. Kitchen design small experts recommend positioning strips away from high-traffic areas and heat sources while keeping them within easy reach of primary prep zones.
Safety and functionality guidelines:
- Mount securely into wall studs or with heavy-duty anchors
- Position 6-8 inches above counter height for easy access
- Choose strips with strong rare-earth magnets for secure hold
- Consider multiple shorter strips instead of one long strip for flexibility
The magnetic pull creates an organized display that transforms tools into functional art.
8. Hang Pots and Pans to Free Valuable Cupboard Space
Cookware represents some of the bulkiest items in kitchen storage, often consuming 2-3 cabinet shelves when stacked. Hanging systems relocate these items to walls or ceiling areas, freeing up 3-5 cubic feet of cabinet space while improving accessibility and preventing scratches from stacking.
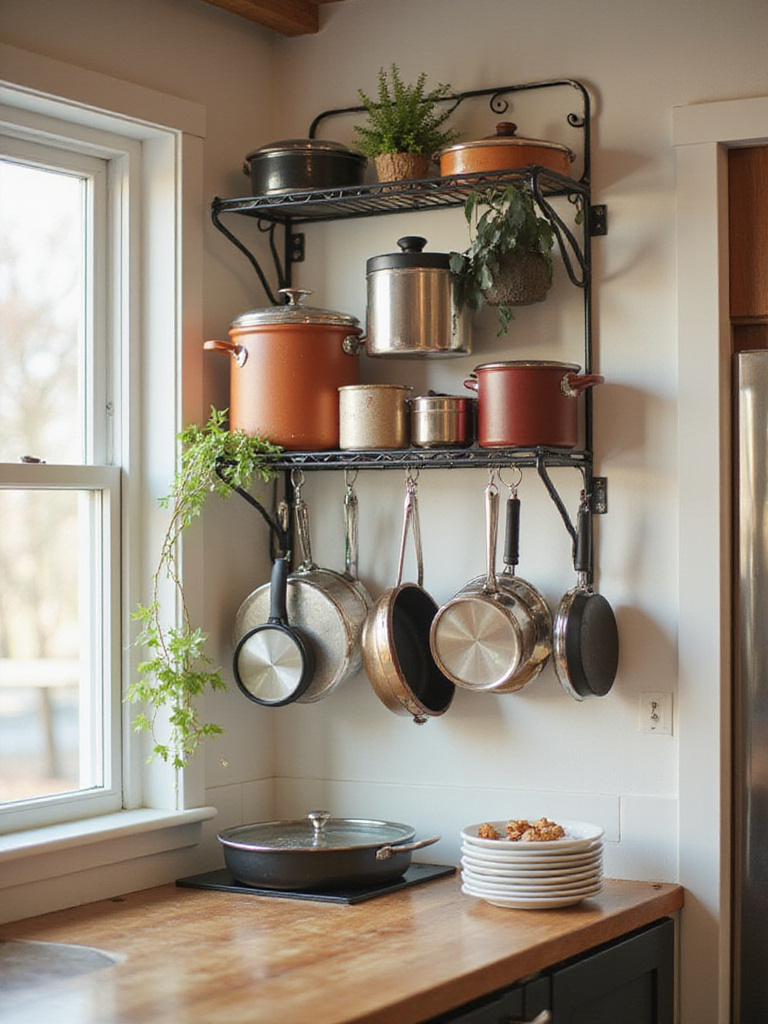
Pot racks serve dual purposes in kitchen design small applications—they provide functional storage while adding visual interest and a professional kitchen aesthetic. Wall-mounted systems work well above ranges or prep areas, while ceiling-mounted options are ideal over islands or in areas with adequate head clearance. The key is selecting hardware rated for the combined weight of your cookware collection.
Installation considerations:
- Locate wall studs or ceiling joists for secure mounting
- Calculate total weight capacity including heaviest pots
- Position for convenient access without obstructing workflow
- Choose finishes that complement existing hardware and fixtures
The suspended cookware creates a dynamic visual element while freeing precious cabinet real estate.
9. Add Storage Racks Inside Cabinet Doors for Items
The inside surface of cabinet doors represents untapped vertical storage space perfect for small, frequently used items. Door-mounted racks can increase cabinet storage capacity by 20-30% while improving organization and accessibility of spices, cleaning supplies, or food storage containers.
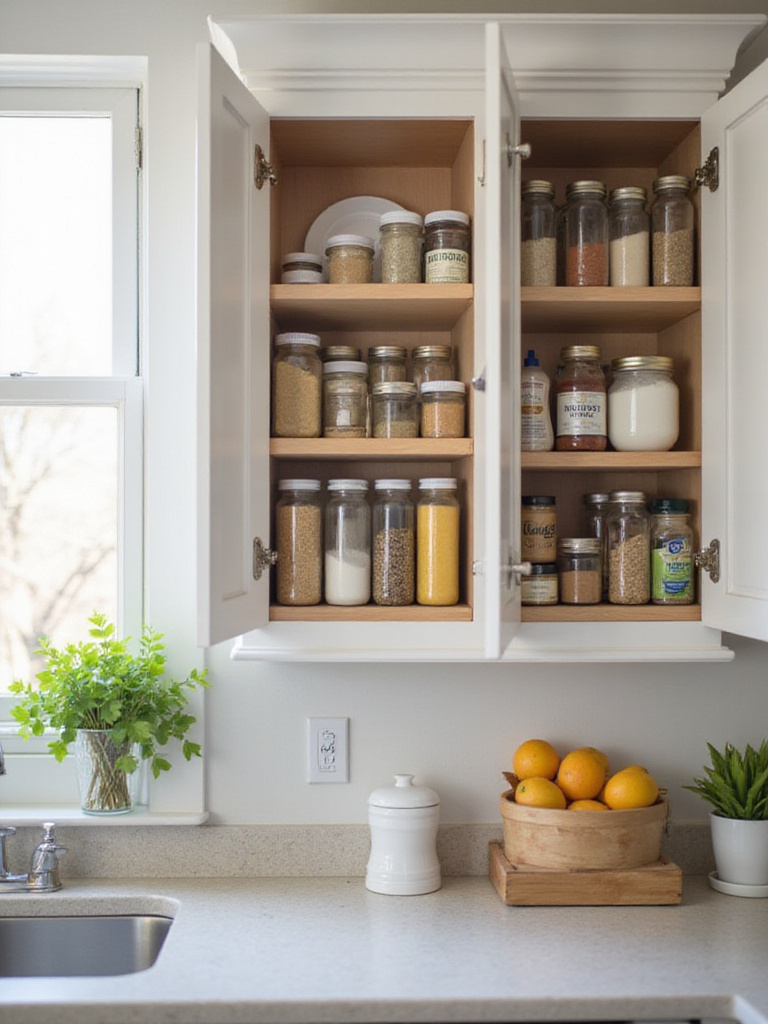
Successful door storage in kitchen design small requires careful measurement to ensure adequate clearance when doors close. The most effective installations use adjustable systems that accommodate various item sizes while maintaining easy access. Professional organizers recommend grouping similar items together and positioning frequently used products at eye level for optimal functionality.
Planning essentials:
- Measure interior clearance with door closed
- Select racks appropriate for intended items and weight
- Use heavy-duty mounting hardware for long-term reliability
- Consider swing-out systems for deeper storage access
The hidden storage capacity unfolds each time you open a cabinet door.
10. Tidy Under-Sink Clutter with Tiered Organizers
Under-sink cabinets often become chaotic storage areas where cleaning supplies disappear into dark corners around plumbing. Tiered organizers with cutouts for pipes transform this challenging space into functional, accessible storage that can increase usable capacity by up to 50%.
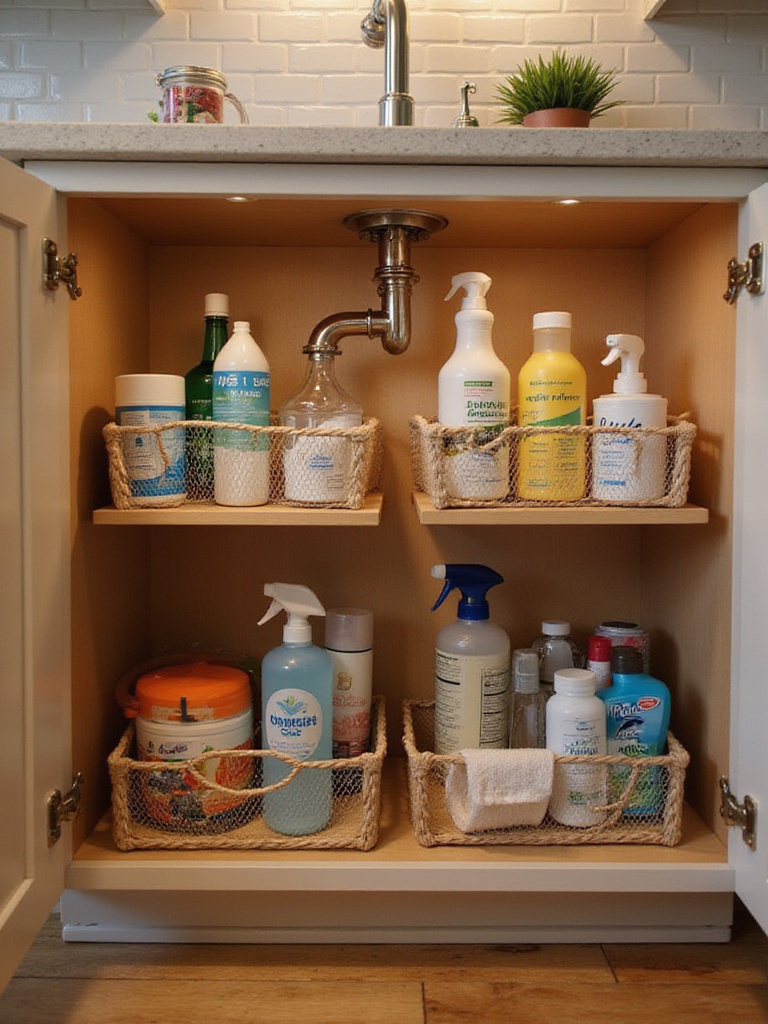
Modern organizer systems navigate around plumbing while providing multiple levels of storage for various item sizes. Pull-out drawer systems offer the best accessibility, allowing you to reach items in the back without crawling into the cabinet. Kitchen design small specialists recommend using the vertical space effectively with stackable or adjustable shelving systems designed specifically for under-sink applications.
Organization strategies include:
- Group similar items on designated levels
- Use pull-out systems for easy back-access
- Install door-mounted racks for additional storage
- Consider leak-proof bins for cleaning supplies
The transformation from chaos to order reveals how much functional space was hiding behind poor organization.
11. Select Compact Appliances to Save Counter Space
Standard-sized appliances can overwhelm kitchen design small layouts, consuming valuable counter space and creating visual clutter. Compact alternatives maintain full functionality while freeing up 6+ inches per appliance swap, space that can dramatically improve workflow and aesthetic appeal.
Multi-functional appliances offer particular value in small spaces by consolidating several tools into one unit. A quality multi-cooker can replace a slow cooker, pressure cooker, rice cooker, and steamer, reducing both counter clutter and storage requirements. Slimline dishwashers, counter-depth refrigerators, and compact ranges maintain essential functions while respecting space constraints.
Selection criteria for compact appliances:
- Prioritize multi-functional units over single-purpose gadgets
- Measure available space including depth and clearance requirements
- Consider energy efficiency ratings for long-term value
- Research reliability ratings for compact models specifically
The streamlined appliance suite creates a more spacious feeling while maintaining culinary capabilities.
12. Fit a Slimline Dishwasher for Added Convenience
Slimline dishwashers, typically 18 inches wide compared to standard 24-inch models, provide automated dishwashing convenience while saving 6 inches of valuable cabinet space. These compact units accommodate 9-10 place settings, sufficient for most small households while freeing up counter space from dish drying racks.
The space savings from choosing a slimline model can accommodate a narrow cabinet for storage or simply provide more breathing room in tight layouts. Modern slimline dishwashers offer the same efficiency and features as full-size models, including multiple wash cycles and energy-efficient operation. Kitchen design small projects often benefit from the improved traffic flow that results from the reduced appliance footprint.
Implementation considerations:
- Verify plumbing and electrical connections are accessible
- Choose integrated models for seamless cabinet appearance
- Consider noise levels in open floor plans
- Plan surrounding cabinetry to maximize space savings
The compact footprint delivers full-size convenience without overwhelming the limited space.
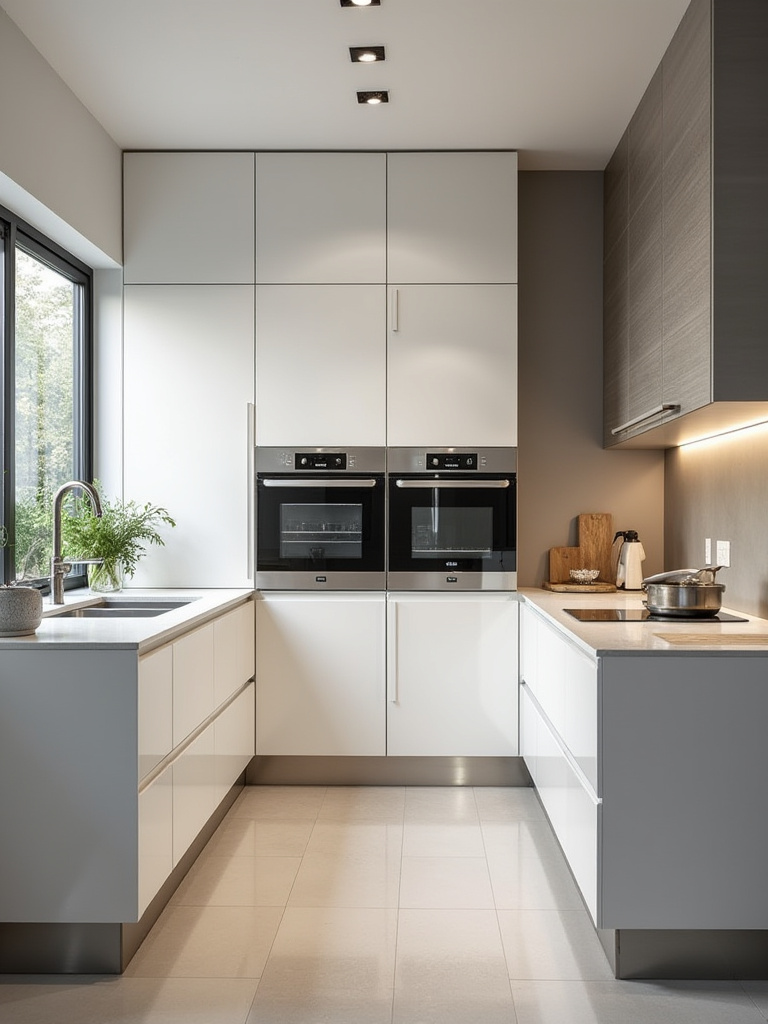
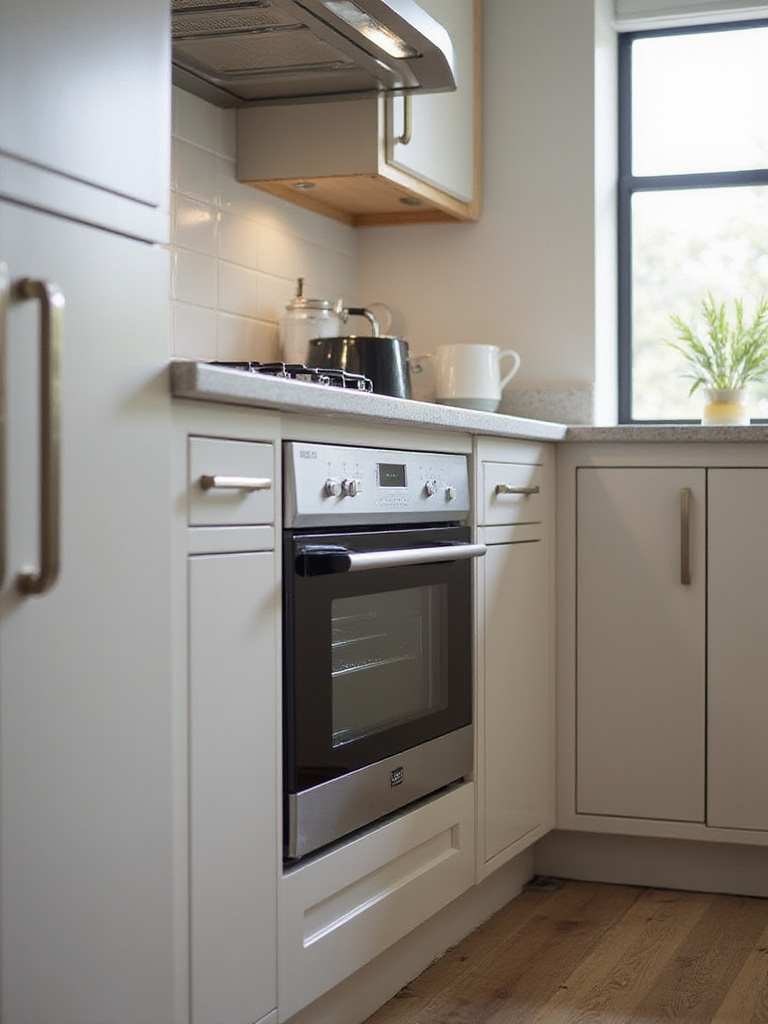
13. Integrate Appliances for a Seamless, Streamlined Look
Visual clutter from mismatched appliances can make kitchen design small spaces feel choppy and confined. Integrating appliances behind matching cabinet panels creates uninterrupted sight lines that make the space feel larger and more cohesive while maintaining a high-end, custom appearance.
Panel-ready appliances accept custom door panels that match surrounding cabinetry, effectively making them disappear into the overall design. This technique works particularly well for dishwashers, refrigerators, and freezer drawers. The seamless appearance reduces visual noise and allows decorative elements to stand out rather than competing with appliance finishes.
Integration planning steps:
- Select panel-ready models during appliance planning phase
- Coordinate with cabinet maker for precise panel sizing
- Ensure adequate ventilation per manufacturer specifications
- Plan for service access without disrupting cabinet appearance
The unified appearance creates a sophisticated backdrop that maximizes the sense of spaciousness.
14. Brighten Work Areas with Under-Cabinet Lighting
Task lighting eliminates shadows on work surfaces while adding visual depth to kitchen design small layouts. Under-cabinet LED strips provide focused illumination where you need it most—directly on cutting boards, prep areas, and cookbook reading zones—while consuming minimal energy and generating little heat.
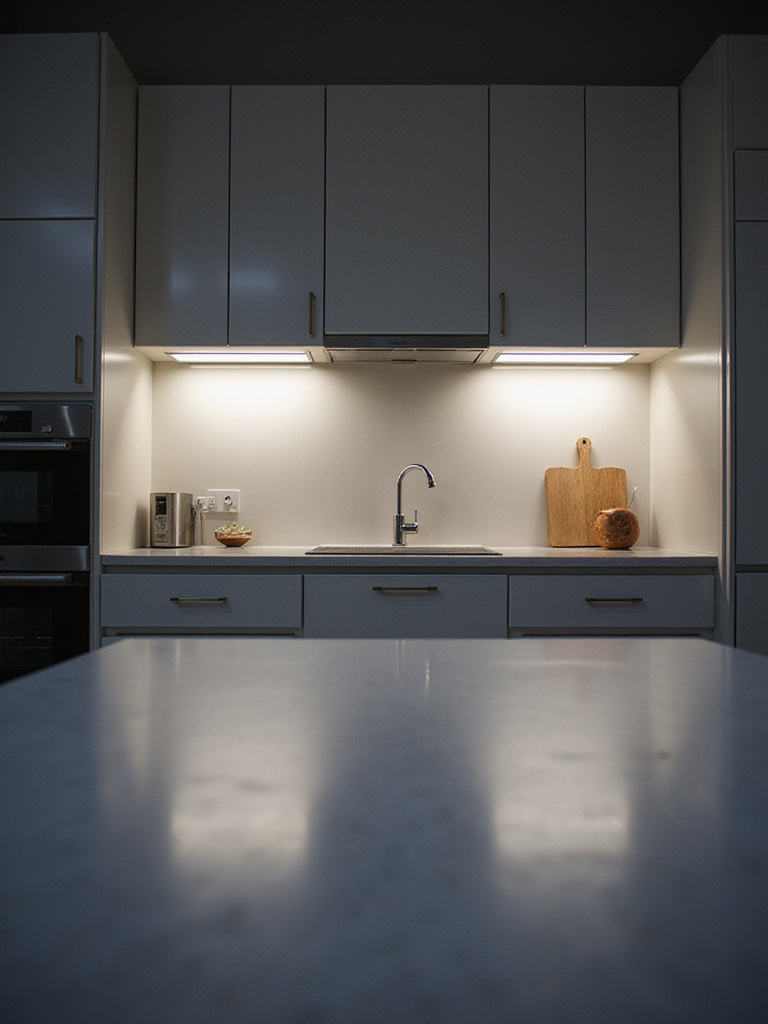
Layered lighting creates the illusion of larger space by adding visual depth and eliminating dark corners that can make small kitchens feel cramped. Dimmable LED systems allow you to adjust brightness for tasks or create ambient lighting for entertaining. The improved visibility also enhances safety by clearly illuminating potential hazards during food preparation.
Lighting installation essentials:
- Choose color temperature appropriate for food preparation (3000K-4000K)
- Install dimmer controls for versatility
- Plan wire management for clean appearance
- Consider motion sensors for hands-free operation
As evening light filters through your space, the layered illumination transforms the atmosphere from purely functional to warmly inviting.
15. Maximize Natural Light with Minimal Window Treatments
Natural light is a powerful tool for making kitchen design small spaces feel larger and more inviting. Heavy window treatments block precious daylight and create visual barriers that make spaces feel confined. Minimal treatments like sheer panels or light-filtering cellular shades maintain privacy while allowing maximum light penetration.
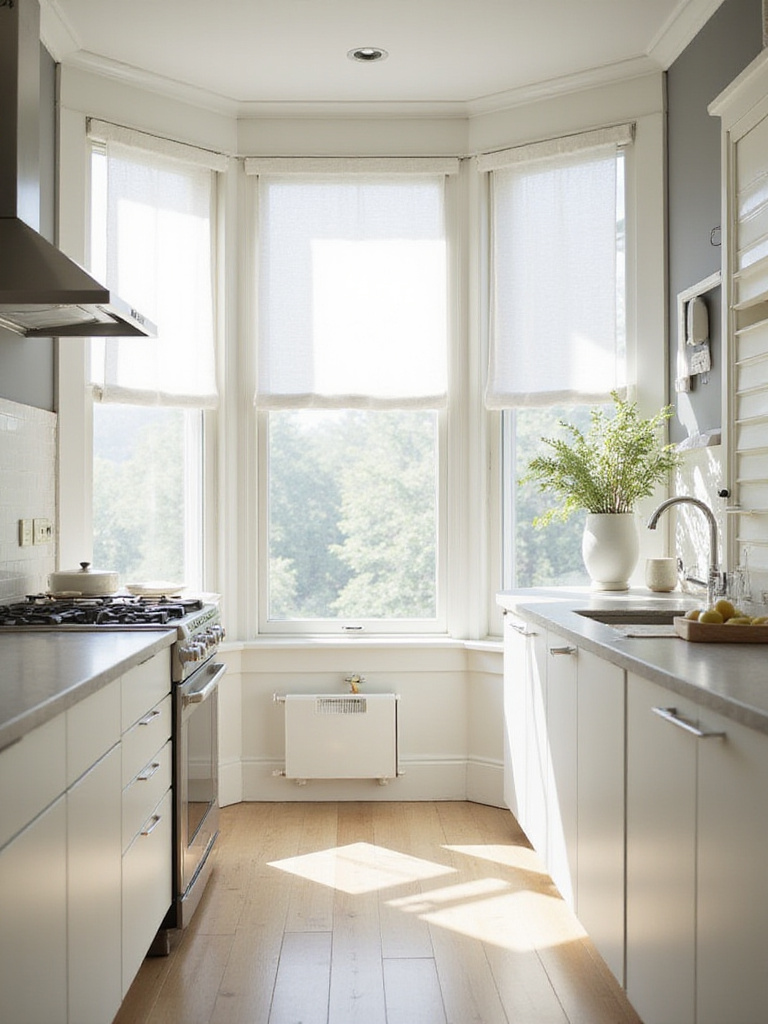
The psychological impact of abundant natural light extends beyond aesthetics—well-lit spaces feel more spacious and comfortable. Clean windows and strategic placement of reflective surfaces near windows can amplify available light throughout the day. Professional designers often recommend mounting treatments outside the window frame to maximize glass exposure when open.
Light maximization strategies:
- Choose treatments that stack completely clear of glass when open
- Keep window surfaces clean for maximum light transmission
- Position reflective surfaces to bounce light deeper into space
- Consider top-down/bottom-up shades for privacy with light
The quality of natural light changes everything about how your compact kitchen feels throughout the day.
16. Choose Light Colors to Visually Expand the Space
Light colors reflect more illumination and create the illusion of expanded space in kitchen design small applications. Surfaces with high Light Reflectance Values (LRV) push walls visually outward while dark colors advance toward the viewer, making spaces feel smaller and more confined.
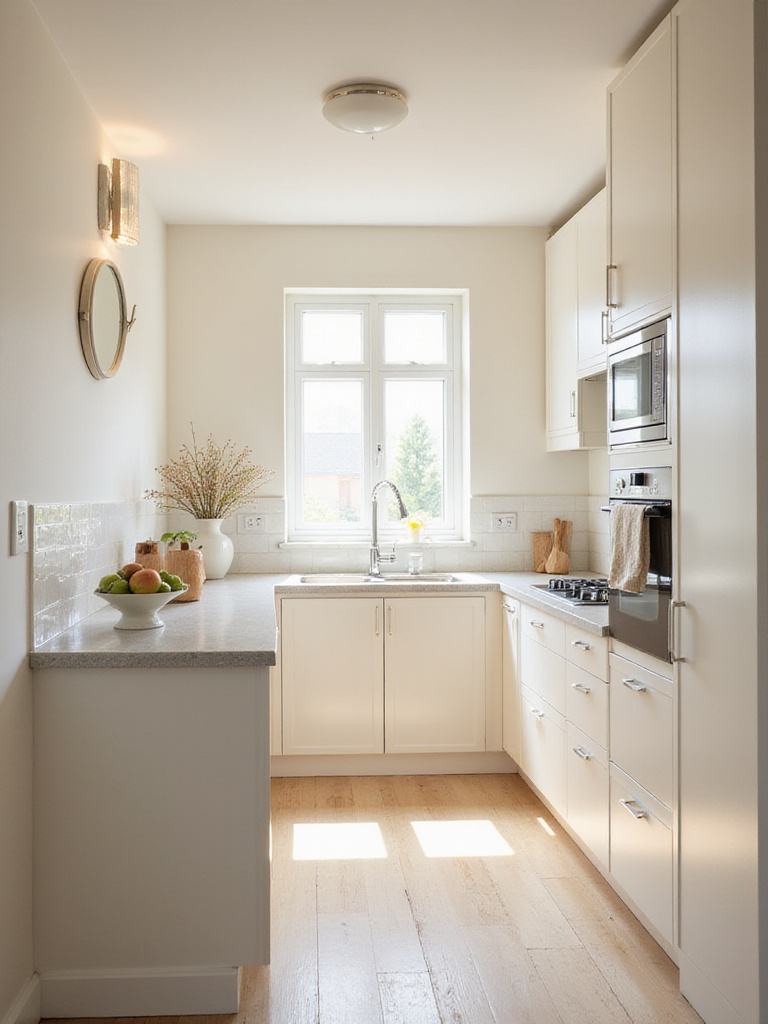
A cohesive light palette creates visual continuity that allows the eye to flow uninterrupted across surfaces. This doesn’t mean everything must be stark white—warm whites, soft grays, and pale natural tones can create depth while maintaining the space-expanding effect. Professional colorists recommend varying textures and sheens within the light palette to add visual interest without sacrificing the expansive feeling.
Color strategy implementation:
- Select paint colors with LRV ratings above 60-70%
- Coordinate cabinet, countertop, and wall colors for continuity
- Use varying textures to add depth within the light palette
- Consider slightly lighter ceiling colors to enhance height perception
The carefully curated palette creates a serene backdrop that makes your compact kitchen feel surprisingly spacious.
17. Use Reflective Backsplashes to Bounce Light Around
Reflective backsplash materials act like subtle mirrors, capturing and distributing both natural and artificial light throughout kitchen design small spaces. High-gloss ceramics, glass tiles, or polished metal surfaces can significantly brighten the room while adding visual depth that pushes walls outward.
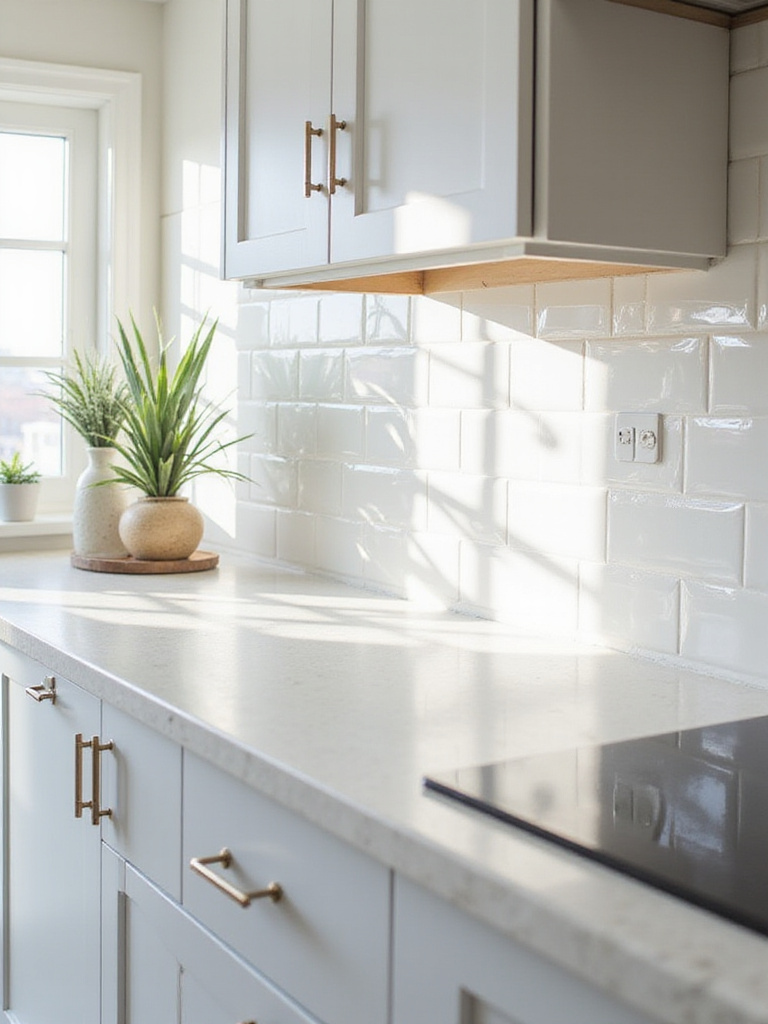
The key to successful reflective backsplashes lies in considering what they reflect. Mirror-like surfaces can multiply visual clutter, while materials with subtle texture provide light distribution without creating distracting reflections. Back-painted glass offers excellent light reflection with easy maintenance, while high-gloss subway tiles provide classic appeal with enhanced brightness.
Reflective material considerations:
- Balance reflection with maintenance requirements
- Consider viewing angles and what surfaces will be reflected
- Coordinate with under-cabinet lighting for maximum effect
- Choose materials appropriate for kitchen moisture and heat
The interplay between light and reflective surfaces creates dynamic illumination that evolves throughout the day.
18. Create Depth with Glass-Front Upper Cabinets
Solid cabinet doors can feel heavy and imposing in kitchen design small layouts, creating visual barriers that make spaces feel enclosed. Glass-front cabinets allow light and sight lines to penetrate through the cabinetry, reducing visual weight while creating the illusion of depth beyond the cabinet face.
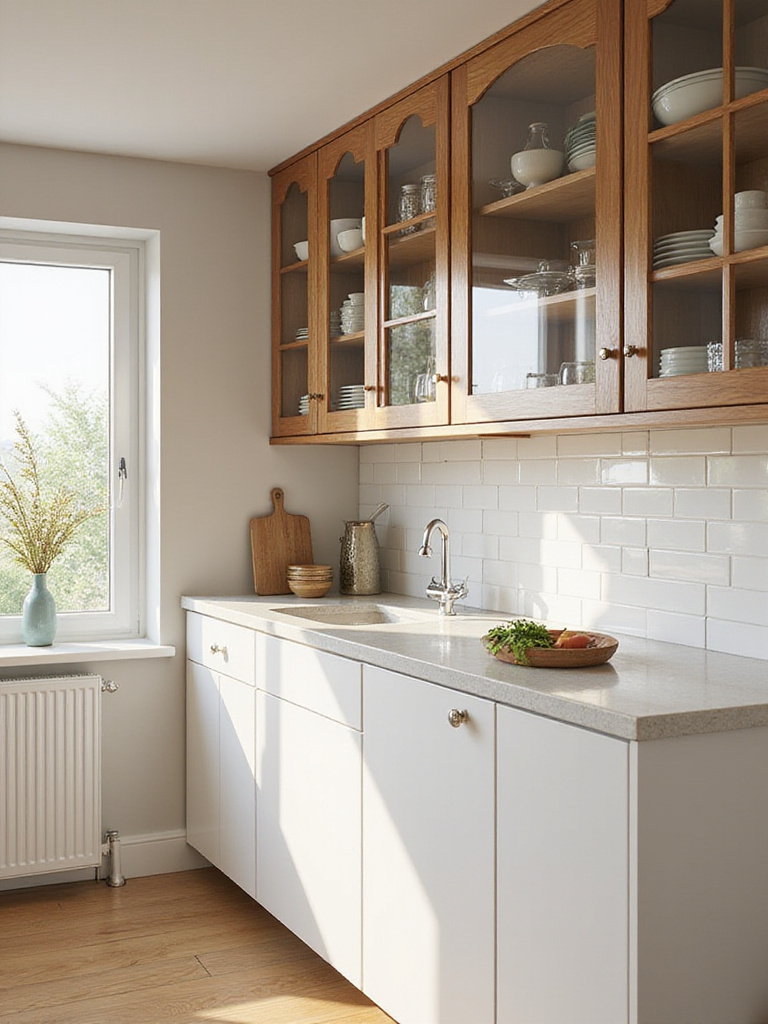
Strategic placement of glass fronts—perhaps flanking a range hood or on upper corners—breaks up monotonous solid surfaces while providing opportunities to display attractive dishware. Interior cabinet lighting enhances the effect by illuminating contents and creating a warm glow. The key is maintaining organized, visually appealing contents since everything will be visible.
Glass cabinet planning:
- Select glass types based on desired transparency and privacy
- Install interior LED lighting for enhanced effect
- Curate displayed items for visual appeal
- Consider frosted or textured glass for partial concealment
The transparent elements create visual breathing room while maintaining essential storage capacity.
19. Introduce a Mobile Island for Prep and Storage
Fixed elements in kitchen design small layouts can’t adapt to changing needs throughout the day. Mobile islands on locking casters provide flexible workspace that can be positioned where needed for specific tasks or moved aside to create clear traffic paths during busy periods.
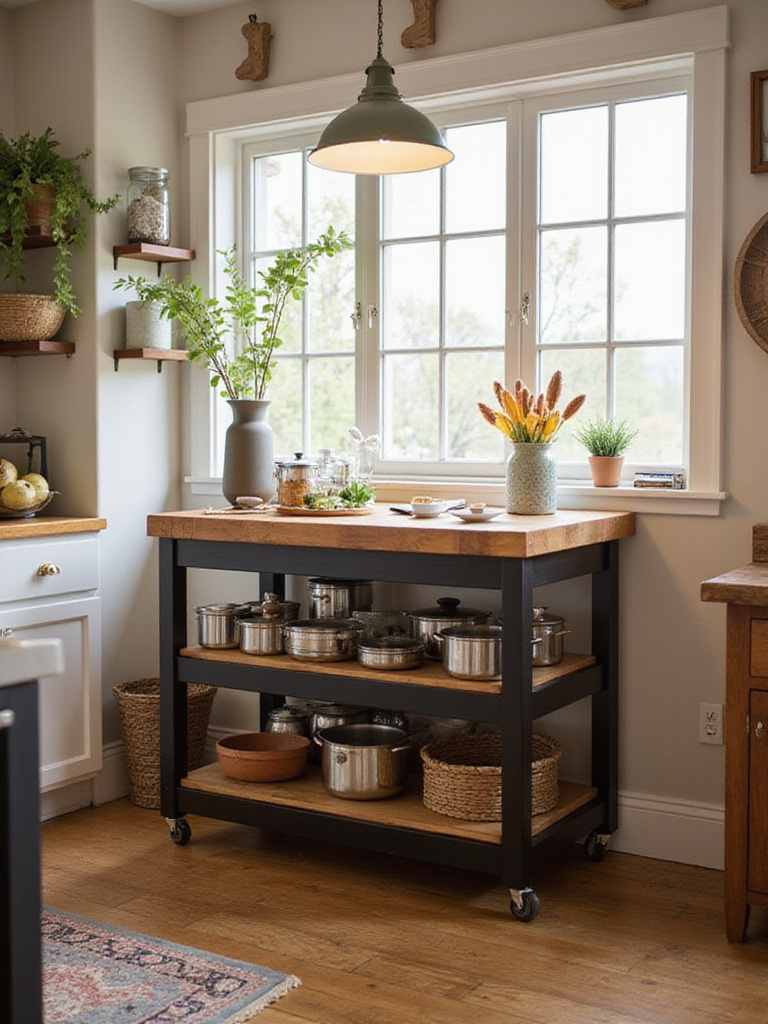
Quality mobile islands offer substantial storage beneath generous work surfaces, often including drawers, shelves, or wine storage. The ability to reposition the island means you can create temporary zones—a baking station near the oven, a beverage prep area near the refrigerator, or additional serving space for entertaining. Locking wheels ensure stability during use while maintaining mobility when needed.
Mobile island selection criteria:
- Choose appropriate size for available floor space and storage needs
- Verify wheel quality and locking mechanisms for stability
- Consider countertop materials that complement existing surfaces
- Plan for electrical outlets if appliance storage is desired
The dynamic workspace adapts to your cooking style while providing essential storage in an efficient footprint.
20. Add a Fold-Down Table for Flexible Dining Space
Permanent dining tables consume valuable floor space in kitchen design small layouts, often creating traffic bottlenecks and reducing functionality. Wall-mounted fold-down tables provide instant dining or workspace that disappears completely when not needed, reclaiming 6-10 square feet of floor area.
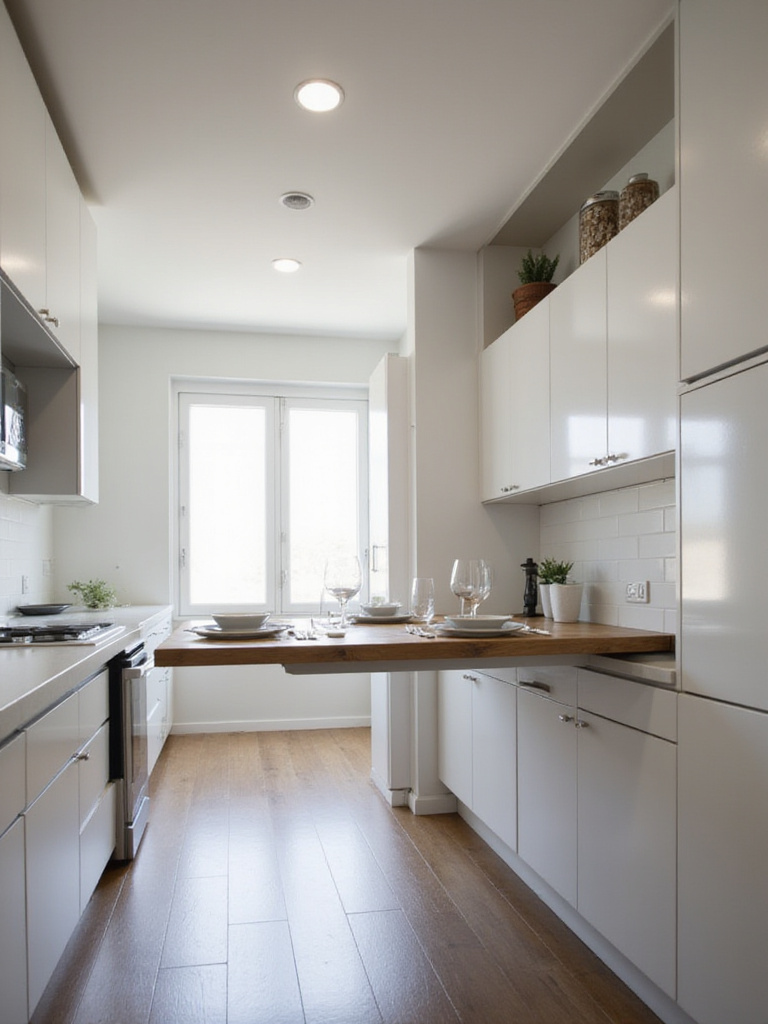
Quality fold-down mechanisms support substantial weight while operating smoothly through thousands of cycles. The table surface can serve multiple functions—breakfast bar, homework station, gift-wrapping area, or additional prep space during large cooking projects. Strategic positioning near windows creates pleasant dining spots with natural light and views.
Installation requirements:
- Locate wall studs for secure mounting of heavy-duty brackets
- Plan appropriate height for intended users and chair clearance
- Consider table surface materials for durability and appearance
- Ensure adequate space for table operation and seating
The transformation from wall-mounted panel to functional table demonstrates how thoughtful design creates space where none existed before.
21. Opt for a Smaller Sink to Gain Countertop Area
Standard double-bowl sinks can consume 30-36 inches of valuable counter space in kitchen design small layouts. Choosing a well-designed single bowl in the 20-24 inch range can reclaim 6-16 inches of precious work surface while maintaining full functionality for most households.

Modern dishwashers handle most cleaning tasks, reducing the need for large hand-washing capacity. A deeper single bowl often accommodates large pots more effectively than shallow double bowls while requiring less counter real estate. The gained counter space can accommodate essential small appliances or provide much-needed prep area in tight layouts.
Sink selection considerations:
- Assess actual washing habits vs. dishwasher usage
- Choose deeper bowls to maximize functionality in smaller footprints
- Consider workstation sinks with integrated accessories
- Plan faucet placement to minimize deck clutter
The reclaimed counter space provides breathing room that makes daily kitchen tasks more pleasant and efficient.
22. Plan Kitchen Zones for Smooth Workflow Efficiency
Efficient workflow becomes critical in kitchen design small spaces where every step matters. Creating distinct zones for cold storage, prep work, cooking, and cleanup—with related tools and ingredients stored at their point of use—minimizes unnecessary movement while maximizing the functionality of limited space.
Professional kitchen designers organize zones around the classic work triangle while adapting to space constraints. The prep zone benefits from proximity to both cold storage and the sink, while cooking implements live near the range. Cleaning supplies cluster around the dishwasher and sink area. Vertical storage within each zone keeps frequently used items accessible without cluttering limited counter space.
Zone planning strategies:
- Analyze your cooking patterns to identify frequently used item combinations
- Store tools and ingredients at their primary point of use
- Use vertical space within zones to maximize accessibility
- Create flexible zones that can serve multiple functions when needed
The thoughtful organization creates an efficient workflow that makes your compact kitchen feel surprisingly spacious and functional.
Conclusion
Transforming a small kitchen from cramped and cluttered to spacious and efficient doesn’t require expanding walls—it requires strategic thinking and smart design choices. These 22 solutions demonstrate that kitchen design small spaces can be both highly functional and aesthetically pleasing when you maximize every available inch through clever storage, strategic layout planning, and thoughtful material selections.
The key lies in viewing limitations as opportunities for creative problem-solving. Whether you implement vertical storage solutions, integrate space-saving appliances, or create flexible zones for improved workflow, each strategy contributes to a more efficient and enjoyable cooking environment. The cumulative effect of multiple small improvements can dramatically transform how your kitchen functions and feels.
Start by identifying the solutions that address your most pressing challenges—perhaps it’s the cluttered countertops that would benefit from magnetic knife strips and compact appliances, or maybe the dark corners that need under-cabinet lighting and reflective backsplashes. Remember that even small changes can yield significant improvements in both functionality and spatial perception, proving that thoughtful kitchen design small strategies can create remarkable transformations within existing footprints.