Picture this: You’re standing at your back door, looking out at the garden you love. But between you and that beautiful view is a chaotic pile of muddy boots, discarded jackets, a rogue backpack, and a basket of laundry that’s been waiting for three days. That little patch of floor isn’t just a room; it’s the airlock between your sanctuary and the wild, wonderful, messy world outside. Get it right, and it makes your whole home work. Get it wrong, and that chaos spills into every other room.
As someone who designs outdoor spaces for a living, I see this all the time. People spend a fortune creating beautiful patios and gardens but forget to design the “bridge” that connects them to their home. The mudroom, especially one with a laundry, is that bridge. It’s not just a utility space. It’s your home’s command center, the place where you shed the day, process the grime, and transition from the elements into your clean, calm interior. Forget corporate jargon and Pinterest fantasies—let’s talk about what actually works.
Foundational Planning & Layout Strategies
This is the part everyone wants to skip. They want to jump right to picking out cool-looking tile and trendy light fixtures. But if you don’t nail the foundation—the flow, the materials, the pure, unglamorous function—you’re just building a pretty room that doesn’t solve any of your problems.
1. Assess Your Family’s Daily Traffic & Gear Needs
You know what people always ask me? “How many hooks do I need?” That’s the wrong question. The right question is, “What kind of mess does my family make?” Before you design a single thing, you have to be a bit of a scientist. For a few days, just observe. Who comes in? When? What are they carrying? Is it a single laptop bag, or is it a five-year-old covered head-to-toe in mud, a teenager with a giant hockey bag, and a golden retriever who just rolled in something questionable?
The real story isn’t about some generic formula; it’s about your life’s unique rhythm. I had a client, a family with three kids in different sports, who couldn’t figure out why their mudroom was always a disaster. We did an audit and realized they needed three distinct zones for three different types of gear—cleats, ballet bags, and lacrosse sticks. The solution wasn’t just “more cubbies,” it was smarter cubbies, each tailored to a specific activity. Once each piece of gear had a logical home, the mess just… vanished.
Once you know what comes in the door, you can finally plan for it.
2. Optimize Floor Plan for Seamless Mudroom-Laundry Workflow
The best designs feel effortless. You walk in, and everything has a natural, logical flow. This isn’t an accident; it’s intentional. Think of it like a little assembly line in reverse. The first zone, right by the door, is for dropping things—wet coats, muddy boots, backpacks. This is your “dirty zone.” From there, soiled clothes should go directly into a hamper, ideally right next to the washer. That’s your “washing zone.” The “clean zone,” with your folding counter, should be last.
The biggest mistake I see is when people scatter these functions randomly. They’ll have the coat hooks on one side of the room and the shoe bench on the other, forcing them to drip water all over the floor just to take their boots off. The key is to map the path: door -> bench -> hooks -> laundry hamper -> washer -> dryer -> folding counter. It’s a simple, elegant sequence that stops dirt and clutter in its tracks. I learned this the hard way on one of my first projects, where a beautiful but poorly planned mudroom was constantly wet and messy simply because the flow was backwards.
This logical flow is the invisible architecture that makes a room feel calm instead of chaotic.
3. Select Durable, Water-Resistant Flooring for Easy Cleanup
Can we talk about why so many people get mudroom flooring wrong? They see a picture of a beautiful, light-colored hardwood floor and think, “I want that.” But a mudroom is a battleground. It’s where your home fights against rain, snow, salt, mud, and everything else you drag in from the outside. That pretty hardwood will be warped, scratched, and stained within a year. It’s a classic case of aesthetics over reality.
The shortcut I wish I’d known earlier is to think like you’re designing a commercial entryway. You need something bulletproof. My go-to choices are large-format porcelain tile with dark, sealed grout lines, or high-quality Luxury Vinyl Tile (LVT). These materials are basically indestructible. They laugh at water, they’re a breeze to clean, and modern versions look incredibly sophisticated. And here’s a pro tip: consider running a floor drain if you live in a really wet or snowy climate. It sounds like overkill, but the first time a washing machine hose bursts or you need to hose down a filthy dog, you’ll thank me.
It’s not about being boring; it’s about being smart and choosing materials that work with nature’s messes, not against them.
4. Strategically Position Utilities for Appliance Installation
This is where people can lose thousands of dollars without even realizing it. A client once had their beautiful new mudroom cabinets installed, only to discover the plumber had roughed in the dryer vent in the wrong place. The fix involved ripping out brand-new cabinetry and drywall, costing a fortune and delaying the project by weeks. All because nobody talked to each other.
Here’s the deal: before a single wall is closed up, you, your builder, your plumber, and your electrician need to be on the same page. Get the exact specs for your washer and dryer. Know where the water lines, the drain, the 240V outlet, and the vent need to go. Place them inside a recessed utility box in the wall. This keeps them hidden and allows you to push the machines nearly flush against the wall, gaining you precious inches of floor space. Planning this upfront is free. Fixing it later is a nightmare.
This step is the definition of “measure twice, cut once,” and it will save you an incredible amount of grief.
5. Designate a Drop Zone for Keys, Mail, and Small Essentials
The kitchen island is not a storage unit. But for most families, that’s what it becomes—a magnet for keys, mail, phones, and sunglasses. The reason this happens is simple: those items don’t have another designated home right at the point of entry. You need a dedicated “landing strip” the moment you walk in the door.
This doesn’t have to be complicated. It can be a simple floating shelf with a small bowl for keys, a wall-mounted mail sorter, and maybe a discreet charging station tucked into a drawer. The point is to create a specific, intentional home for the small-but-important clutter of daily life. This one tiny habit—placing things on the landing strip instead of migrating them further into the house—can have a massive impact on the overall tidiness of your home. It’s the simplest shortcut to a clutter-free kitchen counter.
Once your essentials have a home, you can focus on the bigger stuff.
Smart Storage & Organization Solutions
Once the basic layout is solid, it’s all about how you contain the chaos. Good storage isn’t just about hiding things; it’s about making your daily routine smoother, faster, and less stressful.
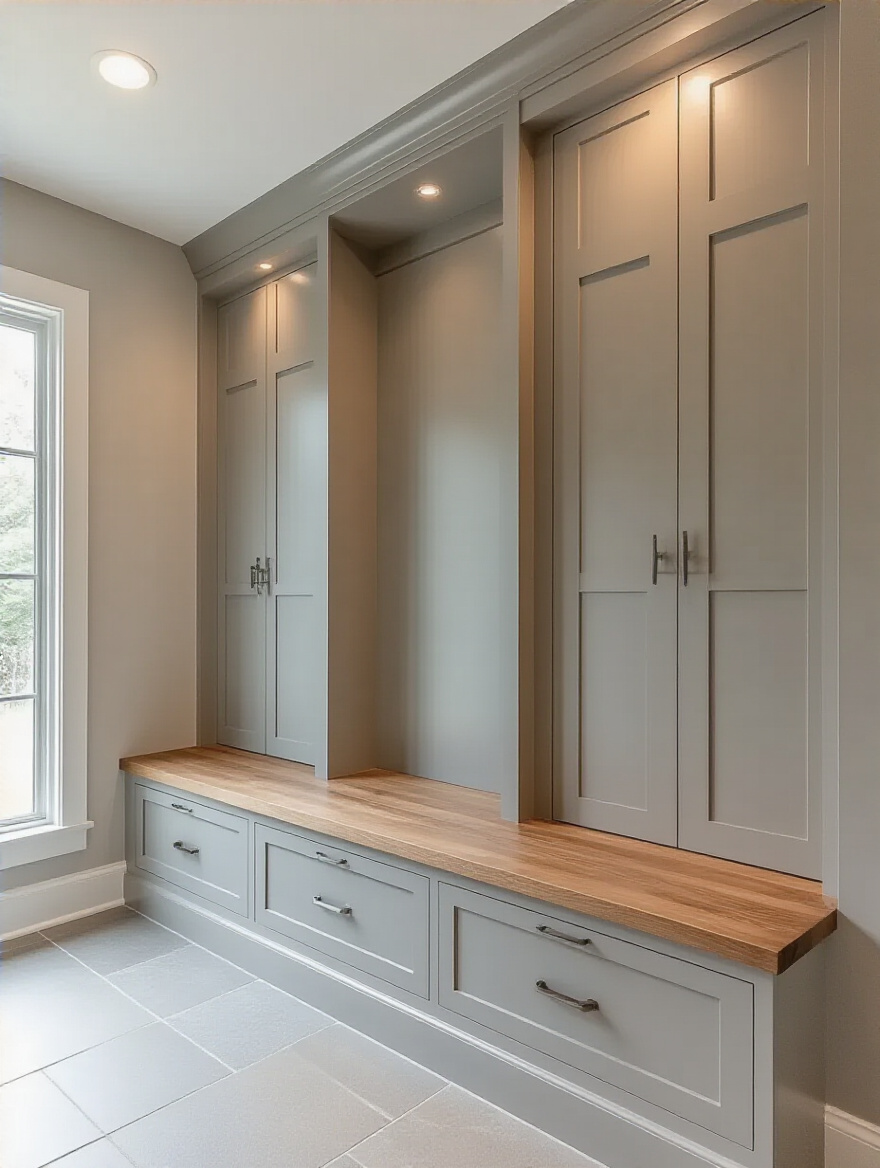
6. Incorporate Dedicated Lockers for Each Family Member
I used to think lockers were just for schools. Then I saw them transform a family’s entryway, and I became a convert. The reality of family life is an explosion of gear—every person has their own coats, shoes, bags, and sports equipment. Piling it all together on a few hooks is a recipe for disaster. Dedicated lockers are the solution.
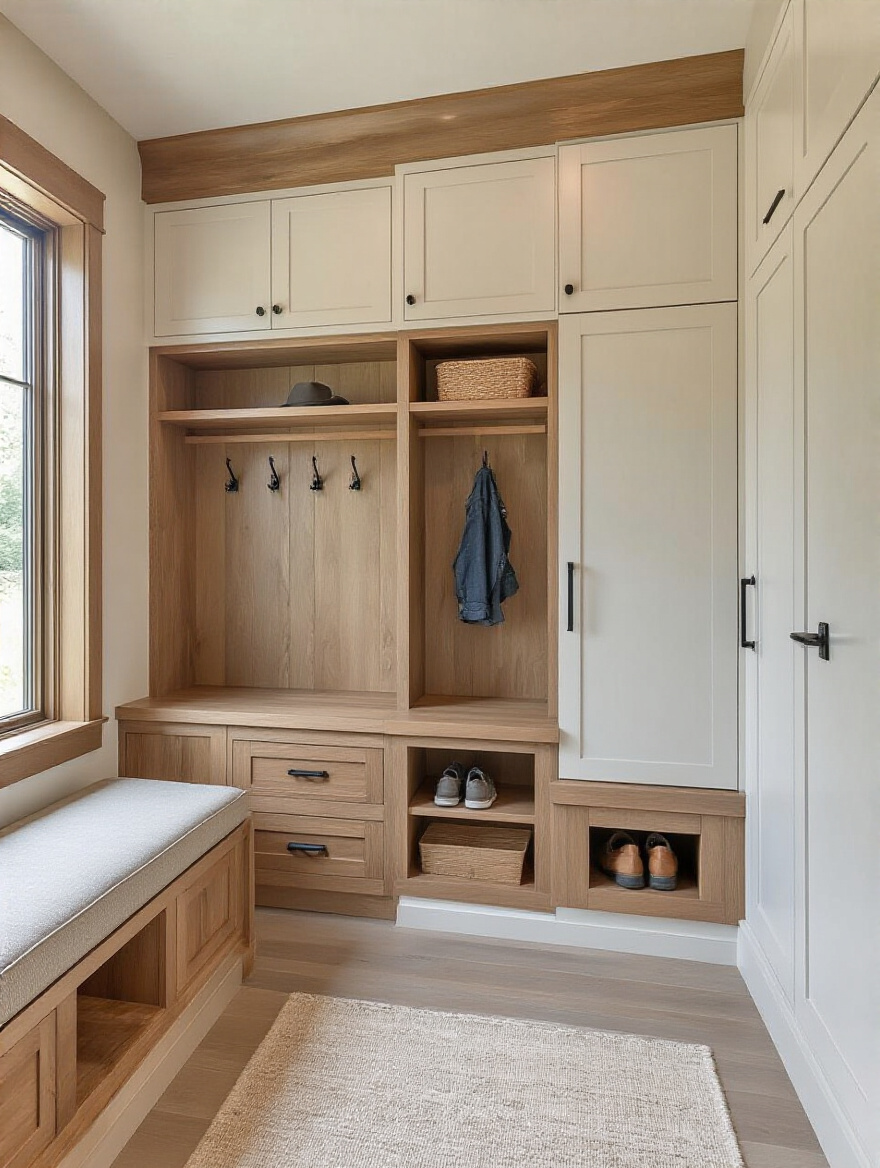
They give each person a clear sense of ownership and responsibility. The five-year-old knows exactly where her backpack goes. The teenager has a spot for his stinky gym clothes. It’s a visual trick that contains the clutter, but more importantly, it’s a behavioral one that teaches organization. For one family, we installed lockers with a power outlet inside each one. Now, the phones charge in the lockers overnight, not on the kitchen counter or in bedrooms, which was an unexpected bonus for family connection.
When everyone has their own zone, the shared space stays miraculously clear.
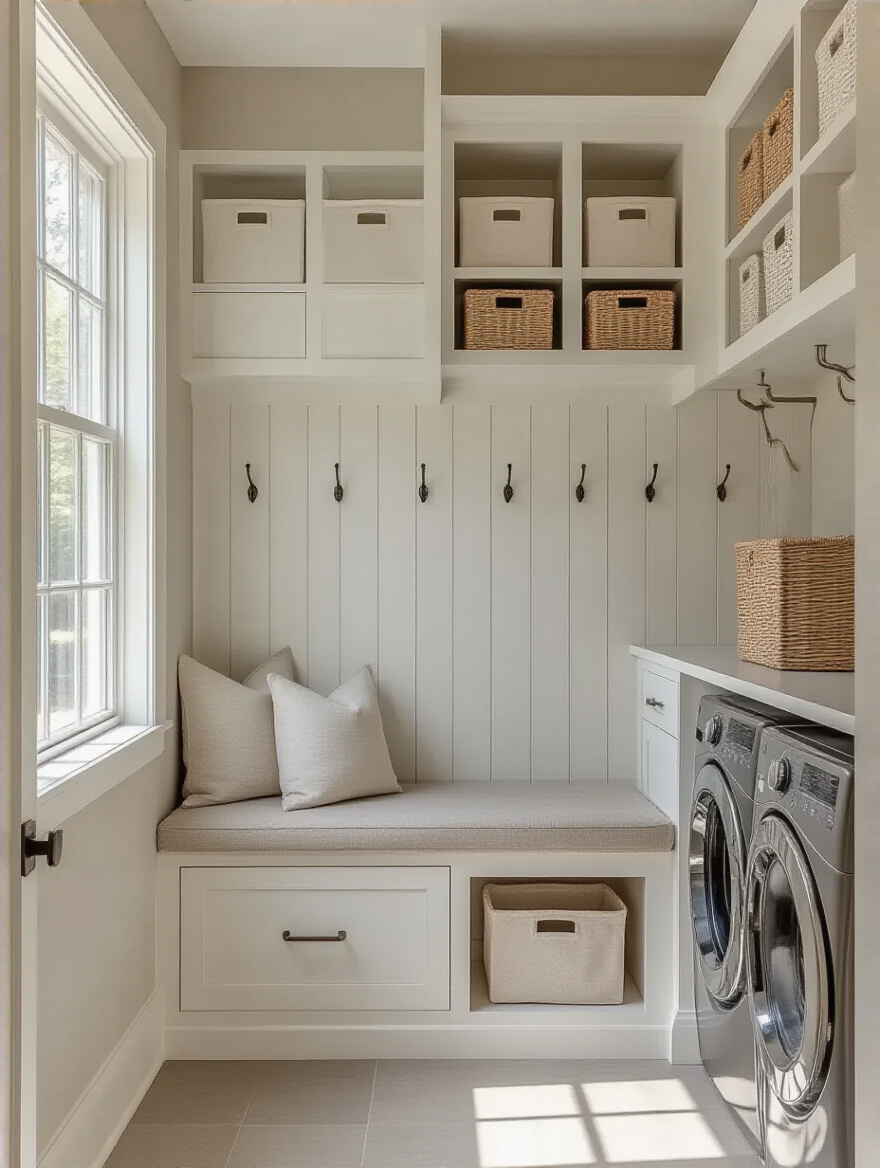
7. Utilize Vertical Storage with Stackable Shelving Units
In most rooms, we live on the floor. In a mudroom, that’s a mistake. The floor should be as clear as possible for easy cleaning and to avoid tripping hazards. That means you have to go up. Vertical space is the most under-utilized asset in any small room, and stackable shelving is the easiest way to claim it.
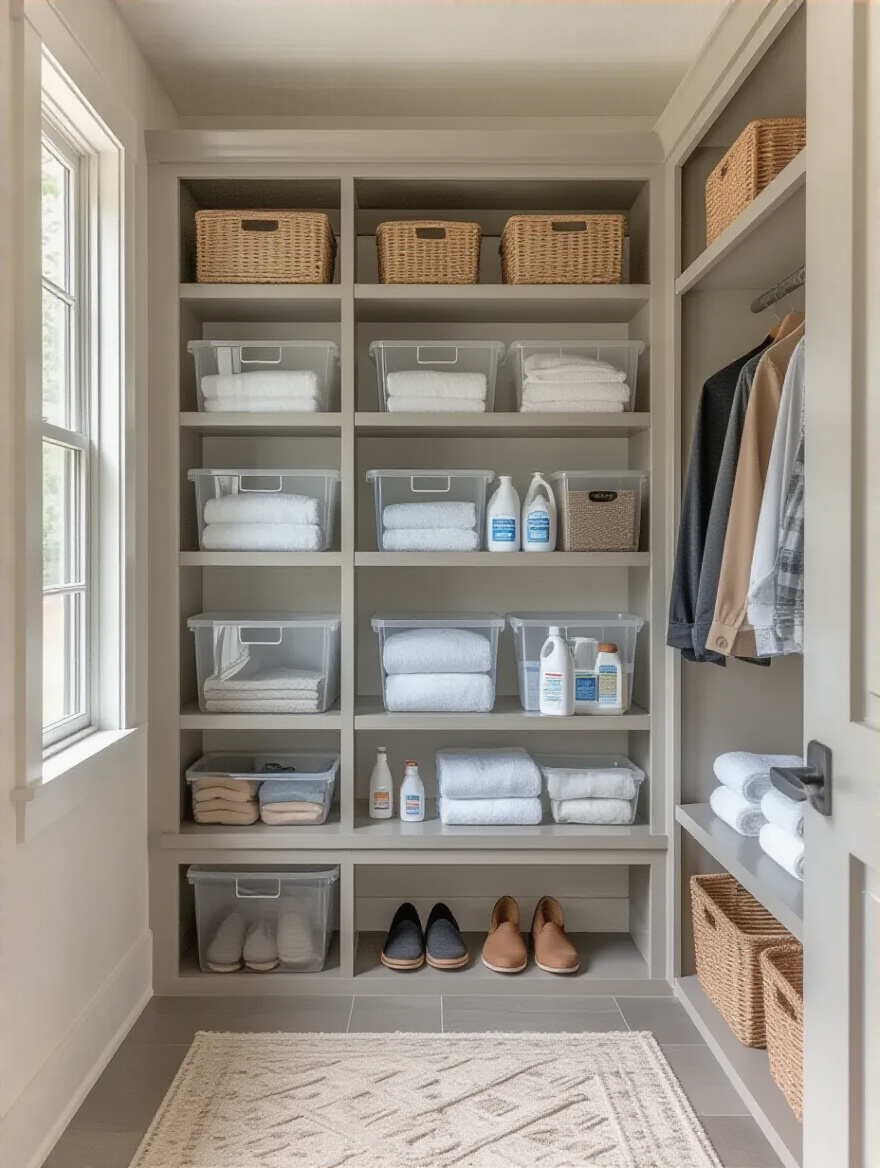
This is your spot for things like cleaning supplies, bulk paper towels, dog food, or baskets of hats and gloves. The key is to keep the frequently used stuff at eye level and the less-used stuff up high. And please, for the love of all that is holy, anchor any tall shelving unit to the wall. I’ve seen what happens when a kid tries to climb one. It’s not pretty. This isn’t about fancy custom built-ins; simple, sturdy wire or modular units can double your storage without taking up an inch of extra floor space.
Think vertically to keep your floor plan open and functional.
8. Designate Covered Storage Bins for Seasonal Items
Every home has a “rhythm of the seasons.” Winter brings out the bulky coats, salt-stained boots, and ski gear. Summer brings beach towels, sandals, and garden tools. You don’t need all of that out all the time. Covered, labeled bins are your best friend for managing this seasonal shift.
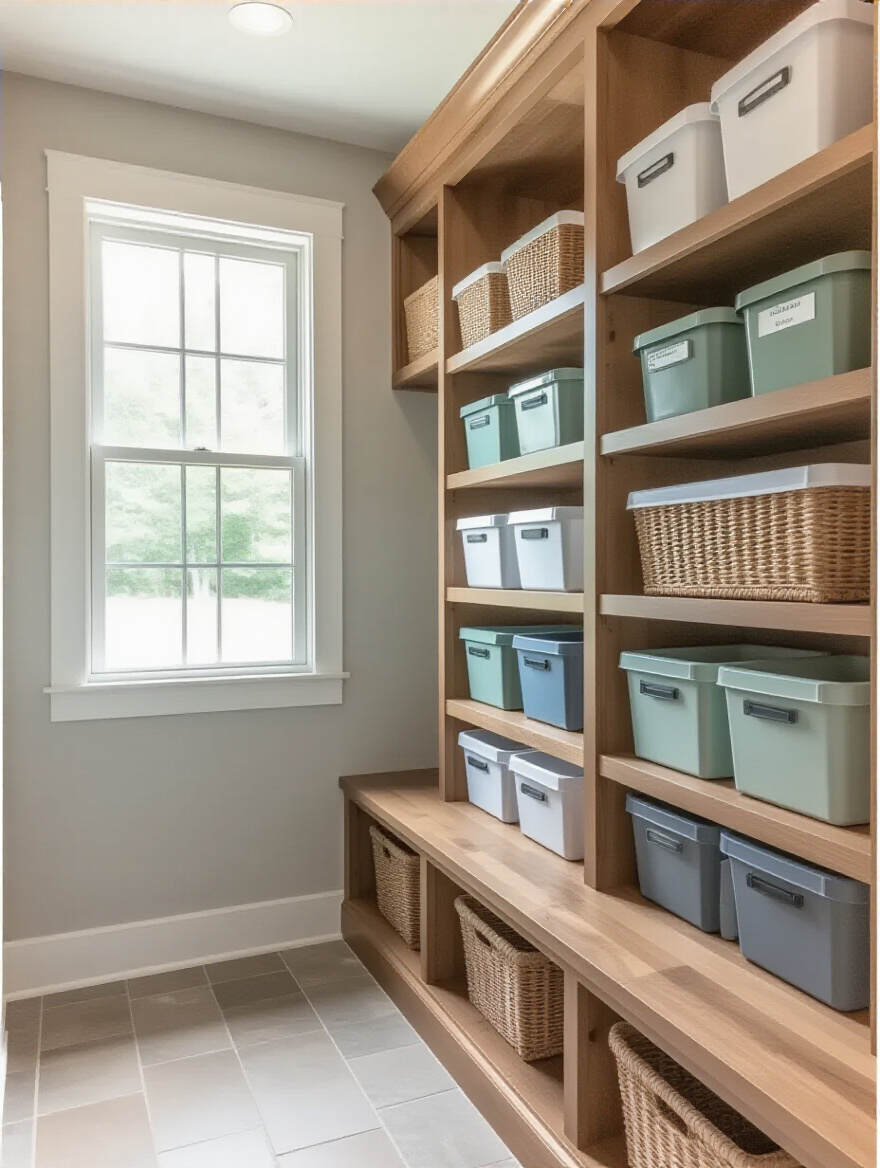
The BS everyone tells themselves is that they’ll remember what’s in that opaque gray bin on the top shelf. They won’t. The shortcut is to use clear bins whenever possible, and for everything else, get a label maker and be brutally specific: “Men’s Winter Hats & Gloves,” not “Winter Stuff.” It feels tedious in the moment, but six months from now, when you’re looking for that one specific thing, you’ll be glad you did it. This system allows your mudroom to breathe and adapt, keeping only the relevant gear accessible.
By rotating your seasonal items, you keep the space feeling organized and relevant to the life you’re living right now.
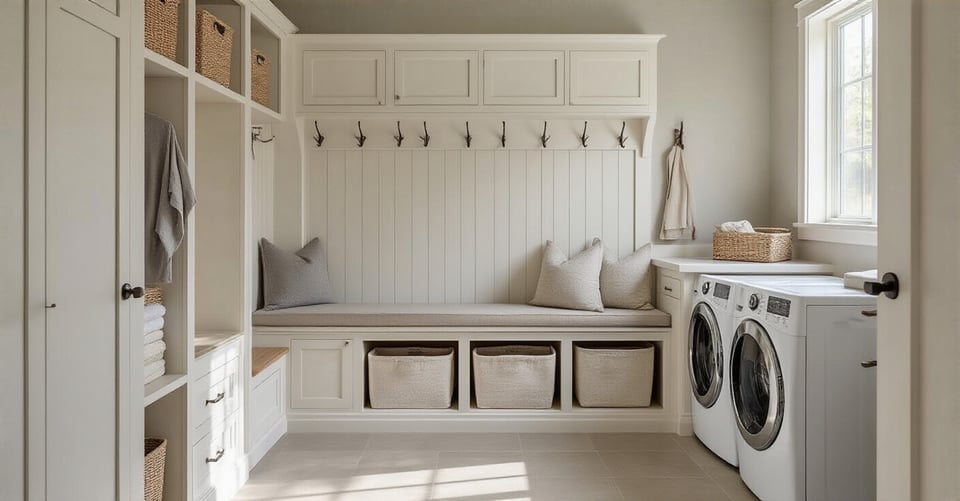
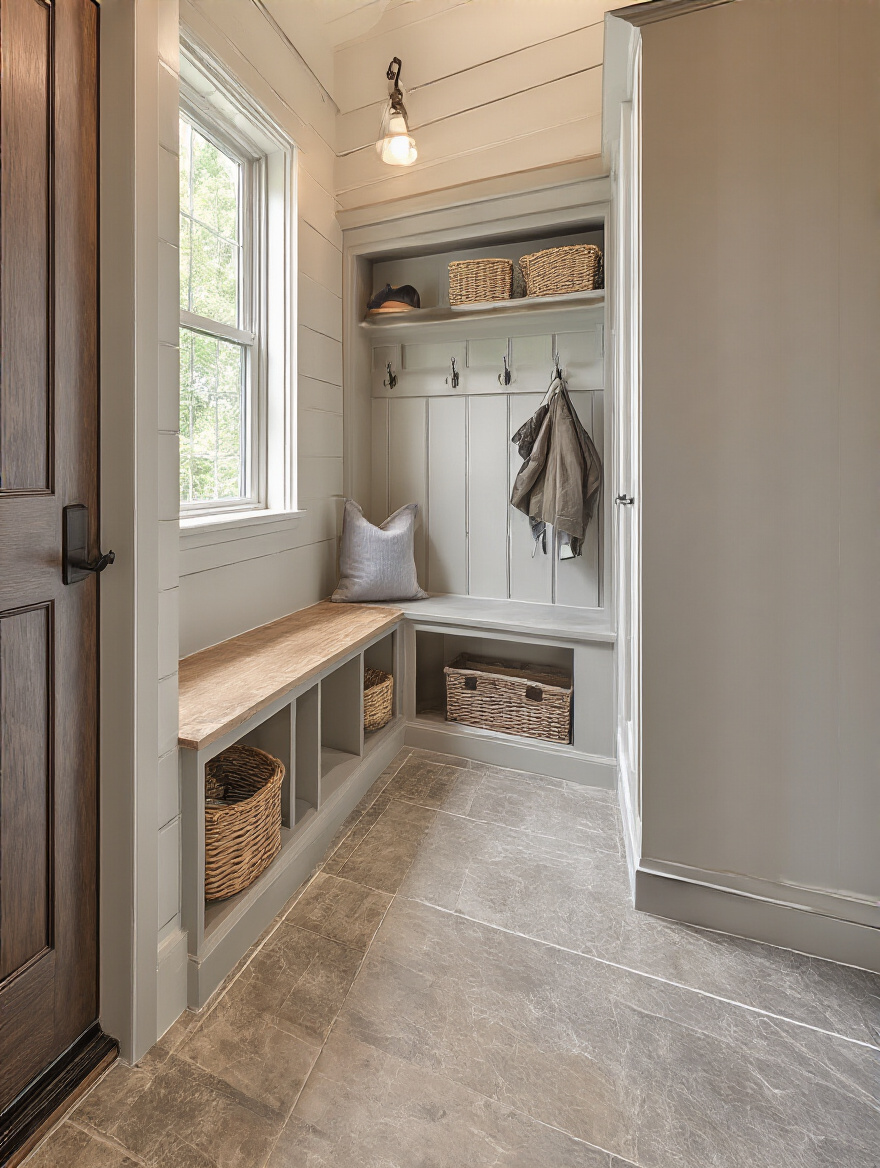
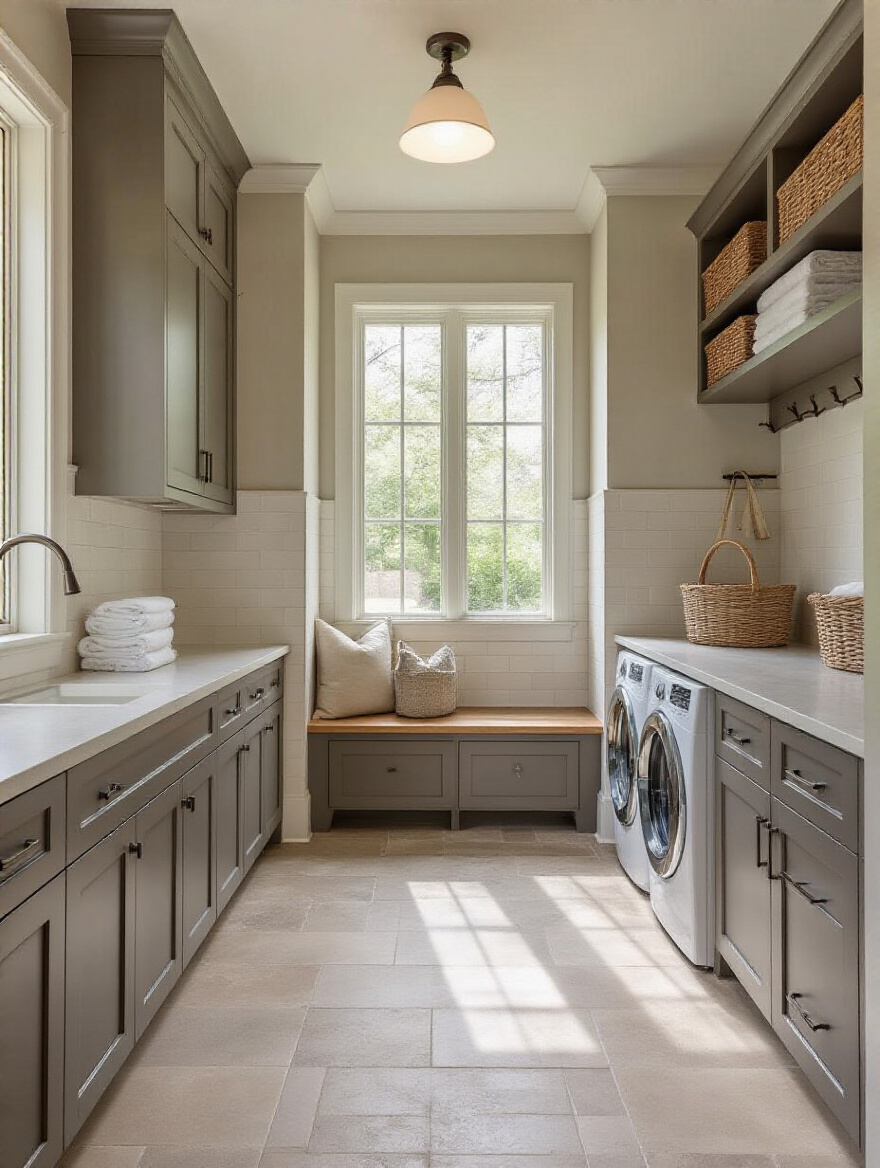
9. Install Bench Seating with Integrated Shoe Storage Drawers
A bench in a mudroom is more than just a place to sit. It’s a moment of pause. It’s where you take a deep breath before heading out into the world, and where you decompress the moment you get home. It’s a functional necessity for taking off muddy boots without hopping around on one foot. But if that bench doesn’t also have storage, you’re missing a huge opportunity.
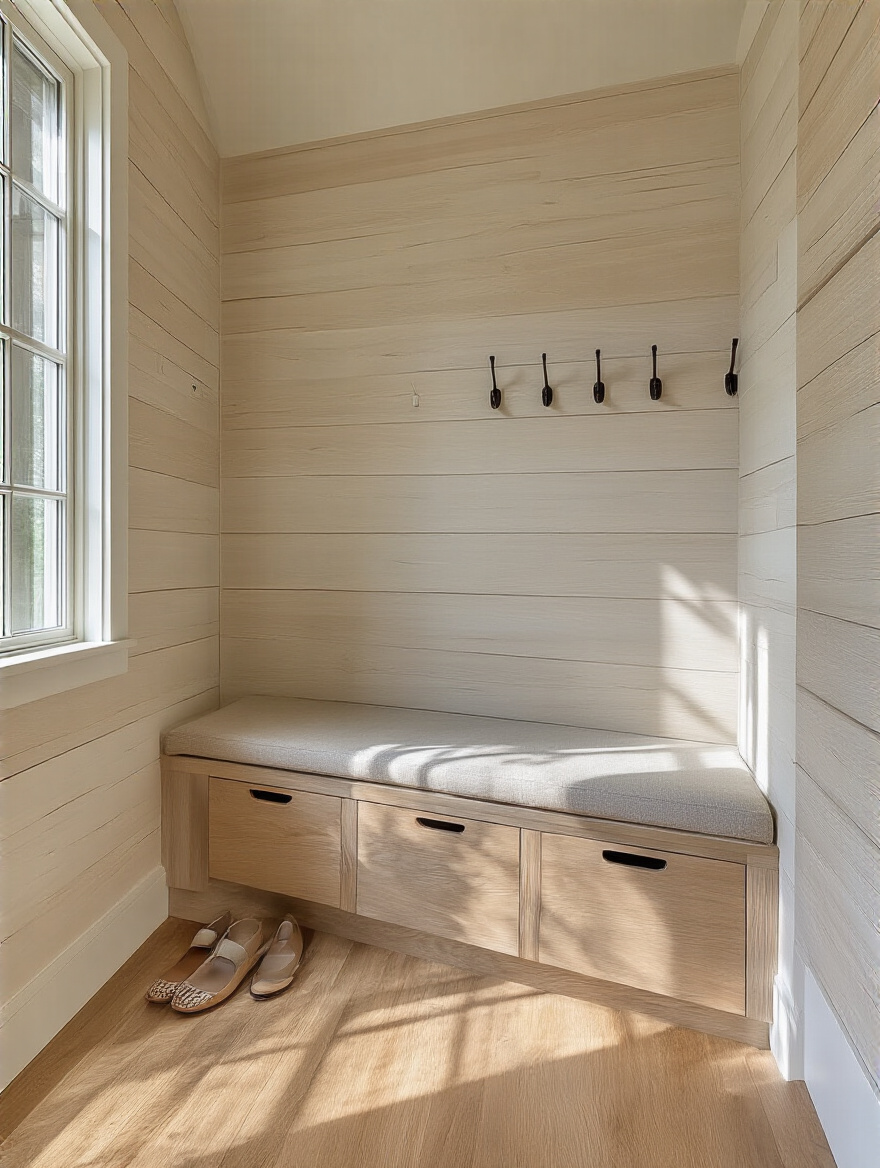
My pet peeve is seeing an open-cubby bench piled high with a jumble of shoes. It’s cluttered and visually stressful. The solution is integrated drawers. Shoes are hidden, the space looks instantly cleaner, and you’ve combined seating and storage into one elegant piece. A tip I always give clients: incorporate some kind of ventilation into the drawers, even if it’s just a few discreet holes drilled in the back. It prevents moisture and odors from building up, keeping your entryway smelling fresh.
This one piece of furniture can solve two of your biggest mudroom problems at once.
10. Create Hidden Cubbies for Off-Season or Seldom-Used Gear
Even with seasonal bins, some items are just plain awkward. Think bulky sleeping bags, extra-large pet carriers, or that giant cooler you only use twice a year. These are the things that end up cluttering the garage or a spare room. Hidden cubbies are the perfect solution.
Think about the “dead spaces” in your mudroom design. Is there space under a bench that could become a lift-top storage compartment? Is there a deep corner where you could build a tall, narrow cabinet with a door that matches the wall, making it nearly invisible? I once designed a mudroom where we built shallow, flush-mounted cabinets between the wall studs. They were perfect for things like emergency flashlights, extra dog leashes, and rolls of paper towels—all completely out of sight but easily accessible.
It’s about being clever and finding storage in unexpected places.
11. Add Wall Hooks at Varying Heights for Coats and Backpacks
If there is one thing that provides the most bang for your buck in a mudroom, it’s hooks. But not just a single row of hooks at adult height. That’s a rookie mistake. If you have kids, you need hooks at their height, too.
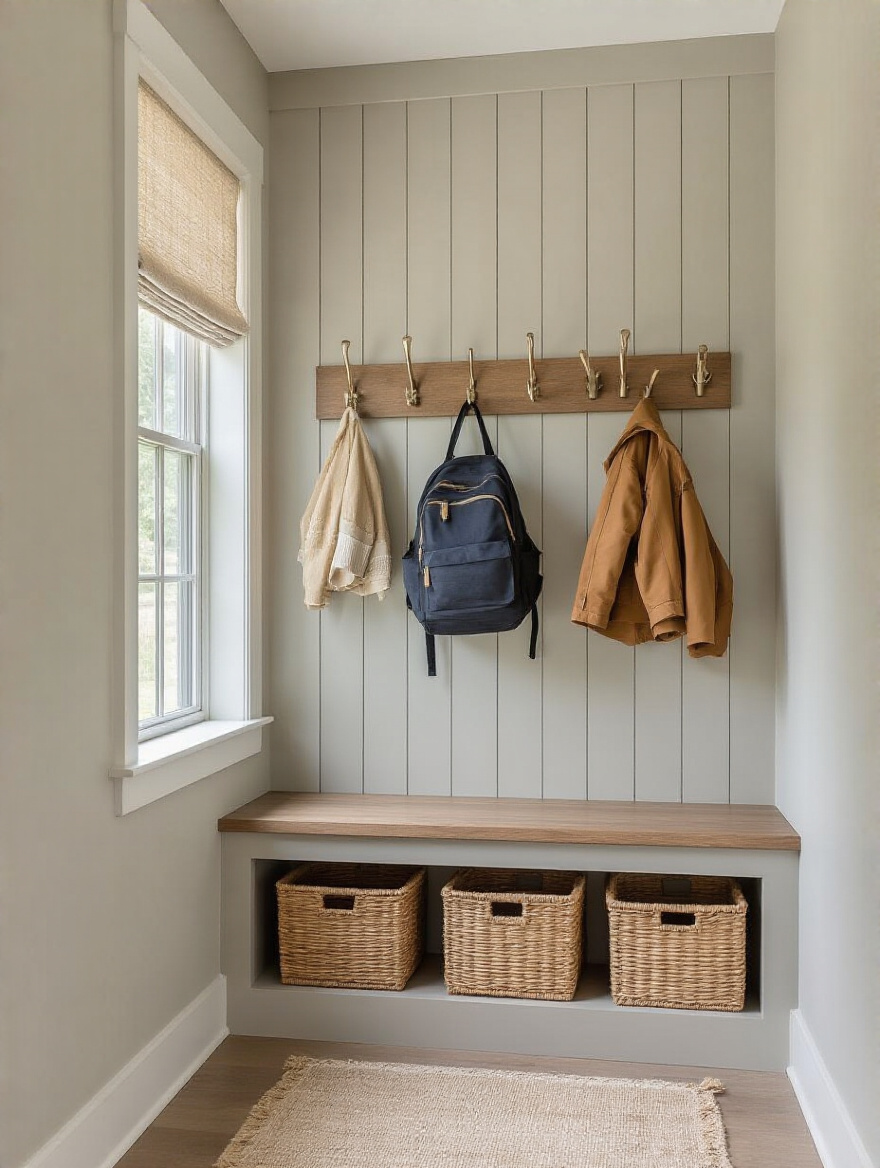
Putting hooks at 36-40 inches for little ones isn’t just a cute design choice; it’s a powerful tool for teaching independence. When a child can reach their own hook, they are infinitely more likely to hang up their own coat. It empowers them and saves you from having to do it for them. Spacing them out properly (about 8-10 inches apart) also allows wet gear to air-dry properly, preventing that musty smell. This is the simplest, cheapest, and most effective organizational tool in the entire room.
Don’t overthink it. Just add more hooks, at more heights.
Enhancing Laundry Efficiency & Convenience
Integrating laundry into the mudroom is a genius move, but only if you design it to be efficient. The goal is to stop laundry from ever migrating into your main living spaces.
12. Include Pull-Out Hampers for Effortless Laundry Sorting
Piles of dirty laundry on the floor are an eyesore. A pull-out hamper system integrated directly into your cabinetry is the solution. It’s a magic trick: the mess is there, but you can’t see it.
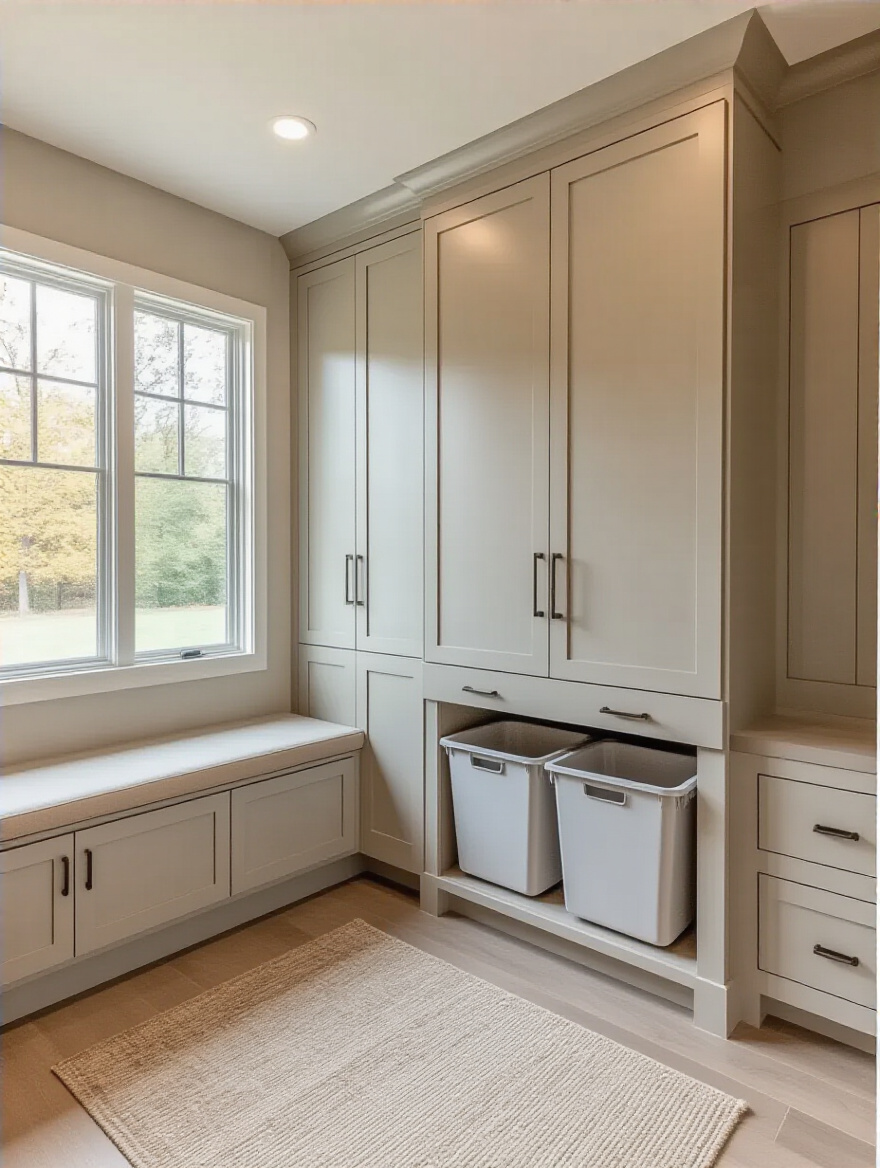
The real game-changer is using multiple bins. One for whites, one for darks, one for delicates. You sort your laundry the moment you take it off, not in one giant, overwhelming pile on laundry day. This little habit saves an incredible amount of time and mental energy. For one client with two teenage athletes, we put a three-bin sorter right at the entryway. Dirty uniforms went straight from their bags into the correct bin. It completely eliminated the “laundry mountain” that used to live in their hallway.
It turns a dreaded chore into a simple, continuous process.
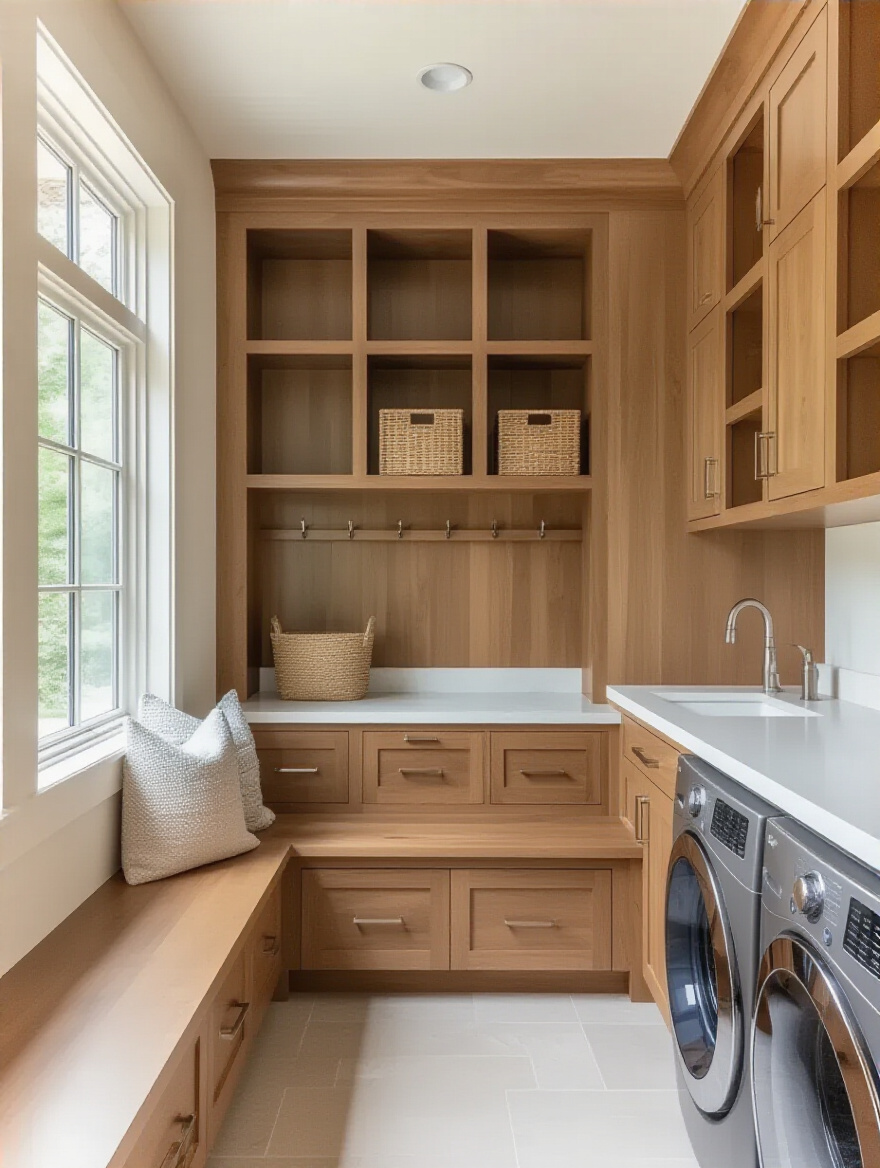
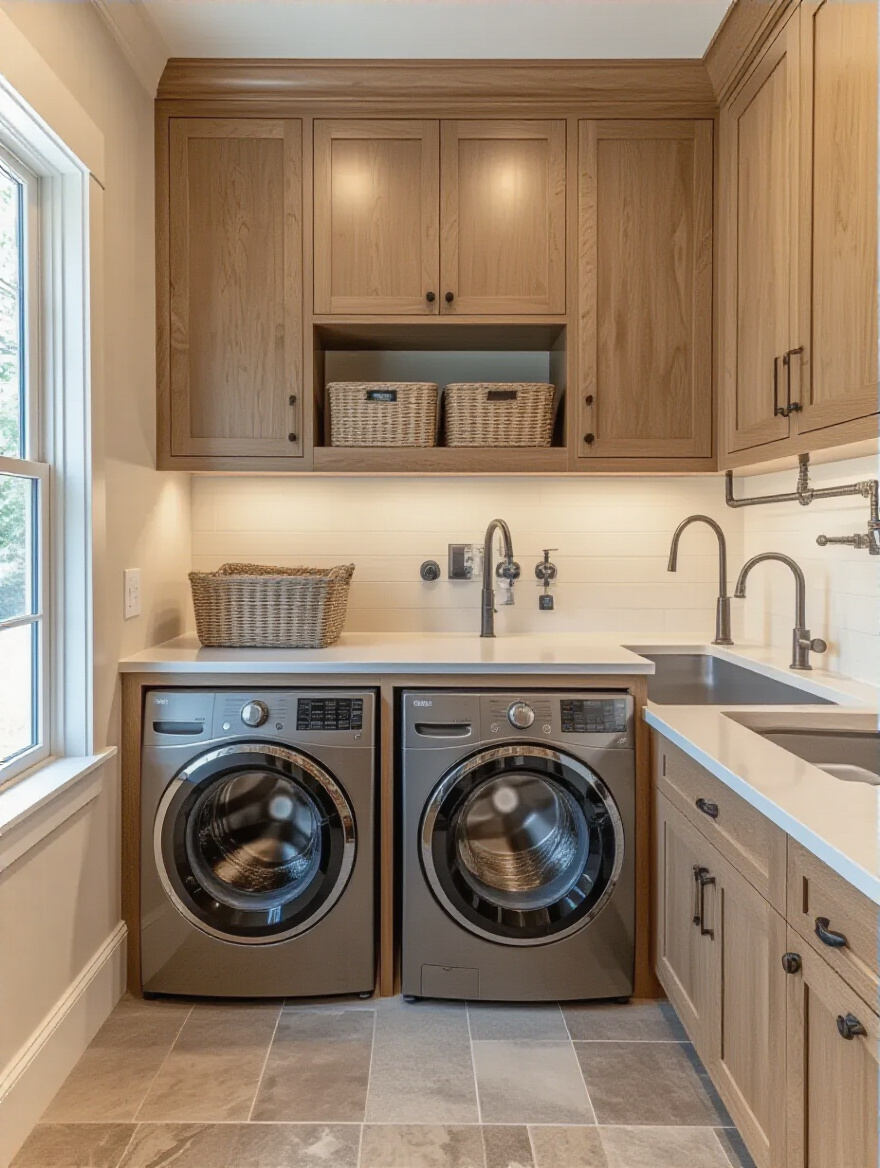
13. Install a Generous Folding Countertop for Large Items
Stop folding laundry on your bed. It’s unhygienic, it’s bad for your back, and it means your bedroom is never truly a sanctuary. A dedicated, generous folding counter in your laundry area is a non-negotiable luxury. And I mean generous—at least 30 inches deep if you can manage it.
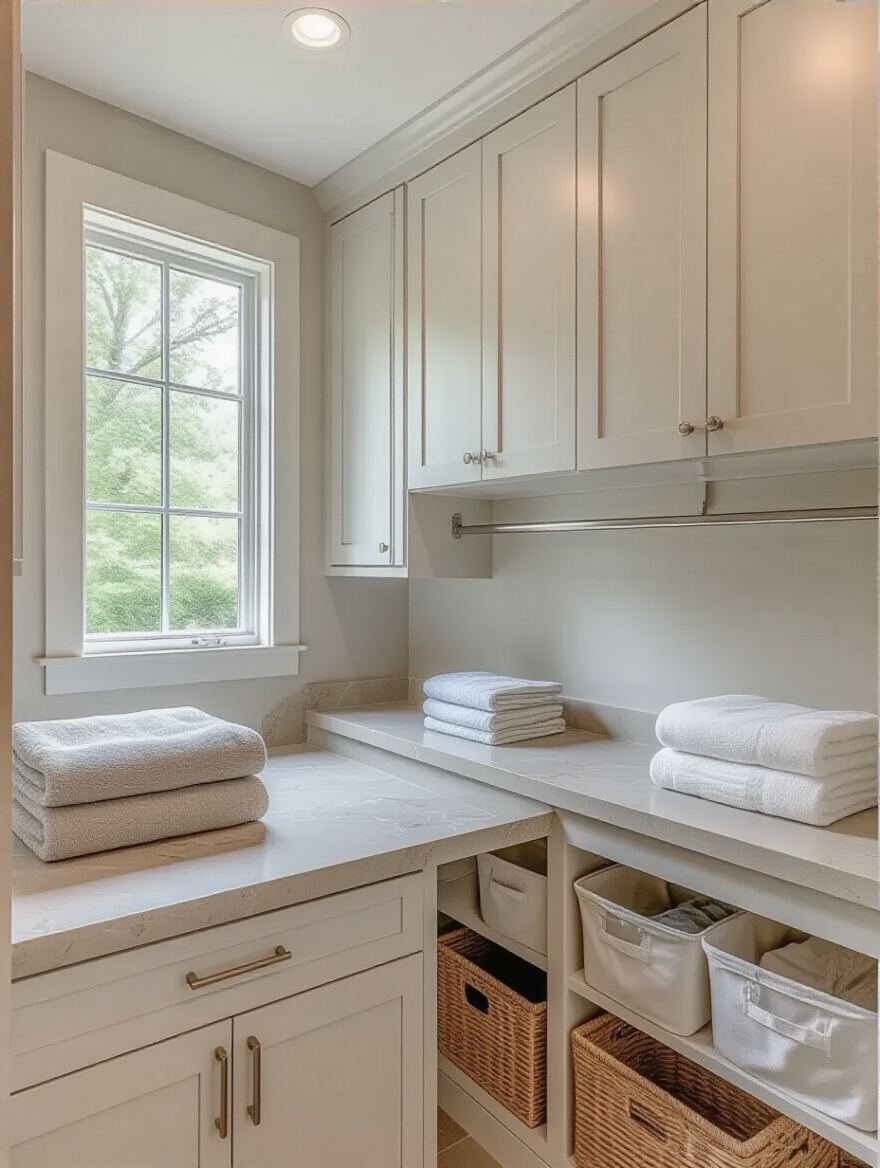
This is especially important if you have a front-loading washer and dryer. Installing a solid countertop directly over them is a no-brainer. It gives you a huge, ergonomic workspace at the perfect height. You can fold sheets, sort stacks, and treat stains without bending over or cluttering another surface in your home. It instantly makes the room feel less like a closet with appliances and more like a functional workspace.
This one surface will single-handedly make you hate doing laundry a little bit less.
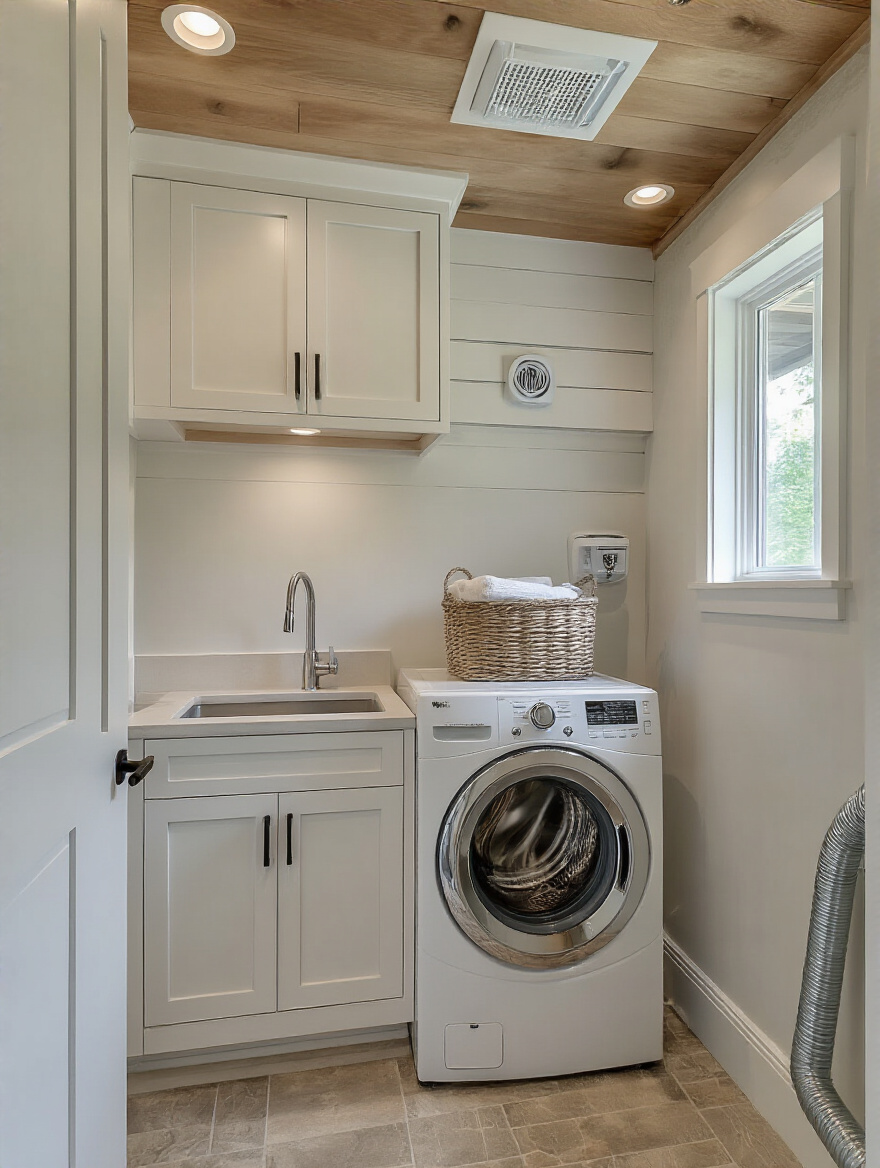
14. Integrate a Deep Utility Sink for Soaking and Pre-Treatment
I am an absolute evangelist for the deep utility sink. If you do any gardening, have kids in sports, own a dog, or do any sort of messy hobby, this is the single most valuable feature you can add. It’s the true workhorse of the mudroom. This is where you wash muddy boots, pre-soak grass-stained baseball pants, rinse off garden vegetables, and even bathe a small (or patient) dog.
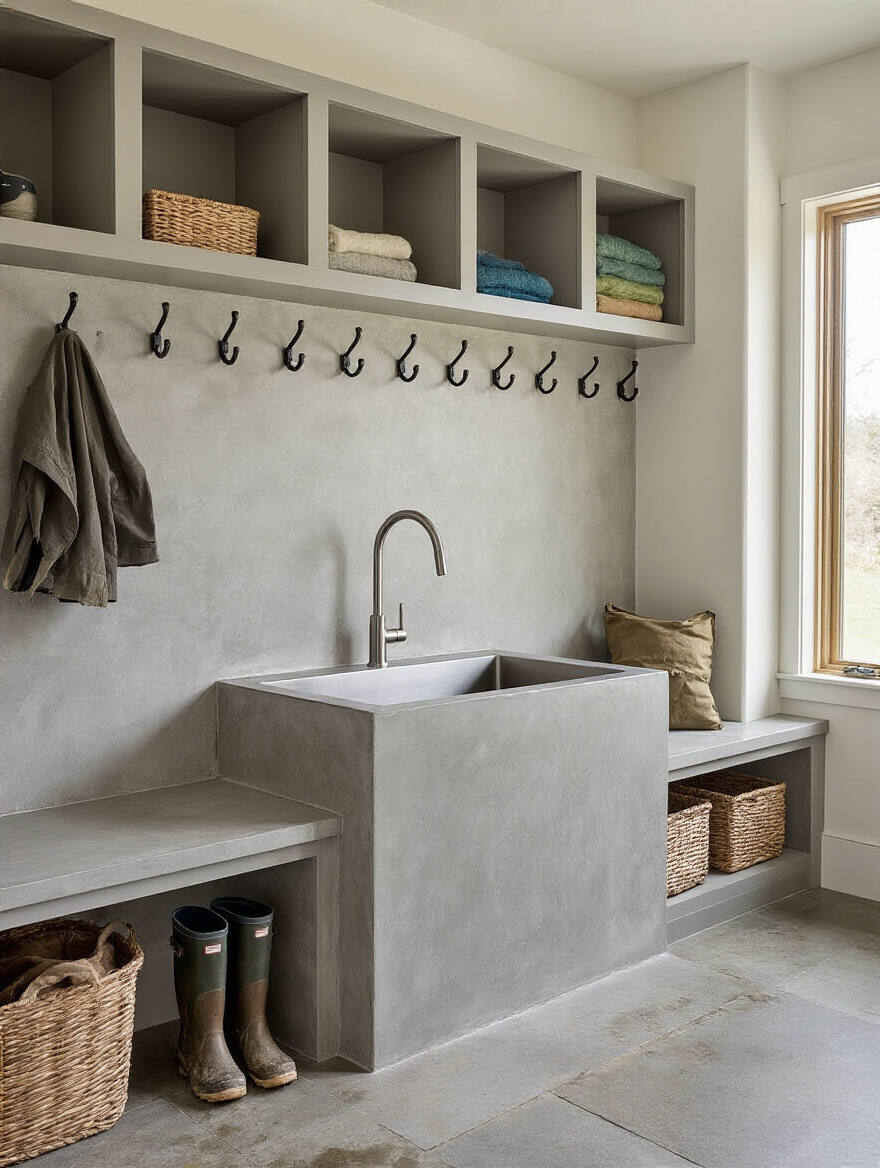
Forget the shallow, stylish sinks. You need something deep, durable, and preferably equipped with a pull-down sprayer. It keeps the heavy-duty messes out of your pristine kitchen sink and contains the grime in a room designed to handle it. A family I worked with installed one and said it was “life-changing”—not an exaggeration. Their kitchen sink stayed cleaner, their clothes came out of the wash cleaner, and post-hike cleanups were 80% faster.
If you add only one “extra” to your mudroom laundry, make it this.
15. Add Wall-Mounted Drying Racks for Delicates and Air Drying
The dryer is great, but it’s a killer for delicate fabrics, expensive athletic wear, and anything you don’t want to shrink. Draping wet clothes over every available surface makes your house look like a laundromat. A wall-mounted, collapsible drying rack is the elegant solution.
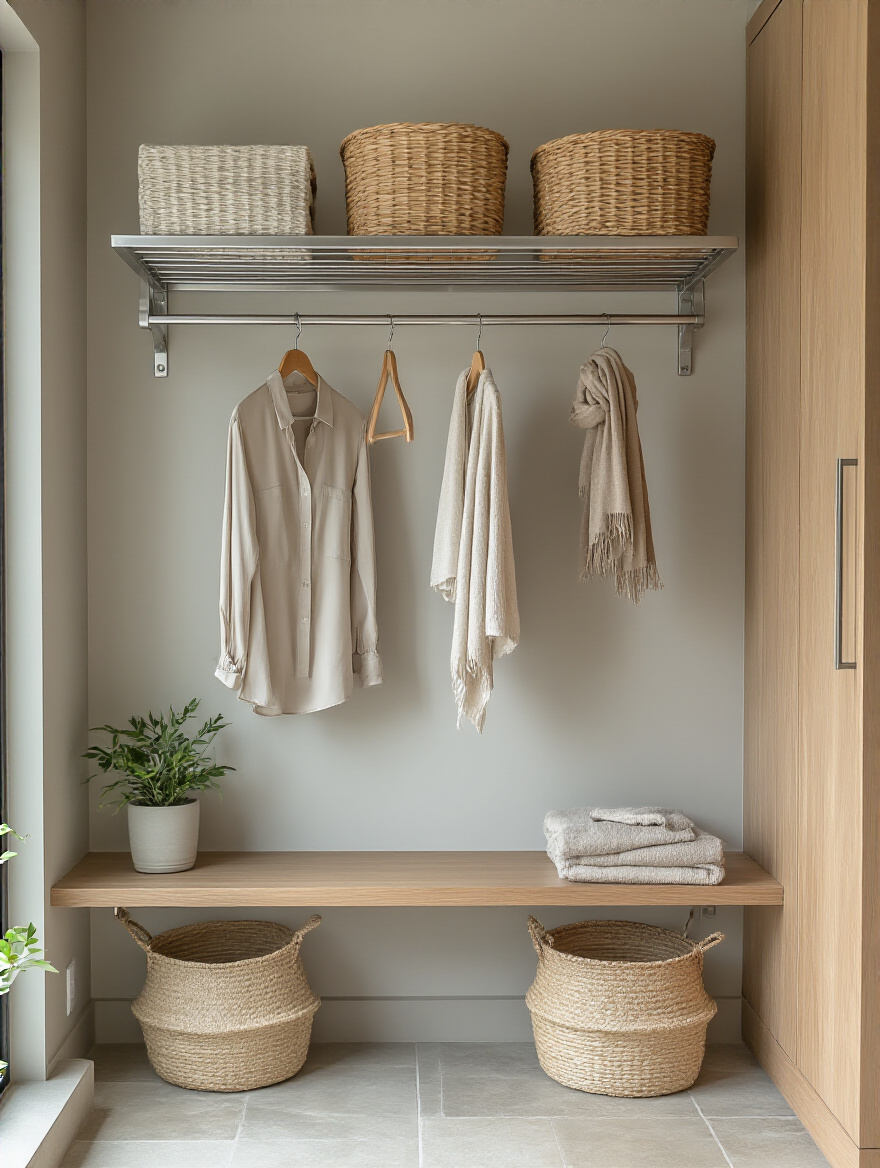
These racks are brilliant because they take up zero floor space when you’re not using them. You can pull them out to dry a few sweaters, and then fold them flat against the wall when you’re done. They’re fantastic for extending the life of your clothes and saving energy. Position them over a heating vent or near the utility sink for maximum efficiency. It’s a small detail that adds a ton of function without adding any clutter.
This is how you care for your clothes and your space at the same time.
16. Optimize Lighting with Bright, Task-Oriented Fixtures
A single, dim overhead light in a utility space is a crime. You can’t treat stains if you can’t see them. You’ll strain your eyes trying to sort dark clothes. Good lighting isn’t just about aesthetics; it’s a functional necessity.
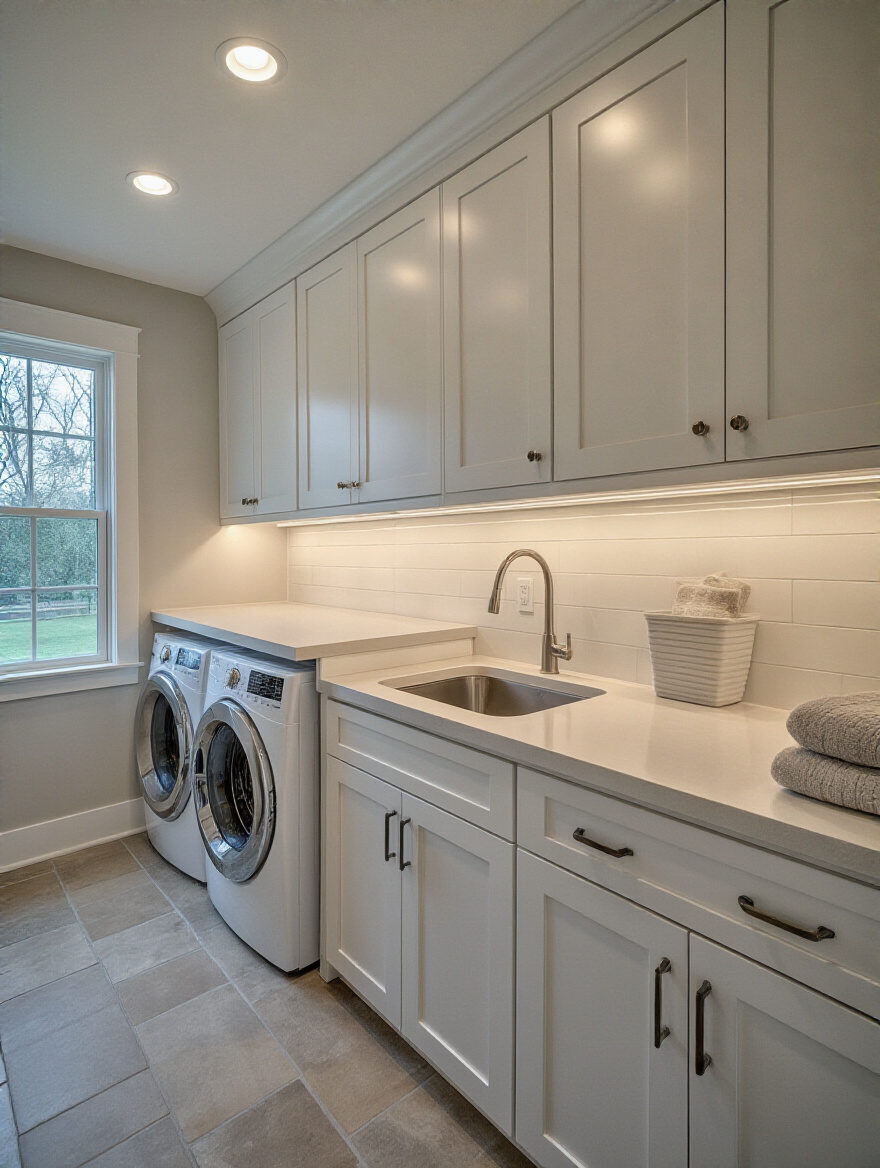
You need layers of light. Start with a bright, clean overhead fixture for general illumination. Then, add task lighting. The most important place is under-cabinet lighting over your folding counter and utility sink. This puts bright, focused light exactly where you’re working, without casting shadows. Use a “cool white” or “daylight” bulb (around 4000K) to see colors accurately—critical for telling the difference between a navy blue and a black sock.
Good lighting makes any task easier, safer, and more pleasant.
17. Ensure Proper Ventilation to Prevent Moisture and Odor
Moisture is the enemy. In a room with a washer, a dryer, wet coats, and snowy boots, it’s a constant threat. Without proper ventilation, you’re practically inviting mold, mildew, and that permanent musty smell. A high-quality, quiet exhaust fan isn’t a luxury; it’s essential for the health of your home and family.
Don’t skimp here. Get a fan that’s rated for the size of your room and, crucially, one that’s quiet. If it sounds like a jet engine, you’ll never turn it on. I recommend hooking it up to a humidity sensor, which will automatically turn the fan on when moisture levels get too high. Also, your dryer vent needs to be a short, straight run of rigid metal ducting, vented directly outside. Clean it out once a year. A clogged vent is not only a moisture problem but a serious fire hazard.
This is the invisible system that keeps your hardworking room from destroying itself from the inside out.
Styling & Advanced Functionality Upgrades
Once the hardworking bones of the room are in place, you can add the final layers that make it both beautiful and even more functional.
18. Select Visually Appealing, Moisture-Resistant Finishes
Just because a room is functional doesn’t mean it has to be ugly. The trick is to choose materials that are both beautiful and bomb-proof. Today, you don’t have to sacrifice style for durability.
For cabinetry, look at high-quality paints or thermofoil finishes that are resistant to moisture. For countertops, quartz is my top pick. It’s non-porous, stain-resistant, and comes in countless styles that mimic natural stone without the maintenance. For walls, consider a tile wainscoting in the “wet zone” by the door and sink, with a high-quality, scrubbable, mildew-resistant paint above it. The goal is to build a room where you can practically hose the whole thing down without worrying about damage.
It’s about choosing materials that are smart enough to handle reality and stylish enough to make you happy every time you walk in.
19. Designate a Pet Washing or Feeding Station within the Layout
If you have a pet, their “stuff” is a major source of clutter. Integrating a dedicated pet station into your mudroom design is a game-changer for containing that chaos. It’s about designing for your entire family.
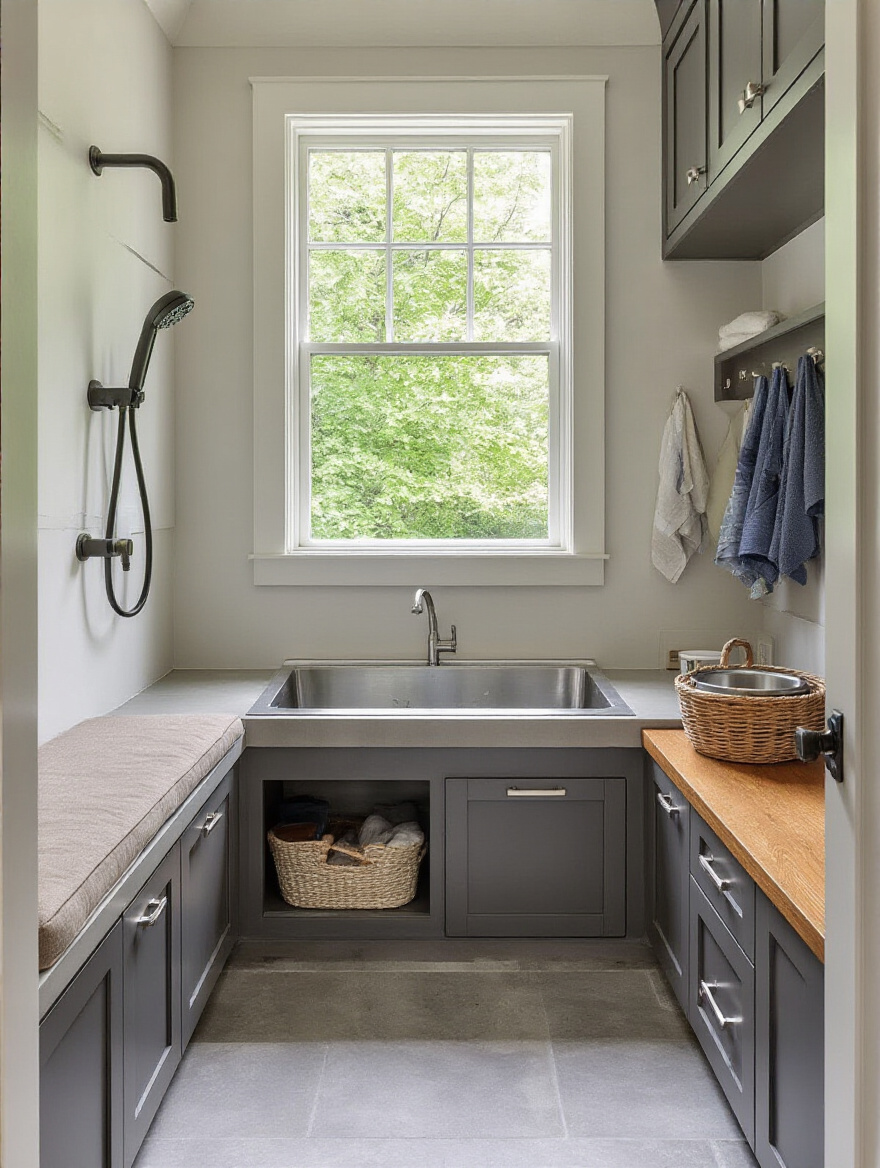
This could be as simple as a built-in nook for food and water bowls, keeping them out of the main traffic path. Or, if you have the space and a particularly mud-prone dog, a tiled, walk-in pet shower with a handheld sprayer is the ultimate upgrade. I designed one for a client with two Golden Retrievers, and they said it was the best investment they made in their entire renovation. No more muddy paw prints through the house, and no more back-breaking bathing sessions in the tub.
This is a perfect example of how thoughtful design can solve a specific, daily annoyance.
20. Consider a Built-in Ironing Board or Garment Steamer
Who has space to store a full-size, clunky ironing board? And who actually wants to drag it out for a quick touch-up on a shirt? A built-in, fold-down ironing board that tucks away into a shallow cabinet or drawer is a brilliant space-saver.
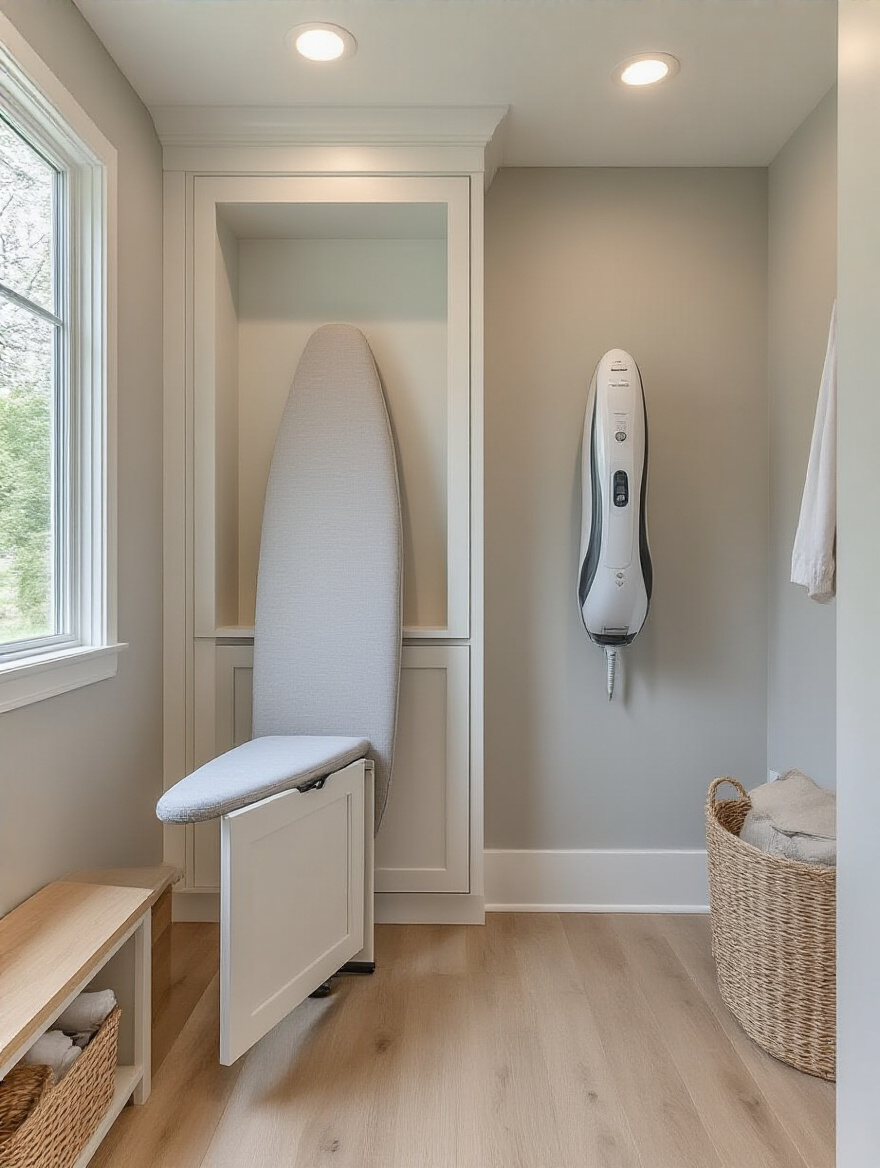
Even better, in my opinion, is a wall-mounted garment steamer. It’s faster than ironing for most things, gentler on clothes, and takes up minimal space. Having one right there in your laundry area means you’re more likely to give a wrinkled shirt a quick steam before you head out the door, rather than thinking, “Ugh, I’ll just wear something else.” It’s a little touch of luxury and convenience that streamlines your morning routine.
This is about making garment care an effortless part of your laundry workflow, not a separate, dreaded chore.
21. Incorporate Smart Home Technology for Appliance Monitoring
I used to think smart home tech in the laundry room was a gimmick. Then I watched a client lose tens of thousands of dollars because a washer hose burst while they were on vacation. Now, I see it differently. Smart tech isn’t about telling Alexa to start the dryer; it’s about peace of mind.
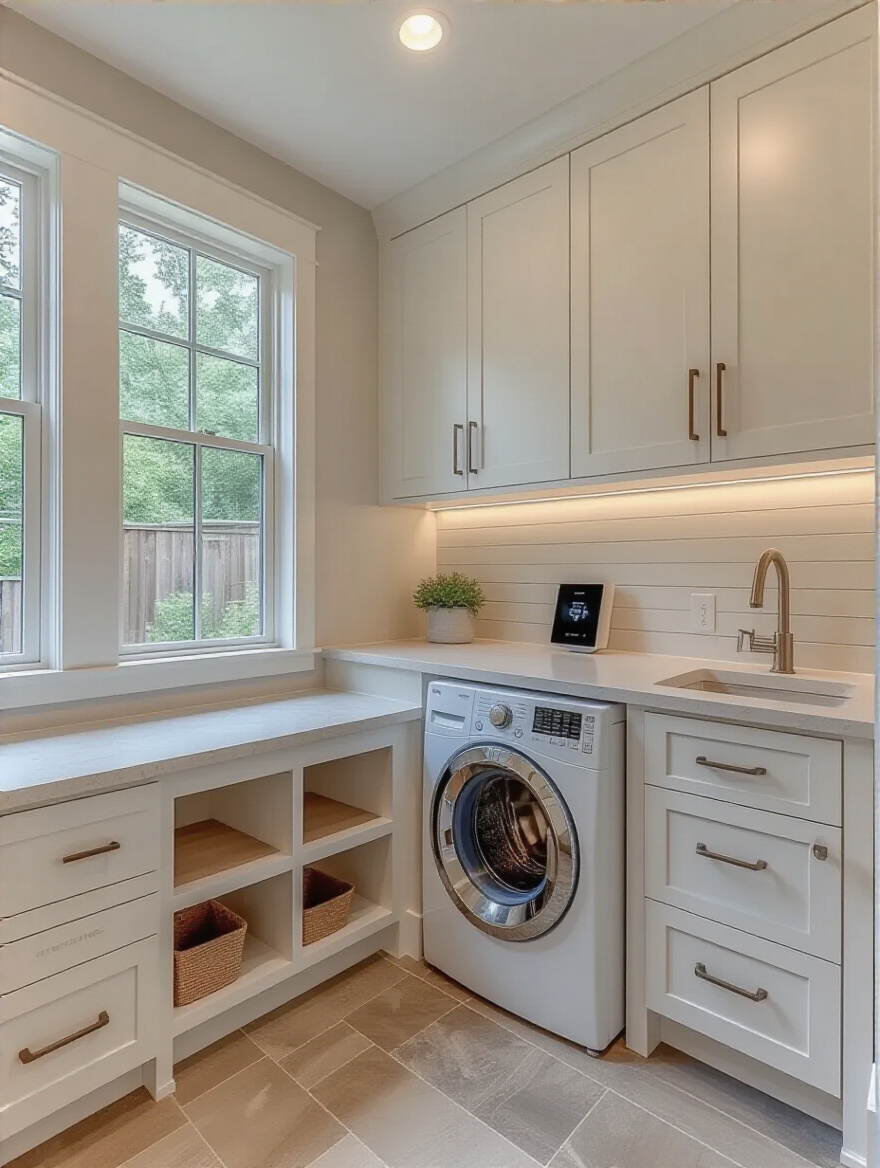
The single most important piece of tech to install is a smart leak detector. It’s a tiny, inexpensive sensor you place on the floor behind your washer. If it detects water, it sends an immediate alert to your phone. It can literally save you from a catastrophic flood. Smart plugs can also notify you when a non-smart appliance has finished its cycle, which is a nice-to-have. But the leak detector? That’s a must-have.
It’s the 21st-century upgrade that protects your entire investment.
Conclusion
So, that chaotic spot by your back door? It holds so much more potential than you think. It’s not just a pass-through; it’s the critical juncture that can make your entire home feel more organized, calm, and connected to the outdoors you love. By focusing on smart flow, durable materials, and solutions tailored to your real life, you can transform it from a source of stress into your home’s most valuable player.
Forget the perfect, sterile images you see online. A brilliant mudroom isn’t one that’s always empty; it’s one that handles the ebb and flow of a full life with grace and efficiency. It’s an investment in smoother mornings, cleaner floors, and a more peaceful transition from the world outside to the sanctuary within. Start small, plan with purpose, and build the bridge your home deserves.