Picture this: It’s a perfect summer evening. The sun is setting, twinkle lights are glowing, and your friends are gathered around a beautiful island, laughing, with cold drinks in hand. You’re at the grill, part of the conversation, effortlessly cooking in a space that feels just as much a part of your home as your indoor kitchen. This isn’t just a fantasy—it’s the magic of a thoughtfully designed outdoor kitchen.
But I’ve also seen the other side. Can we talk about why so many outdoor kitchens end up as sad, unused grill graveyards? It’s because they’re designed like an afterthought—a grill plopped on a patio with zero thought for how people actually live, cook, and entertain. They forget that an outdoor kitchen isn’t just about appliances; it’s about creating an experience, a destination, a reason to celebrate every season. After years of styling spaces for parties and everyday life, I’ve cracked the code. These are the things that actually matter, the secrets to creating an outdoor kitchen you’ll be obsessed with for years to come.
Smart Planning: Laying the Foundation for Your Dream Outdoor Kitchen (Part 1)
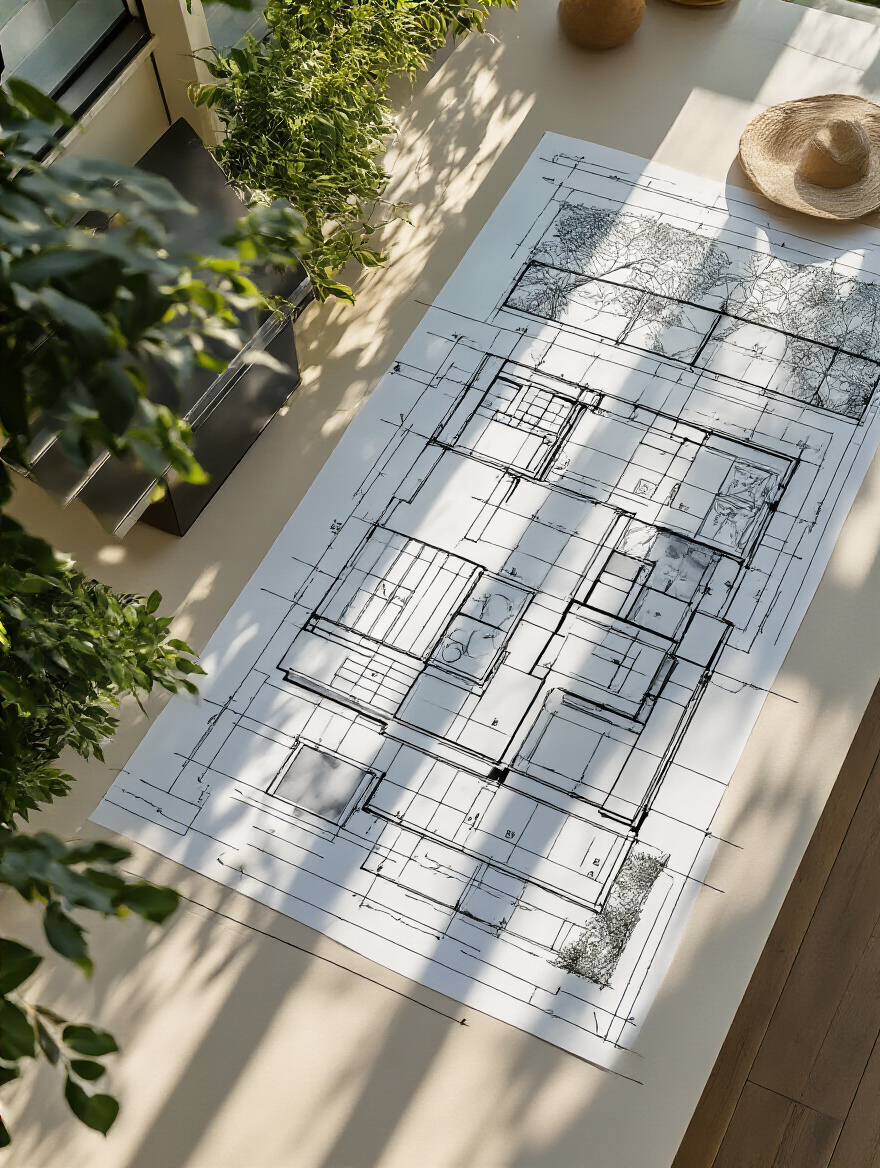
Before you even think about stainless steel or granite, we need to talk about the foundation. This is the stuff that isn’t glamorous but will absolutely make or break your entire project. Getting this right means avoiding thousand-dollar mistakes and creating a space that feels intuitive and effortless from day one.
1. Conduct a Thorough Site Assessment for Optimal Placement
Everyone wants to just pick a spot and start building. Don’t do it! I once had a client who was so excited, she insisted on putting her kitchen in a spot that got blasted by the afternoon sun. The result? A gorgeous, expensive kitchen that was practically an oven by 5 p.m. and barely got used. We spent a fortune on misters and a massive cantilever umbrella trying to fix a problem that could have been avoided by just… watching.
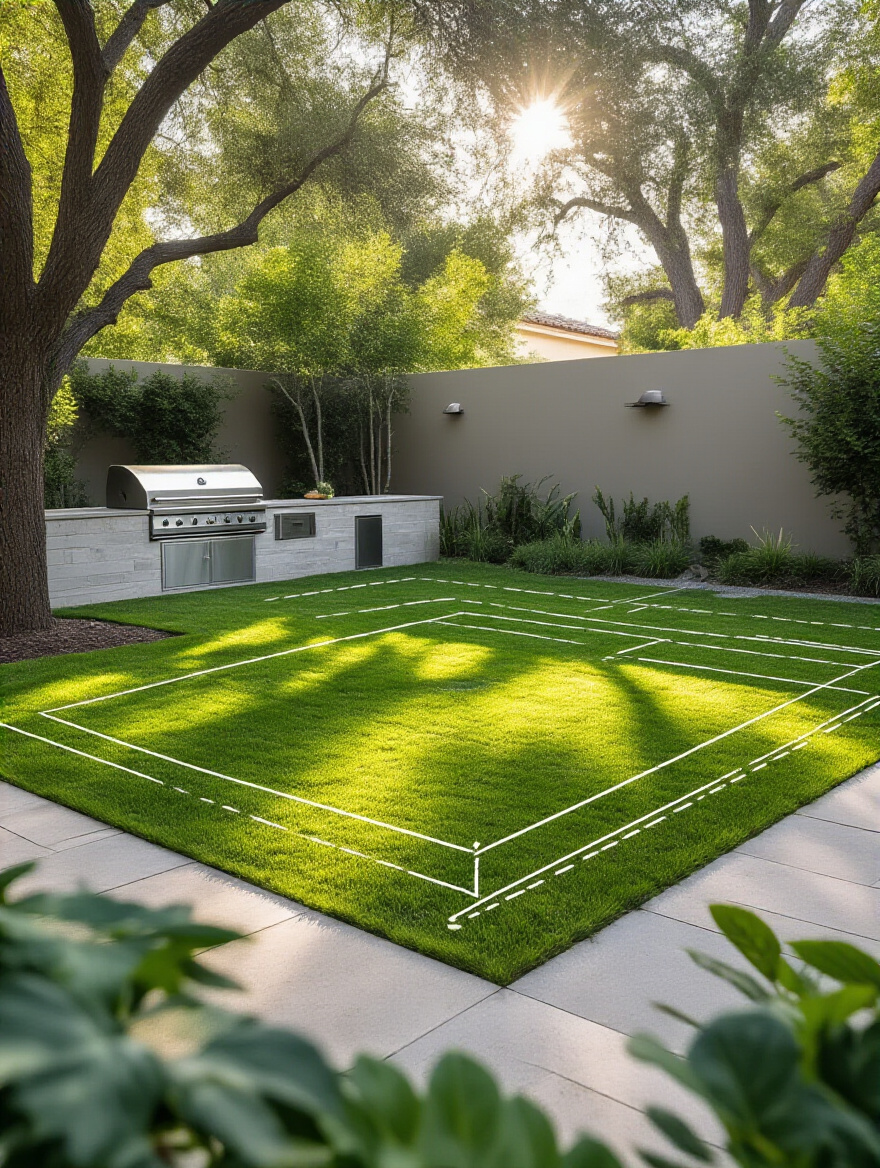
So, before you do anything else, spend a week being a detective in your own backyard. Where does the sun hit and when? Which way does the wind blow? You don’t want grill smoke pouring back into the house every time you cook. Where do people naturally walk? The best spot isn’t just about what looks good; it’s about what feels good and works with the natural rhythm of your yard.
This initial observation phase is your single best tool for avoiding regret. Think of it less as a technical assessment and more as choreographing the experience. You’re designing the flow of your future parties and family dinners, and that starts with understanding the stage you’re working with.
2. Define Your Culinary Needs: Grilling, Dining, or Full Prep Zone?
Okay, real talk. Are you a “grill a few burgers on a Tuesday” person or a “smoke a brisket for 14 hours and host 30 people” person? Your answer changes everything. The biggest mistake people make is over-equipping their space with trendy gadgets they’ll never use. That wood-fired pizza oven looks incredible on Pinterest, but if you’re only going to use it twice a year, that’s some seriously expensive real estate it’s taking up.
Be brutally honest about your lifestyle. A simple, elegant grilling station with a bit of counter space and a built-in fridge might be all you need for amazing weeknight meals. But if you’re a serious entertainer, you’ll be miserable without a sink, ample prep space, and maybe even a warming drawer. Don’t build the kitchen you think you should have; build the one you will actually use.
Thinking in zones—hot (grill), cold (fridge), and wet (sink)—helps clarify your needs. Even if your space is small, making sure these functions are distinct but connected is the key to a kitchen that doesn’t feel chaotic when you’re in the middle of cooking.
3. Establish a Realistic Budget and Stick to It
This is the boring part, I know, but it’s critical. People always remember to budget for the big stuff—the grill, the countertops. What they forget are the “invisible” costs that can absolutely destroy a budget. Running gas lines, adding dedicated electrical circuits, and proper drainage can sometimes cost as much as the appliances themselves.
My best advice is to get at least three detailed quotes, and make sure they break down the utility work separately so you can see the real numbers. Then, whatever that total number is, add another 15-20% on top for your “oops” fund. Trust me, there will be an “oops.” It might be a supply chain issue, an unexpected grading problem, or you might just fall in love with a fancier faucet. That contingency fund is your permission to handle it without panicking.
Remember, a budget isn’t a restriction; it’s a roadmap. It helps you decide where to splurge (maybe on a killer grill) and where to save (perhaps with a more modest countertop choice for now).
4. Understand Local Zoning Laws and Permitting Requirements
I can’t tell you how many people think, “It’s my backyard, I can do what I want!” That’s a fast track to getting a giant red stop-work order slapped on your project. As soon as you’re running permanent gas or electrical lines, you’re on the city’s radar. They have rules about how close you can build to your property line (setbacks) and how much of your yard can be covered by hard surfaces.
Do yourself a huge favor: make your first call to your local building department, not your last. Ask them what’s required for an “outdoor kitchen” and they’ll tell you everything you need to know. Getting your permits in order upfront is a hassle, but it’s nothing compared to the nightmare of having to tear out work you’ve already paid for because it’s not up to code.
With the boring (but essential!) groundwork laid, we can move on to the guts of the operation—the parts that actually do the work. This is where we start building the functional core of your kitchen.
Smart Planning: Laying the Foundation for Your Dream Outdoor Kitchen (Part 2)
We’ve covered the big picture, but now we get into the nitty-gritty that makes everything work. Think of this as the central nervous system of your outdoor kitchen. If it’s not planned correctly, nothing else matters.
5. Strategically Map Out Utility Connections and Access Points
This is my biggest shortcut for you: Plan for the kitchen you might want in five years, not just the one you’re building today. It is infinitely cheaper to run an extra electrical conduit or a water line while the ground is already dug up than it is to do it later. Want a kegerator someday? Plan for the outlet now. Think you might add an ice maker down the road? Stub out the plumbing.
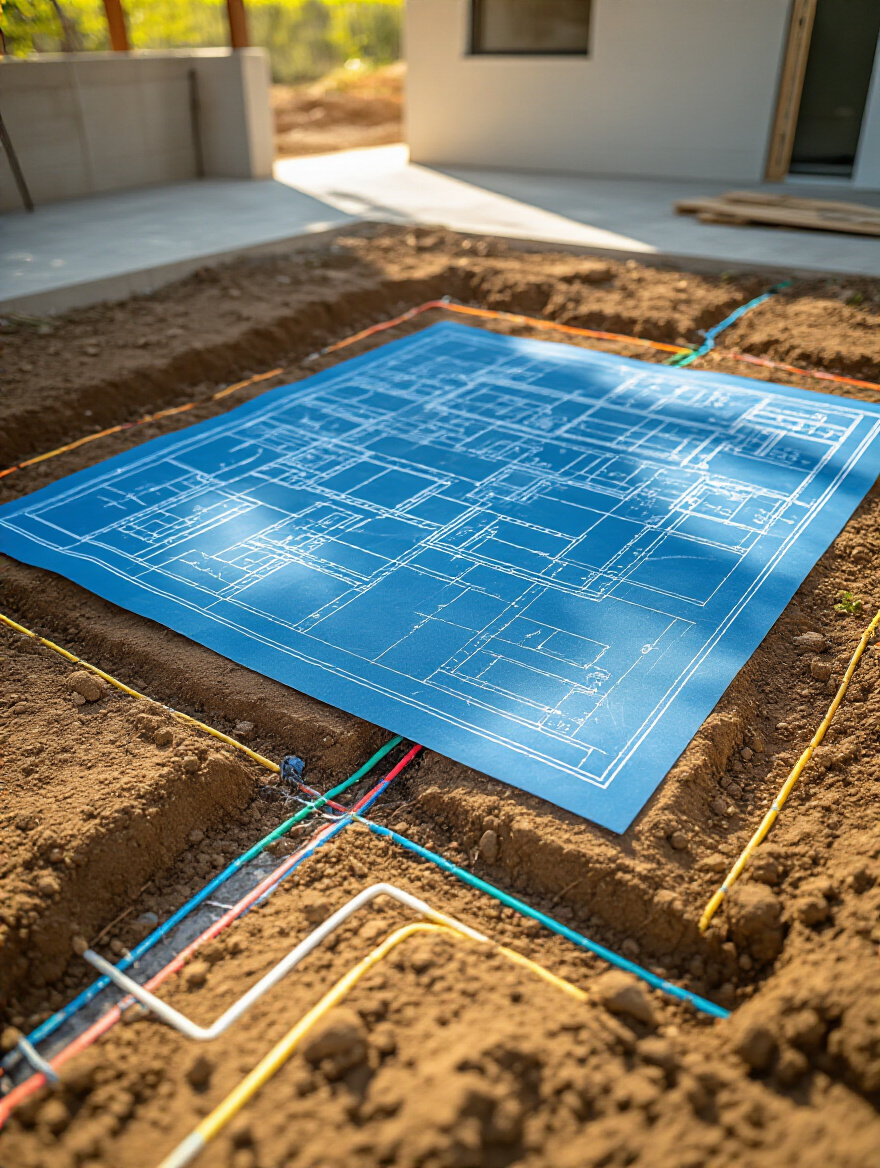
Work with your licensed pros to draw an actual map of where every single line will run. Also, and this is crucial, make sure you have accessible shut-off valves for everything. I had a friend whose outdoor water line got a tiny leak, and because the shut-off was in a ridiculously hard-to-reach spot behind the cabinetry, a simple fix became a huge, expensive ordeal. Good planning here is all about making your future life easier.
Now that the invisible infrastructure is planned, let’s get to the fun part: choosing the star players of your outdoor culinary theater.
Core Components: Choosing and Integrating Essential Appliances (Part 1)
This is where your outdoor kitchen gets its personality! The appliances you choose will define how you cook and entertain. It’s about finding that perfect balance between powerhouse performance and everyday convenience.
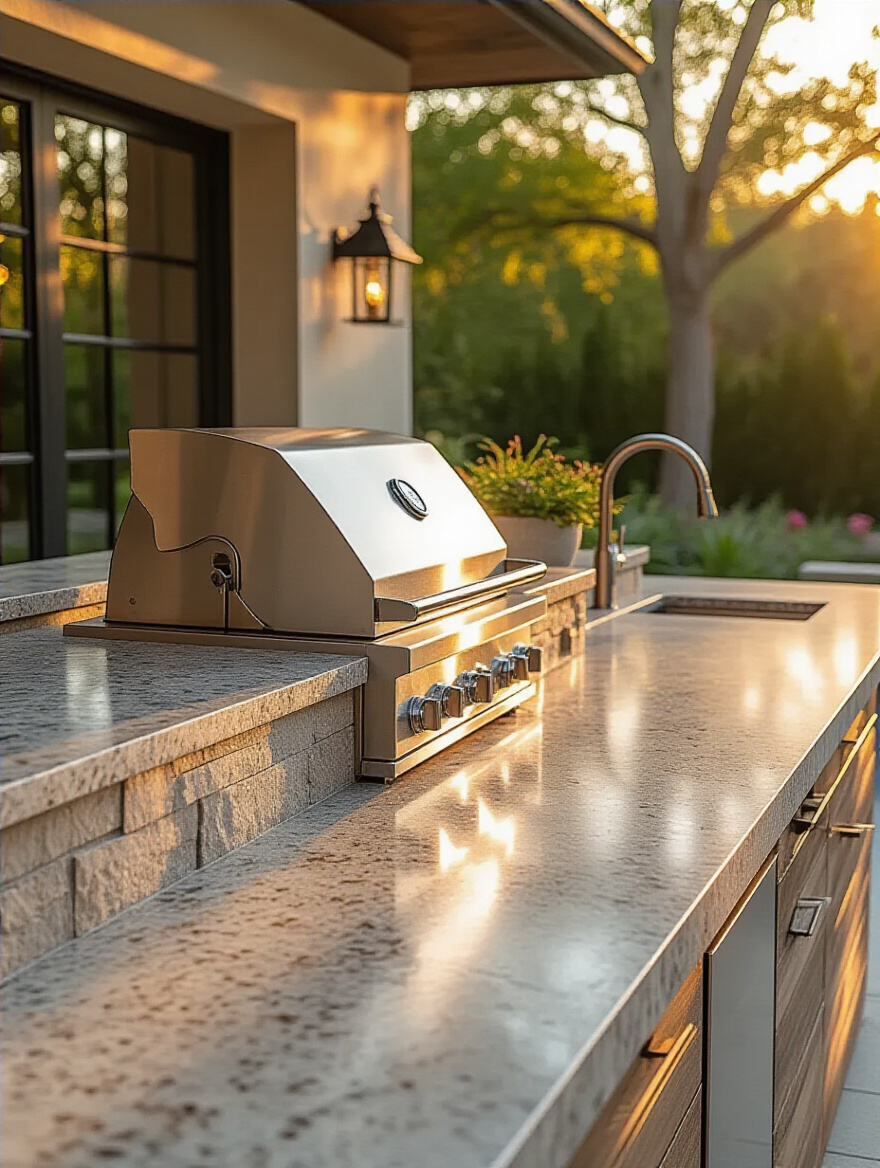
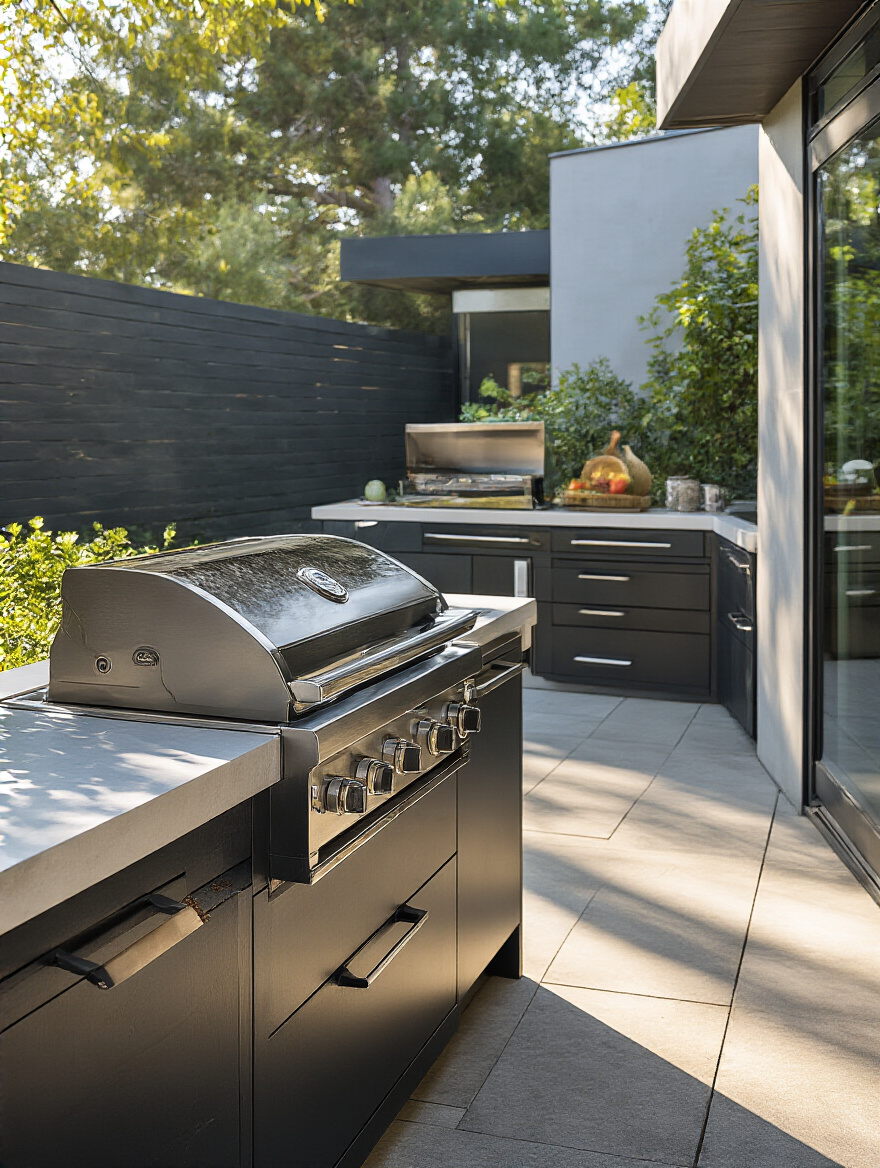
6. Select the Right Grill Type for Your Cooking Style
The grill is the heart and soul of your outdoor kitchen, so don’t just buy whatever is on sale. This choice should be all about your cooking style. Gas grills are the undisputed kings of convenience—perfect for quick weeknight dinners and ready to go in minutes. But if you’re a barbecue purist who loves that smoky flavor and the ritual of cooking, a charcoal or kamado-style grill might be your true love.
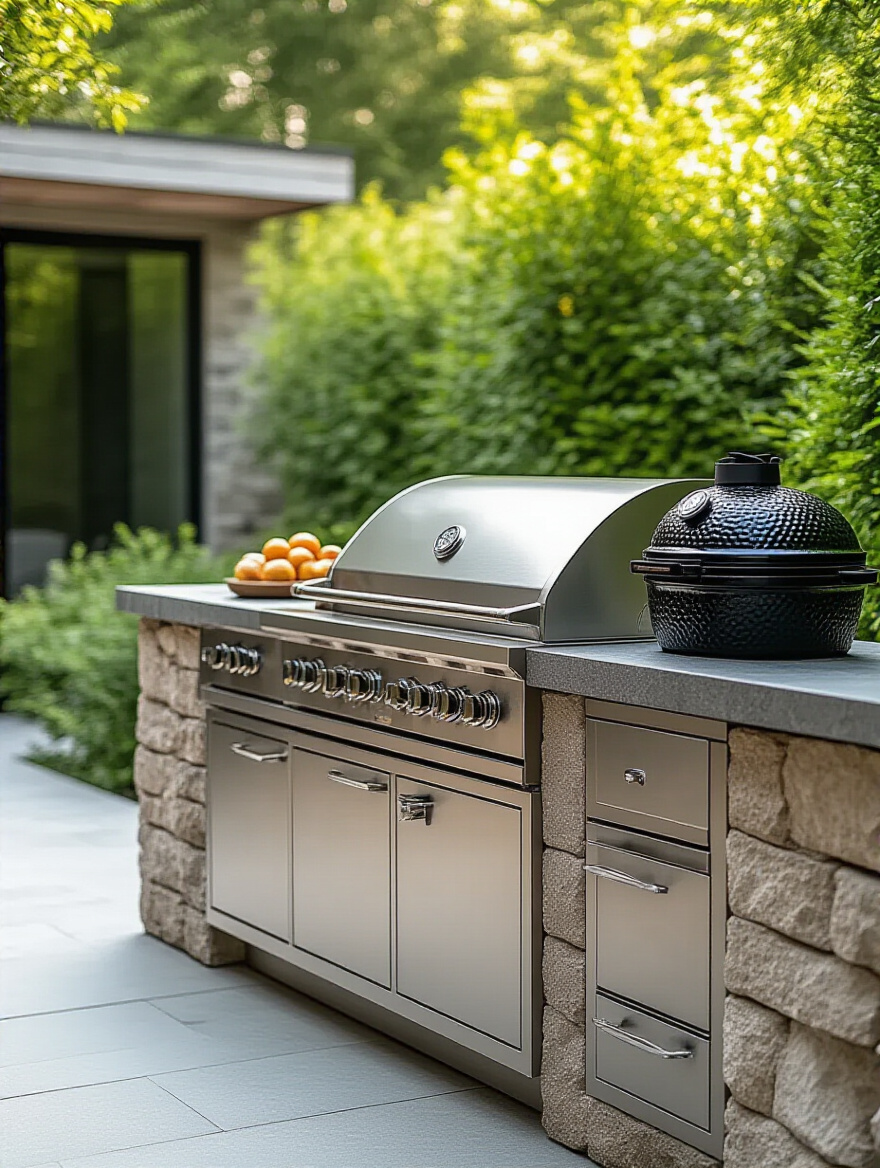
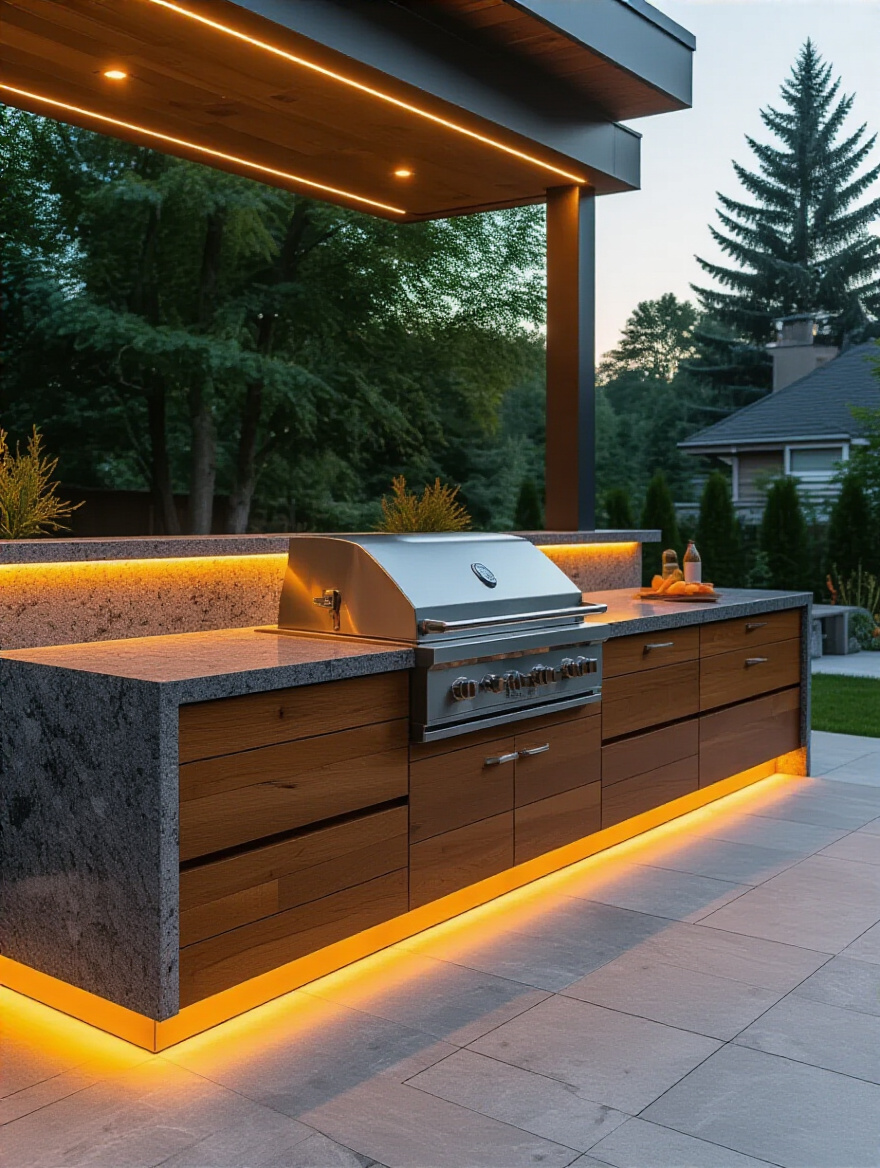
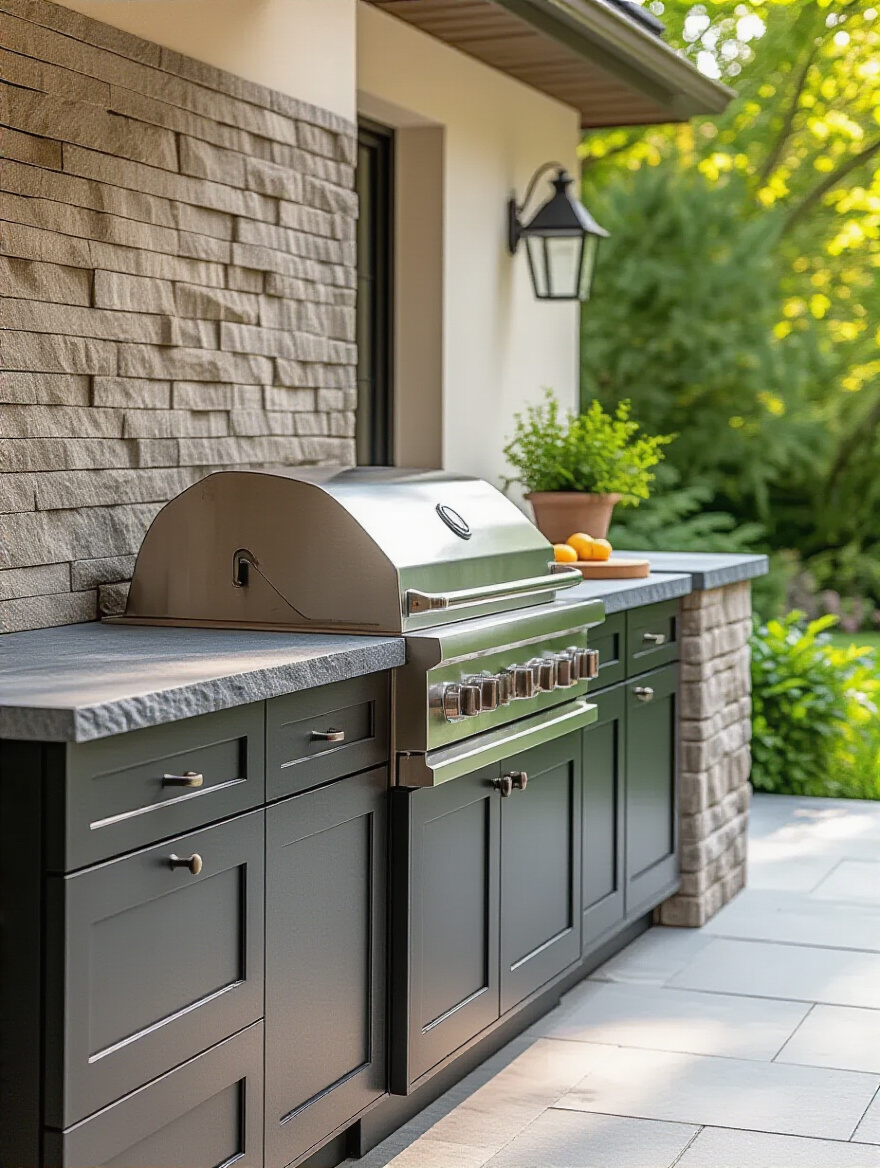
Here’s the inside scoop: don’t just look at the brand name, look at the materials. You want 304-grade stainless steel. It’s the industry standard for resisting rust and corrosion and will look good for years, not just a season. Cheaper grades will start showing rust spots, especially if you live in a humid climate. This is one of the most important places to invest in quality.
The grill sets the tone, but it can’t do all the work alone. Let’s talk about its essential support system.
7. Choose Durable, Weather-Resistant Cabinetry Materials
This is a place where I see people make budget cuts they always regret. Do not use indoor cabinetry outside. I don’t care if it’s under a covered roof—humidity and temperature swings will destroy it. It will warp, the finish will peel, and it will be a moldy, sad mess in a couple of years.
Your best bets are materials designed to live outside. Stainless steel is sleek and durable. Marine-grade polymer (which is a fancy name for a super-dense, tough plastic) is my secret weapon—it’s virtually indestructible, comes in tons of colors, and won’t ever rust or warp, making it perfect for coastal or humid areas. Powder-coated aluminum is another fantastic, stylish option. These cost more upfront but save you the cost of a full replacement down the line.
With your storage protected, let’s think about what you’re storing in it—starting with the cold stuff.
8. Incorporate a Functional Outdoor Refrigerator or Beverage Cooler
An outdoor fridge feels like a luxury until you have one, and then you realize it’s an absolute necessity. It stops the endless parade of people trekking through your house with dirty feet to grab another drink or a condiment. It keeps you, the host, right in the middle of the action instead of running back and forth.

But here’s the critical part: it must be an outdoor-rated model. An indoor mini-fridge just can’t handle the heat. Its compressor will run constantly, burn out prematurely, and won’t keep your food and drinks at a safe temperature on a hot day. An outdoor-rated unit is built with better insulation and a more powerful compressor designed to handle ambient temperatures up to 100°F or more. It’s an investment in convenience and food safety.
Now that you can keep things cool, you need a place to put everything down.
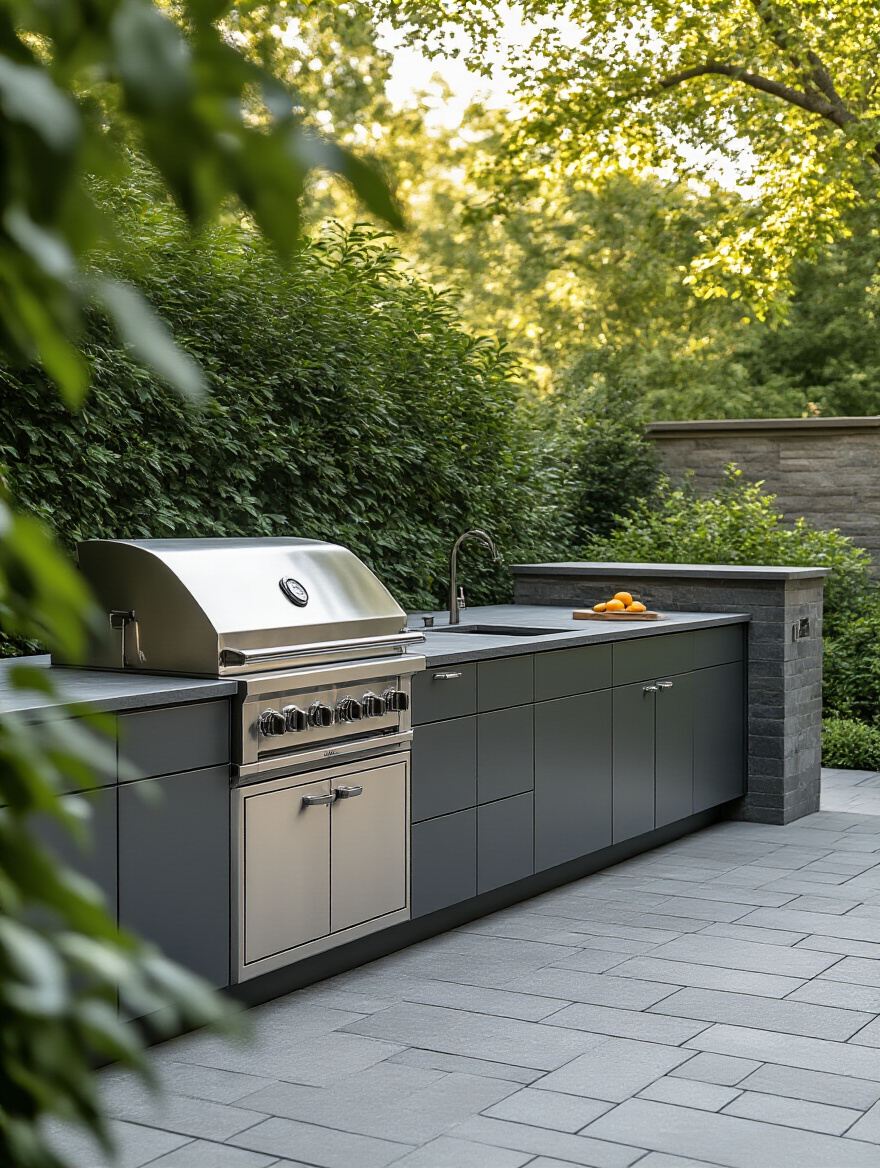
9. Plan for Adequate Countertop Space and Material Durability
Listen to me: you can never have enough countertop space. It’s the number one thing people wish they had more of. You need “landing zones” on either side of your grill for platters of raw and cooked food. You need space next to the sink for drying dishes, and you need a dedicated prep area that isn’t cluttered. My rule of thumb is a minimum of 36 inches of clear prep space.
When it comes to materials, durability is everything. Granite is a workhorse, as long as it’s sealed properly to prevent stains. Dekton and other sintered stone surfaces are incredible—they are practically bulletproof and won’t fade in the sun, scorch from a hot pan, or stain from a spilled glass of red wine. Whatever you choose, make sure it’s rated for outdoor use and can handle UV exposure without fading.
Okay, we’ve got the core components in place. Now, let’s talk about arranging them in a way that actually makes sense.
Core Components: Choosing and Integrating Essential Appliances (Part 2)
Having great appliances is one thing; making them work together seamlessly is another. This is about designing the choreography of cooking, so you feel like a chef, not a pinball.
10. Design a Logical Layout for Efficient Workflow and Movement
You know the “kitchen triangle” they talk about for indoors? It’s even more important outside. The flow between your fridge (cold zone), sink (wet zone), and grill (hot zone) should be effortless. You shouldn’t have to walk around an island or a group of chatting guests to get from one to the other.
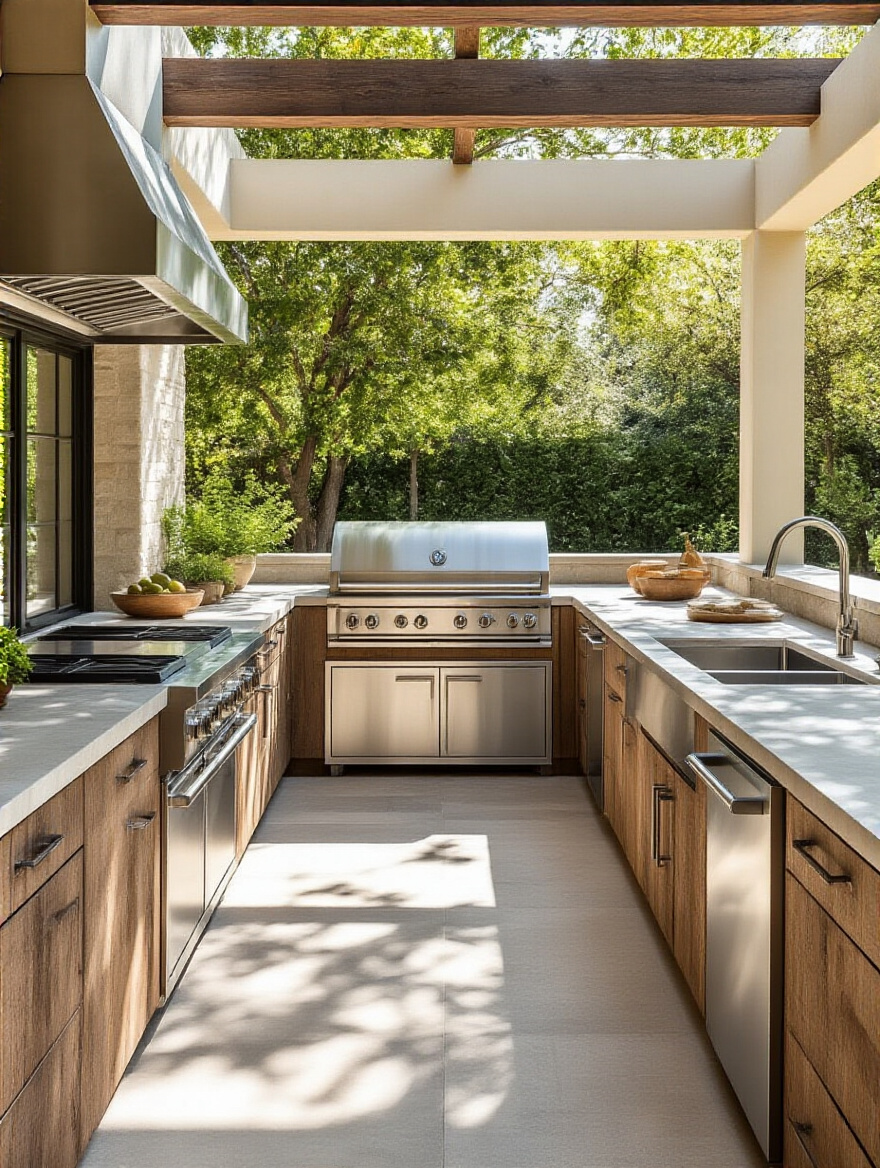
Before you finalize your layout, do this simple trick: go outside with a garden hose or some chalk and sketch the full-size layout on the ground. Then, walk through the motions of making a meal. “Okay, I’m getting meat from the fridge… now I’m taking it to the sink to wash my hands… now to the prep counter… now to the grill.” You will immediately feel where the bottlenecks are. A layout that looks good on paper can feel terrible in practice.
The most underrated player in this functional flow? The humble sink.
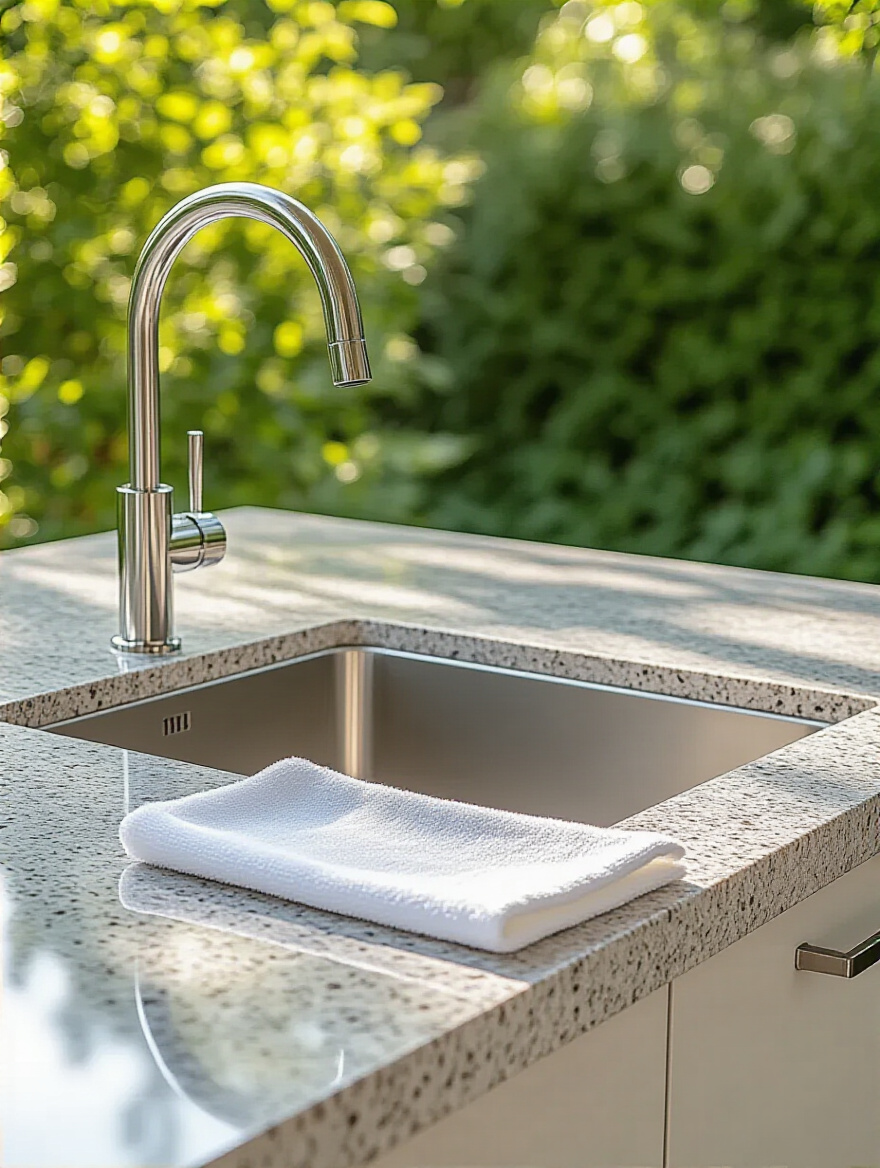
11. Integrate Sinks and Plumbing for Convenient Cleanup
Let me be bold: an outdoor kitchen without a sink is just a fancy grill stand. It’s the component that elevates your space from a simple cooking area to a truly functional, self-sufficient kitchen. It’s not just for washing dishes; it’s for washing your hands after handling raw meat, for rinsing veggies from the garden, for filling a pot with water.
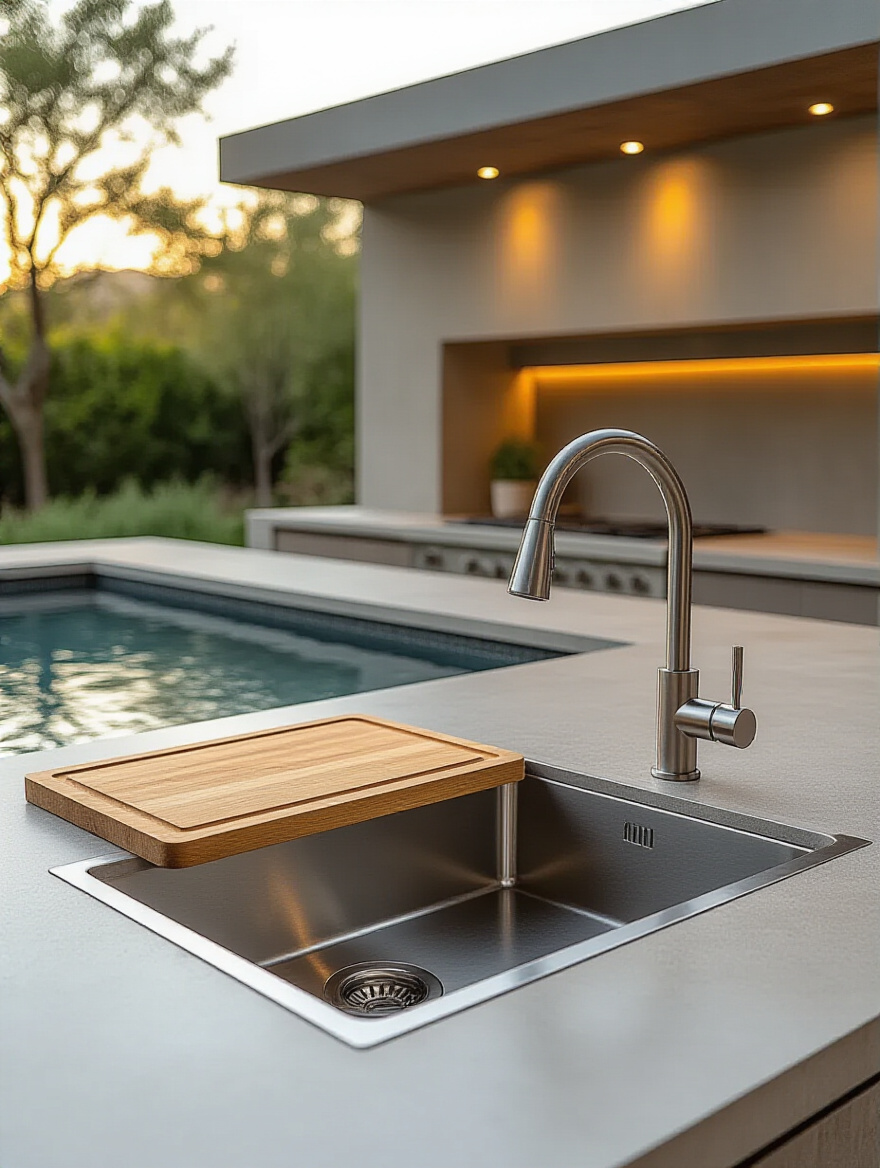
Having a sink eliminates about 80% of the reasons you’d need to run back inside. It contains the mess and makes cleanup a breeze. Just be sure to work with a licensed plumber, and if you live in a cold climate, make sure you have a clear and easy plan for winterizing the pipes to prevent them from freezing and bursting.
Now that we have a functional masterpiece, let’s make it beautiful. This is my favorite part!
Aesthetics & Comfort: Elevating Your Outdoor Kitchen’s Look and Feel (Part 1)
This is where we turn a functional workspace into an irresistible oasis. A great outdoor kitchen should appeal to all the senses and make you and your guests want to linger long after the meal is over.
12. Integrate Effective Lighting for Ambiance and Functionality
Great lighting is the secret ingredient to a magical outdoor space. You need layers! First, you need task lighting—bright, focused light directly over the grill, prep counter, and sink so you can actually see what you’re doing. There’s nothing worse than trying to tell if a chicken breast is cooked using your phone’s flashlight.
Then, you need ambient lighting. This is the glow that makes the space feel inviting. Think about uplighting on a beautiful stone feature, string lights under a pergola, or soft LED strips tucked under the edge of the countertop. And my non-negotiable pro tip: put everything on a dimmer. This lets you crank up the lights for cooking and then dial them down for a soft, relaxed vibe when it’s time to eat and socialize.
With the mood set, it’s time to get comfortable and create spaces that invite connection.
13. Add Comfort with Purpose-Built Outdoor Seating and Dining Areas
The best outdoor kitchens are designed so the chef is never isolated from the party. A counter-height bar with comfortable stools is a perfect way to do this. It gives guests a place to perch with a drink and chat with you while you cook. It creates an energy that pulls everyone together.
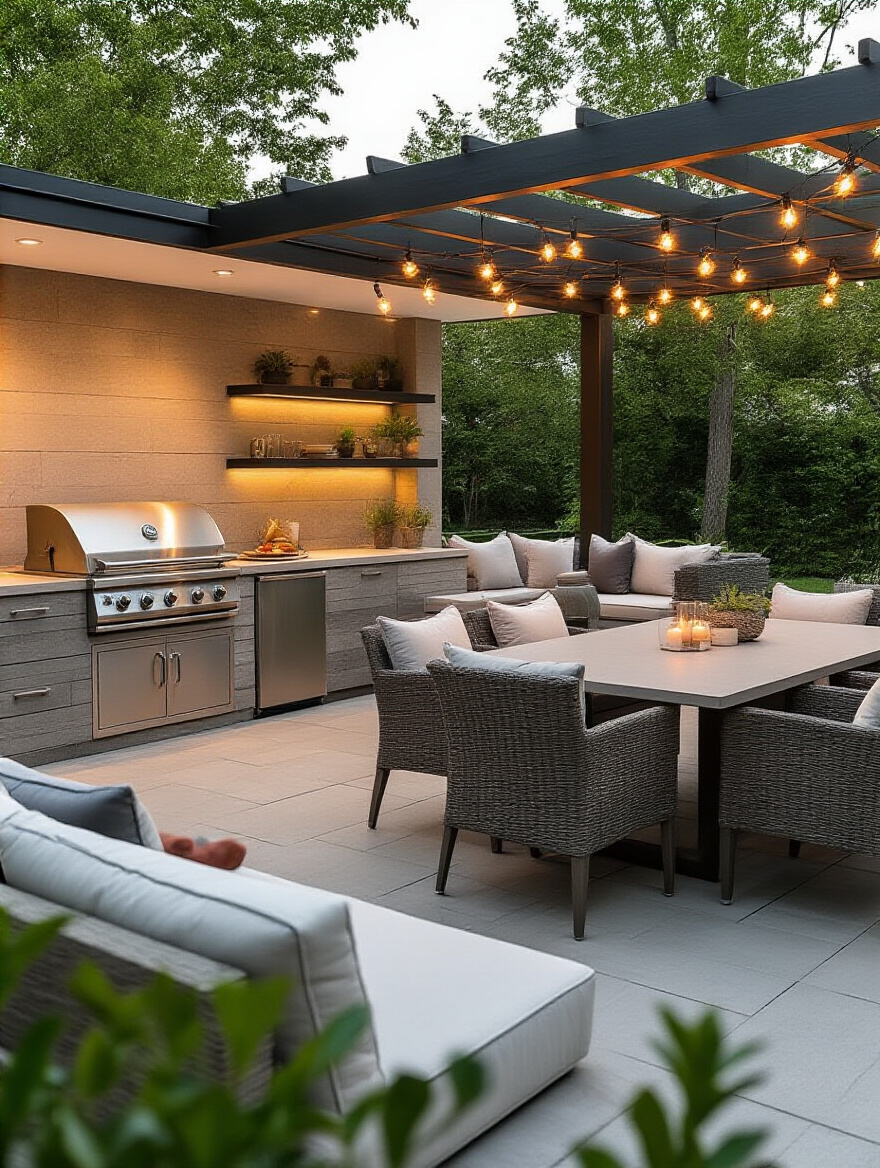
When choosing furniture, think beyond just a dining table. Create a separate, soft seating area nearby—a few comfy outdoor sofas or chairs around a fire pit. This gives your space versatility. People can eat at the table, then move to the lounge area for dessert and conversation. And always, always invest in high-quality outdoor fabrics like Sunbrella that resist fading and mildew.
To tie all these different zones and pieces together, you need a unified visual story.
14. Select Cohesive Materials and Colors for a Harmonized Aesthetic
The most sophisticated outdoor kitchens look like they were part of the home’s original design, not a disconnected add-on. The easiest way to achieve this is to “steal” materials and colors from your house. Does your home have fieldstone on the chimney? Use a similar stone as the veneer for your kitchen island. Is your trim painted a specific color? Use a shade of it in your outdoor cushions.
Create a mood board with samples of everything—the countertop, the cabinet finish, the stone veneer, the fabrics. Take them outside and look at them in the natural light at different times of day. A color that looks great indoors can look completely different in bright sunlight. This simple step ensures you create a cohesive, harmonious palette that feels intentional and high-end.
The final layer of beauty comes from nature itself.
15. Incorporating Landscaping Elements for Enhanced Privacy and Beauty
Landscaping is the frame for your beautiful picture. It’s what makes your kitchen feel like a true oasis. Use plants to create privacy and screen out nosy neighbors or an unsightly view. Tall, columnar evergreens or a trellis with a climbing vine can create a living wall of green.
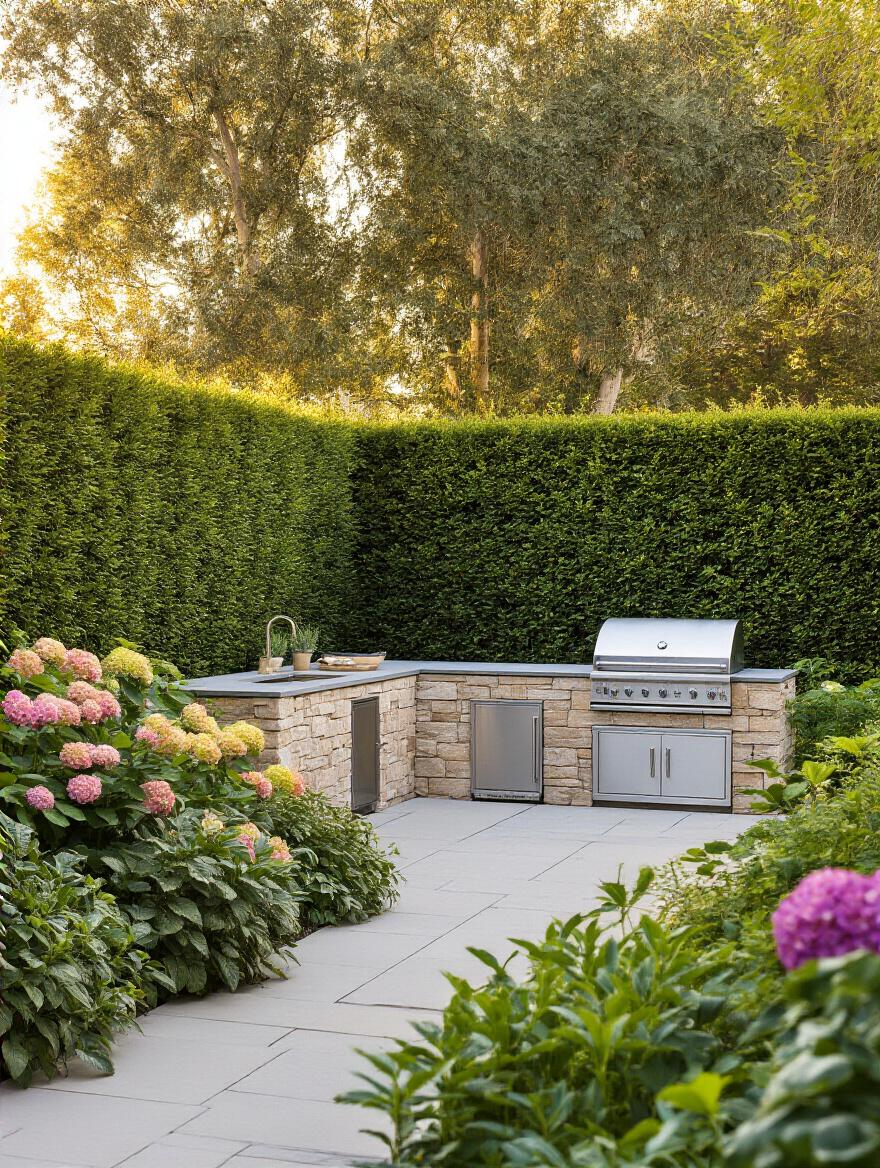
Think about incorporating all the senses. Plant fragrant herbs like rosemary or lavender in pots near the seating area. The sound of ornamental grasses rustling in the wind can be incredibly relaxing. My favorite trick is to build a small, raised herb garden right into the kitchen structure. It’s beautiful, it smells amazing, and you have fresh ingredients right at your fingertips.
With the aesthetics dialed in, let’s make sure this beautiful space is usable no matter what the weather decides to do.
Aesthetics & Comfort: Elevating Your Outdoor Kitchen’s Look and Feel (Part 2)
A truly great outdoor space offers shelter and comfort, extending its usability from the hottest days of summer into the crisp evenings of fall. This is about making your kitchen a reliable haven.
16. Design Overhead Protection from Sun and Rain
Overhead protection is what turns your outdoor kitchen into a true three-season room. It’s the difference between being able to host a party rain-or-shine and having to cancel your plans because of a light drizzle. A solid roof extension offers the most protection, but a pergola can be a beautiful compromise, providing shade while still feeling open and airy.
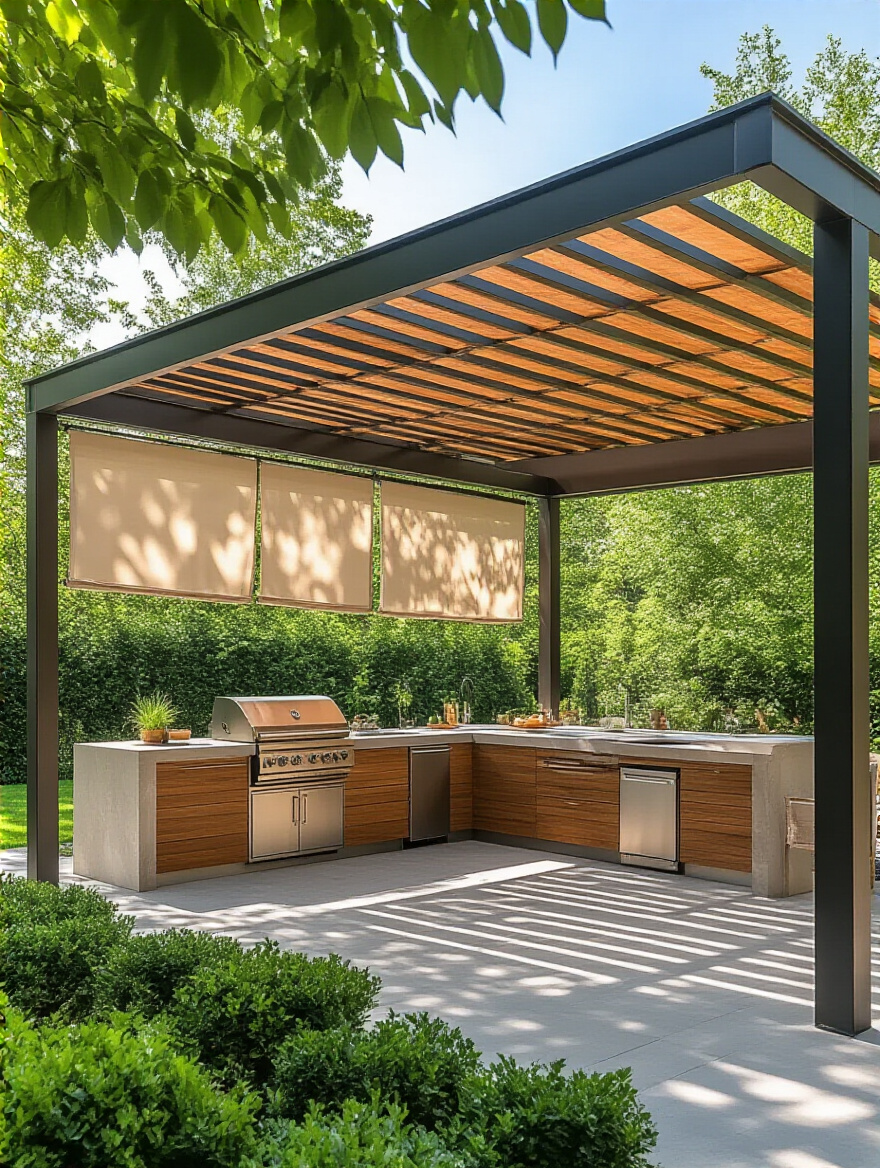
My personal favorite for flexibility is a louvered pergola system. The slats can be angled to block the sun, closed completely to keep out the rain, or opened to let in the light, all with the push of a button. And whatever structure you choose, consider integrating ceiling fans for a cooling breeze and infrared heaters to extend your outdoor season well into the cooler months.
Your masterpiece is built. Now, the final chapter is all about making sure it stays as amazing as the day it was finished.
Longevity & Enjoyment: Maintaining and Upgrading Your Outdoor Culinary Space (Part 1)
Think of your outdoor kitchen like a luxury car. You wouldn’t just drive it for years without changing the oil, right? Protecting your investment with a little regular care ensures it will perform beautifully and look stunning for a decade or more.
17. Implement a Regular Cleaning Schedule for All Surfaces and Appliances
This doesn’t have to be a huge chore. The secret is “clean as you go.” Wiping down the grill grates while they’re still warm, cleaning up spills on the counter immediately, and taking out the trash after every use prevents a massive cleaning project from building up.
Create a simple caddy with your outdoor cleaning essentials: a good degreaser, a non-abrasive sponge, a stainless steel polish, and microfiber cloths. Keep it stored in one of the outdoor cabinets. If the tools are right there, you’re a million times more likely to do a quick wipe-down, which is 90% of the battle.
Your best friend in the fight against deep cleaning? A really great cover.
18. Protect Your Investment with Proper Covers and Winterization Techniques
A high-quality, custom-fit cover is the cheapest insurance you can buy for your outdoor kitchen. It protects everything from UV damage, pollen, bird droppings, and rain. Use it religiously. It will cut your cleaning time in half and drastically extend the life of your appliances and finishes.
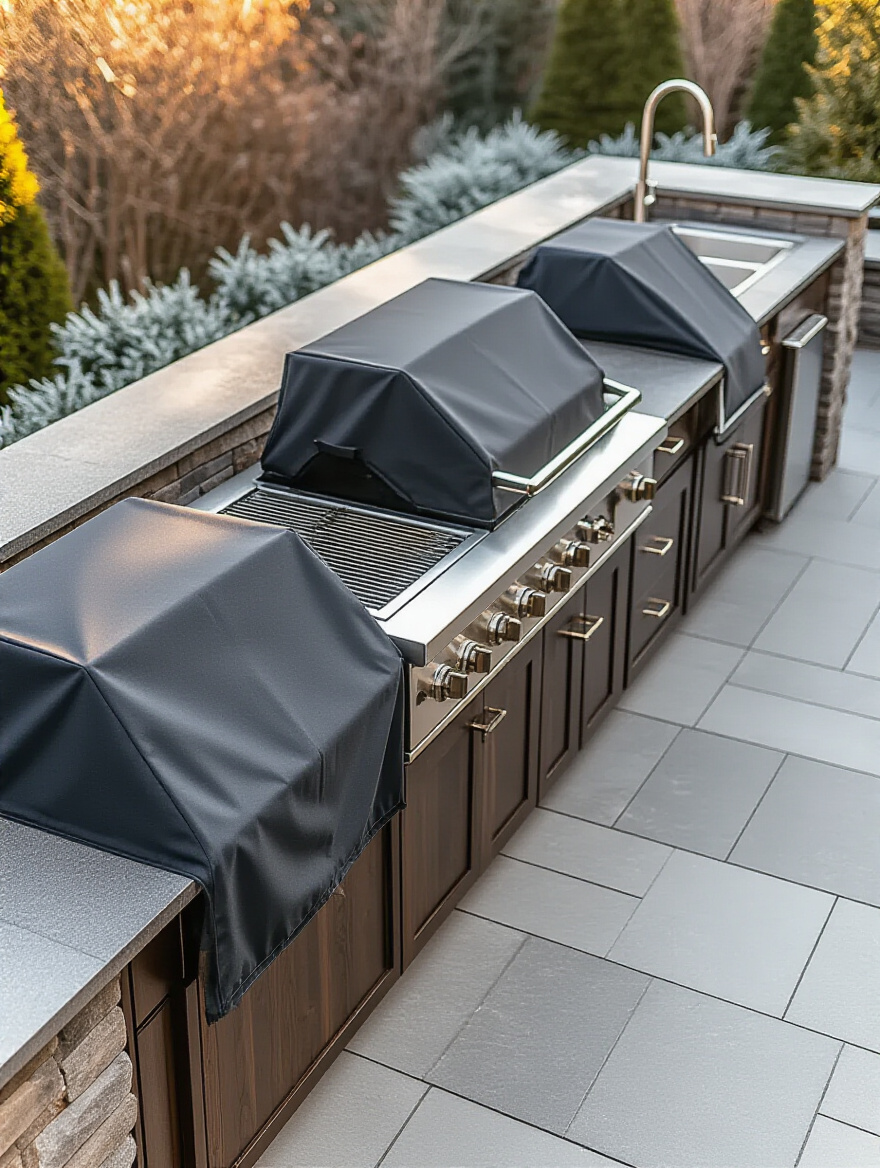
If you live in a place that freezes, winterization is non-negotiable. This means properly draining all water lines, turning off the gas, and disconnecting the power before the first deep freeze. It sounds like a pain, but it will save you from the expensive, heartbreaking disaster of a burst pipe.
A clean kitchen is great, but an organized one is a dream to use.
19. Install Smart Storage Solutions to Keep Supplies Organized and Handy
Great storage is about having a logical home for everything. A pull-out trash and recycling bin is the unsung hero of the outdoor kitchen—it keeps waste hidden and away from pests. Dedicated utensil drawers, weather-sealed pantry cabinets for spices and oils, and even a secure, locked cabinet for cleaning supplies make the space so much more functional.
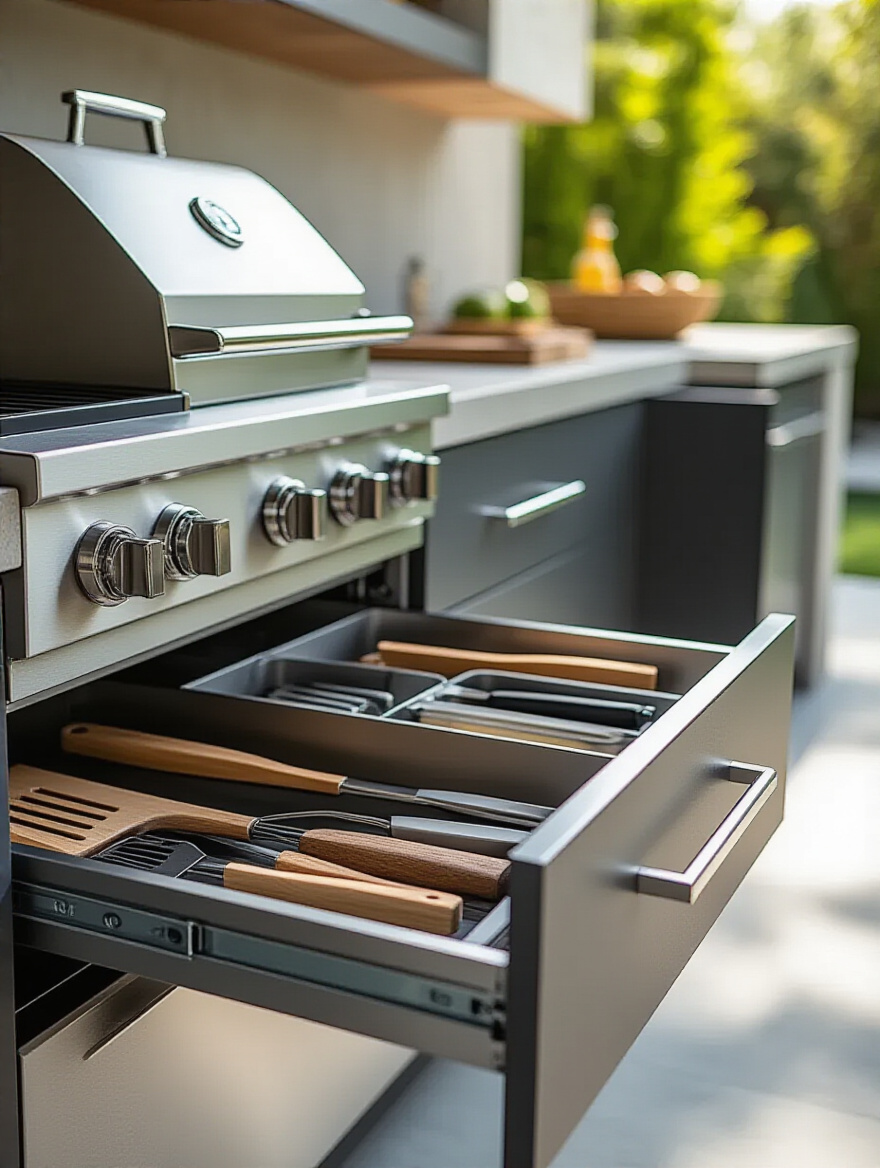
Don’t forget vertical space! A few well-placed hooks for your essential grilling tools keeps them off the counter but still within arm’s reach. The goal is to keep your countertops as clear as possible to maximize your workspace and maintain that clean, inviting look.
Now, let’s add a little 21st-century magic to the mix.
20. Explore Smart Home Integration for Enhanced Convenience
You don’t have to go full “smart home” to make a big impact. Start simple. Put your string lights and landscape lights on a smart outdoor plug. This way you can turn on your party-perfect glow with a single voice command or have them come on automatically at sunset.
From there, you can explore integrated sound systems, a weatherproof TV for watching the game while you grill, or even smart grills that let you monitor your food’s temperature from your phone. The key is to add technology that genuinely makes your life easier and your time outside more enjoyable, not just for the sake of having gadgets.
Finally, remember that your outdoor kitchen isn’t static. It can and should evolve with you.
Longevity & Enjoyment: Maintaining and Upgrading Your Outdoor Culinary Space (Part 2)
The final step is to think of your kitchen as a living part of your home. A little check-in now and then keeps it feeling fresh, functional, and perfectly suited to your life.
21. Periodically Assess and Upgrade Key Components for Modernization
Once a year, maybe in the spring as you’re “opening up” the kitchen for the season, do a quick audit. Are the faucet seals still good? Do all the grill burners ignite properly? Does the lighting still meet your needs? This quick check-up can catch small problems before they become big, expensive ones.
And don’t be afraid to upgrade! Technology changes. Maybe a new side burner with infrared searing capabilities catches your eye, or perhaps you’re ready to switch out your old speakers for a better sound system. A periodic refresh keeps your space from feeling dated and ensures that it continues to be the exciting, functional heart of your backyard.
Conclusion
Creating an incredible outdoor kitchen isn’t about following a rigid formula; it’s about making a series of smart, personal choices that reflect how you want to live. It’s about designing a space that makes cooking a joy, not a chore, and transforms your backyard into the ultimate gathering spot for the people you love. By focusing on a foundation of smart planning, integrating components that serve your lifestyle, and surrounding it all with comfort and beauty, you’re not just building a kitchen—you’re creating the backdrop for a lifetime of happy memories.