The bathtub is the one fixture in a bathroom that most homeowners simply work around rather than think about — it came with the house, it functions, and so it stays. That’s a significant missed opportunity. A well-considered bathtub remodel can shift the entire character of a bathroom from a utility space to something that actually earns its square footage.
Thirty years of working on older homes has taught me that the bath is usually where the most interesting decisions happen. Whether you’re dealing with a cast iron clawfoot that’s seen better days, an alcove tub encased in dated fiberglass, or a 1990s jetted model that hasn’t been used in a decade, the path forward is almost always better than the status quo. What follows are sixteen approaches — ranging from a single-weekend refinish to a full wet room conversion — each grounded in what actually works in the field.
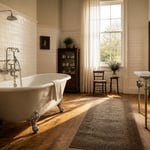
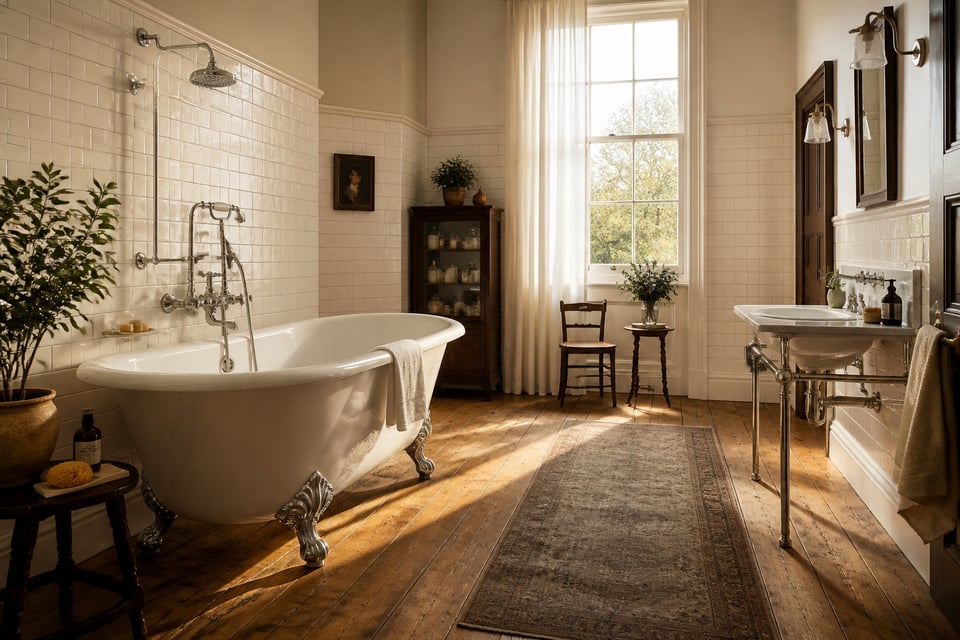
1. Cast Iron Clawfoot Tub Restoration for a Period-Perfect Bathroom
Few fixtures in a historic home carry the same weight as an original cast iron clawfoot tub. These pieces — manufactured by companies like JL Mott Iron Works, Standard Manufacturing, and Crane & Co. from roughly 1880 through 1940. Built with thick cast iron walls and fired porcelain enamel. In fact, that enamel, when in good condition, outperforms any modern acrylic surface. When it’s crazing or chipping, the right move is nearly always restoration over replacement.
Professional reglazing is a molecular bonding process, not paint. A skilled refinisher will deep-clean the surface, apply an acid etch to create microscopic porosity for adhesion, repair any chips with fiberglass putty, apply a bonding primer, then spray 3-4 coats of acrylic urethane via HVLP gun — the same coatings used in automotive refinishing. Interior work runs $350-$700; full interior and exterior comes in at $500-$1,800 depending on condition and location. The result lasts 10-15 years on cast iron and porcelain. DIY kits in the $60-$100 range predictably fail within 6-18 months because they skip the acid etch and bonding primer that make the chemistry work.
Finishing the Exterior and Sourcing Period Hardware
The exterior is a separate job. Stripping the old paint (sandblasting is ideal; chemical stripping if the tub can’t be moved), applying a rust-inhibiting metal primer on bare cast iron, then spraying oil-based enamel in your chosen color produces a durable finish. One mandatory step before any sanding: test for lead paint. Pre-1978 tubs almost certainly have lead paint on their exteriors, and disturbing that surface without proper containment is both a health risk and a code violation in most jurisdictions.
Original hardware (ball-and-claw legs, wall-mount telephone shower sets) can be sourced from US salvage dealers like PlaceMakers or English Salvage in the UK. Budget $1,500-$4,000 for a complete period wall-mount faucet set with handshower in polished nickel or oil-rubbed bronze.
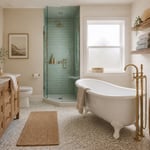
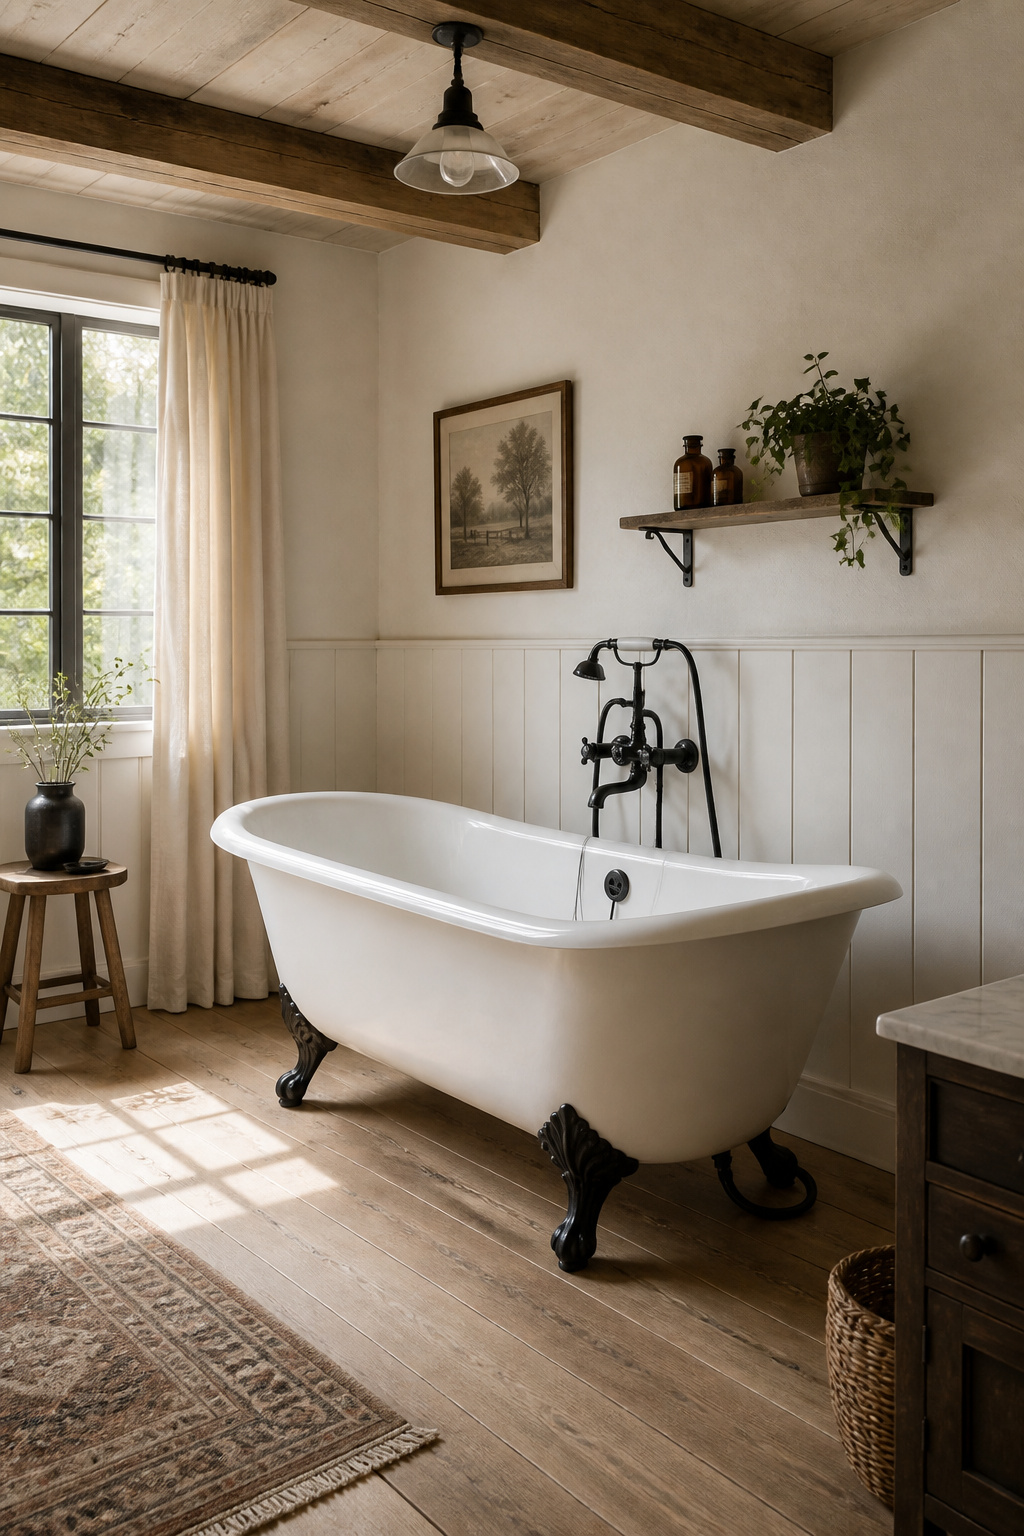
2. Freestanding Soaker Tub as a Bathroom Centerpiece
A freestanding soaker tub works architecturally because it reads as an object rather than an installation. The tub’s position becomes a compositional decision, not just a plumbing convenience — and that shift in thinking is exactly what separates a designed bathroom from one that’s simply functional.
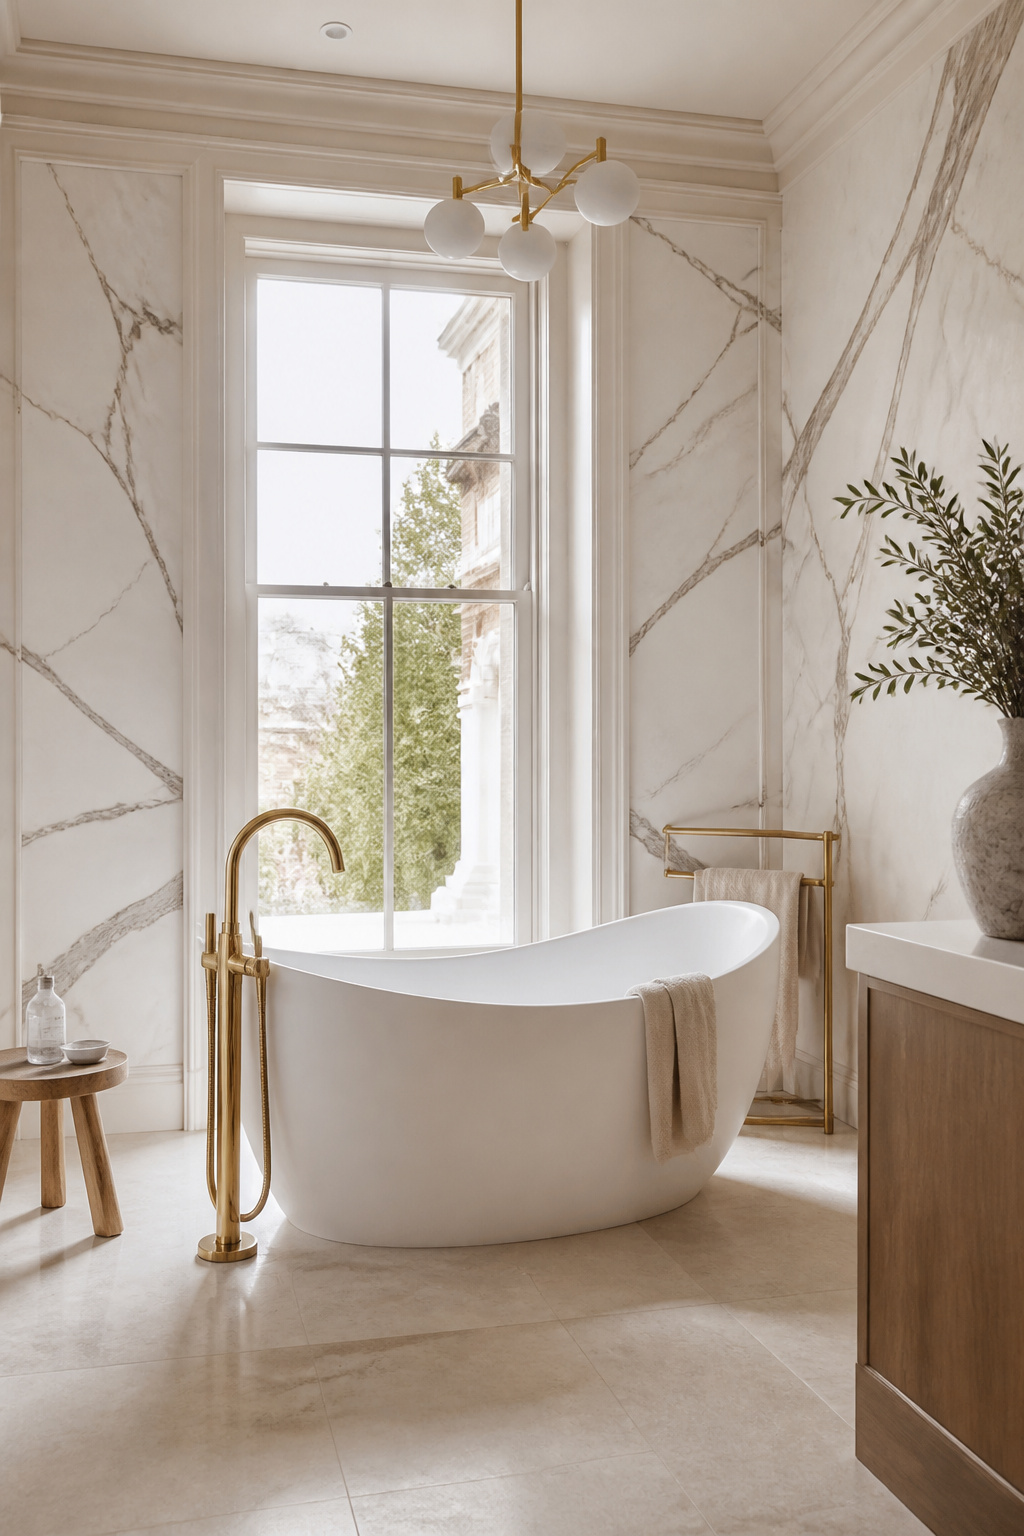
Material selection is consequential. Acrylic tubs (60-120 lbs dry, $700-$2,500) offer the widest range of sculptural shapes since acrylic molds more freely than cast iron. Stone resin (a blend of crushed limestone or quartz bonded with resin) comes in at 150-250 lbs dry ($1,500-$4,000), holds heat for 20-30 minutes longer than acrylic, and is genuinely non-porous and scratch-resistant. Cast iron at 350-500 lbs ($800-$4,000+) provides the best heat retention and carries its own material authority. All three are legitimate choices; what drives the decision should be floor structural capacity more than aesthetics. On an upper floor of an older home, get a structural assessment before committing to stone resin or cast iron — filled weights can exceed 1,000 lbs.
Plumbing Logistics and Project Costs
The plumbing logistics are less flexible than they appear. A freestanding tub requires floor supply lines and a floor drain connection: water must come up through the subfloor rather than from a wall. If the existing supply runs in the wall, relocation adds $1,500-$3,500 in plumbing costs. Moving the drain (if the desired tub position differs from the existing drain) adds another $500-$2,000. Total project cost for a mid-range acrylic freestanding tub with floor-mount filler and plumbing labor: $2,500-$5,500. Stone resin with matching faucet: $4,000-$9,000.
A floor-mount freestanding filler (the tall swan-neck type that rises from the floor) is the most architecturally coherent hardware choice; it anchors the composition and keeps the tub rim clean. For a 50-60 gallon soaker, verify your water heater can supply 35-40 gallons of hot water — a standard 40-gallon tank is right at the edge.
3. Walk-In Bathtub Remodel for Accessibility Without Losing Style
The case for a walk-in bathtub remodel is practical before it’s aesthetic. The CDC reports that one in four Americans aged 65 and older falls each year, with the bathroom ranking among the highest-risk rooms in the house. The 14-16″ step-over of a standard tub is, for many people, not a minor inconvenience but a genuine daily hazard. Walk-in tubs address this with a 2-4″ threshold (ultra-low models go to 1-2″), a 17″ ADA-height built-in seat, integral grab bars, and non-slip floor surfaces, solving three of the four main bathroom fall-risk factors simultaneously.
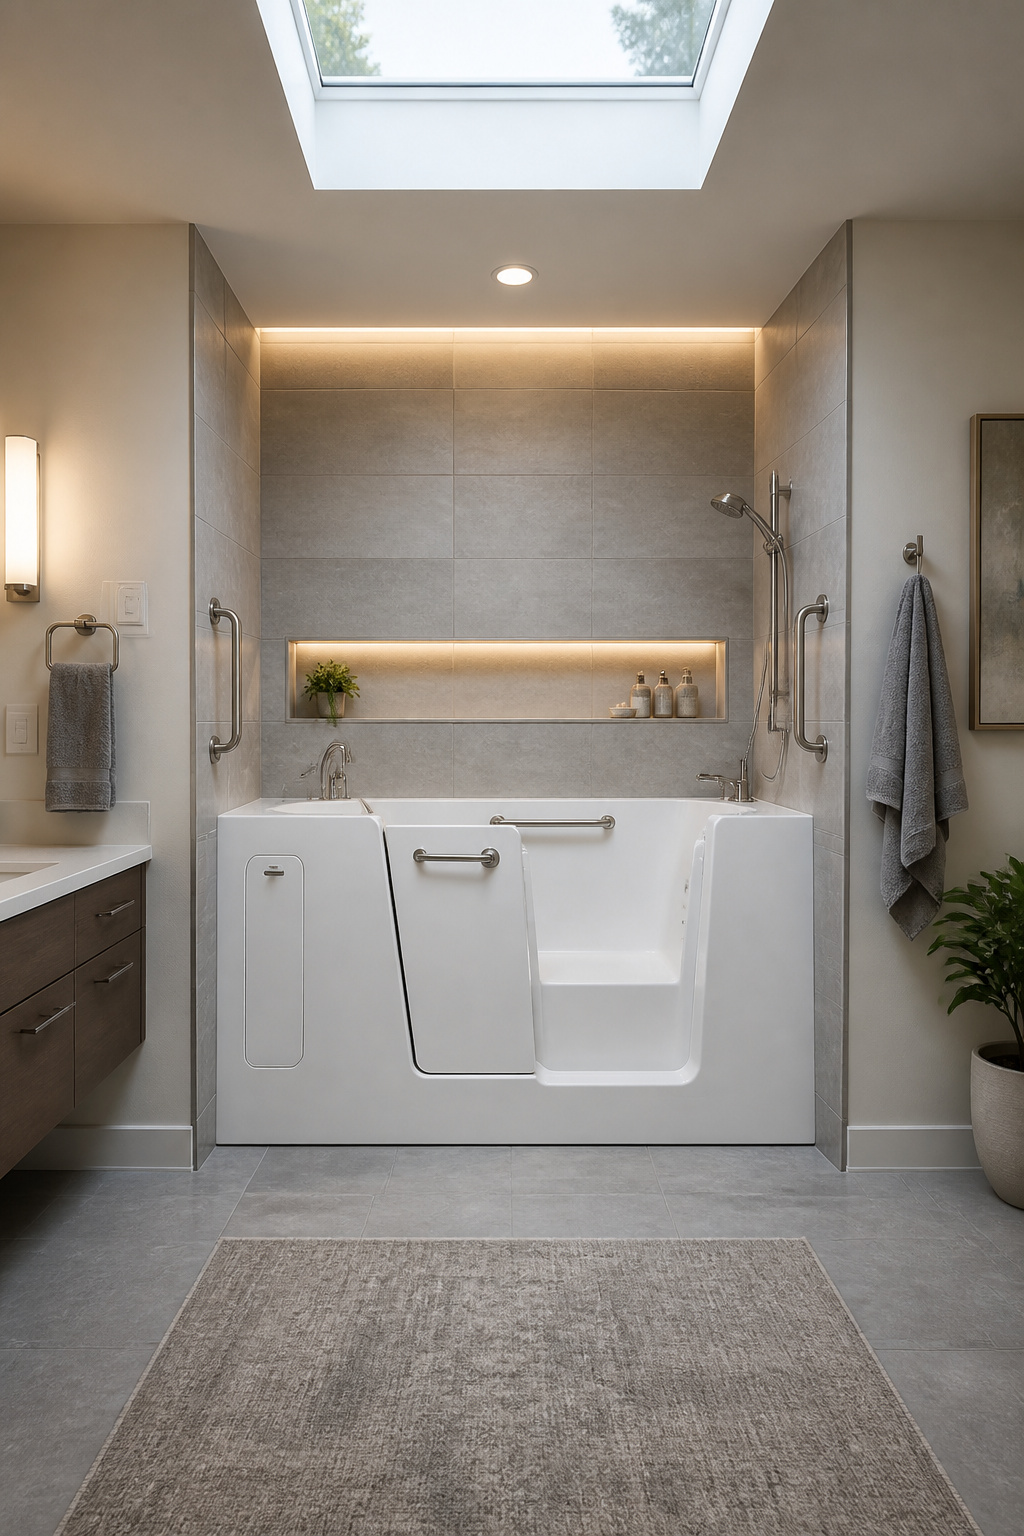
The best current models from American Standard, Safe Step, and Kohler are far less institutional-looking than anything from a decade ago. Also, standard walk-in dimensions of 30-32″ wide by 52″ long are designed specifically to fit the standard 60″ alcove with a pony wall extension panel, meaning most installations work with existing plumbing locations. That matters because repositioning the drain adds $800-$1,500 in subfloor work.
The infrastructure requirements are specific. Floor load: a filled walk-in tub with bather can exceed 1,200 lbs. Standard residential joists are rated around 40 lbs per square foot, and reinforcement is frequently required. Also required: a dedicated 20-amp GFCI-protected circuit for the motor system, and a 75-gallon high-recovery water heater or 8 GPM tankless minimum. The inward-swing door (standard on most models) also has a fill-time implication — you must be seated inside before filling, which changes the bathing sequence considerably. Outward-swing doors cost more and require additional floor clearance, but suit wheelchair transfer situations better.
Full installation range: $4,000-$10,000 for standard models; $10,000-$18,000 for luxury hydrotherapy versions with combined air and water jet systems.
4. Alcove Bathtub Remodel With Classic Subway Tile Surround
Of all the bathtub remodel projects in this list, the alcove tile surround offers the best return on investment. Bathroom remodels nationally return 60-70% at resale; alcove tub replacements with properly tiled surrounds sit at the high end of that range because they directly address what most buyers look at first — tub condition and surround integrity. A dated fiberglass one-piece surround signals renovation deferred. A well-tiled alcove signals renovation completed.
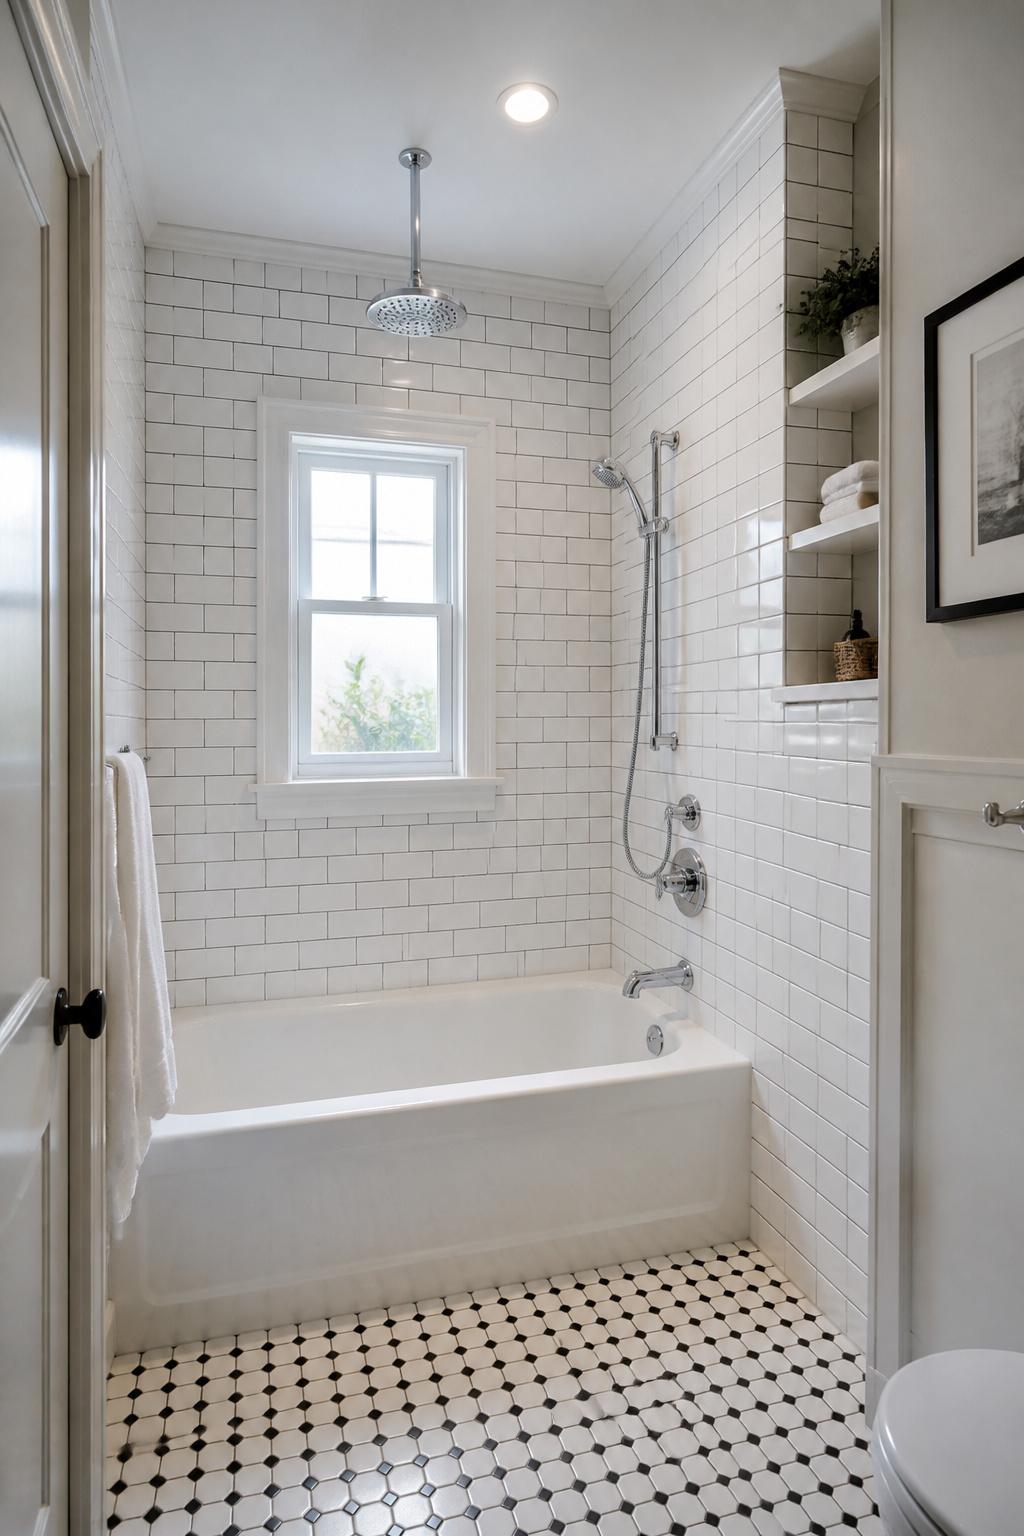
In practice, the waterproofing system is where most alcove remodels succeed or fail, and it’s determined before a single tile touches the wall. Two proven approaches: the Schluter KERDI system (sheet membrane applied over cement backer board with thinset, covering every surface before tile) and RedGard (a liquid-applied membrane brushed over cement board, built up to 40 mil thickness). Both require cement backer board (HardieBacker or Durock) and never greenboard or standard drywall in a wet zone. A demo-to-studs approach is worth the extra cost on any tub surround older than 15-20 years. What’s behind the existing surround frequently reveals water damage, rot, or mold that would otherwise be sealed in.
Tile Selection and the One Detail That Matters
For the tile itself, 3″×6″ white or cream ceramic subway in a running bond pattern remains the most time-proven choice — inexpensive ($2-$5 per square foot), widely available, and the correct period reference for homes built between 1900 and 1960. Beveled subway (metro tile) adds a shadow line at each grout joint that gives the surface more visual depth. Large-format tile (12″×24″ or bigger) reads more contemporary but requires a flatter substrate and more precise installation.
One detail that separates a lasting installation from a premature failure: the joint where wall tile meets the tub rim must be 100% silicone caulk, never grout. That joint flexes as the tub deflects under load; grout cracks within months and water infiltration begins.
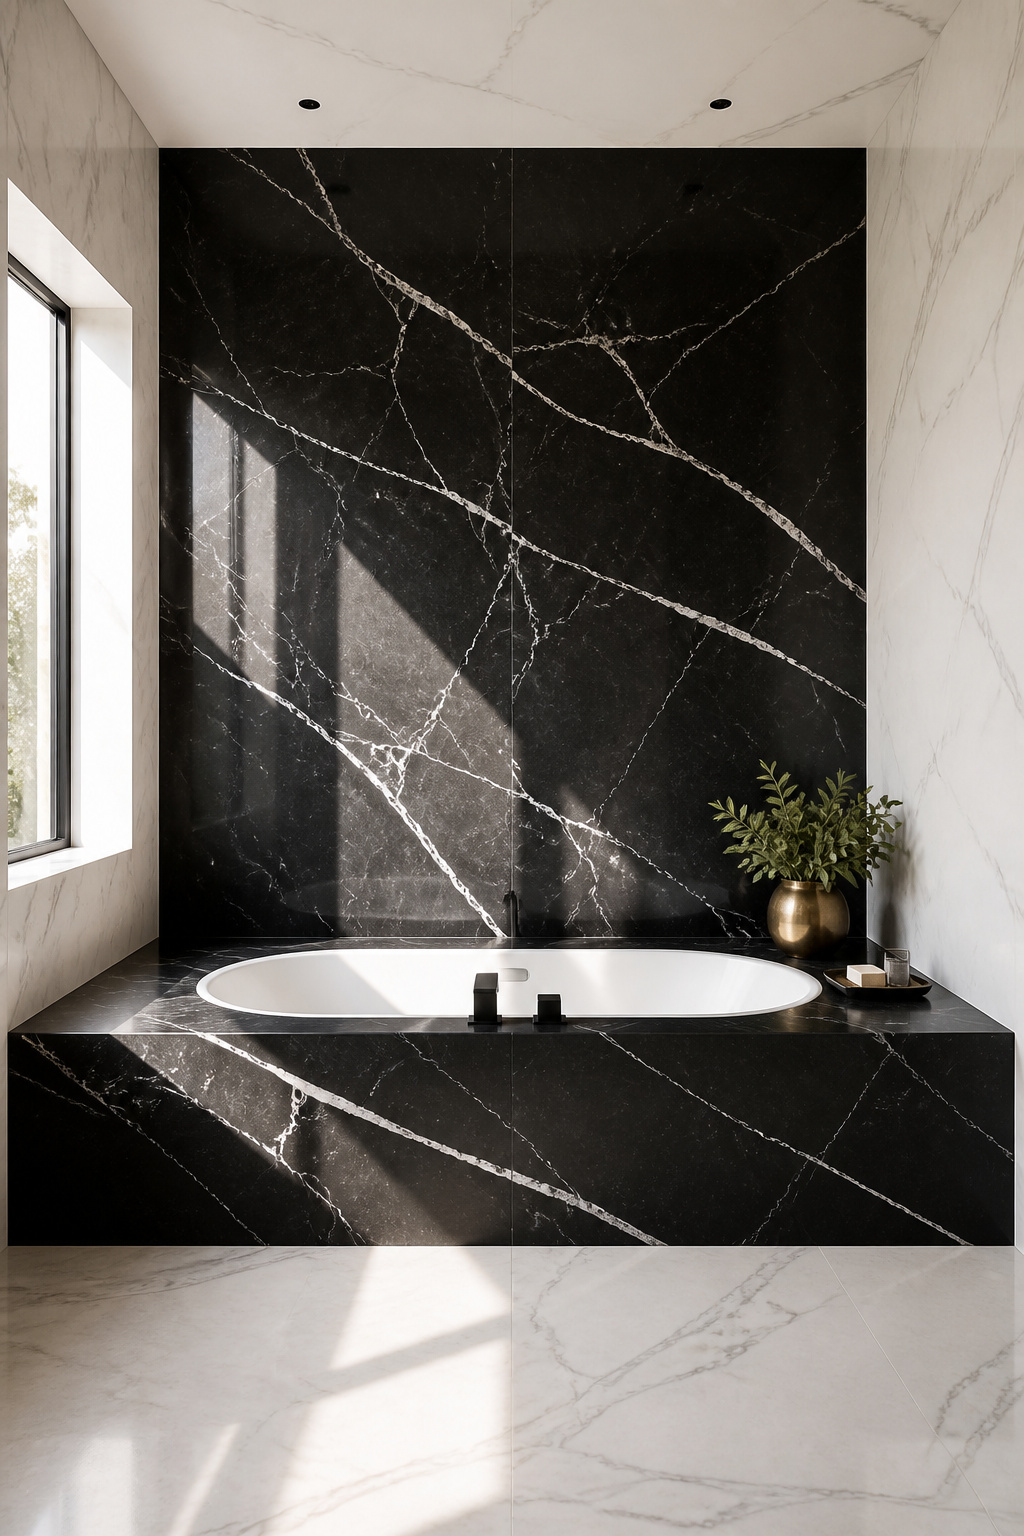
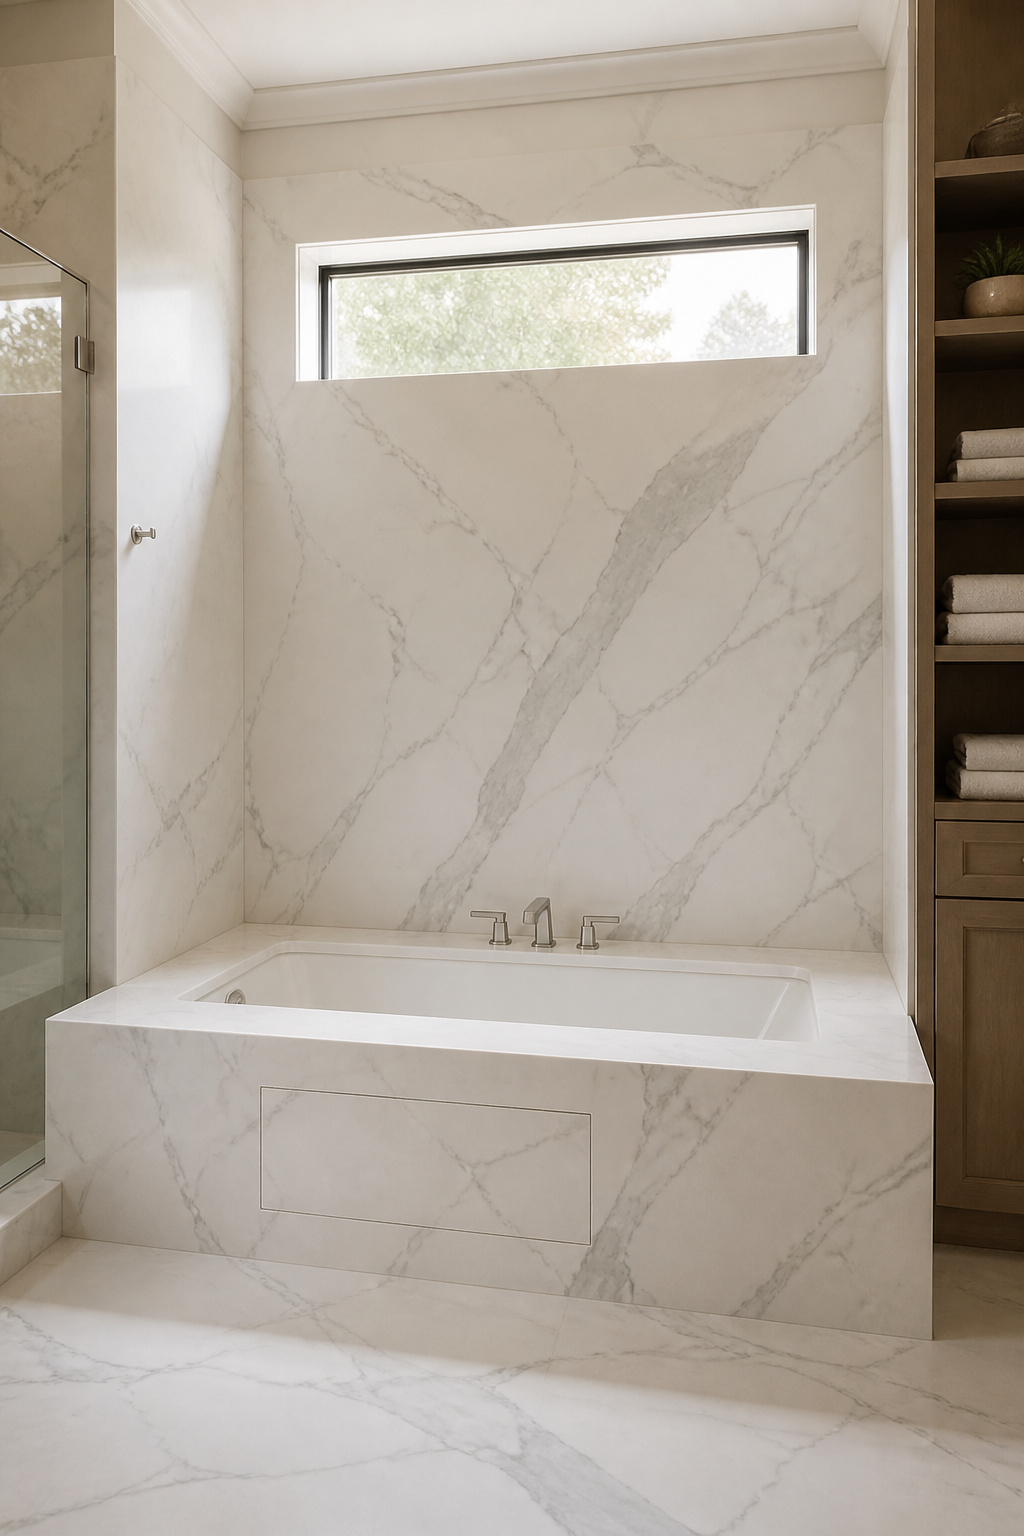
5. Drop-In Tub With a Custom Stone Deck and Waterfall Filler
A drop-in tub installation is fundamentally a deck construction project. The tub itself is almost incidental to the design decisions. The tub’s rim rests on the deck surface, meaning the deck material defines the look entirely: ceramic tile at $7-$15 per square foot reads differently than Carrara marble at $40-$60, which reads differently than Nero Marquina at a similar price point. The basin under the water is largely invisible. The deck is what you see every day.
However, material choice carries maintenance implications worth stating plainly. Marble is calcite-based and etches from acidic contact. The shampoos and soaps routinely sitting on the deck ledge are mildly acidic enough to dull a polished marble surface within months if the stone isn’t properly sealed. Honed finish hides etching better than polished. Quartzite (a metamorphic stone, not to be confused with engineered quartz countertop material) offers similar veining to marble but significantly better acid resistance. Taj Mahal and Sea Pearl are the most popular patterns for bathroom applications. Nero Marquina, a dense black marble from the Basque Country with bold white veining, creates maximum contrast against white fixtures but requires sealing every 6-12 months; mineral deposits read visibly on the dark ground.
Waterfall fillers — a single wide spout delivering a sheet flow — have replaced the roman tub filler as the contemporary standard for drop-in decks. Mounting requires 1-3/8″ holes for standard stems, cut with a diamond core bit and water cooling. Waterproofing the full deck with a liquid membrane (Mapei AquaDefense) before any stone goes down is essential; stone alone is not waterproof. An access panel in the deck apron is not optional: any drain or overflow issue without access means full deck demolition.
6. Japanese Soaking Tub Conversion for a Spa-Style Bathroom
An ofuro occupies a completely different philosophical territory from any Western bathtub. The vessel is shorter (typically 60″×36″) but far deeper — designed for fully immersed, seated soaking with water at shoulder level. More importantly, the ritual is different: you shower first, then soak in still, clean hot water. The bathtub is not where you wash; it’s where you decompress.
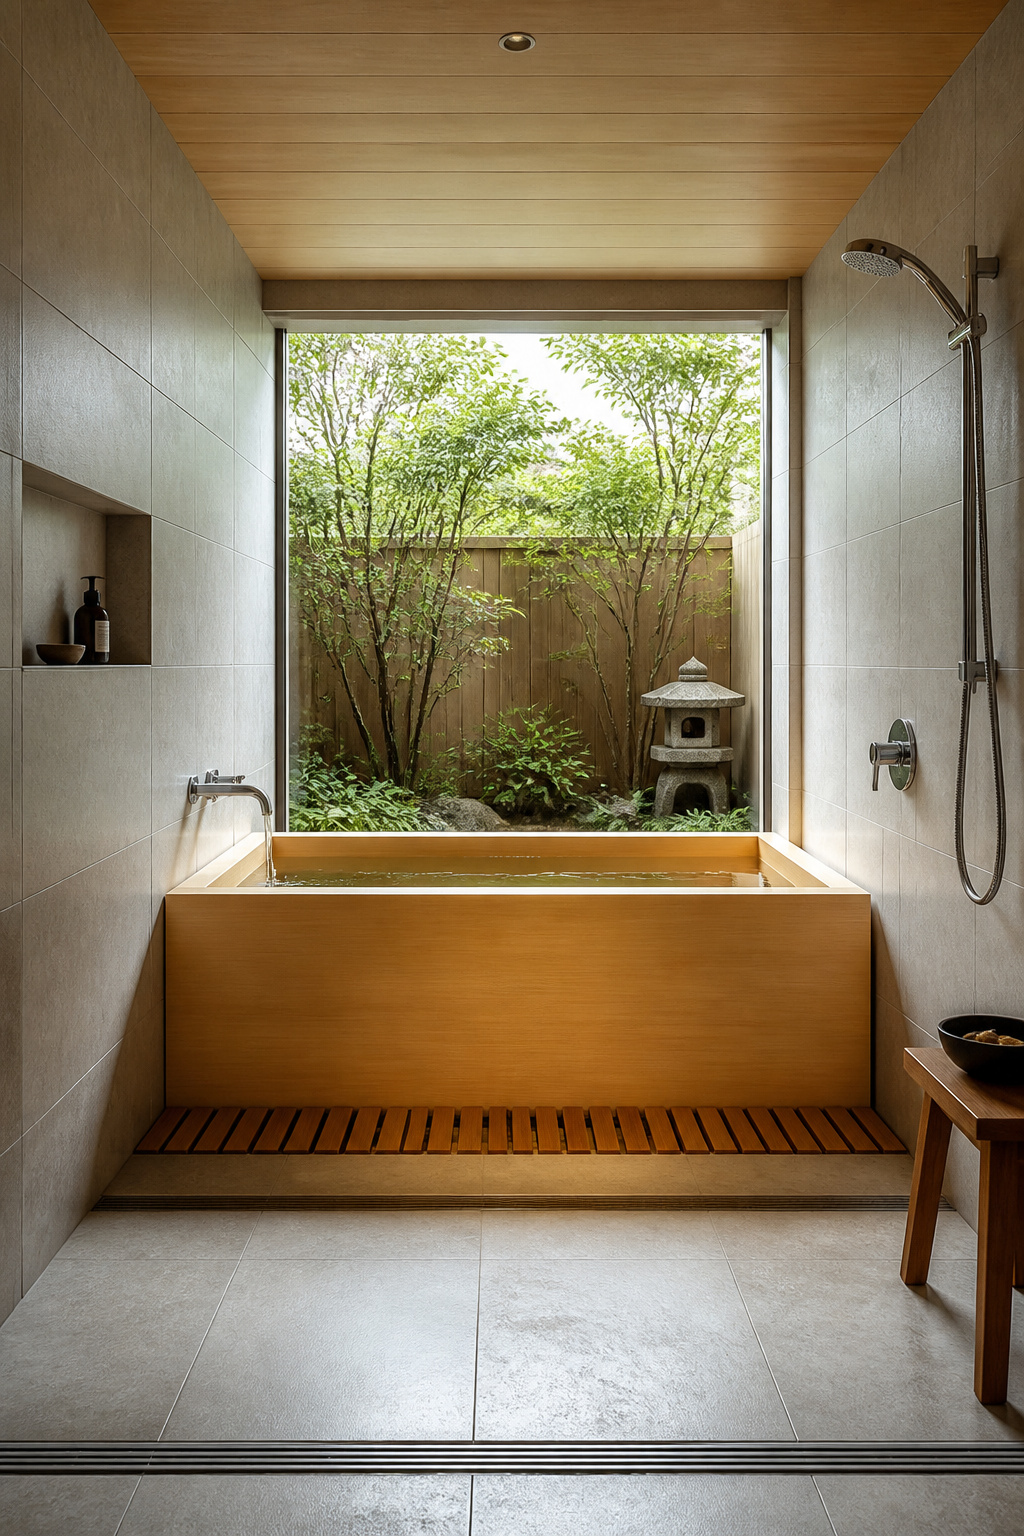
Hinoki (Japanese cypress) is the traditional material, and the choice is not merely aesthetic. Hinoki contains natural oils that resist moisture and mildew, making it suitable for a wet environment without heavy chemical treatment. When wet, it releases a warm cedar-like fragrance, inseparable from the experience. Asnaro (a related species) and teak are used for outdoor or entry-level versions. Fully assembled hinoki tubs from Bartok Design start at approximately $6,600 for the popular 1515mm×915mm×725mm size (roughly 60″×36″×28″). Acrylic versions in ofuro proportions are available from US suppliers for $800-$2,500.
Two installation configurations exist. Sueoki style: the tub sits directly on the floor, the wooden panel construction exposed. This is the simpler conversion — it goes in where your existing tub was, assuming the plumbing lines up. Umekomi style: partially or fully recessed into the floor, creating a barrier-free entry. Best executed at ground level where subfloor excavation is feasible without structural complexity.
The floor requires a drain. The traditional approach is a full wet room: the entire bathroom floor waterproofed and sloped to a central floor drain, with a wood slat floor grate (sunoko) surrounding the tub. The first fill should soak for several hours; the wood planks expand as they reach moisture equilibrium, and the tub won’t be fully watertight until that expansion occurs.
7. Painted Tub Exterior as a Budget-Friendly Bathtub Remodel
The most affordable bathtub remodel in this entire list isn’t a replacement — it’s a finish. A painted or reglazed tub exterior transforms the look of a clawfoot or roll-top entirely, and it can be done for as little as $350 professionally or under $100 with a consumer kit. The gap in outcome between those two options, however, is substantial.
Consumer DIY kits (Rust-Oleum Tub & Tile is the most widely sold) apply single-part epoxy by roller or brush. The limitation isn’t the product’s fault; it’s that consumer applications skip the steps that make a finish last. Professional reglazing uses catalyzed two-part polyurethane or acrylic urethane systems that cross-link chemically during curing — fundamentally different chemistry. Applied after acid etching and bonding primer via HVLP spray, the professional finish bonds at a molecular level and lasts 10-15 years. DIY kits, skipping those surface preparation steps, typically peel or bubble within 6-18 months. As a temporary measure before a full renovation, a DIY kit is a reasonable stopgap. As a permanent solution, it’s false economy.
Custom Colors, Lead Paint, and Cure Time
A custom color is one of the most effective per-dollar design moves available. Deep navy, forest green, charcoal, dusty rose — any of these on a freestanding tub exterior, paired with a contrasting interior glaze, creates a bathroom focal point that reads as intentional and designed. Custom color work adds $100-$300 to a standard refinishing job. Before any sanding on a pre-1978 tub, lead paint test: it’s a legal requirement in most jurisdictions and a common-sense precaution regardless. For homeowners working within tighter renovation budgets, this kind of finish upgrade pairs well with the other ideas in this roundup of budget bathroom makeovers that actually work, and a refinished tub as the room’s focal point changes everything else that surrounds it.
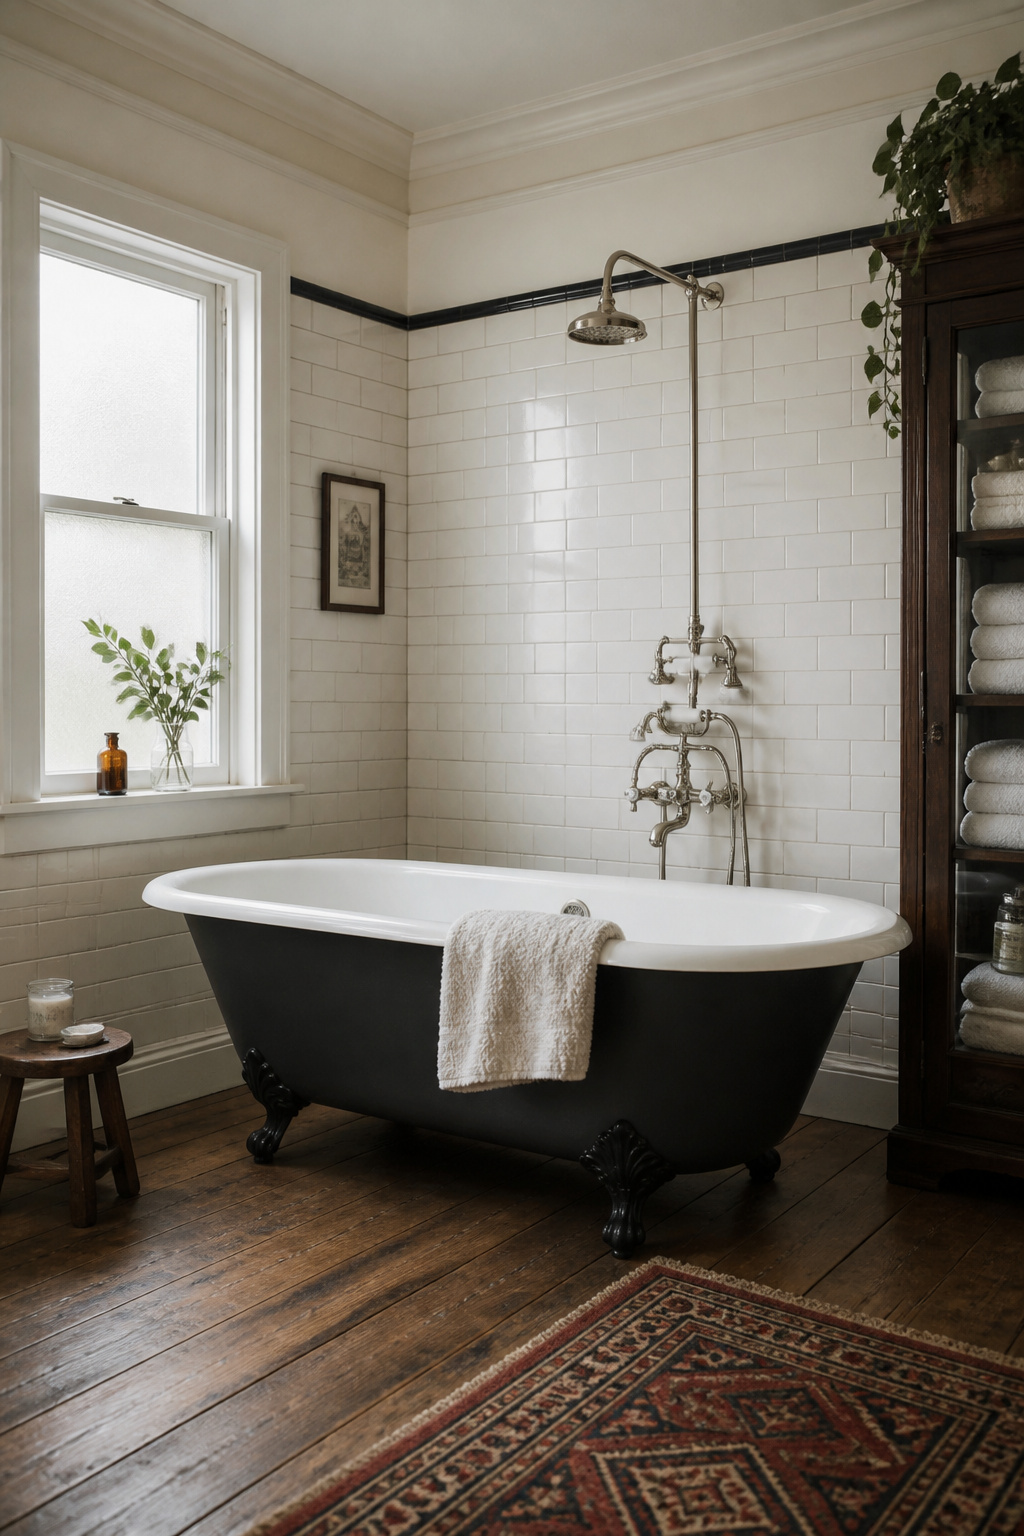
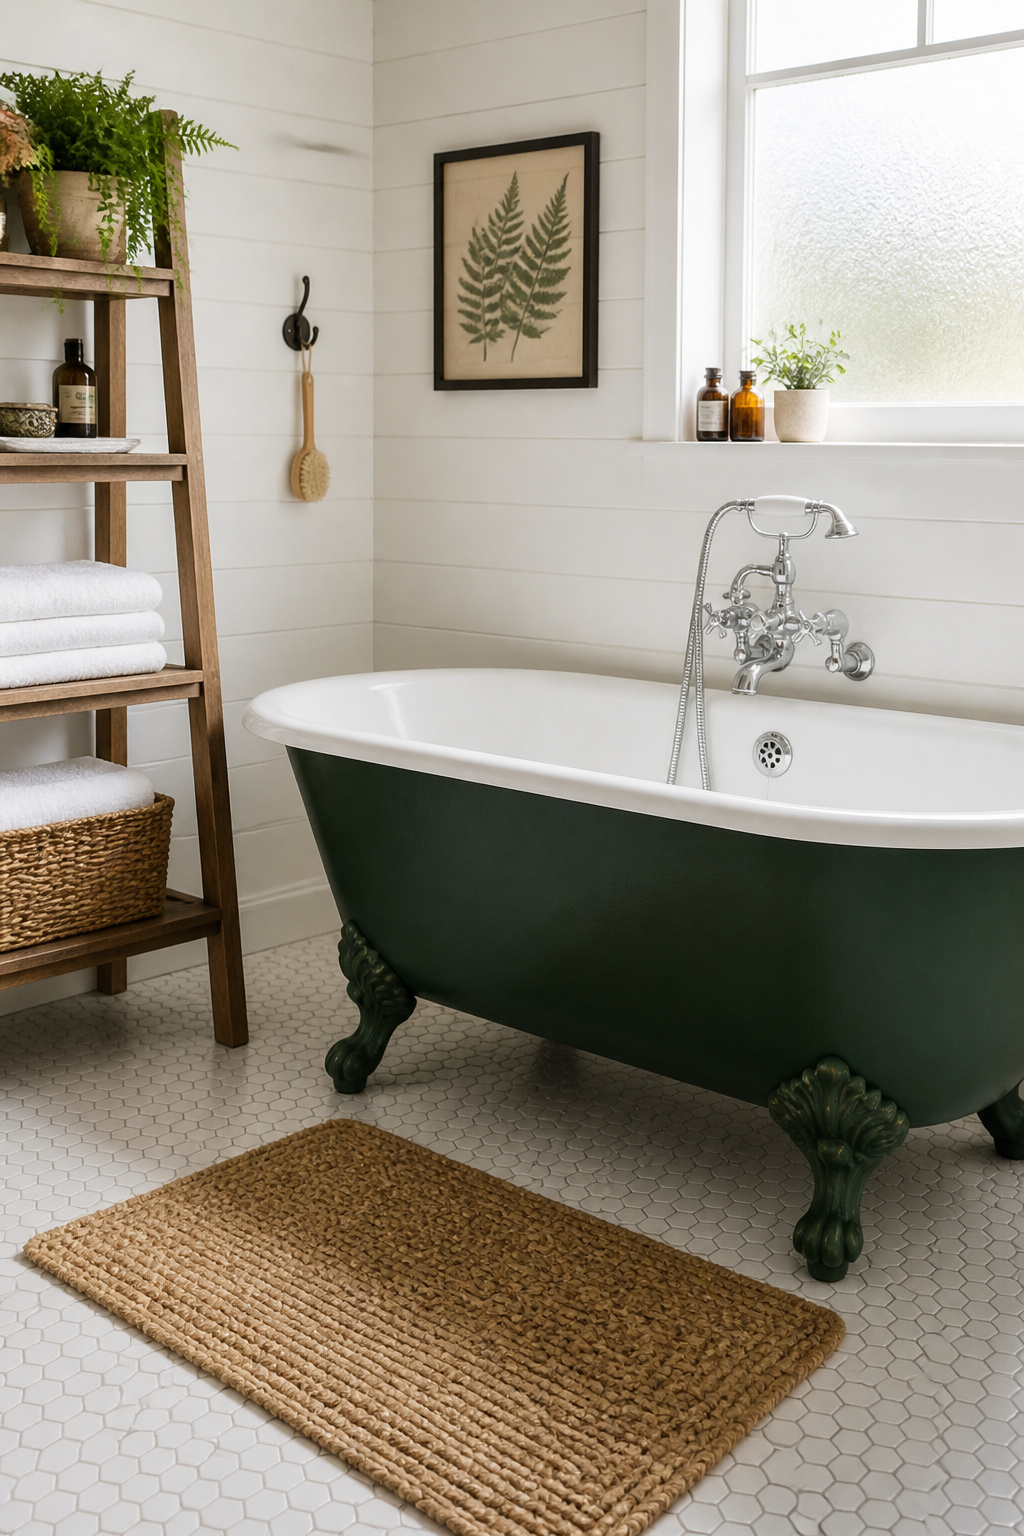
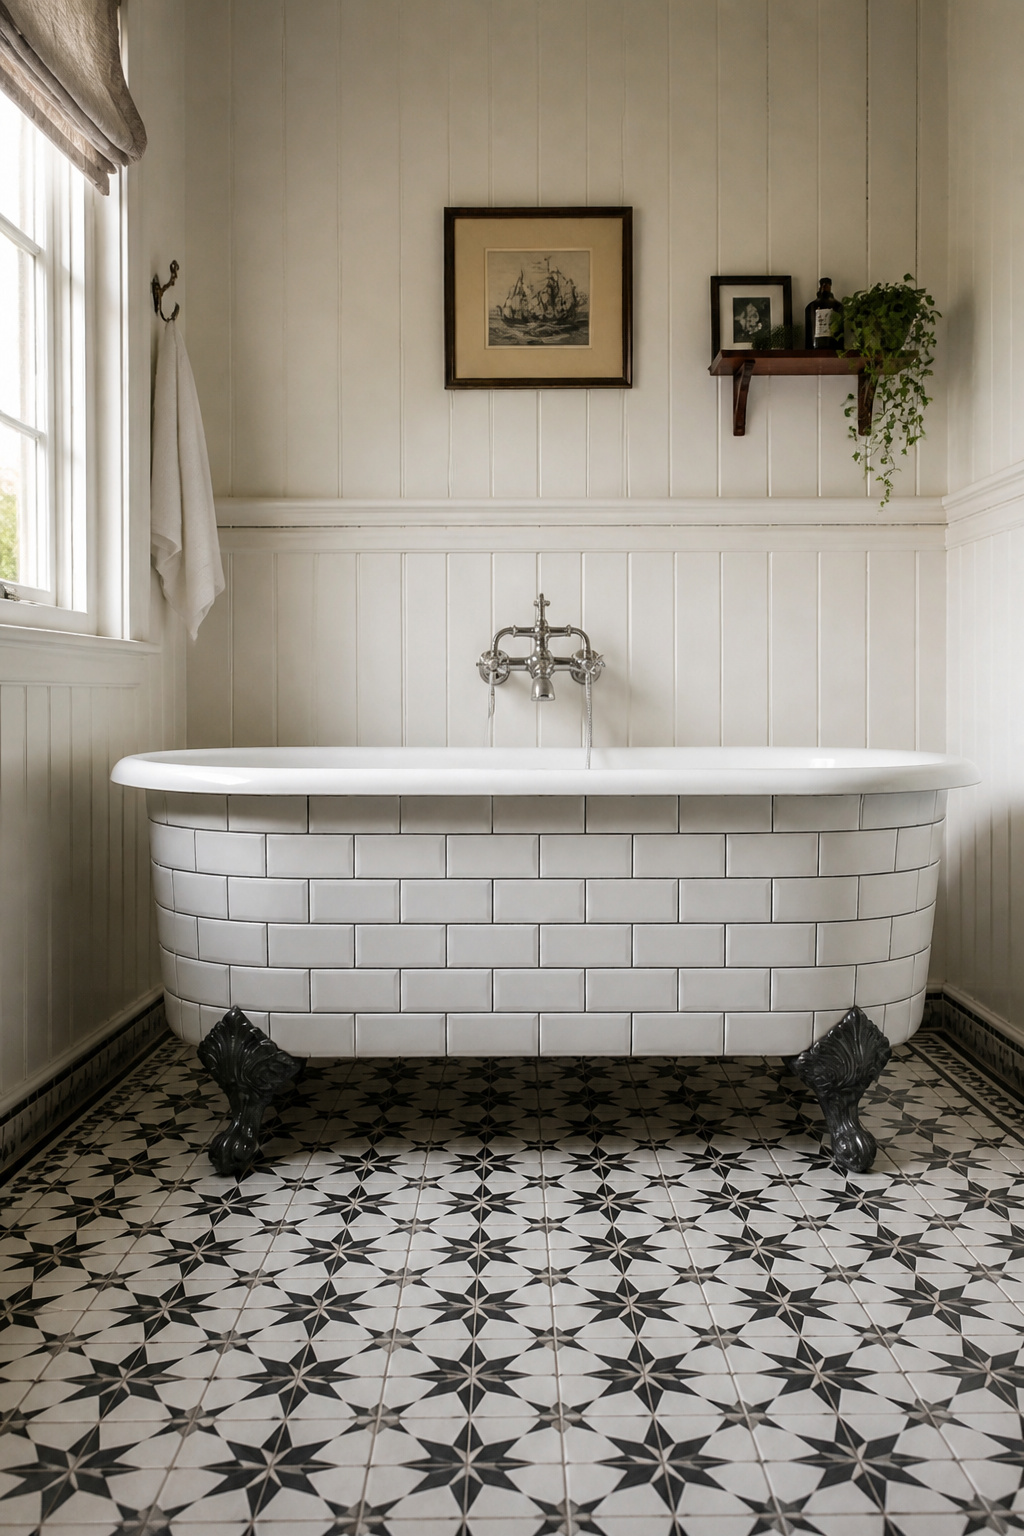
8. Farmhouse Roll-Top Tub With Exposed Matte Black Plumbing
The double-ended roll-top bath is one of the most historically consistent forms in bathroom design — it dates to the 1880s and has been in continuous production since. What gives the farmhouse version its particular energy is the hardware pairing: white porcelain or acrylic exterior against matte black fittings creates a combination that reads simultaneously as period and contemporary. The form is Victorian; the finish is unmistakably current.
Contemporary roll-top baths come in twin-skinned acrylic (typically 1695-1750mm long, ~750mm wide, 50-75 lbs) or cast iron. The acrylic version with aluminum reinforcement is the practical choice for most renovations: lighter, faster to install, and available with pre-matched matte black ball-and-claw legs. Leg style options are worth considering: ball-and-claw is the most traditional and ornate; bun feet are more restrained and suit a Shaker-influenced farmhouse aesthetic; lion’s paw feet lean into the Victorian high-style direction. All three are available in matte black from Kingston Brass and Barclay in the US, or Victorian Plumbing if you’re willing to import.
Hardware Configuration and the One Hard Rule
Hardware configuration matters as much as the tub itself. The wall-mount telephone handshower, the period-authentic configuration, requires the tub to be drilled for 3-3/8″ or 7″ faucet centers. Floor-mount freestanding fillers work for a more contemporary read but require floor supply lines routed up through the subfloor. Exposed drain assembly and P-trap are part of the aesthetic; matte black P-traps with large-format drain covers are available from Kingston Brass and Signature Hardware. Check your local code — some jurisdictions require an access panel if the P-trap is enclosed.
One hard rule: the hardware finish must be consistent throughout. Matte black legs against chrome or brushed nickel fittings undermines the entire composition. For those where the roll-top is just the beginning, the farmhouse bathroom decor that creates an oasis extends well beyond the tub; wall treatment, floor tile, and wood accents all respond to the roll-top’s visual weight.
9. Bathtub-to-Shower Conversion for Small Bathroom Layouts
A bathtub-to-shower conversion is the most logistically complex project in this list that doesn’t require a general contractor. The decision to remove a tub also has real estate implications that deserve consideration before the demo starts. In a multi-bathroom home, removing a tub from a secondary bathroom is generally neutral to positive. In a one-bathroom home, losing the only tub statistically narrows the buyer pool by 10-12% in most family-oriented markets. If accessibility is the driver and you plan to stay, the math changes entirely.
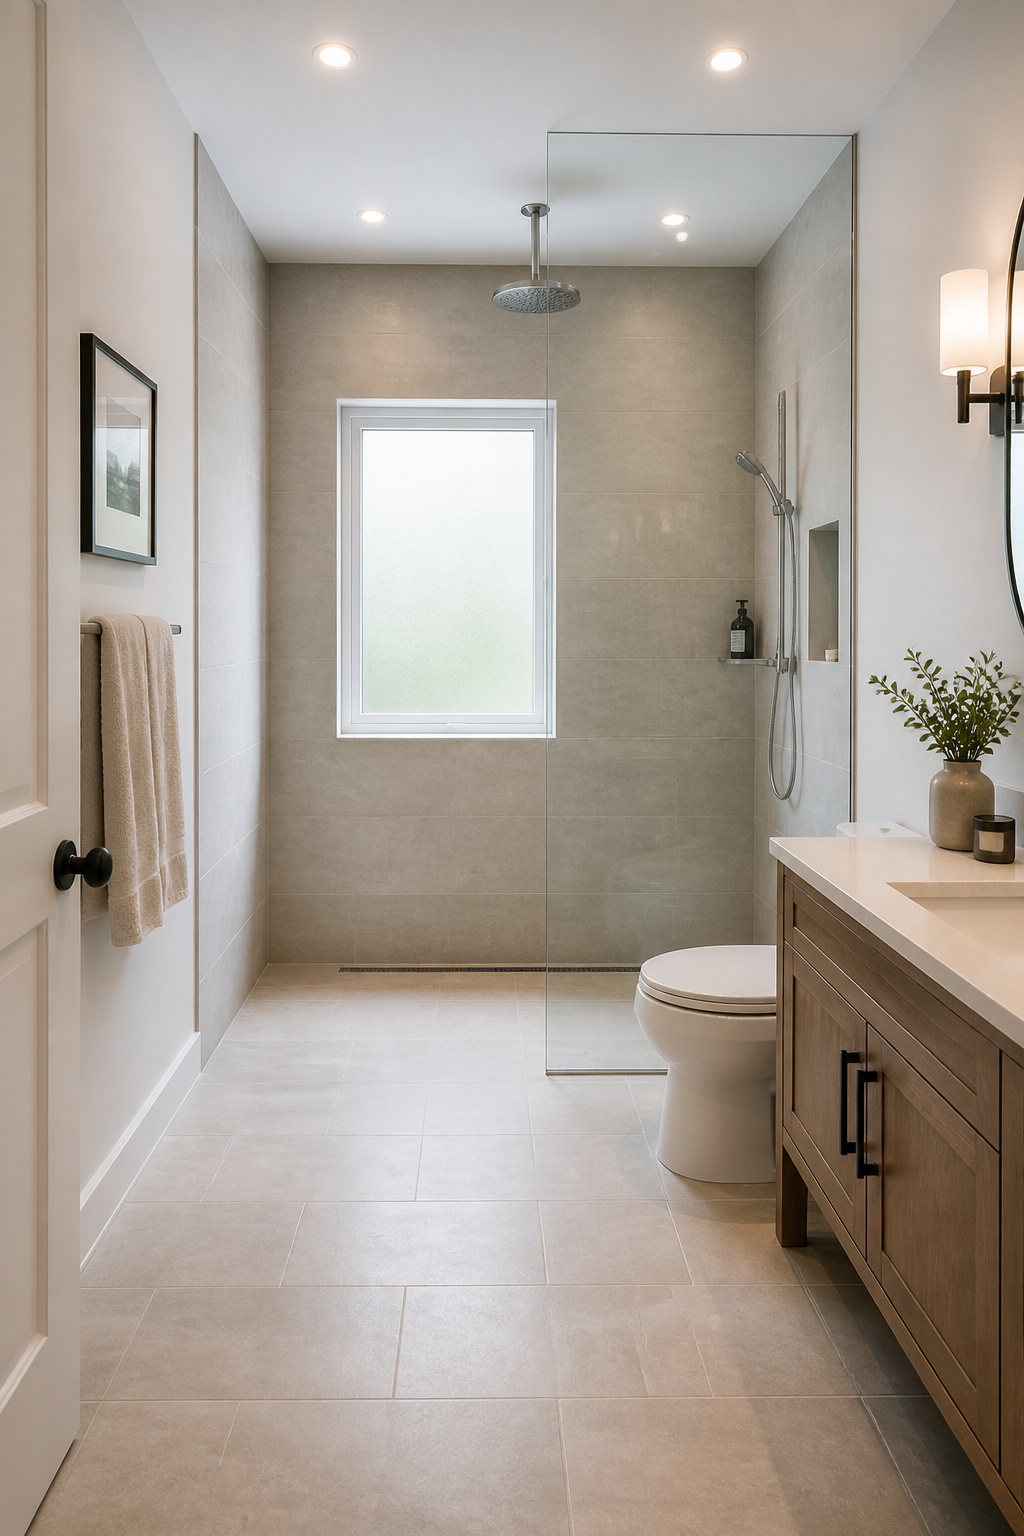
The mandatory code change that surprises most homeowners: tub drains are 1.5″ diameter; shower drains must be 2″. Even when keeping the drain in the same location, the plumber must upgrade the drain line from trap to stack. This is not optional in any jurisdiction. The cost consequence of drain location is significant — keeping the drain in its existing position saves $800-$1,500 versus moving it to center or to the opposite end for a linear drain.
Curbless showers add $1,000-$3,000 to the conversion: the entire bathroom floor must slope to the drain at 1/4″ per foot, and waterproofing extends beyond the shower zone across the full floor area. In a small bathroom, this is worth the premium — removing the curb boundary makes the floor read as one continuous surface and the room feels meaningfully larger. Total conversion costs by tier: prefab conversion kit $5,000-$8,000; standard tiled conversion $7,500-$12,000; premium curbless with large-format tile and linear drain $12,000-$18,000.
Once the conversion is done, it opens up new design directions — the bathroom shower designs that feel like a personal spa you can build in that reclaimed space are worth thinking through before finalizing the layout.
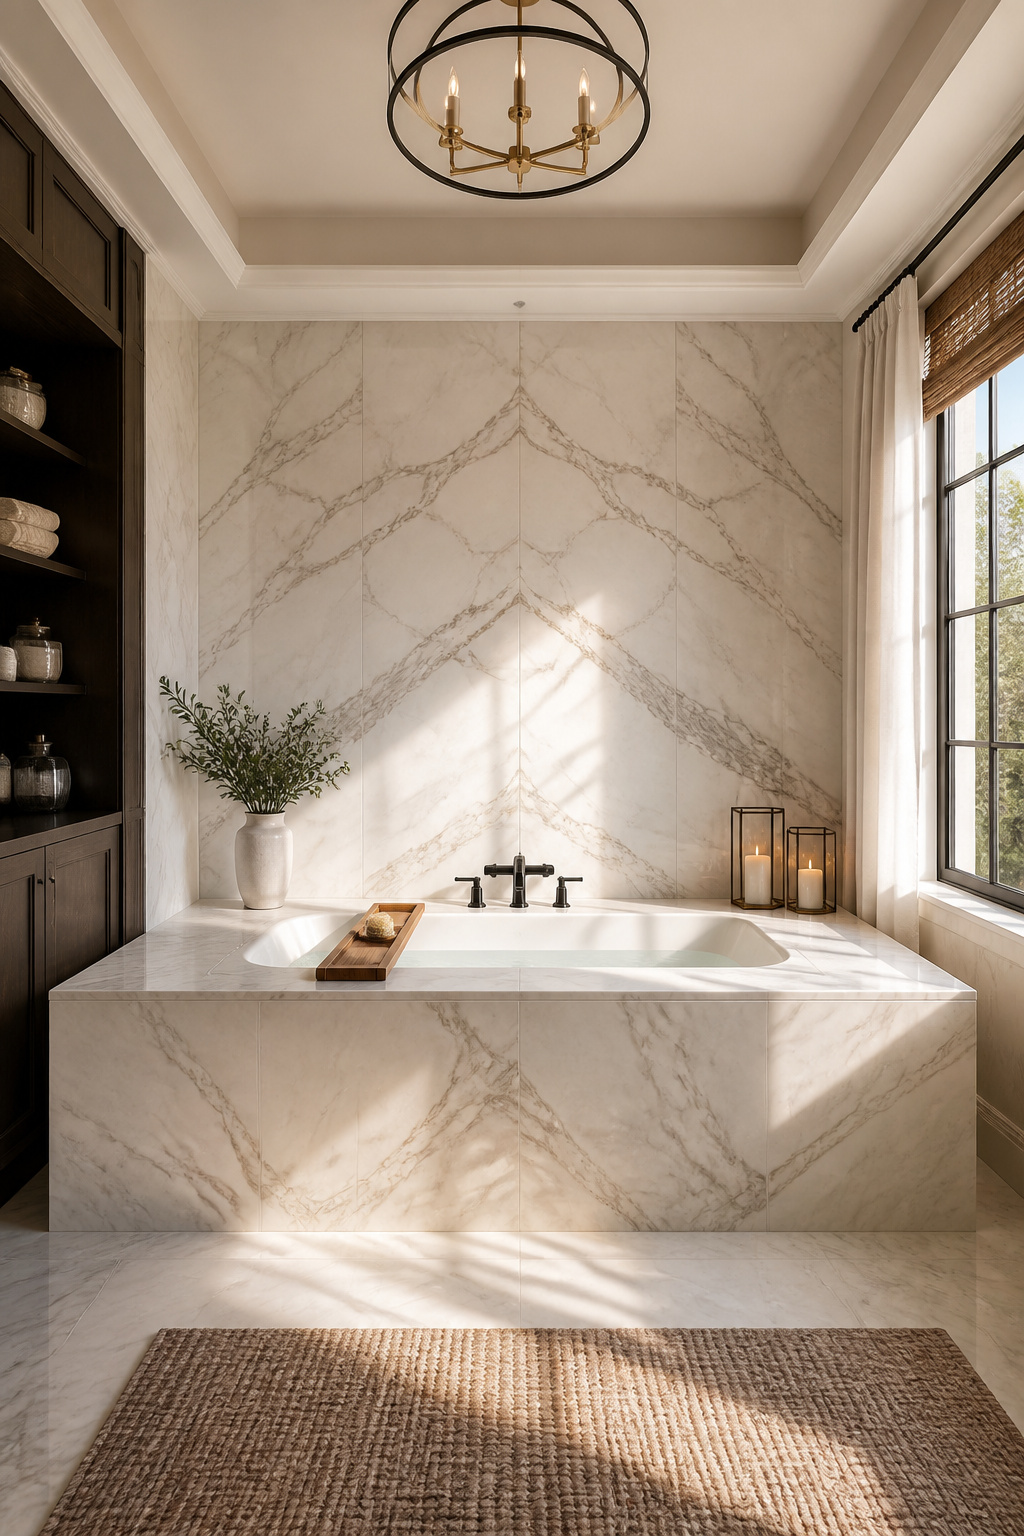
10. Deck-Mounted Tub Surround Remodel Using Marble or Stone Tile
Stone tile around a bathtub is among the highest-stakes work in any bathtub remodel project. Done correctly, it lasts for decades and transforms the character of the room. Done incorrectly (with inadequate substrate, skipped waterproofing, or the wrong stone) a stone surround can fail expensively within a few years.
Substrate selection matters more than most homeowners realize. Cement backer board (HardieBacker or Durock) is adequate for ceramic and small-format porcelain tile. For large-format stone (12″×24″ or larger): use a mud-set system for maximum rigidity, or Schluter KERDI-BOARD, a foam backer board with integral waterproofing — which eliminates a separate waterproofing step and reduces weight. Large-format stone on standard cement board flexes enough to crack the panels. The substrate must be completely rigid.
Stone options beyond Carrara marble deserve consideration. Quartzite gives you marble-like veining with significantly better acid resistance; it won’t etch from the shampoo sitting on the deck ledge the way Carrara will. Nero Marquina creates a dramatic high-contrast look against white fixtures. Travertine reads warm and European, but the natural pitting requires a decision upfront: leave it open for an authentic look or fill with grout. For any calcite-based stone (marble, limestone, travertine), penetrating sealer applied before installation, after grouting, and annually is the minimum maintenance commitment.
The deck-to-wall transition is the highest-risk waterproofing zone. Liquid membrane (Mapei AquaDefense) covers the full deck and surround, with mesh fabric tape at all transitions and penetrations. Installation sequence: back wall first (temporary ledger boards to prevent slumping), side walls, deck surface last. Allow 72 hours before applying any load to the stone deck.
11. Victorian Pedestal Tub With Authentic Period-Correct Fixtures
A genuine Victorian pedestal tub is in a different category from everything else in this list. Where a reproduction delivers visual impact, an original cast iron or fireclay pedestal from JL Mott Iron Works, Standard Manufacturing, or Crane & Co. carries actual material history — the weight of a century of use, the fired porcelain enamel that no modern surface fully replicates, and the ornate pedestal casting that justifies a significant investment.
The distinguishing details are visible to the trained eye: thick walls and heavy casting; ornate relief work on the pedestal; a craquelure (fine crazing) in the aged glaze that is a patina, not a defect; dimensions that reflect pre-standardization manufacturing, typically 33″×68″. A JL Mott 1904 fireclay pedestal tub in excellent condition at PlaceMakers in San Francisco recently commanded $16,500 — a measure of rarity. More typically, expect $5,000-$10,000 for a good original from US salvage dealers like Irreplaceable Artifacts or Preservation Works. UK sources (English Salvage, Lassco, Mooney Demolition) are worth investigating for exceptional pieces even accounting for transatlantic shipping.
Period Hardware and What Makes the Room Commit
Budget for re-enameling: $500-$1,800 for professional interior restoration. A cracked fireclay pedestal is a structural concern: the repair is difficult and may not hold under load. Inspect before purchasing. Reproduction pedestal tubs from Barclay, Cheviot, or Hudson Reed run $2,000-$5,000 and look the part from across the room, but lack the material depth of an original.
Period hardware is where the room either commits or doesn’t. An authentic wall-mount bridge faucet with ceramic cross handles and telephone handshower, in polished nickel (the Victorian standard), comes from Barber Wilsons (UK), Samuel Heath (UK), or Strom Plumbing and Randolph Morris in the US. This hardware level runs $800-$2,500 for a complete set. Chrome is acceptable on reproductions; on an original Victorian tub, the finish mismatch undermines the entire effect.
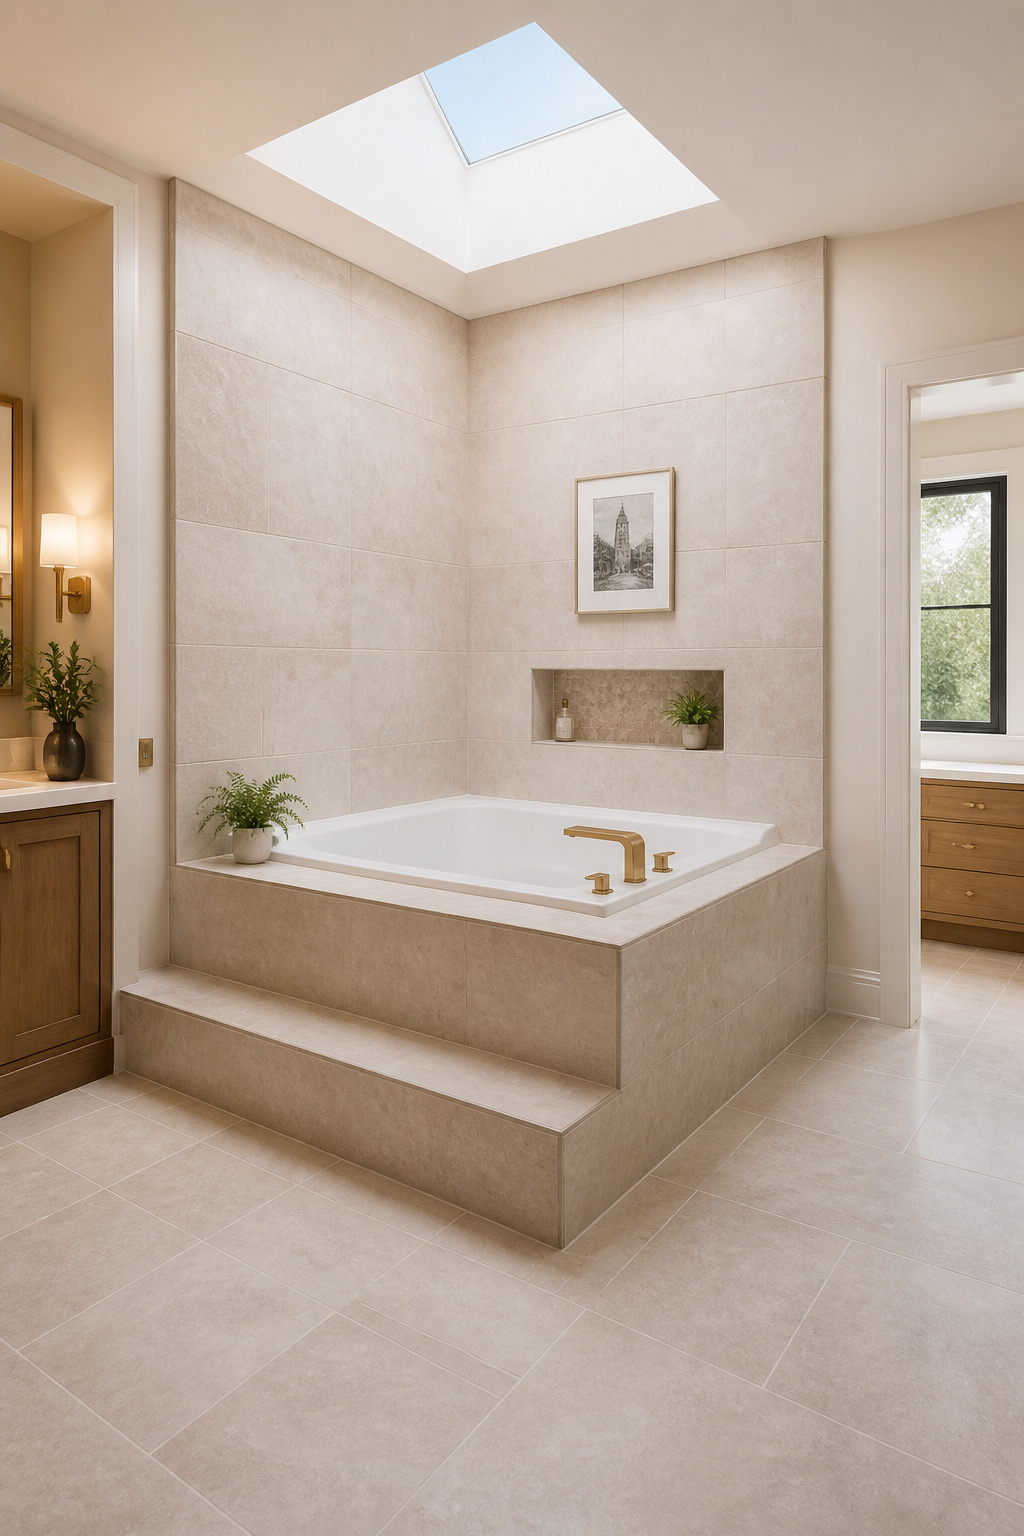
12. Undermount Tub Recessed Into a Built-In Deck or Platform
An undermount tub reads differently from a drop-in because the distinction is architectural rather than decorative. The rim is completely hidden beneath the deck material, and the stone or tile surface appears to continue right to the water’s edge. It’s a seamless quality that takes more precision to achieve than a drop-in, but it’s the detail that makes a platform tub feel designed rather than installed.
Not every tub can be undermounted — the manufacturer’s specs must explicitly confirm compatibility. Verify before purchasing. The deck cutout dimensions are critical; any variation from manufacturer tolerances creates either a gap or a rim that won’t seat correctly. If you’re thinking through master bathroom remodeling strategies that include a platform tub, the undermount detail is worth the additional precision it requires.
Platform framing: 2×4 lumber at 16″ on center with cross-blocking, rigidly anchored to the floor and adjacent walls. No flex is acceptable. Add 2×4 blocking directly under the deck edge where the undermount rim will bear — this is where the weight concentrates. Platform height is typically 17-18″ (seated height for comfortable entry and exit); lower 12-14″ platforms are more contemporary in feel but require more of a step-and-lower approach.
The access panel is non-negotiable and frequently omitted: cut a removable panel into the side apron, minimum 12″×18″, sized to reach the drain and overflow connections by hand. Any future leak without that access means tearing out the entire platform. With it, a service call to reseat the drain takes 20 minutes.
13. Jetted Tub Remodel Upgrade to a Luxury Air Bath System
The vast majority of jetted tubs installed in American homes between 1985 and 2005 fall into one of three conditions: broken, barely used due to maintenance burden, or forgotten entirely. A jetted tub remodel — either restoring a failed system or upgrading from whirlpool to air bath — is one of the more underestimated renovations available because it changes the use case of a tub that has effectively become decorative.
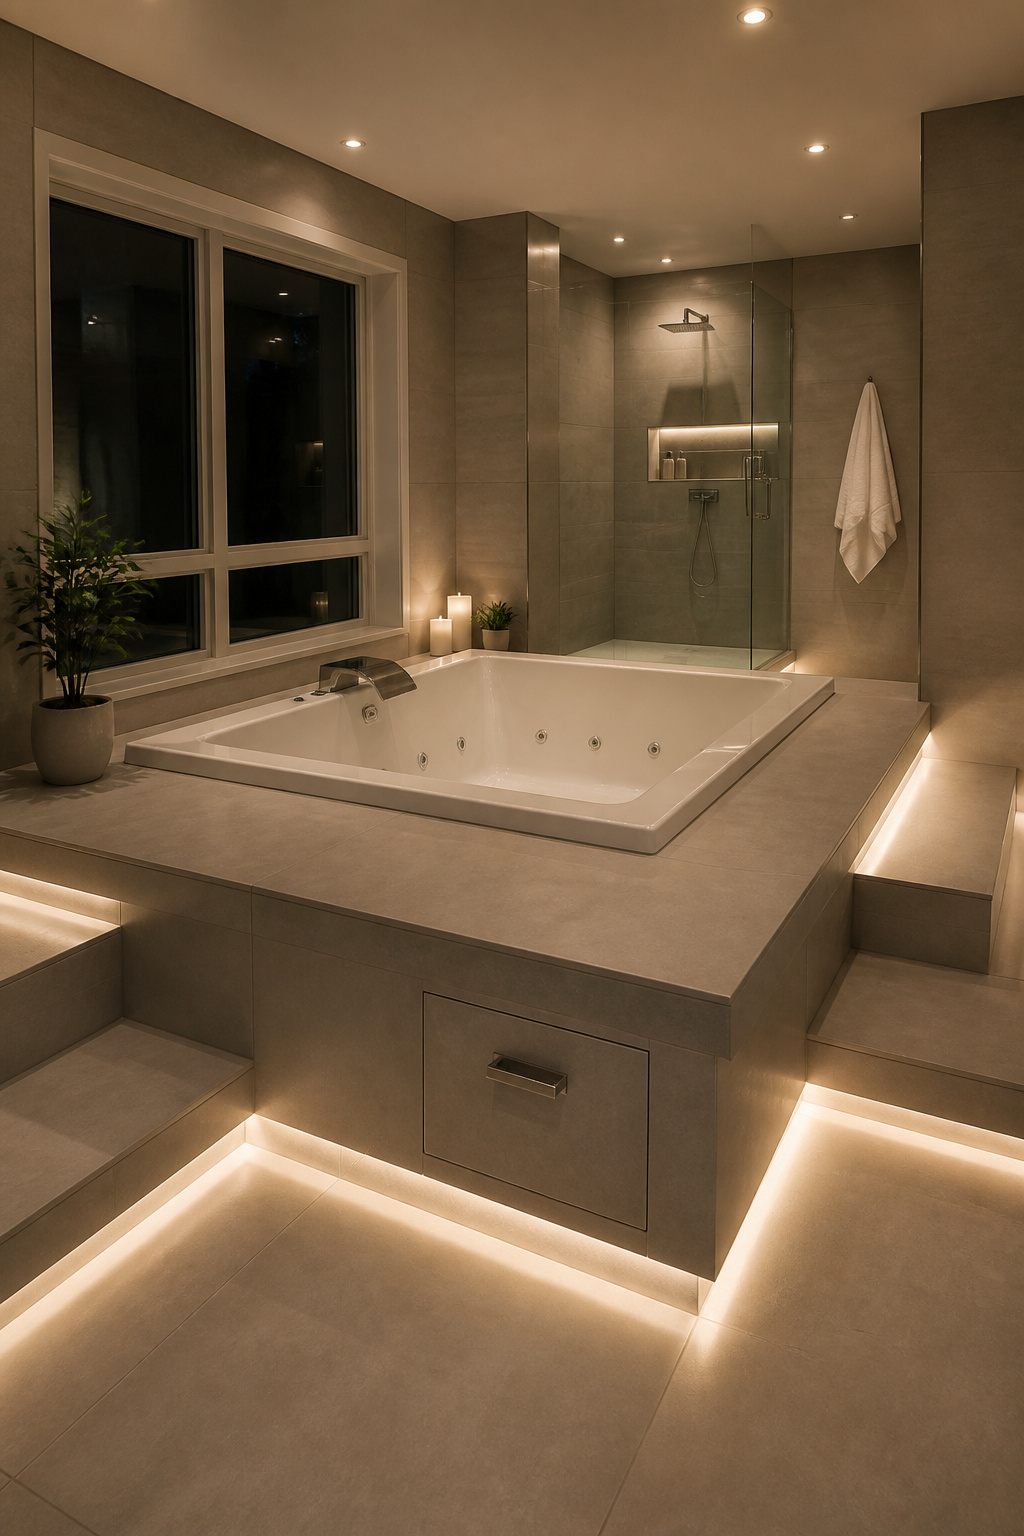
First, the distinction between air bath and whirlpool systems matters. A whirlpool tub circulates water through jets. The same water you’re bathing in passes through the pump and return lines, which harbor bacteria and biofilm unless purged monthly. Air bath systems pump air only; the jets are dry between uses, self-cleaning by running air after draining. The sensation is different: air baths create an effervescent full-body bubble effect (gentle, enveloping); whirlpools produce targeted directional pressure (deep-tissue, adjustable). Premium dual systems from Bain Ultra and Jason International combine both, selectable independently. These fixtures run $3,000-$8,000 for the tub alone.
Upgrading Without Full Demolition
If the existing tub basin is in good structural condition but the pump has failed: replacement pump kits are available for major brands through the existing access panel, without tile demolition. This is the best-value repair for a mechanically failed tub. If there’s no access panel, plan for limited demo to create one before replacing the motor — the access panel is what makes any future serviceability possible. Electrical requirements remain: dedicated 20-amp GFCI circuit.
One maintenance fact that bears emphasis: never use bath oils, bath salts with solid particles, or bubble bath in a whirlpool system. The oils coat and eventually clog the pump and jet orifices. Air baths have no such restriction, which is the primary practical advantage beyond the gentler sensation.
14. Tiled Roll-Top Tub Surround in an Edwardian-Era Bathroom
The tiled panel surround on a roll-top bath is a period detail most homeowners don’t know has a name, but it’s historically grounded in a specific moment in early 20th-century design. From roughly 1900-1920, Edwardian bathrooms began transitioning from fully exposed freestanding tubs to partially enclosed arrangements: paneling one or two sides with ceramic tile while retaining the original form and visible legs. The result reads more built-in than freestanding, while remaining identifiably period.
If this aesthetic direction appeals (and it pairs beautifully with period renovation work throughout the rest of the house), there’s a deep well of timeless vintage bathroom inspiration to draw from when thinking through the full room.
Tile Selection for Period Accuracy
The tile language of the period was specific: white glazed brick-bond subway tile (3″×6″ beveled metro tile is the accessible contemporary equivalent), occasionally with a decorative border of encaustic cement tiles or majolica relief tiles at waist height. Dark grout, specifically charcoal or near-black, is more historically accurate than white for this application and makes the pattern read more clearly. Encaustic cement tiles on the floor (black-and-white geometric patterns: octagon-and-dot, Moroccan star, herringbone) ground the room in the correct period vocabulary.
Panel construction: timber frame (2″×2″ or 2″×3″ softwood) attached to floor and wall, cement backer board face, liquid-membrane waterproofed, then tiled. The panel runs from floor to tub rim height. The bottom course must be set in silicone where it meets the floor tile (not grouted), to allow for movement. The feet remain visible below the panel line, which is the defining detail. Paint them to match the grout color (charcoal feet on white tile) or contrast deliberately; either makes the tub float visually above the panel in a way that reads more sophisticated than it sounds.
15. Corner Bathtub Remodel That Maximizes an Irregular Floor Plan
The corner bathtub peaked in popularity between roughly 1985 and 2005, and many installations from that era are now functionally obsolete: the jetted systems have failed, the aesthetic reads dated, and the large footprint (typically 60″×60″) sits in the corner consuming floor space without delivering anything in return. A corner bathtub remodel doesn’t require moving that footprint — it requires reconsidering what goes in it.
The case for renovating in place rather than relocating: all the plumbing infrastructure is already in the corner. Two walls are already tiled or tiled-adjacent. Keeping the drain in its existing position saves $800-$1,500 in subfloor work; working within the existing platform footprint avoids floor-leveling complications. The renovation’s job is to replace the aging jetted tub with either a contemporary soaking tub or an updated air bath system, and to retile the deck and surround in a material palette that belongs to this decade rather than the previous two.
For tiling, large-format tile (24″×48″) on the deck and apron creates a contemporary monolithic look that works particularly well with the wide, flat surfaces a corner platform provides. The two-wall installation presents an outside corner where the tile changes direction — use a Schluter metal edge profile (RONDEC or JOLLY) or a mitered stone edge here. An unfinished raw tile edge at an outside corner on an otherwise clean installation reads amateur.
Corner tub dimensions: 60″×60″ square (most common), or 54″×54″ for tighter spaces. A full corner bathtub remodel (replacement tub and retile, using existing plumbing) runs $4,000-$7,000. Adding a new air bath motor system adds another $1,000-$2,500.
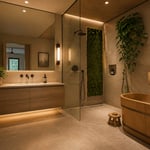
16. Wet Room Design Pairing a Freestanding Tub With an Open Shower
A wet room bathtub remodel is a fundamentally different category of project. Rather than a defined shower zone with a curb, enclosure, and threshold, the entire room is waterproofed and drained: the floor is the shower floor, the tub shares the space, and water moves freely toward a drain. The result, when done well, reads more like a private spa than any other format in residential design.
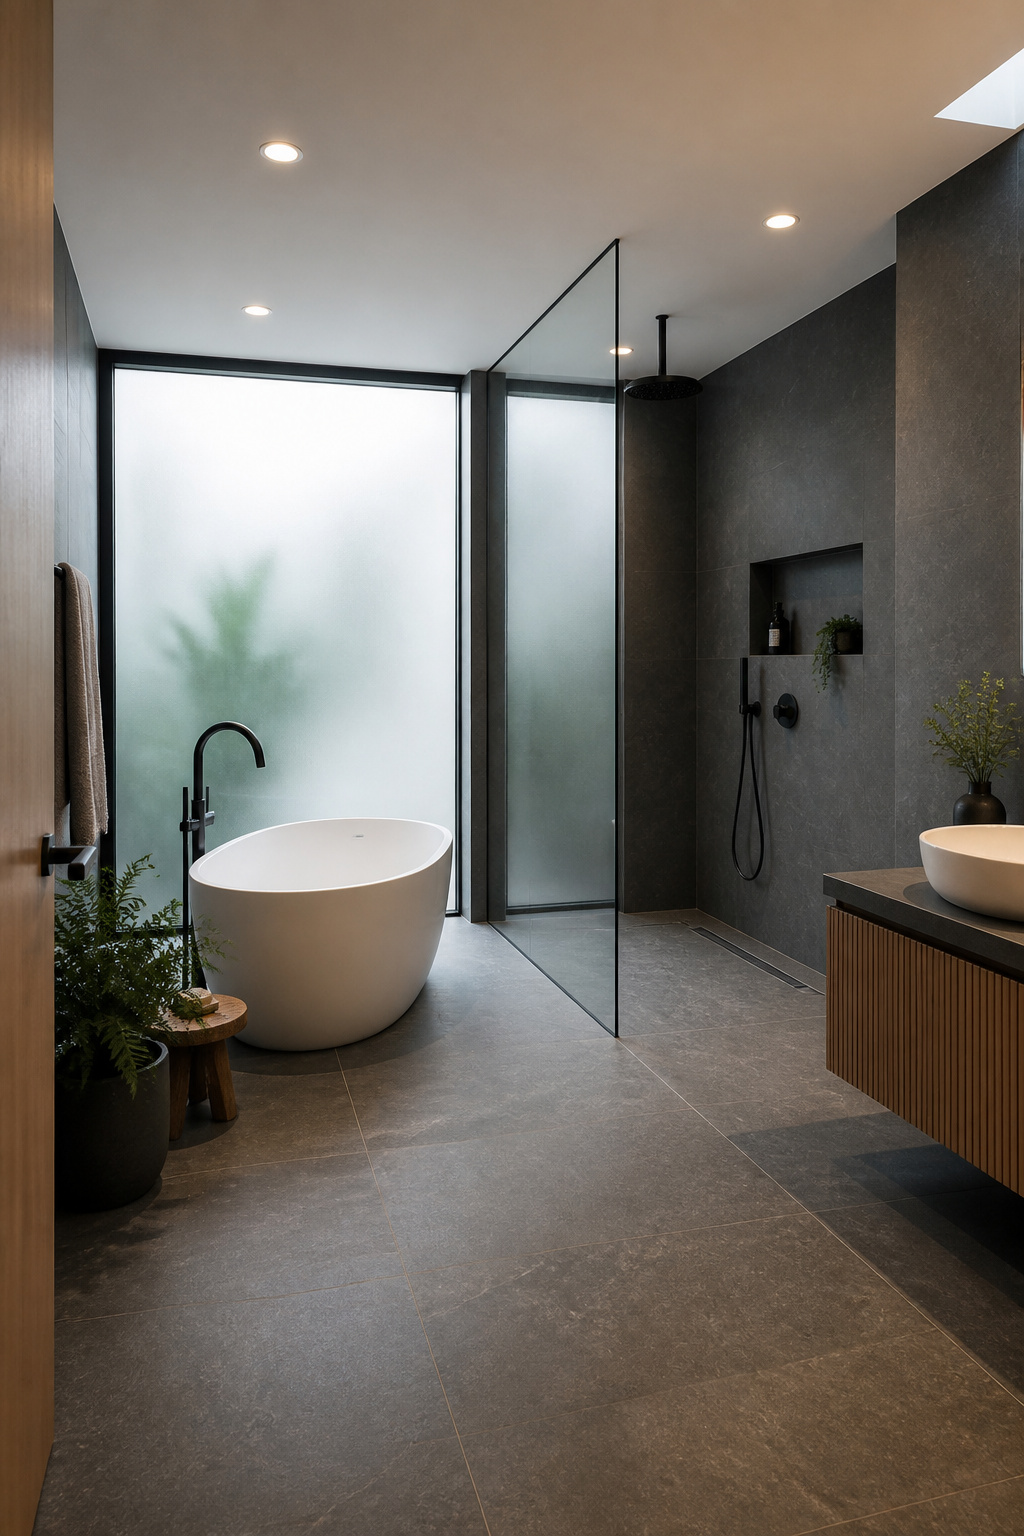
What makes this distinct from a curbless shower is the scope of waterproofing. Full tanking across the entire floor and lower walls is required, with a continuous membrane beneath and around the freestanding tub, sealing all floor penetrations (drain, supply pipes, tub supply lines) with rated collars or gaskets. A minimum 60-70 square feet is needed to accommodate tub and shower without feeling cramped, though 75+ square feet is where the composition becomes comfortable.
Drainage, Anti-Slip Requirements, and Tub Placement
Floor slope is the technical challenge: 1/4″ per foot toward the drain across the entire bathroom floor, not just the shower zone. A linear drain positioned along one wall simplifies the geometry considerably — all slopes run toward one direction rather than converging from four. Anti-slip tile is mandatory; a slip resistance rating of R11 minimum (DIN 51130) for a wet room floor. Textured porcelain, honed stone, and mosaic tile all qualify. Large polished tiles fail this standard.
Tub placement matters for a practical reason that often goes unmentioned: position the freestanding tub away from the shower zone. Steam from the shower carries mineral deposits; a tub parked directly adjacent collects scale on the exterior with every use. Six inches minimum clearance on accessible sides, twelve inches preferred for cleaning access. Total project range: $10,000-$30,000+, depending on bathroom size, tile specification, and structural complexity.
Choosing the Right Bathtub Remodel for Your Home
The decision tree is more straightforward than sixteen options might suggest. Budget under $2,000: reglazing or a painted exterior (Items 1 and 7) punch far above their price. Budget $2,000-$6,000: an alcove tile surround remodel (Item 4) or a tub-to-shower conversion keeping the existing drain location (Item 9) both produce results that read as complete renovations. Above $6,000: the field opens to freestanding tubs, stone deck surrounds, wet room conversions, and period salvage installations.
Structural feasibility is the checklist before anything else: floor load capacity for heavy tub materials on upper floors, existing drain location relative to where you want the tub, water heater capacity for larger soaking volumes, and electrical capacity if adding a jetted system. These aren’t gatekeeping checks — they’re the variables that determine whether a project costs what you expect or runs significantly over.
The work worth professionalizing: waterproofing inspection before tiling any wet zone; structural engineer sign-off before installing stone resin or cast iron on an upper floor; a period salvage specialist if you’re matching Victorian or Edwardian hardware. Waterproofing failures in a bathroom are expensive not just to repair but to discover — they typically manifest in the ceiling below rather than in the bathroom itself.
Start with the scope that your structure and budget can genuinely support. The most successful bathtub remodels I’ve seen aren’t always the most ambitious — they’re the ones where every decision was made with full knowledge of what was behind the wall.