Is your kitchen feeling a little…blah? Dreaming of a stylish, functional space but terrified of the price tag? You’re not alone! As someone who’s spent 14 years helping homeowners breathe new life into historic properties, I’ve learned that kitchen transformations don’t have to empty your wallet.
The truth is, most people assume kitchen renovations require contractors, demolition, and major disruption. But I’m here to tell you there’s another way. With some creativity and strategic thinking, you can achieve remarkable results that honor your home’s character while creating the kitchen you’ve always wanted – all without breaking the bank.
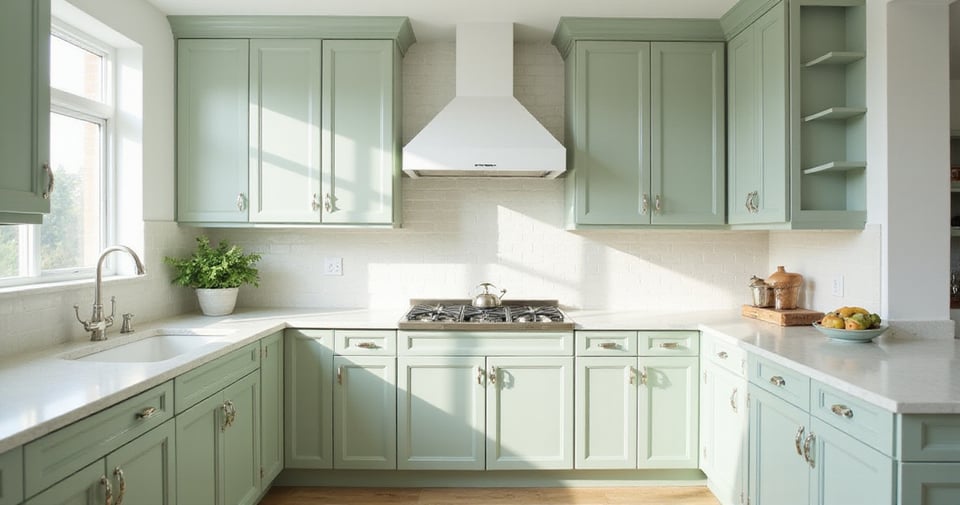
1. Give Your Cabinets a Facelift with Paint: The Power of a Fresh Coat
Painting cabinets is hands-down one of the most dramatic transformations you can make on a tight budget. When clients balk at the cost of new cabinetry (often $10,000+), I immediately suggest paint as an alternative. Cabinet replacement involves not just materials, but installation costs and potential plumbing or electrical modifications. Paint, by contrast, requires just primer, quality paint, brushes, and perhaps new hardware.
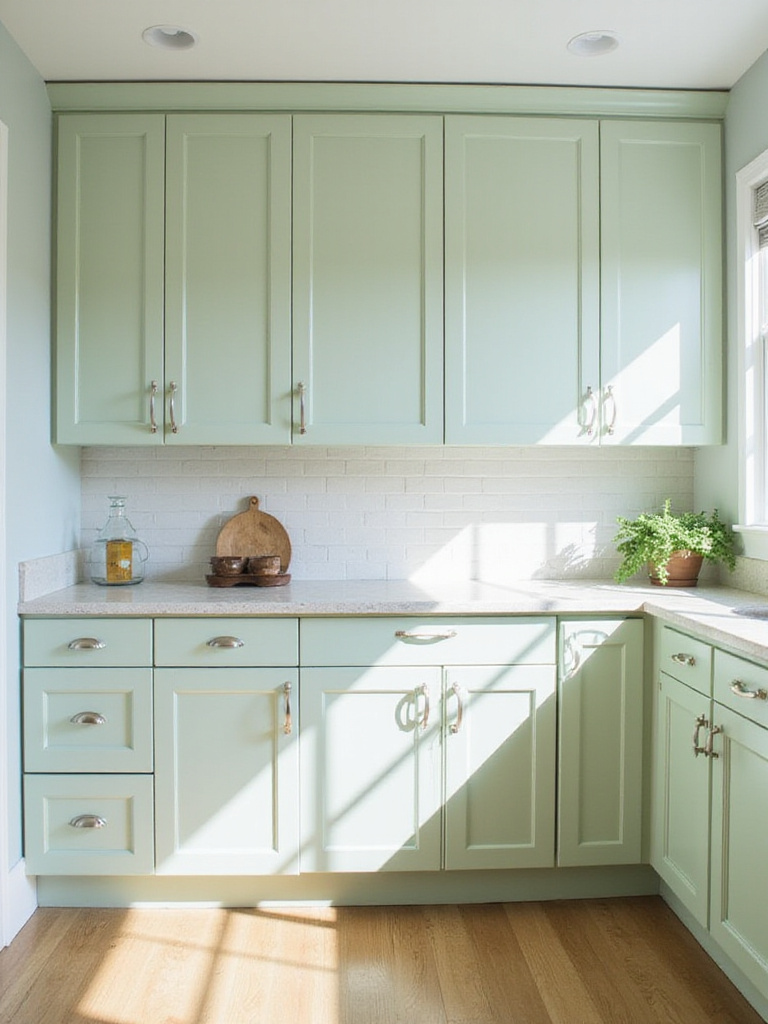
For kitchen cabinets, durability is essential. I typically recommend alkyd enamel paints – they provide that perfect balance between the hardness of oil-based formulas and the lower VOCs of water-based options. Semi-gloss or satin finishes stand up beautifully to kitchen moisture and frequent cleaning. Remember that preparation is where the magic happens: remove doors and hardware, clean thoroughly with a degreaser, sand lightly, apply primer, and only then begin painting.
- Add decorative trim or molding to cabinet doors before painting for a custom look
- Label all cabinet doors and hardware during removal to ensure easy reassembly
- Consider period-appropriate colors if you’re working with a historic home
Here’s where it gets interesting – freshly painted cabinets immediately transform your kitchen’s entire feel, making it the perfect foundation for the budget-friendly changes to come.
2. Instantly Upgrade Cabinets with New Hardware: Small Change, Big Impact
Think of cabinet hardware as the jewelry of your kitchen. I’ve walked into countless homes where the cabinets themselves were perfectly fine, but dated knobs and pulls were dragging down the entire look. Swapping these small elements delivers an outsized impact for minimal investment – often less than $100 for an entire kitchen.
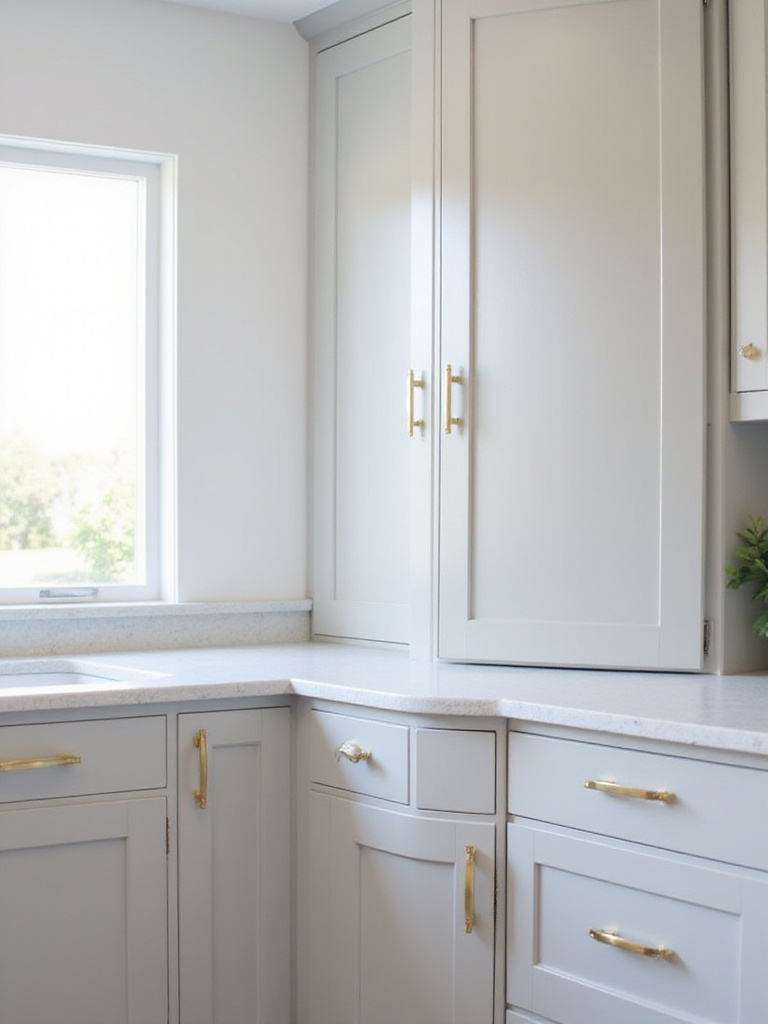
The hardware world offers endless possibilities. For Victorian-era homes, I often suggest ornate brass or bronze pulls that reflect the craftsmanship of that period. Craftsman bungalows shine with simple, squared-off hardware in oil-rubbed bronze or copper. Mid-century homes call for sleek, minimalist hardware with clean lines. And don’t worry about breaking the bank – home improvement stores carry budget options, but I’ve found some of my best deals at flea markets, architectural salvage shops, and online marketplaces where vintage hardware often sells for less than new reproductions.
The tricky part is getting the sizing right. Before shopping, measure the distance between screw holes on your existing pulls (center-to-center measurement) to ensure proper fit. Consider mixing knobs and pulls for visual interest – perhaps knobs on upper cabinets and pulls on lower ones.
With your cabinets refreshed, let’s think about another budget-friendly approach that completely reimagines your storage situation.
3. Ditch Upper Cabinets for Stylish Open Shelving: Create Space and Save Money
You might be wondering if removing perfectly good cabinets makes sense in a budget renovation. The surprising part is that replacing upper cabinets with open shelving can actually save you money while dramatically transforming your kitchen’s feel. Upper cabinets require more materials, hardware, and complex installation compared to simple shelving. Plus, in historic homes, open shelving often better reflects original kitchen designs from eras before built-in cabinetry became standard.
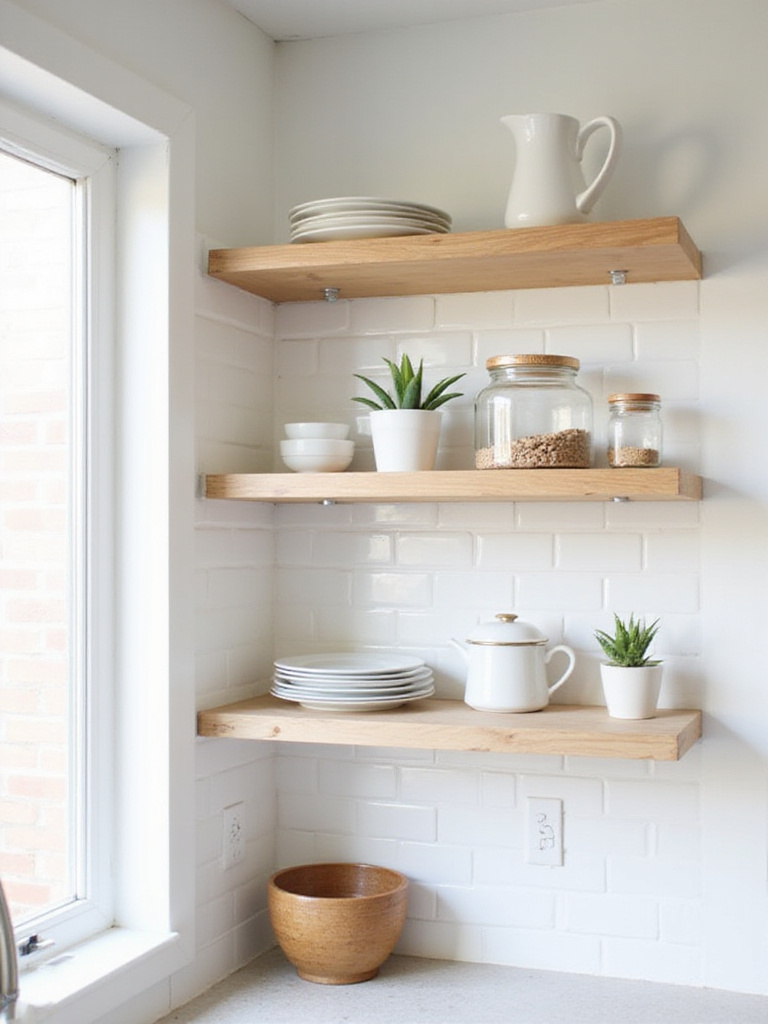
Beyond the cost savings, open shelving creates an immediate sense of spaciousness that can make smaller kitchens feel more generous. It allows you to display beautiful dishware or period-appropriate kitchen items that become part of your decor. I’ve helped clients create stunning displays of everything from antique ironstone to colorful Fiestaware collections that were previously hidden behind cabinet doors.
- Use floating shelves for a clean, minimalist look
- Install brackets that complement your home’s architectural period
- Consider reclaimed wood for shelving to add warmth and character
What complicates this approach is the need for organization and curation. Open shelving requires a commitment to keeping things tidy and displaying only items that enhance your kitchen’s aesthetic. But for many homeowners, this “forced minimalism” becomes a blessing in disguise.
4. Achieve a Tile Look with Peel and Stick Backsplash: Easy and Affordable DIY
Traditional tile backsplashes can easily cost $500-1,000 when you factor in materials and installation. But here’s the game-changer: peel and stick options have evolved dramatically in recent years. Today’s products offer remarkable realism at a fraction of the cost – typically $50-150 for an entire kitchen.
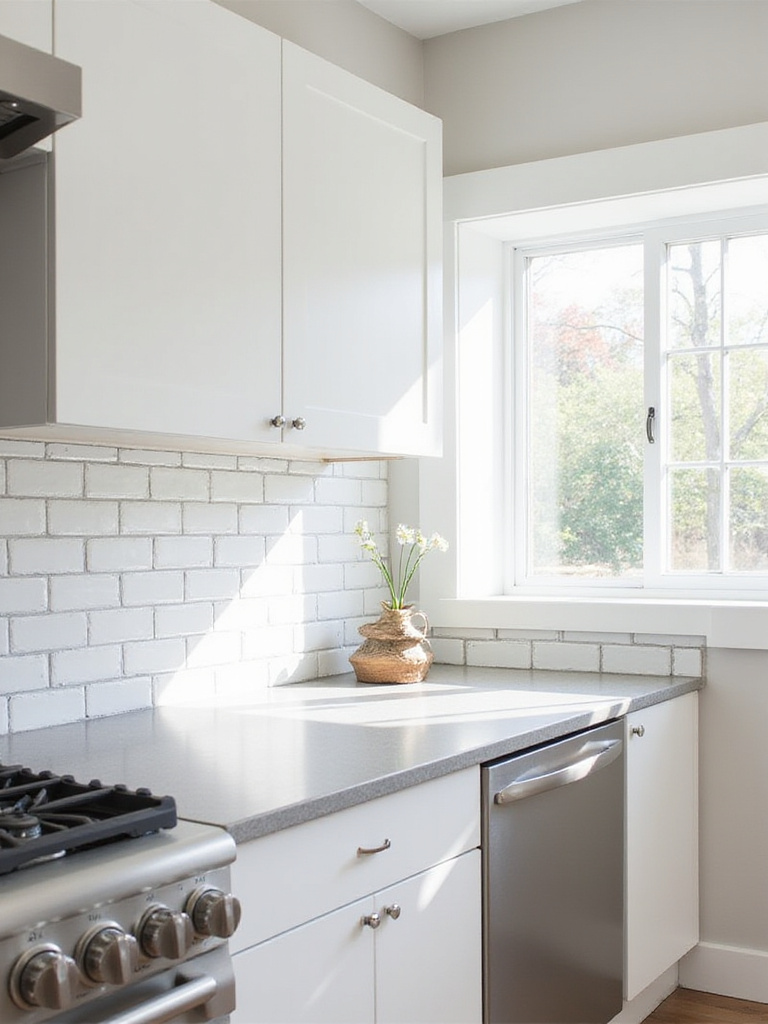
What makes peel and stick backsplashes so perfect for budget renovations is their DIY-friendly nature. Unlike traditional tile that requires specialized tools, mortar, grout, and significant skill, peel and stick options need little more than a measuring tape, utility knife, and patience. They’re also removable, making them ideal for renters or homeowners who like to change their decor frequently. For historic homes, you can even find designs that mimic period-appropriate subway tiles, hexagonal mosaics, or tin ceiling patterns.
“Surface preparation is the secret to success with peel and stick backsplashes. Take the time to thoroughly clean and degrease your walls, and you’ll be rewarded with a backsplash that stays put and looks professional.”
My breakthrough came when I discovered that many peel and stick options can be cut with scissors or a utility knife, making them much more forgiving for DIYers than traditional tile. This accessibility opens up possibilities for homeowners who might otherwise be intimidated by backsplash installation.
5. Brighten Your Kitchen with Affordable Lighting Updates: Illuminate on a Dime
Lighting might be the most overlooked element in budget kitchen renovations, yet it delivers enormous impact for minimal investment. In my preservation work, I’ve seen countless kitchens transformed simply by addressing poor lighting that made spaces feel gloomy and uninviting.
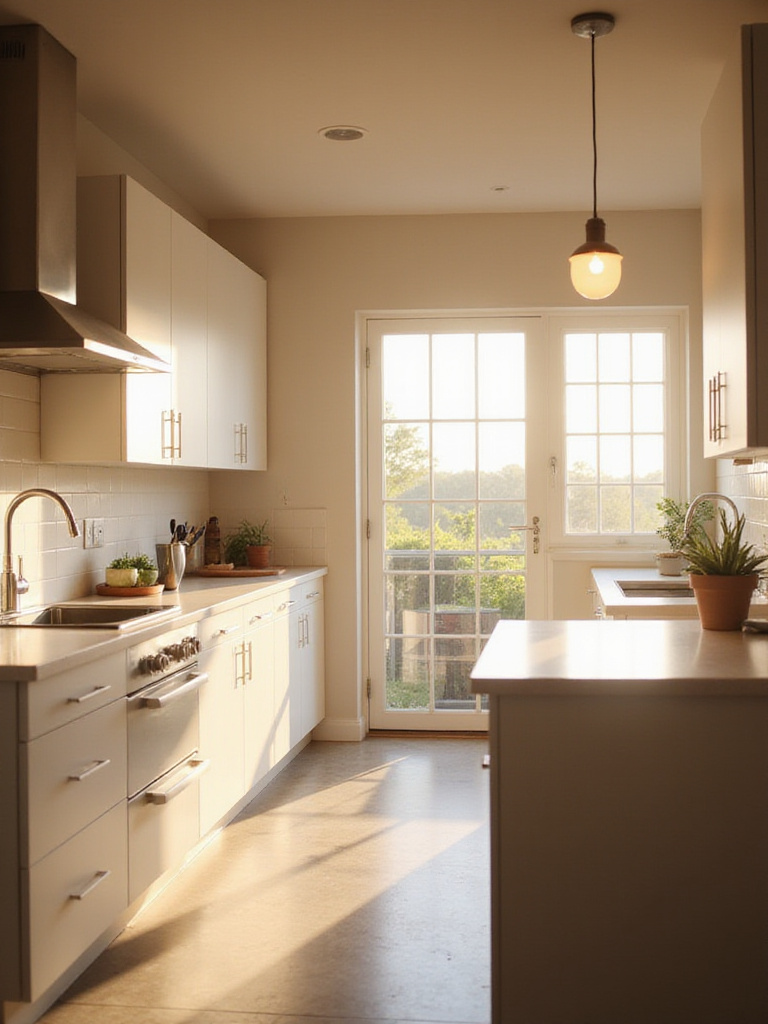
The key thing to understand is that kitchens need layered lighting: ambient light for general illumination, task lighting for work areas, and accent lighting to highlight architectural features or decor. Under-cabinet LED strip lights are a game-changer, typically costing $20-50 but dramatically improving visibility on countertops. Replacing outdated flush-mount fixtures with more contemporary designs can update the entire feel of your kitchen for under $100. Even simply swapping old bulbs for LEDs with a warmer color temperature (2700-3000K) can make your kitchen feel more inviting.
- Install under-cabinet LED strips for task lighting
- Add a dimmer switch to control ambiance (most are DIY-friendly)
- Consider battery-operated puck lights for inside glass-front cabinets
Picture it this way: good lighting doesn’t just help you see better – it actually makes your other budget improvements look more expensive. The right lighting can make painted cabinets look more professional and highlight your new hardware and backsplash.
6. Declutter Counters for a Spacious Feel: Free and Instantly Effective
Want to know the absolute best kitchen ideas on a budget? Start with something that costs nothing at all: decluttering your countertops. I’ve walked into countless kitchens where homeowners were convinced they needed more space, when what they really needed was less stuff on display.
Cluttered counters create visual noise that our brains interpret as chaos. This makes even spacious kitchens feel cramped and dysfunctional. By removing rarely-used appliances, random papers, and decorative items that serve no purpose, you immediately create a sense of order and spaciousness. Focus on keeping only daily-use items accessible, storing everything else in cabinets or drawers.
“The most beautiful kitchens aren’t necessarily the most expensive – they’re the ones where everything has a purpose and a place. Clutter is the enemy of good design, regardless of your budget.”
Let that sink in for a moment – this zero-cost improvement can make every other kitchen ideas on a budget look more intentional and high-end. A clean, organized counter provides the perfect backdrop for the few carefully chosen decorative elements that truly deserve to be displayed.
7. Transform Countertops with DIY Painting Techniques: A Budget-Friendly Makeover
New countertops typically represent the biggest expense in kitchen renovations, easily running $2,000-5,000. But what if you could transform your existing countertops for under $200? Specialized countertop painting kits have revolutionized budget renovations, allowing you to mimic the look of granite, marble, or solid surface materials for a fraction of the cost.
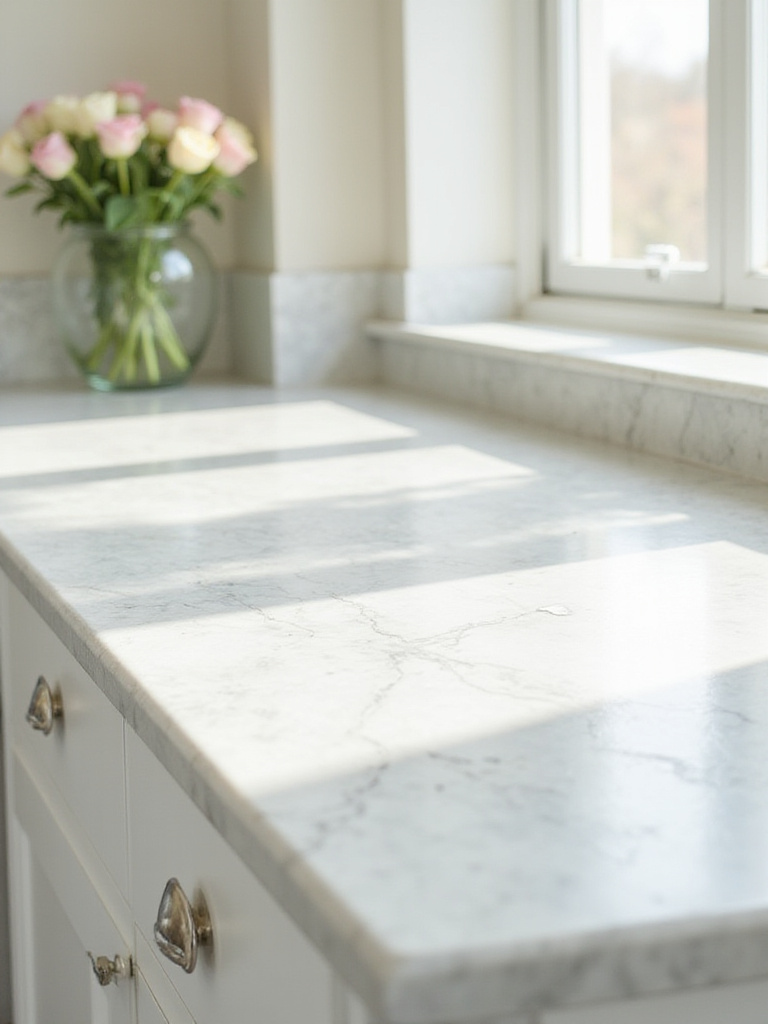
Laminate countertops are the perfect candidates for this treatment, though some kits also work on tile, cultured marble, and even Corian. The process typically involves thorough cleaning, light sanding, application of a bonding primer, base coat, decorative effects (created with sponges, feathers, or special tools), and multiple protective topcoats. The results can be remarkably convincing, especially with newer kits that include metallic flecks and dimensional effects.
- Choose a countertop paint kit designed specifically for kitchens
- Practice your technique on a small test area first
- Apply multiple thin coats rather than fewer thick ones for best results
The stumbling block is durability – painted countertops won’t last as long as stone or solid surface materials. However, with proper care (using cutting boards, avoiding harsh cleaners, promptly wiping spills), they can provide a beautiful interim solution while you save for a permanent upgrade.
8. Bring Life to Your Kitchen with Greenery: Plants on a Budget
In my years of historic home renovation, I’ve discovered that plants bring something to a kitchen that no other design element can match: life. A strategic placement of greenery softens hard surfaces, adds color, and creates a welcoming atmosphere that makes even modest kitchens feel special.
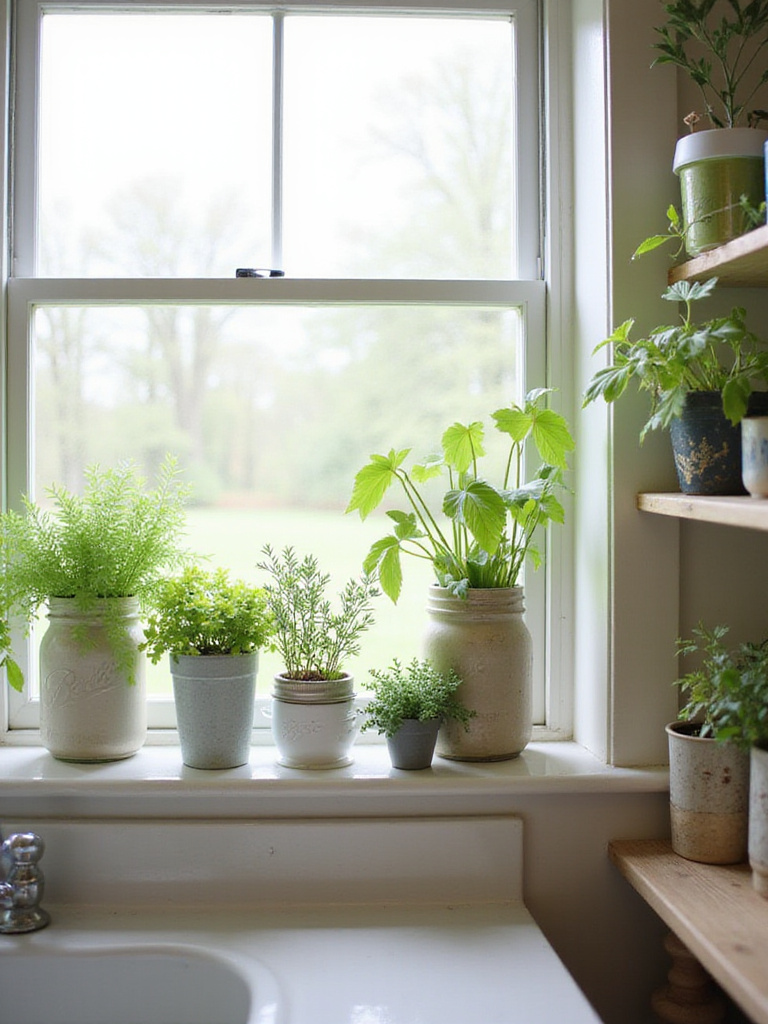
The good news is that plants are among the most affordable kitchen ideas on a budget. Start with practical herbs like basil, mint, or rosemary in simple terra cotta pots – they typically cost $3-5 each and provide both beauty and flavor for your cooking. For non-edible options, pothos, spider plants, and snake plants thrive in kitchen environments and can often be propagated from cuttings (potentially free if you have a friend with established plants). Place them on windowsills, open shelving, or hang them from ceiling hooks to add vertical interest without consuming valuable counter space.
- Group plants of varying heights for visual interest
- Repurpose vintage containers as planters for period-appropriate charm
- Choose low-maintenance varieties if you’re new to plant care
It’s similar to how historic kitchens often incorporated window gardens – plants have always been part of welcoming kitchen spaces. They add a touch of nature that makes even budget renovations feel more complete and thoughtfully designed.
9. Warm Up Your Kitchen with Budget-Friendly Rugs and Runners: Add Style Underfoot
Kitchen floors can be expensive to replace, but a well-chosen rug or runner offers an immediate update for as little as $20-100. I’ve helped countless homeowners use this strategy to disguise dated flooring while adding warmth and personality to their kitchens.
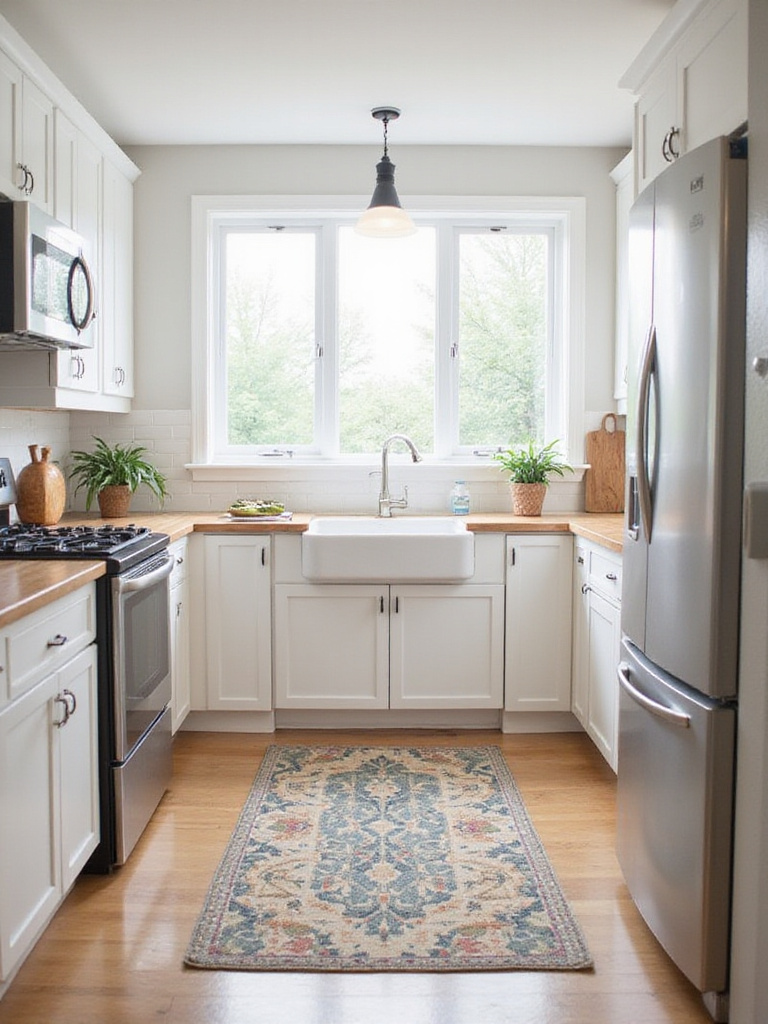
For kitchens, practicality must guide your choices. Look for flat-weave cotton rugs that can be machine washed, indoor/outdoor rugs that resist stains and moisture, or natural fiber rugs like jute or sisal for texture (though these require more care around spills). Size and placement matter too – runners work beautifully in galley kitchens or alongside islands, while smaller 2’x3′ rugs provide comfort at the sink or stove. Always use a non-slip pad underneath to prevent accidents.
The heart of the matter is choosing designs that complement your kitchen’s style while disguising floor imperfections. For historic homes, vintage-inspired patterns or simple stripes often work beautifully. In more contemporary spaces, bold geometrics or subtle textures can add interest without overwhelming the space.
With your floor looking fresher, let’s turn our attention upward to another budget-friendly opportunity: your kitchen walls.
10. Personalize Your Walls with DIY Art and Prints: Creative and Cost-Effective Decor
Kitchen walls offer prime real estate for personalizing your space on a budget. Unlike living areas where expensive art often takes center stage, kitchens allow for more creative, casual approaches that can cost next to nothing while adding tremendous character.
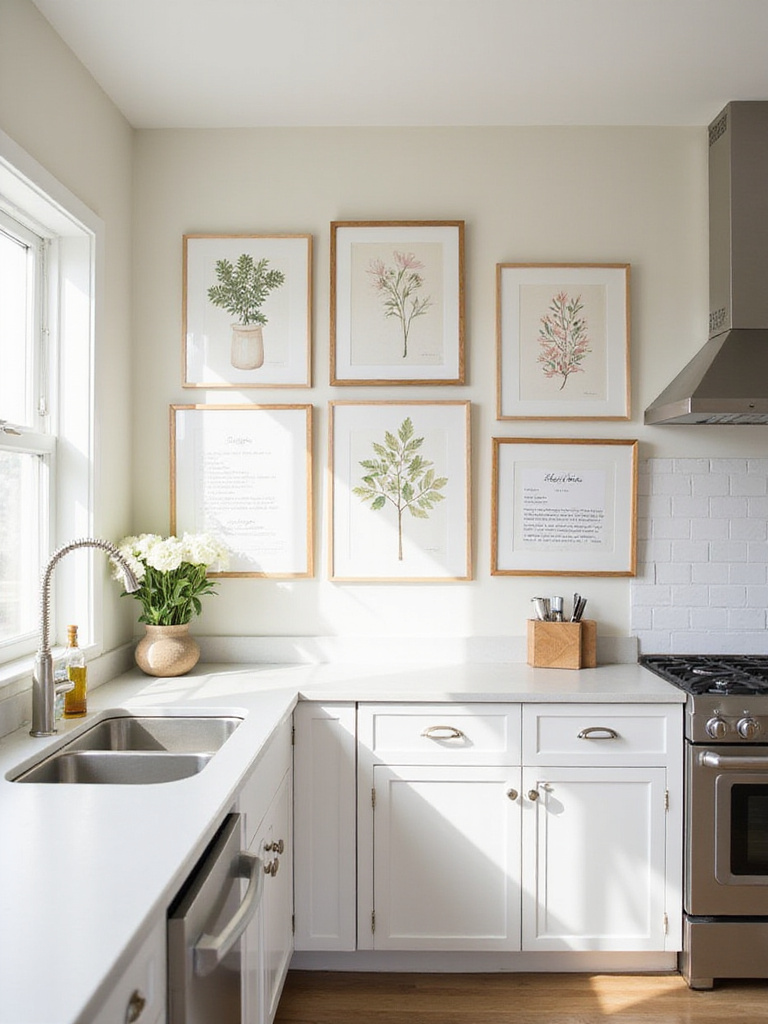
Some of my favorite budget-friendly kitchen art solutions include framing vintage cookbook pages or food advertisements that reflect your home’s era (often available online for a few dollars). Botanical prints of herbs and vegetables make perfect kitchen art and can be printed from free online sources. For a more personal touch, frame family recipes – particularly handwritten ones from parents or grandparents – which become both decoration and meaningful heirlooms.
- Create a gallery wall using thrift store frames painted in a unified color
- Frame fabric scraps, tea towels, or even pretty gift wrap for instant art
- Look for free printable kitchen art online – many beautiful options exist
My experience went like this: I helped one client create a stunning kitchen gallery wall using nothing but thrift store frames ($15 total) and free botanical printables. Visitors consistently assume she spent hundreds on custom art, when the entire display cost less than $20.
11. Repurpose Furniture for Smart Kitchen Storage: Think Outside the Box (Stores)
One of my favorite kitchen ideas on a budget comes from looking beyond traditional kitchen cabinetry to unexpected furniture pieces that can be repurposed. Old dressers, sideboards, bookshelves, and even vintage school lockers can provide unique storage at a fraction of the cost of built-ins.
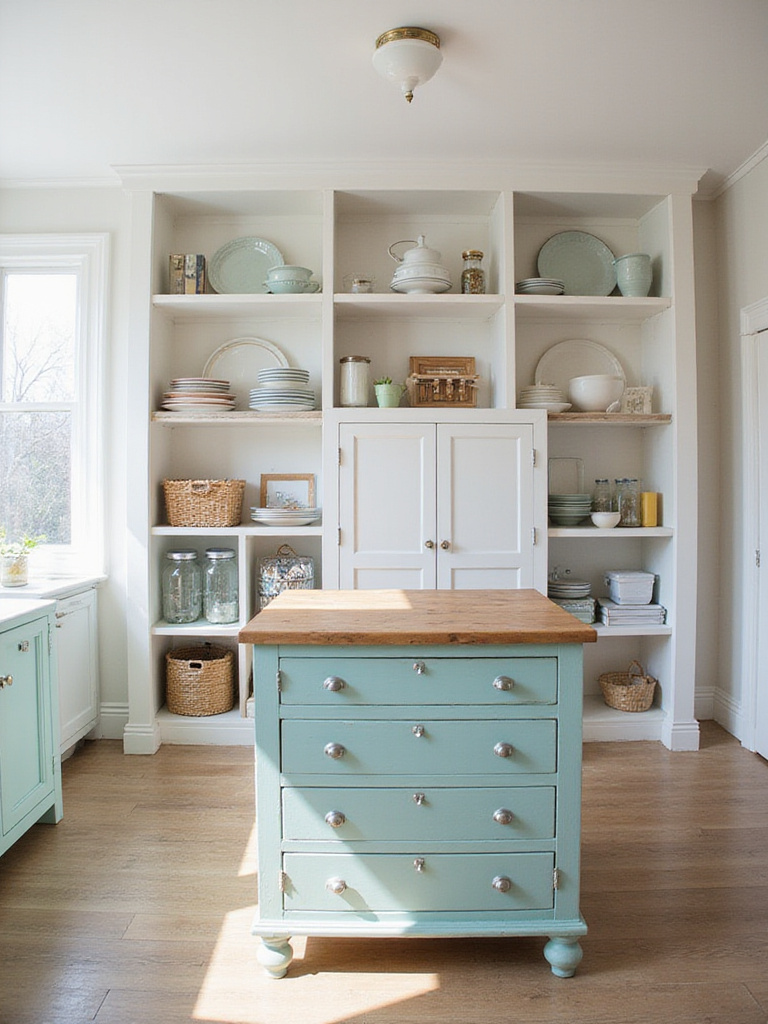
I recently helped a client transform an $80 thrift store dresser into a stunning kitchen island by adding a butcher block top ($150) and some fresh paint. The drawers provided perfect storage for utensils and linens, while the solid construction ensured it would stand up to kitchen use. Another client used a vintage industrial cart ($125 at a flea market) as a rolling pantry, adding tremendous storage without any construction.
“Historic homes often lack adequate kitchen storage because they were designed before modern appliances and cooking styles. Repurposed furniture allows you to add storage in character-appropriate ways that honor your home’s heritage while meeting contemporary needs.”
What unfolded next was a revelation about how these repurposed pieces often become the most commented-on elements in my clients’ kitchens – unique conversation pieces that add character while solving practical problems.
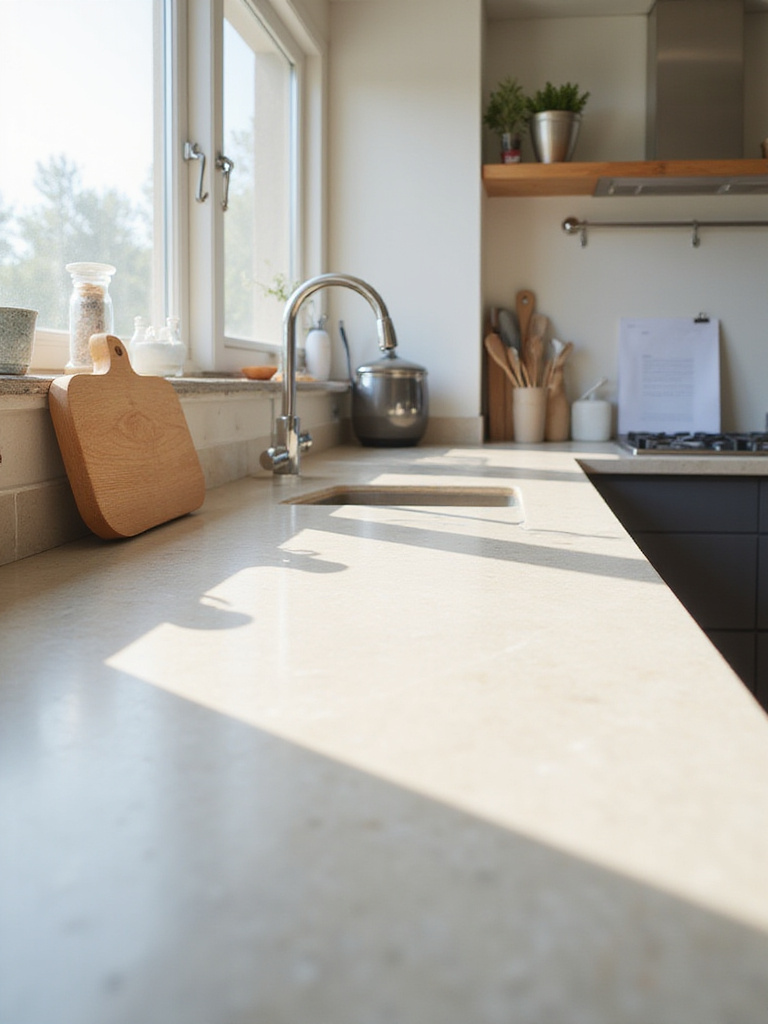
12. Refresh Your Sink Area with a New Faucet: Modernize Without the Splurge
The faucet is literally the centerpiece of your sink area, and replacing an outdated model can instantly modernize your kitchen for $75-200 – a fraction of most renovation costs. I’ve seen this simple switch transform the feel of countless kitchens, especially when paired with other budget-friendly updates.
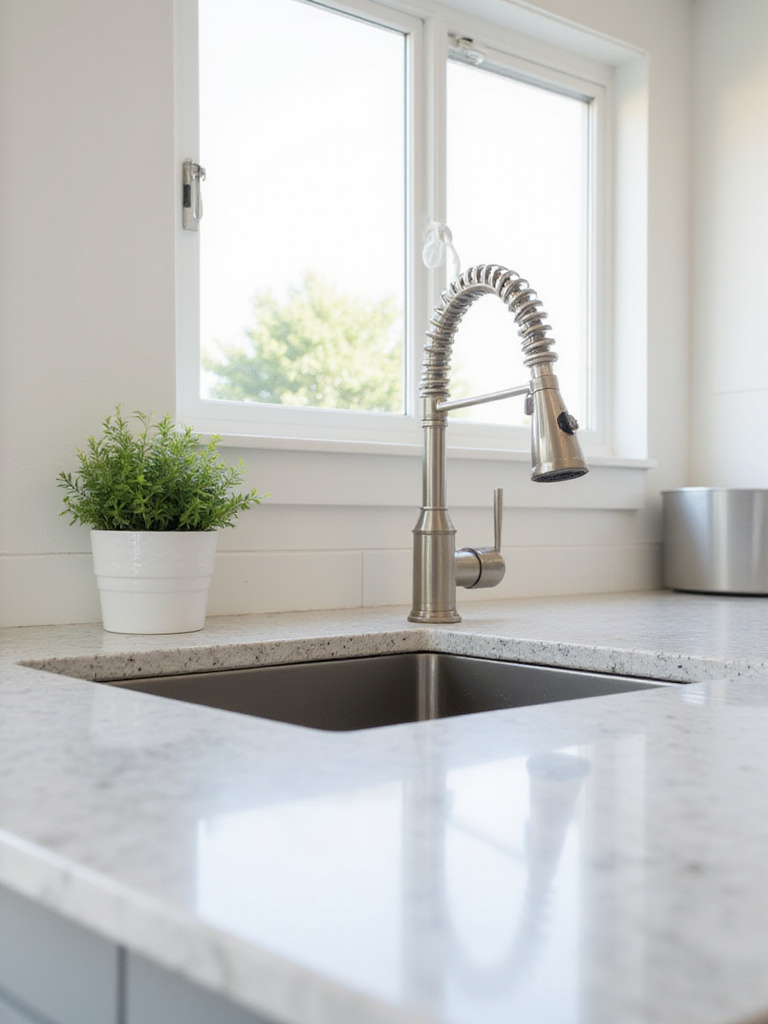
When selecting a budget-friendly faucet, focus on reputable brands’ entry-level models rather than unknown brands’ premium lines. This typically ensures better internal components while keeping costs reasonable. For historic homes, consider bridge faucets or cross-handle designs that reflect traditional aesthetics. More contemporary spaces benefit from clean-lined single-handle models. Finishes like brushed nickel and matte black offer modern appeal without the premium price of specialty finishes.
- Look for faucets with ceramic disc valves for longer life
- Consider water-saving features that reduce utility bills
- Check clearance items at home improvement stores for significant savings
The game-changer happened as I realized most faucet replacements are surprisingly DIY-friendly, requiring just basic tools and a couple hours of work. This makes it one of the most accessible kitchen ideas on a budget, even for homeowners with limited renovation experience.
13. Update Window Treatments for a Fresh Look: Light and Airy on a Budget
Window treatments often get overlooked in kitchen renovations, yet they can dramatically impact both aesthetics and functionality. I’ve transformed countless kitchens with window updates costing $50-150 – a minimal investment for significant visual change.
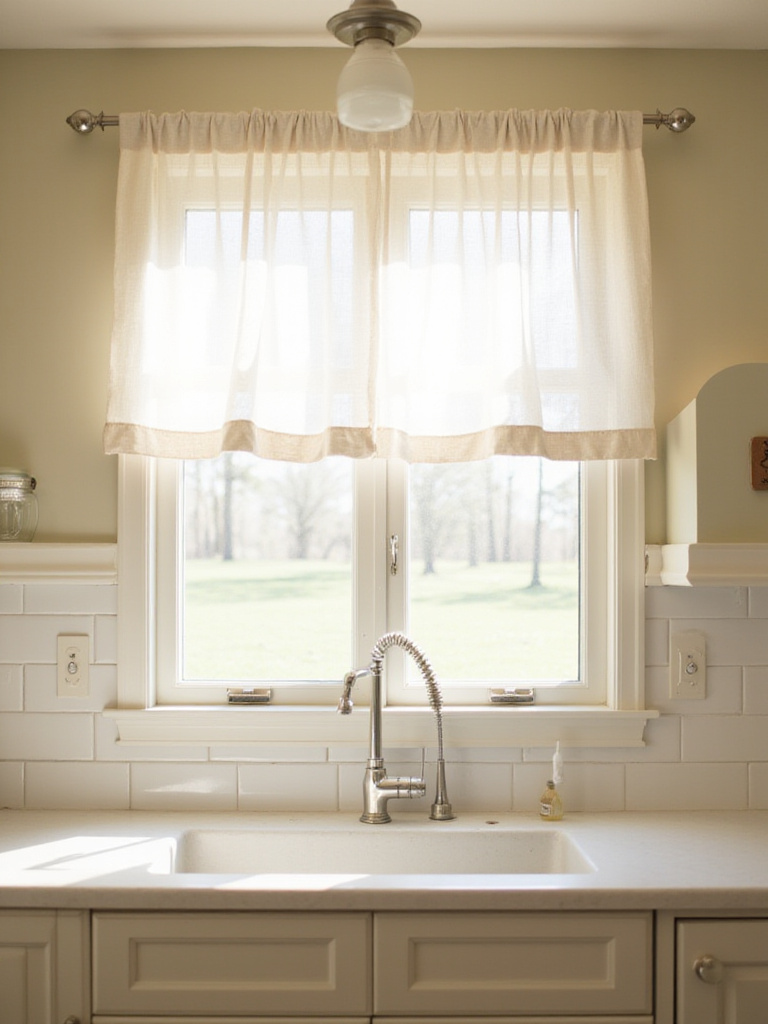
For period-appropriate options in historic homes, consider simple cafe curtains that cover just the lower portion of windows – these provide privacy while allowing plenty of light through the upper portion. They’re also among the easiest window treatments to DIY, requiring minimal sewing skills. Roman shades offer another budget-friendly option that works in various architectural styles, from Victorian to mid-century. For the truly budget-conscious, roller shades can be dressed up with fabric trim or decorative pulls.
The breakthrough came when I discovered how often kitchen window treatments can be created from repurposed materials. Vintage tablecloths, feed sacks, and even flour sack towels can become charming curtains that add authentic character to older homes while costing next to nothing.
With your windows looking fresh, let’s tackle another organizational challenge that plagues many kitchens: pantry chaos.
14. Conquer Kitchen Clutter with Pantry Organization: Maximize Space, Minimize Spend
An organized pantry isn’t just visually satisfying – it’s a money-saving strategy. When you can see what you have, you avoid buying duplicates and prevent food waste. This makes pantry organization one of the most practical kitchen ideas on a budget, often paying for itself within months.
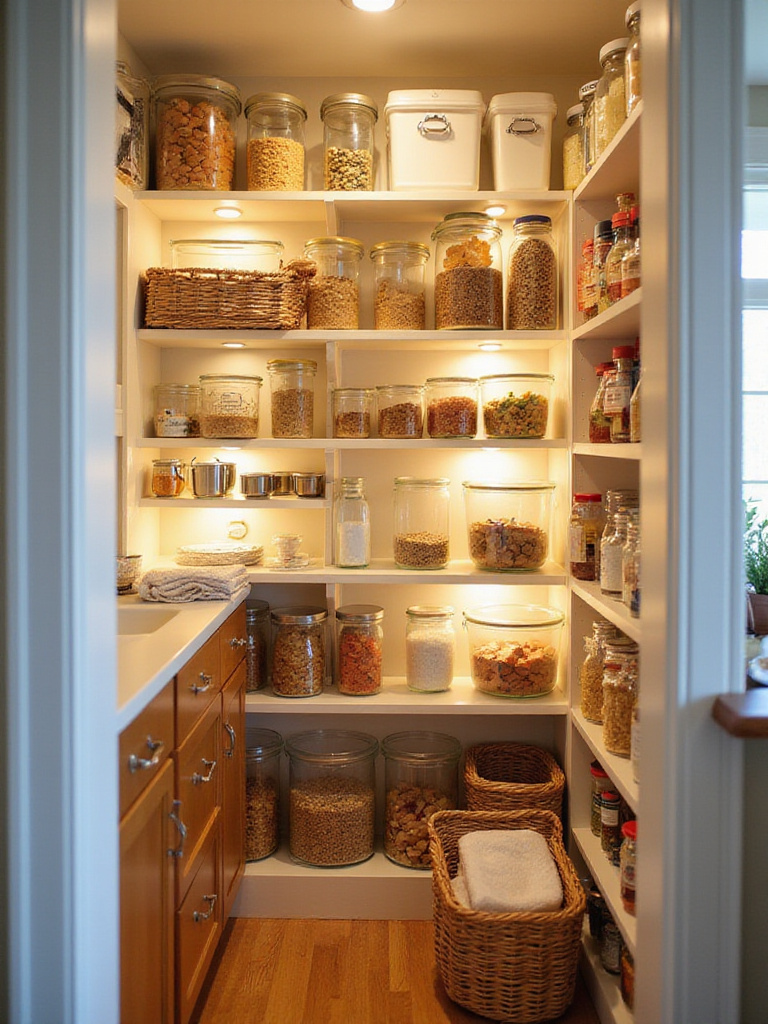
The secret to budget pantry organization is using what you already have. Mason jars, pasta sauce jars, and even takeout containers can become effective storage solutions when cleaned and labeled. Dollar stores are goldmines for baskets, bins, and containers at minimal cost. The key is creating a system where everything is visible and accessible – consider grouping items by category (baking, breakfast, snacks) rather than randomly placing them on shelves.
- Use tension rods to create dividers for baking sheets and cutting boards
- Add command hooks inside pantry doors for measuring cups or small tools
- Label everything clearly – chalkboard labels offer flexibility for changing contents
Do you see how huge that is? An organized pantry not only functions better but looks dramatically more expensive, even when the organizational tools cost very little. This visual upgrade complements your other budget improvements and creates a sense of intentional design.
15. Keep Spices Handy with a DIY Spice Rack: Organize with Creativity
Spice organization presents a unique challenge in kitchens – these small containers need to be visible and accessible but can quickly create clutter. A DIY spice rack solves this problem while adding a custom touch to your kitchen for minimal cost.
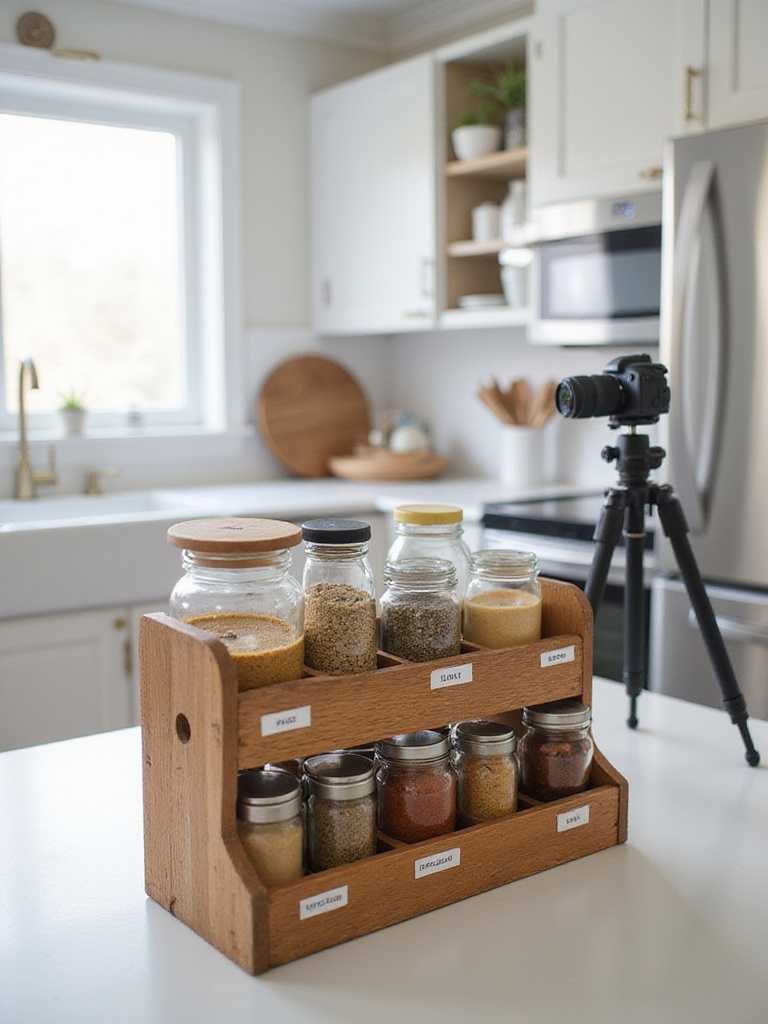
I’ve helped clients create stunning spice storage using everything from reclaimed wood to magnetic strips. One of my favorites involved mounting a $10 piece of galvanized metal to a kitchen wall and adding small magnets to the backs of spice tins – creating a space-saving display that doubled as kitchen art. Another client repurposed an old wooden ladder, hanging it horizontally to create unique spice storage that reflected their farmhouse aesthetic.
The missing piece is often just thinking beyond conventional solutions. Look around your home or local thrift stores for items that could be repurposed – test tube holders, printer’s trays, shallow drawers, or even old soda crates can become unique spice storage that adds character while solving a practical problem.
Let’s explore another creative DIY project that adds both function and personality to your kitchen without breaking the bank.
16. Add a Fun Touch with Chalkboard Paint: Functional and Decorative on the Cheap
Chalkboard paint has become one of my go-to recommendations for budget kitchen renovations, offering both practical function and visual interest for about $20 per quart. This versatile material can transform cabinet doors, wall sections, or even refrigerator panels into useful message centers and menu boards.
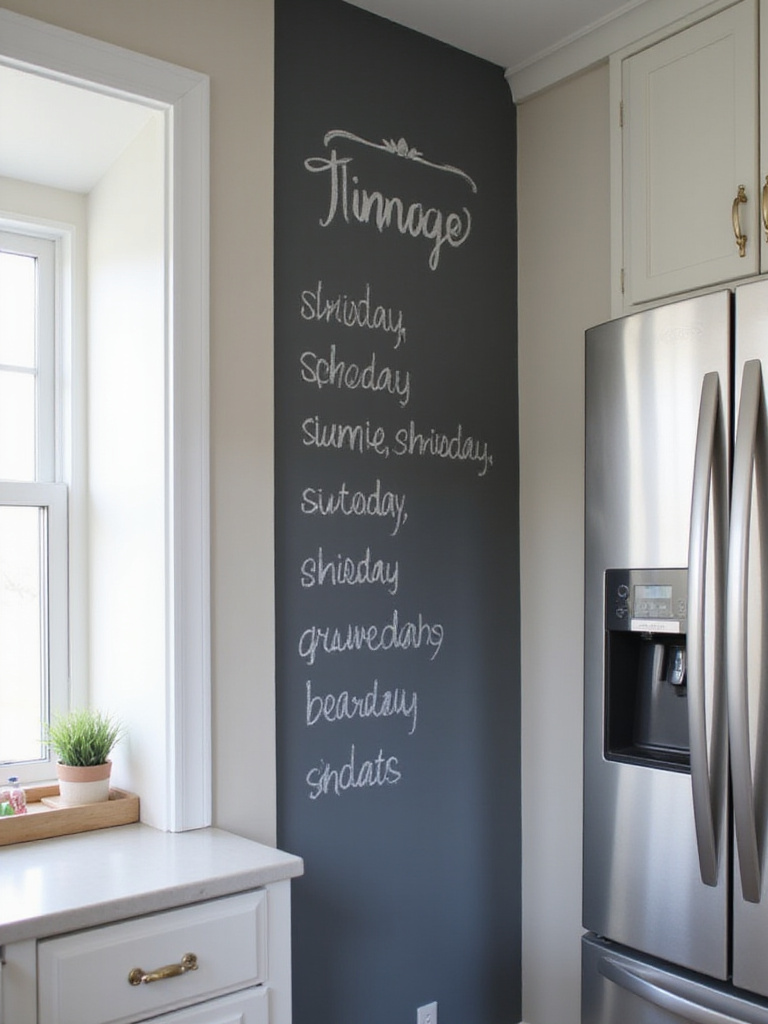
In historic homes, I often suggest using chalkboard paint on a section of wall where a message board would have traditionally hung. For more contemporary spaces, painting the inside of a pantry door creates a hidden but highly functional planning surface. The application is straightforward – most surfaces need minimal preparation beyond cleaning and light sanding, making this an easy weekend project even for novice DIYers.
“Chalkboard surfaces add an interactive element to your kitchen that both family members and guests appreciate. They invite creativity and communication in what is already the natural gathering place in most homes.”
Everything changed after I discovered that chalkboard paint now comes in colors beyond traditional black. Green, navy, or even custom tints can coordinate with your kitchen’s color scheme while providing the same practical writing surface, allowing this functional element to become part of your overall design strategy.
17. Transform Floors with Budget-Friendly Vinyl Flooring: Style Without the High Price Tag
Flooring replacement typically represents one of the largest expenses in kitchen renovations, but vinyl options have revolutionized what’s possible on a limited budget. Today’s vinyl flooring bears little resemblance to the sheet vinyl of decades past, offering remarkable realism for $1-3 per square foot compared to $8-20 for hardwood or tile.

Luxury vinyl plank (LVP) and luxury vinyl tile (LVT) stand out as particularly good options for kitchen renovations. These products feature realistic visual layers that can convincingly mimic wood, stone, or ceramic tile, complete with texture. Many feature click-lock installation systems that make them accessible to DIYers, eliminating installation costs. For historic homes, look for products that replicate period-appropriate materials – many manufacturers offer excellent reproductions of Victorian tile patterns or traditional wood looks.
- Choose thicker wear layers (12-20 mil) for better durability
- Look for waterproof cores in kitchen applications
- Consider loose-lay vinyl for the easiest installation
The ripple effects are enormous – by saving on flooring, you free up budget for other improvements or higher-quality fixtures. This strategic approach to allocating your renovation dollars is key to creating a kitchen that looks more expensive than it actually was.
18. Create Display Space with DIY Floating Shelves: Simple and Affordable Storage
Floating shelves offer that perfect combination of form and function, adding storage while creating visual interest for a fraction of the cost of cabinetry. In my renovation work, I’ve installed countless floating shelves for $50-100 per shelf, compared to $300-500 for even basic upper cabinets.
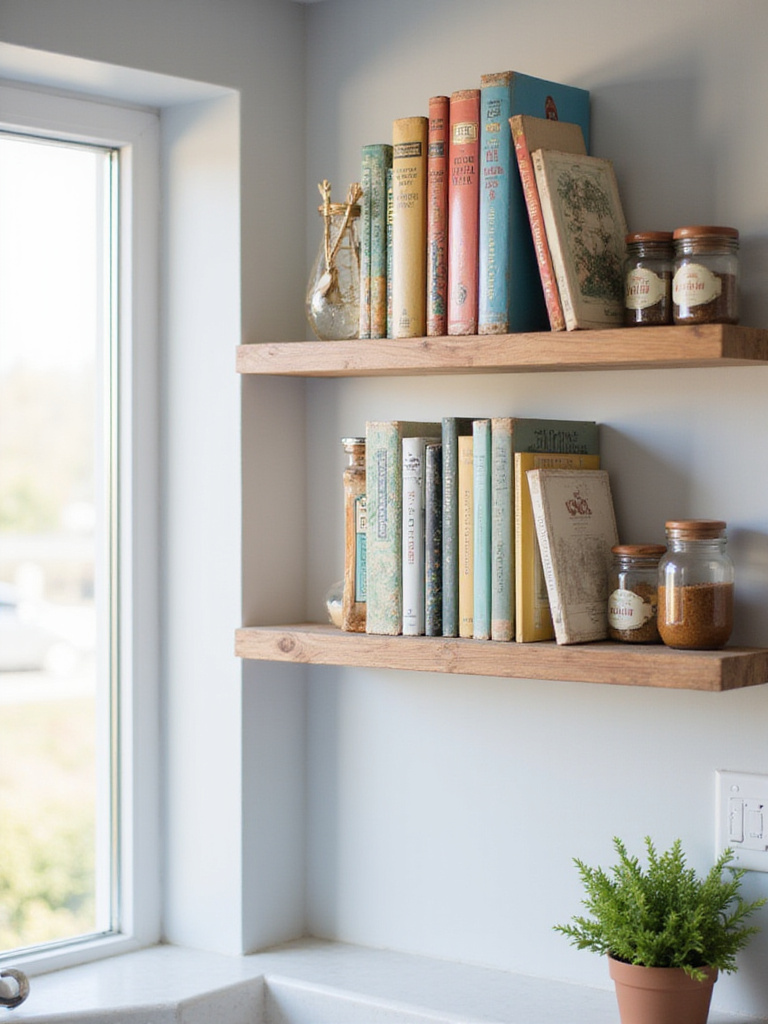
The beauty of DIY floating shelves lies in their versatility. In Victorian-era homes, I often create substantial shelves with decorative brackets that complement original architectural details. For Craftsman bungalows, chunky wood shelves with visible joinery honor the handcrafted aesthetic of that period. Mid-century homes benefit from sleek, minimalist shelves that showcase clean lines. The materials can be equally varied – from inexpensive pine (painted or stained) to reclaimed wood with character and history.
Let me paint you a picture: floating shelves not only provide practical storage but create opportunities to display items that tell your story – perhaps vintage kitchen tools that connect to your home’s history, family heirlooms, or collections that bring you joy. This personalization is what transforms a simple kitchen into a space that feels uniquely yours.
With your walls now working harder for storage and display, let’s add some color and texture with another budget-friendly element: textiles.
19. Refresh Kitchen Textiles for a Pop of Color: Towels, Curtains, and More on a Budget
Textiles might be the most underrated kitchen ideas on a budget. For just $50-100, you can introduce color, pattern, and texture that dramatically shifts your kitchen’s feel without changing any permanent elements. I’ve helped countless clients use this strategy to breathe new life into their kitchens between larger renovations.

Focus on high-impact textiles that serve practical purposes: dish towels draped over the oven handle, pot holders hung near the stove, a small rug in front of the sink, and simple curtains or valances at windows. These elements can be coordinated for a cohesive look or mixed for more eclectic appeal. For historic homes, consider textiles that reflect your home’s era – grain sack towels for farmhouses, botanical prints for Victorian kitchens, or geometric patterns for mid-century spaces.
The potential here is enormous – textiles can completely shift your kitchen’s color scheme and style without any permanent changes. This makes them perfect for seasonal refreshes or for testing color schemes before committing to more substantial updates like paint or backsplash.
For our final budget-friendly kitchen idea, let’s explore a versatile solution that adds both workspace and storage without major construction.
20. Add Versatility with a Kitchen Island Cart: Extra Space Without a Full Renovation
A permanent kitchen island typically costs $2,000-5,000 when professionally installed, putting it beyond most budget renovations. Enter the kitchen island cart – a mobile workstation that delivers many of the same benefits for $100-300, with no construction required.
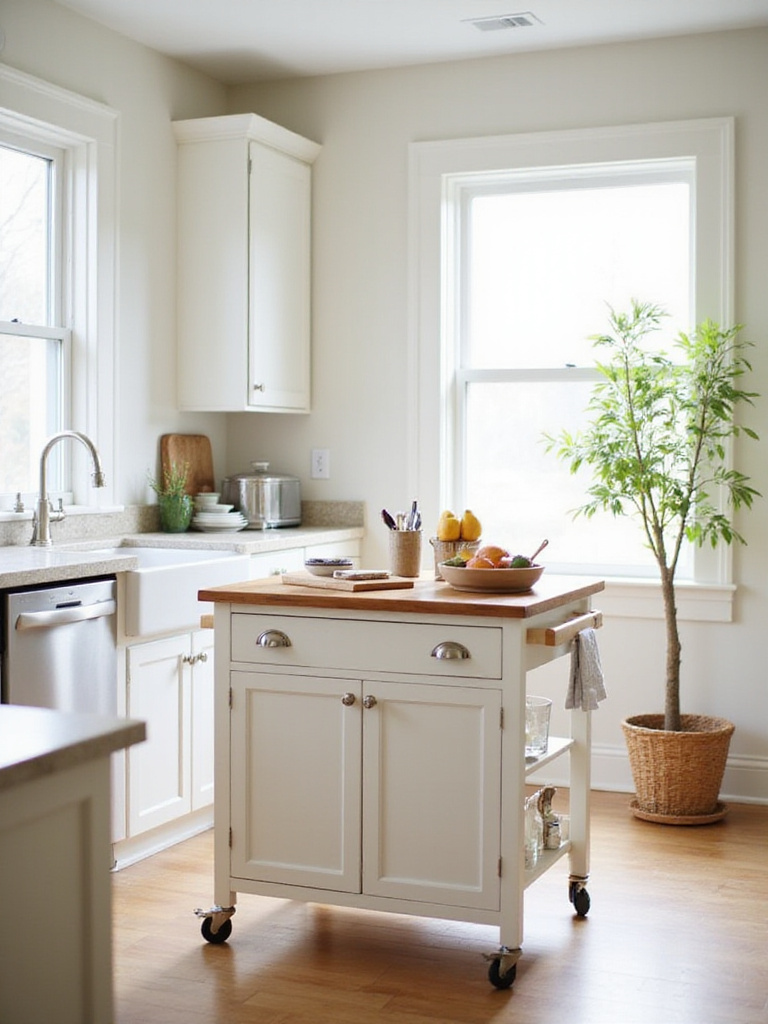
When selecting a kitchen island cart, prioritize functionality for your specific needs. If counter space is your primary concern, look for models with butcher block tops that provide durable work surfaces. If storage is the priority, choose carts with a combination of open shelving, drawers, and cabinets. Many carts feature locking wheels, allowing them to serve as permanent workstations when needed or roll aside when space is at a premium.
- Look for solid wood tops that can handle food preparation
- Choose carts with adjustable shelves for maximum flexibility
- Consider models with extendable leaves for extra workspace when needed
It works something like this: a kitchen island cart provides the additional work surface and storage you need without the commitment or expense of permanent construction. This flexibility is particularly valuable in historic homes where preserving original layouts is often desirable, or in rental properties where permanent changes aren’t possible.
Conclusion: Your Dream Kitchen is Within Reach
Throughout this exploration of kitchen ideas on a budget, one thing becomes clear: transformative change doesn’t require emptying your bank account. By focusing on strategic updates that deliver maximum visual impact – painted cabinets, new hardware, updated lighting, and thoughtful organization – you can create a kitchen that feels completely refreshed without major construction.
What I’ve learned in my years of historic home renovation applies equally to modern spaces: authenticity and thoughtfulness matter more than expensive materials. A well-organized, clean kitchen with carefully chosen details will always feel more special than a generic high-end renovation lacking personality.
So start small. Pick the ideas that resonate most with your space and your style. Layer in changes as your budget allows. Remember that the most beloved kitchens aren’t showcases of wealth – they’re thoughtfully designed spaces that support how you live and reflect who you are. With these budget-friendly strategies, that dream kitchen isn’t just possible – it’s within reach right now.