Most people accept their kitchen lighting the way they accept a stiff lower back — as something uncomfortable they’ve simply learned to live with. But the flat overhead glare that makes food prep feel like a chore, and the shadow that falls across your cutting board every time you lean over it, aren’t design inevitabilities. They’re fixable. And fixing them has a measurable effect on how long you spend in your kitchen, how well you sleep after an evening cooking session, and how much you actually enjoy the process.
As a wellness design consultant with a WELL AP certification and eight years helping clients redesign the spaces that matter most to their health, I’ve come to believe that kitchen lighting ideas are the highest-leverage intervention in any home. The kitchen is where most people begin their day, prepare food that fuels their bodies, and decompress in the evening. Get the lighting right and everything in that space works better. These 16 kitchen lighting ideas cover the practical and the wellness-informed — from the basics of task illumination to the science of circadian light programming — all with the goal of making your kitchen genuinely better to be in.
1. Under-Cabinet LED Strips for a Perfectly Lit Prep Zone
Among the most immediately rewarding kitchen lighting ideas on this list, under-cabinet LED strips deliver a transformation you’ll notice the moment you start making dinner. Without them, the overhead light source is behind you when you stand at the counter, which means your own body casts a shadow onto every task you’re trying to do. It’s the most common cause of visual fatigue in kitchens, and almost everyone has it.
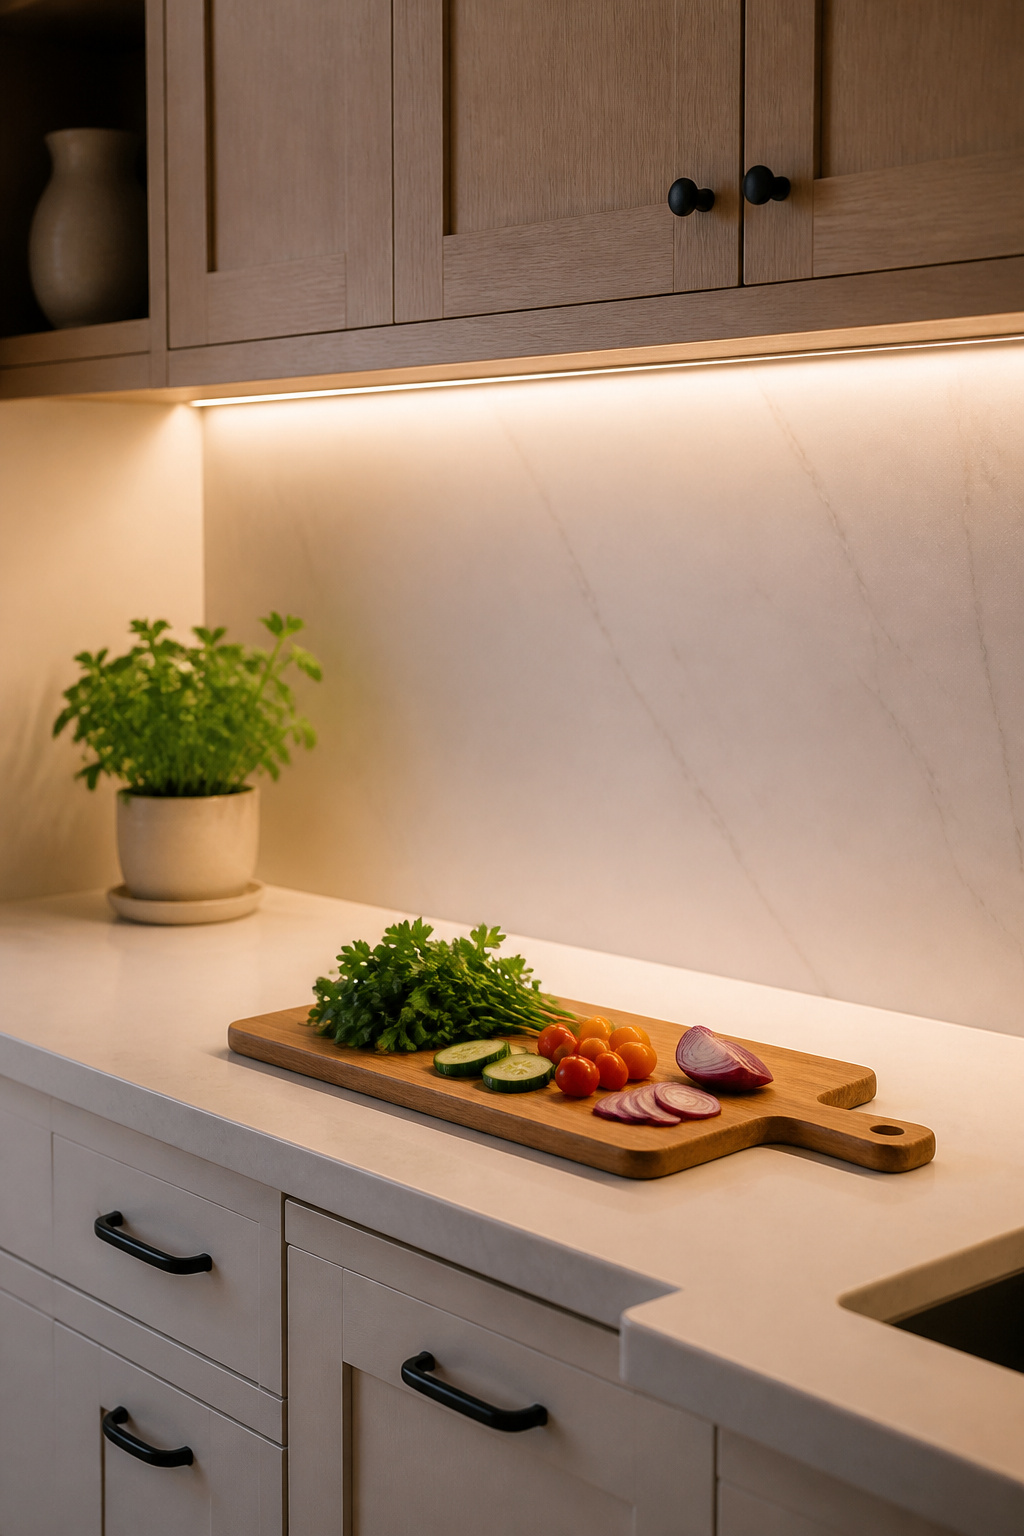
For a food preparation area, aim for 400–700 lumens per linear foot, with a CRI of at least 90. That CRI number matters more than most people realize — it determines how accurately the light renders colors, and in a kitchen, that means the difference between spotting a ripe avocado at a glance and guessing. The dedicated R9 value (deep red rendering) should also clear 90 if you cook meat or work with bright produce. Waveform Lighting’s UNDERCAB series is a benchmark for this spec, though several mid-range options now hit 95 CRI at a much lower price point.
For color temperature, aim for 3500K–4000K under cabinets — neutral enough to show ingredient colors accurately without the yellow cast of 2700K. Install the strip toward the back of the cabinet underside, not the front, and run it through an aluminum diffuser channel. Front-edge installation creates direct glare at eye level; a diffuser channel turns a line of individual LED dots into an even wash of light across the full counter depth.
One practical note: pair the installation with a trailing-edge dimmer rather than the older leading-edge (TRIAC) type. Trailing-edge dimmers handle LED driver electronics cleanly — no buzzing, no flicker at low dim levels. Dimming range matters in the evening; you’ll want to dial these down after dinner to support a healthy wind-down.
2. Pendant Lights Over the Island: Kitchen Lighting That Defines the Space
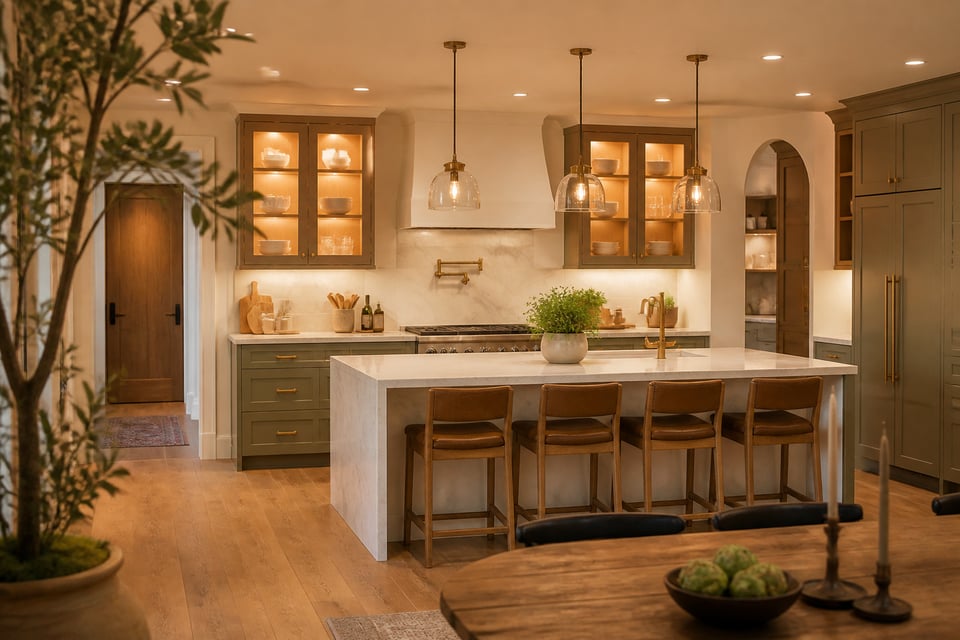
Pendant lights over a kitchen island are the design decision that most transforms a kitchen’s character, and also the one most commonly gotten wrong. The two failure modes are choosing pendants that are too small — which makes them look like afterthoughts — and hanging them too high, which defeats their purpose as task lights.
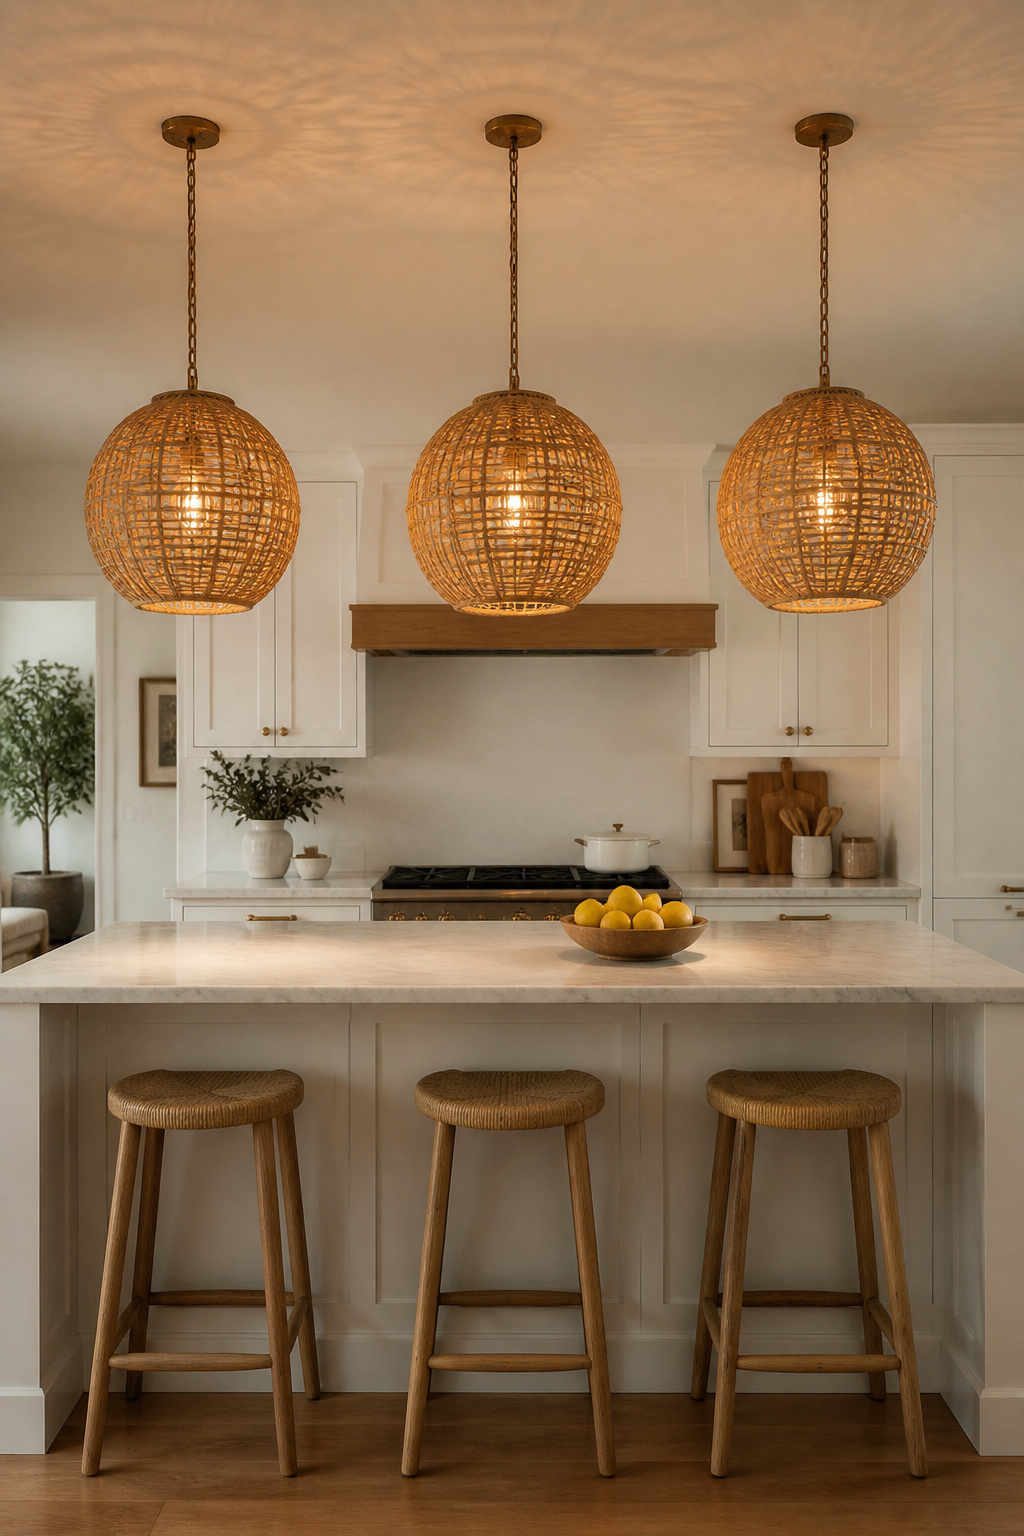
The rules here are reliable. Pendant diameter should be approximately half to two-thirds the width of the island — a 36-inch wide island suits 18–24-inch pendants; a narrow 24-inch island needs 12–16-inch fixtures. Hang them 30–36 inches above the countertop, measuring from the bottom of the pendant to the surface. For taller ceilings, add three inches of hanging height for every additional foot above eight — a 10-foot ceiling calls for pendants at 36–42 inches above the counter. Space multiple pendants 24–30 inches apart, center to center, and maintain equal gaps from the ends of the island rather than compressing the middle. For more detail on every island configuration, the full guide on kitchen lighting over the island covers hanging height, fixture count, and size calculations in depth.
Style-wise, the direction in 2025–2026 is clearly toward natural materials and honest forms. Globe pendants in amber glass diffuse light warmly in all directions — good for informal kitchens where ambience matters as much as function. Cone or bell pendants direct a focused beam downward, which suits task-heavy prep islands better. And rattan or woven pendants are having a sustained moment because they do something no glass or metal pendant can: they cast dappled light that mimics sunlight filtering through a canopy. Two or three pendants suit islands up to 48 inches; three is the standard configuration for 60–72-inch islands, and odd numbers read more dynamically than even.
3. Layered Lighting With Dimmers for Total Mood Control
This kitchen lighting idea has a wellness dimension that goes well beyond convenience. A kitchen with only one type of light — usually ambient overhead — works at exactly one brightness level for every task and every time of day. Layering means having at least three types of light available: ambient (the overall fill), task (targeted at work surfaces), and accent (display, toe kick, decorative). Together, they allow a kitchen to transition from high-visibility morning prep to relaxed dinner ambience to quiet night navigation, all without touching the layout.
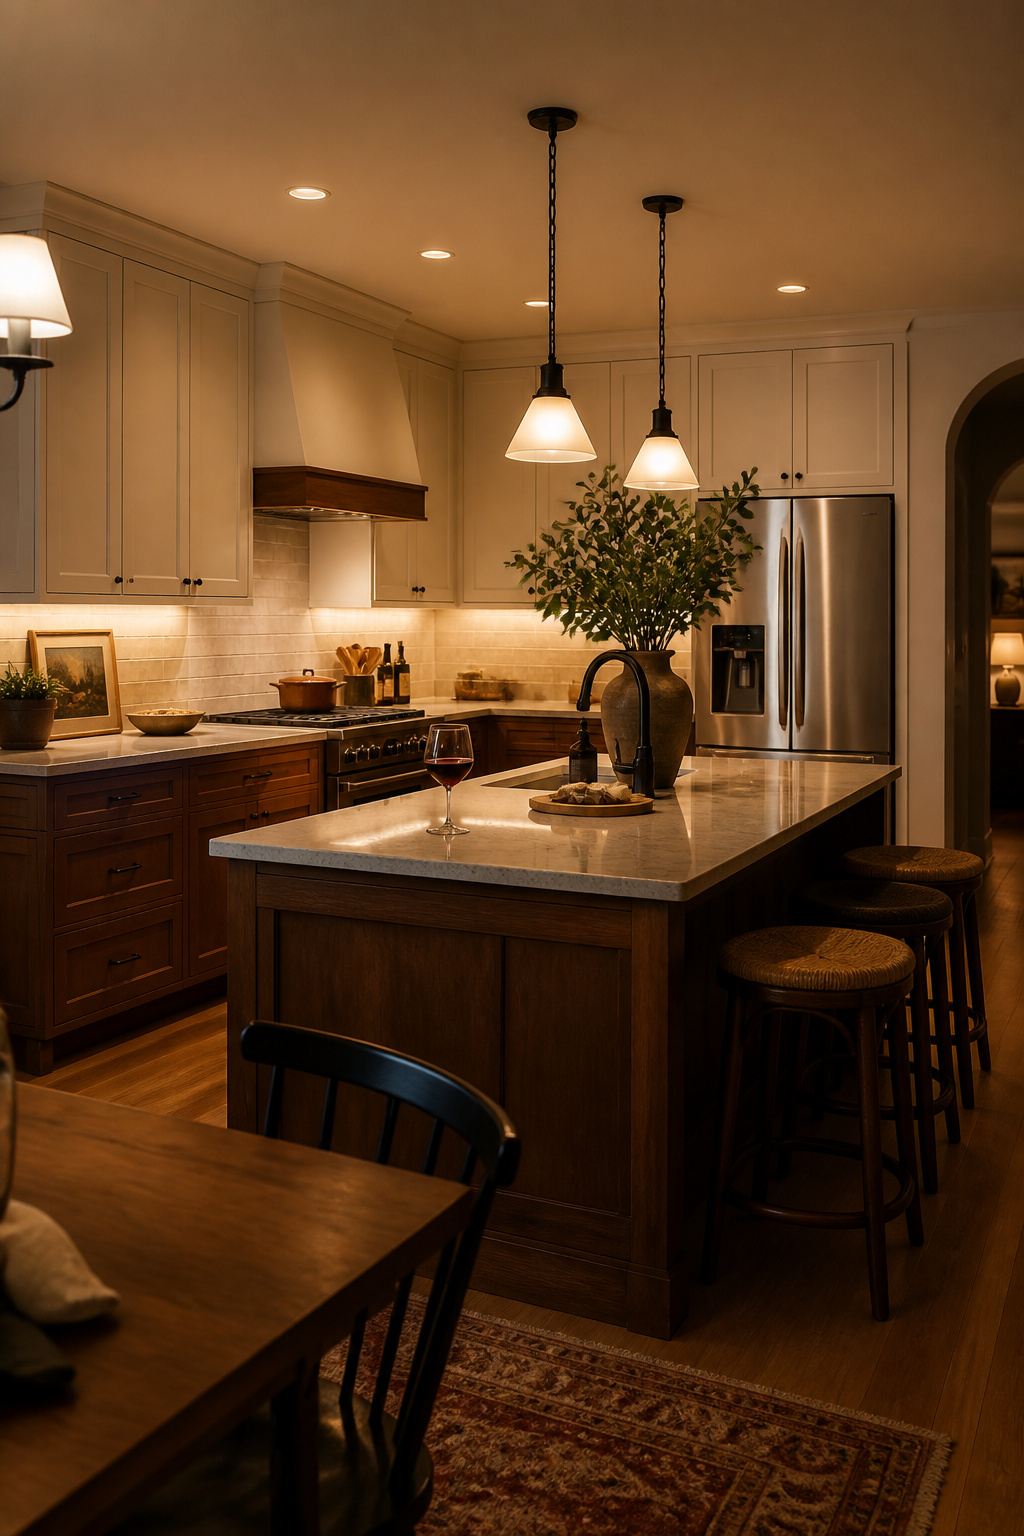
Dimmers are the mechanism that makes this work across the day. But there’s also a circadian benefit: dimming LEDs after sunset reduces blue-wavelength light output, and blue light (centered around 460–480nm) is the primary signal that suppresses melatonin production. After dinner, if your kitchen overhead is still at full brightness with a cool 4000K temperature, your body is receiving the biological equivalent of noon sunlight. Dimming ambient kitchen lights to 10–30% while keeping warm-toned task lighting active for cooking is a practical, no-cost circadian adjustment that most people can make tonight.
For compatibility: use only dimmable LED bulbs on any dimmed circuit — non-dimmable LEDs on dimmers buzz, flicker, and fail early. Choose trailing-edge dimmer switches (labeled MLSD) rather than the older TRIAC type designed for incandescent bulbs. Lutron’s Caséta line and Leviton’s Decora Smart series are the most reliable trailing-edge options for residential kitchens.
4. Recessed Downlights Positioned for Shadow-Free Cooking
Here’s the problem with most recessed kitchen lighting: the fixtures are in a symmetrical grid in the ceiling center, which is exactly the wrong place. When you stand at the counter, those ceiling-center fixtures are behind your head and above your shoulders — which means your body casts a shadow directly onto your work surface. The light lands on your back, not on your cutting board.
The fix is specific: position recessed fixtures 18–26 inches from the wall, directly over the counter edge. This moves the beam angle onto the work surface instead of onto you. For standard 8-foot ceilings, 4-inch cans producing 700–1000 lumens each work well for task zones; 6-inch cans at 600–1000 lumens fill the ambient layer. General spacing: ceiling height divided by two equals fixture spacing in feet, so an 8-foot ceiling calls for roughly 4-foot spacing between fixtures in the ambient layer, tighter over counter zones. Keep lights at least 12–18 inches from the face of upper cabinets to avoid hot spots on cabinet fronts and uneven counter coverage below.
Gimbal trim — the type with an adjustable head that tilts up to 35 degrees — is worth choosing over fixed trim wherever you have open shelving or a textured backsplash to highlight. Position those fixtures 18 inches from the wall and angle inward to wash the vertical surface with light, adding depth to an otherwise flat plane. One technical detail that matters for insulated ceilings: IC-rated cans are required wherever the fixture contacts ceiling insulation. Non-IC cans in insulated ceilings are a fire code violation — an easy mistake to make when replacing older fixtures.
5. Natural Light Maximization: Mirrors and Windows as Kitchen Light Sources
Before adding a single new fixture, look at what daylight you already have and how much of it you’re actually using. In most kitchens, natural light is blocked, filtered, or simply not directed where it would do the most good. Along with the fixture-based kitchen lighting ideas elsewhere in this guide, maximizing natural light is one of the most wellness-effective strategies available — and it starts with what’s already in the room.
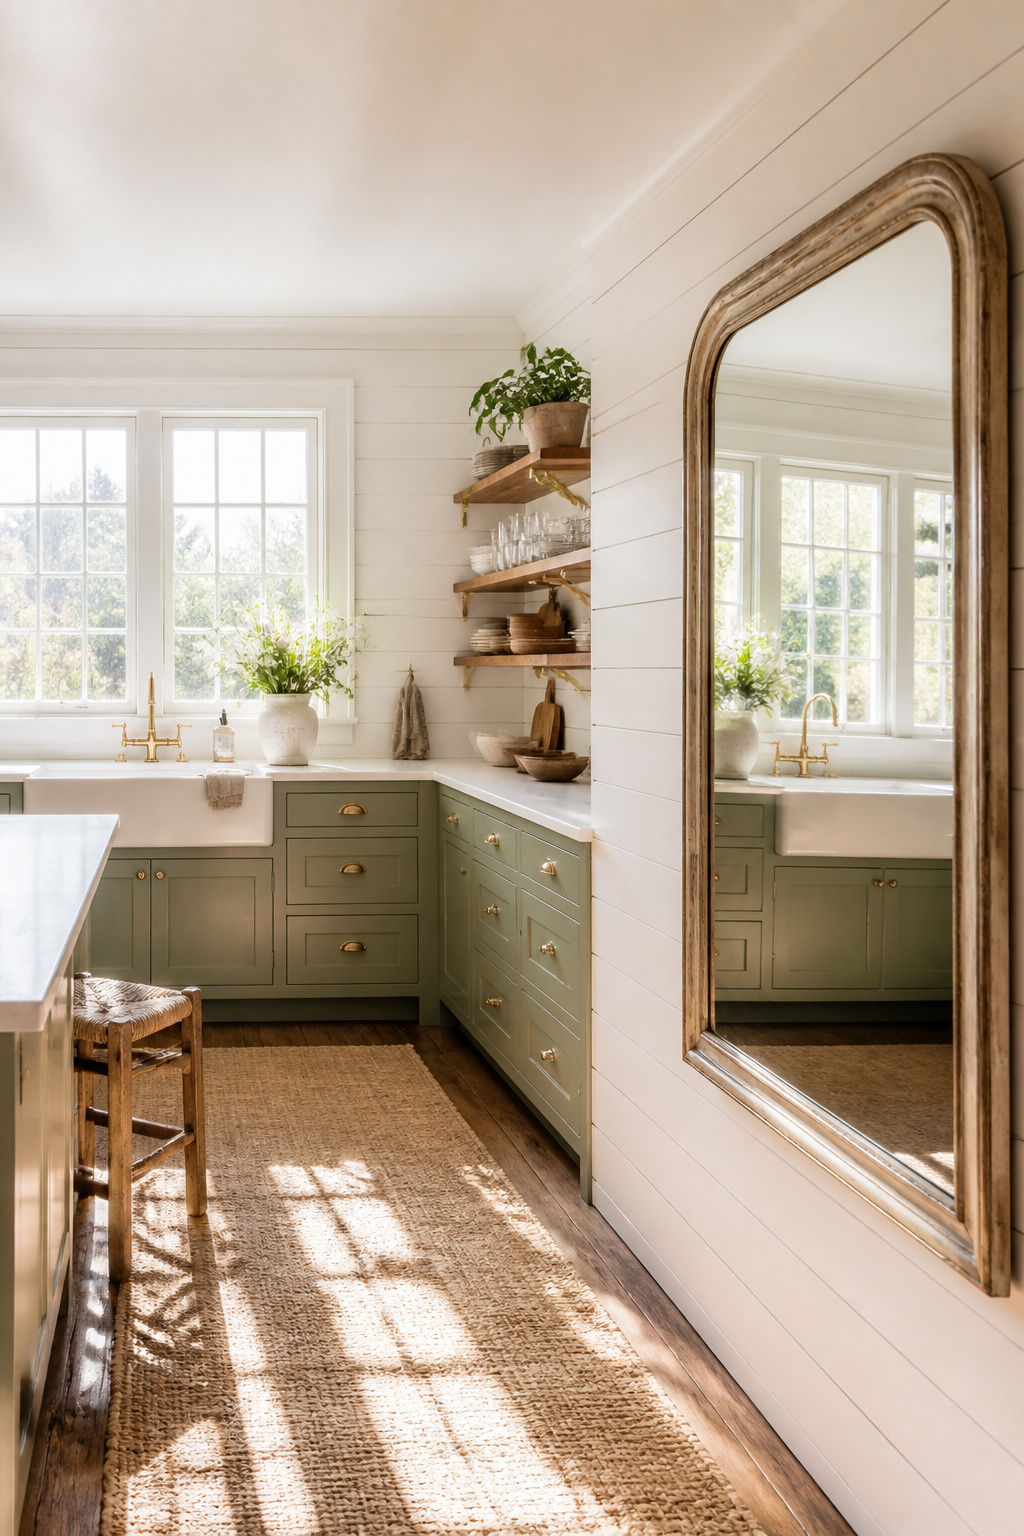
The most efficient single move: place a large mirror on the wall opposite the main kitchen window. Natural light enters, bounces off the mirror, and travels deeper into the room — particularly effective in north-facing or narrow kitchens. Beyond mirrors, glossy cabinet finishes, light-toned countertops, and polished backsplash tiles all act as secondary reflectors. For kitchens with no external windows, a 10-inch Solatube light tube delivers the equivalent of 225 watts of full-spectrum natural daylight to an interior space.
The wellness case for prioritizing natural light is strong. Morning natural light exposure synchronizes the suprachiasmatic nucleus — the brain’s master circadian clock, which governs sleep quality, hormone release, digestion, and immune function. Even 15–30 minutes of morning daylight has been shown to improve sleep quality that night and sharpen daytime concentration. The kitchen, where most people begin their mornings, is the ideal delivery point. For window treatments, sheer linen panels allow 60–80% of incoming daylight through while providing privacy; solar shades with a 5–10% openness factor block heat without darkening the room. Leaving the upper third of kitchen windows completely bare is the simplest way to maximize light entry while maintaining privacy below.
6. Statement Chandeliers That Make Kitchen Lighting a Design Focal Point
A chandelier in a kitchen is a commitment — to a specific aesthetic, to more frequent cleaning, and to accepting that you’re trading some functional efficiency for visual impact. Done well, it’s worth all three. Done poorly, it collects grease and blocks sightlines across the room. The broader guide to kitchen lighting fixtures covers the full range, but for chandeliers specifically, the key variables are ceiling height, room proportions, and material choice.
Sizing follows a reliable formula: add the room’s length and width in feet, and that sum in inches equals the recommended chandelier diameter. A 12×14-foot kitchen dining area calls for approximately a 26-inch chandelier. For the island, use the pendant rule instead — diameter of one-half to two-thirds the island’s width. Minimum hanging height from floor to the bottom of the fixture is seven feet, and most kitchen-appropriate chandeliers need at least nine-foot ceilings to look natural.
Material choice matters more in a kitchen than in any other room. Crystal and glass chandeliers require frequent cleaning when positioned near cooking — grease vapor settles on every surface. Matte finishes (powder-coated black or bronze) resist grease visually far better than polished chrome or brass. Rattan or natural-fiber chandeliers, while beautiful, should be positioned over a dining zone away from the cooktop — placed directly above a cooking island, they absorb vapors and become nearly impossible to clean.
7. Track Lighting for a Flexible, Adaptable Kitchen Setup
Track lighting is the kitchen lighting idea that rewards planning ahead. Once a track is mounted, the heads can be repositioned in minutes — angled toward the counter when you’re prepping, redirected toward open shelving when you’re hosting, adjusted when the island gets rearranged. No additional wiring, no electrician call. For kitchens that evolve, or for renters who can’t permanently modify the space, it’s the most practical flexible lighting solution available.
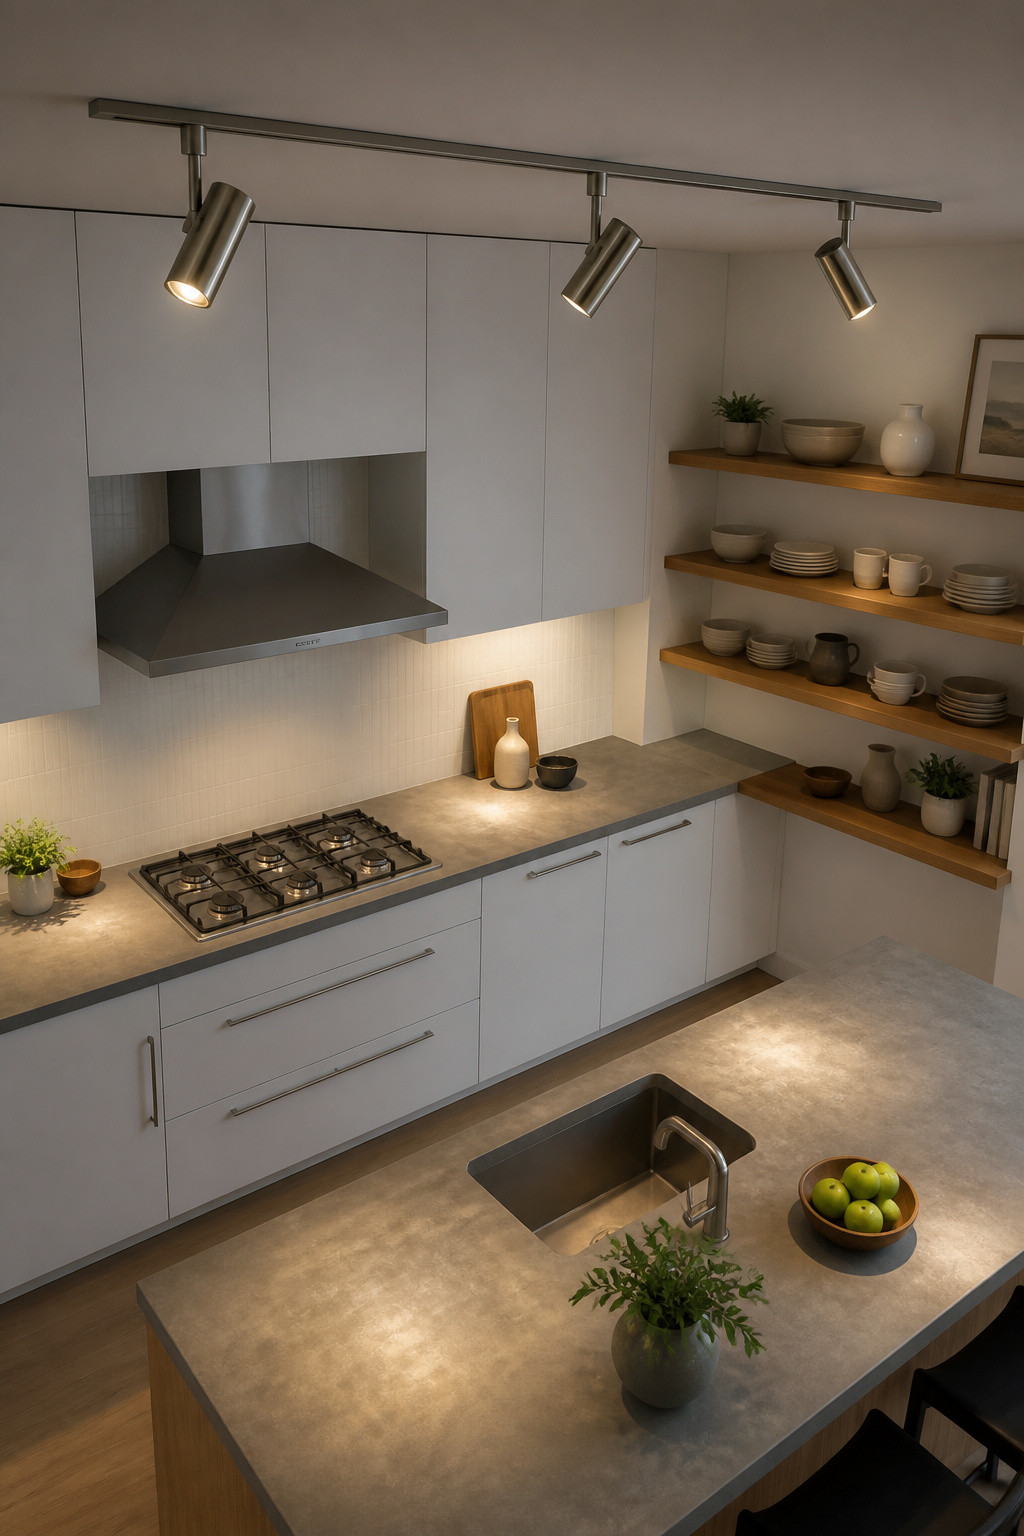
The main track types — H-track (Halo), J-track (Juno), and L-track (Lightolier) — are line-voltage systems rated at 20 amps per circuit, with heads that are not interchangeable between systems. Buy heads and track from the same brand to avoid compatibility issues. Flood heads (60-degree beam angle) provide broad ambient wash for general kitchen areas; spot heads (15–25-degree beam) deliver focused accent light for specific surfaces. A typical kitchen setup uses two spots flanking a central flood head for the best combination of task and ambient coverage.
Monorail systems are the design-forward alternative to standard H or J track. Unlike fixed linear track, monorail rails are suspended from standoff rods and can be curved — useful in kitchens with vaulted or irregular ceiling geometry, or where a more sculptural overhead presence is the goal. Monorail is limited to around 300 watts per 12V transformer, so calculate your fixture wattage before specifying; heavily loaded systems need a second transformer. Also, for renters, plug-in track adapters allow a full track system to run from an existing ceiling outlet with no wiring changes at all.
8. Smart Kitchen Light Ideas: Scenes, Schedules, and Voice Control
The practical value of smart kitchen lighting goes well beyond turning lights on with your voice. The real opportunity is circadian automation — a programmed daily light schedule that shifts from bright, cool morning light (5500K at 90% output) through neutral midday cooking light (4000K at 100%) to warm, dimmed evening light (2700K at 30–40%) without manual adjustment after the initial setup.
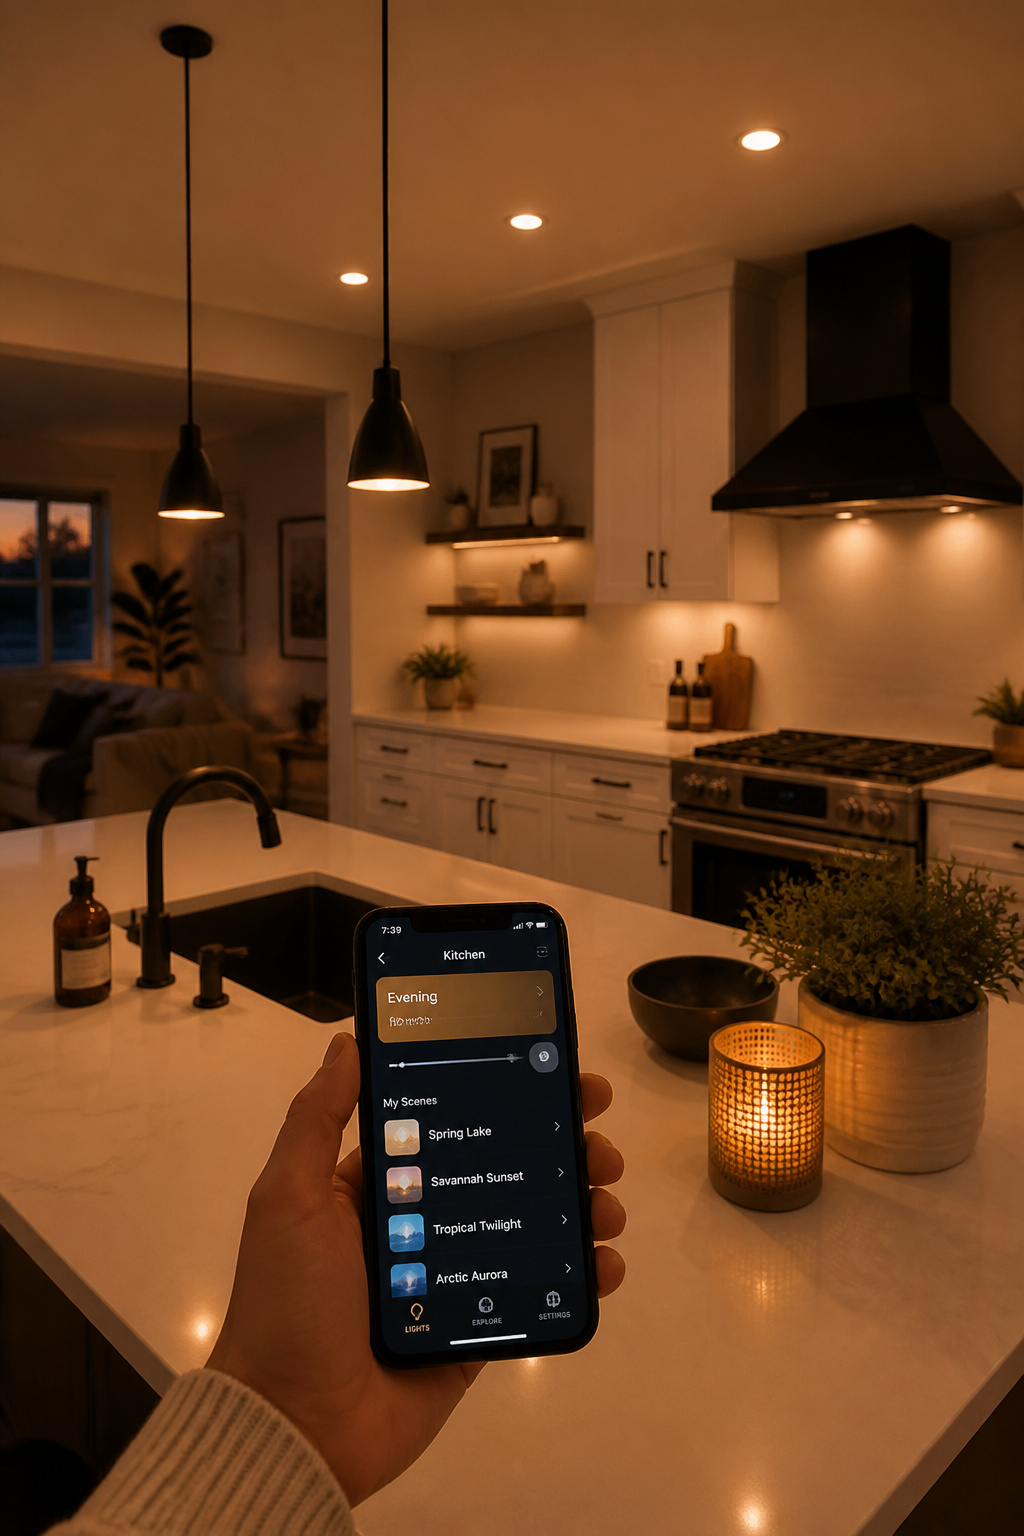
Tunable white smart bulbs from Philips Hue, LIFX, and Lutron support this kind of schedule. Hue requires a Bridge and has an 80 CRI limitation (adequate for ambient fixtures, limiting for task lighting); LIFX connects directly to Wi-Fi, skips the hub, and offers higher CRI for better food color rendering. Lutron Caséta is the professional-grade choice for whole-room dimming control — its proprietary Clear Connect protocol avoids Wi-Fi interference issues common to other smart switches, and it integrates with Hue for hybrid systems where Caséta handles the switch dimming while Hue manages the bulb color temperature. For how smart home features extend into adjacent spaces, the same platform choices apply across your home.
Four kitchen scenes worth setting up: Morning (5500K, 90%), Cooking (4000K, 100% task + 60% ambient), Dining (2700K, 50% ambient + pendants dimmed), and Night (2200K, 15% toe kick only). One important practical note: smart bulbs in fixtures controlled by standard wall switches lose their programming when the switch is turned off. Either install switch guards, or replace the switch with a smart dimmer that maintains power to the bulb.
9. Glass-Front Cabinet Lighting for Display-Ready Open Shelving
One of the more quietly impactful kitchen lighting ideas in a busy household, internal cabinet lighting is the detail that most clearly separates a kitchen that has been designed from one that has simply been furnished. It costs relatively little, installs in an afternoon, and produces an effect — layered depth, warm presence, the sense of a kitchen that’s alive even when no one is using it — that no surface update can replicate.
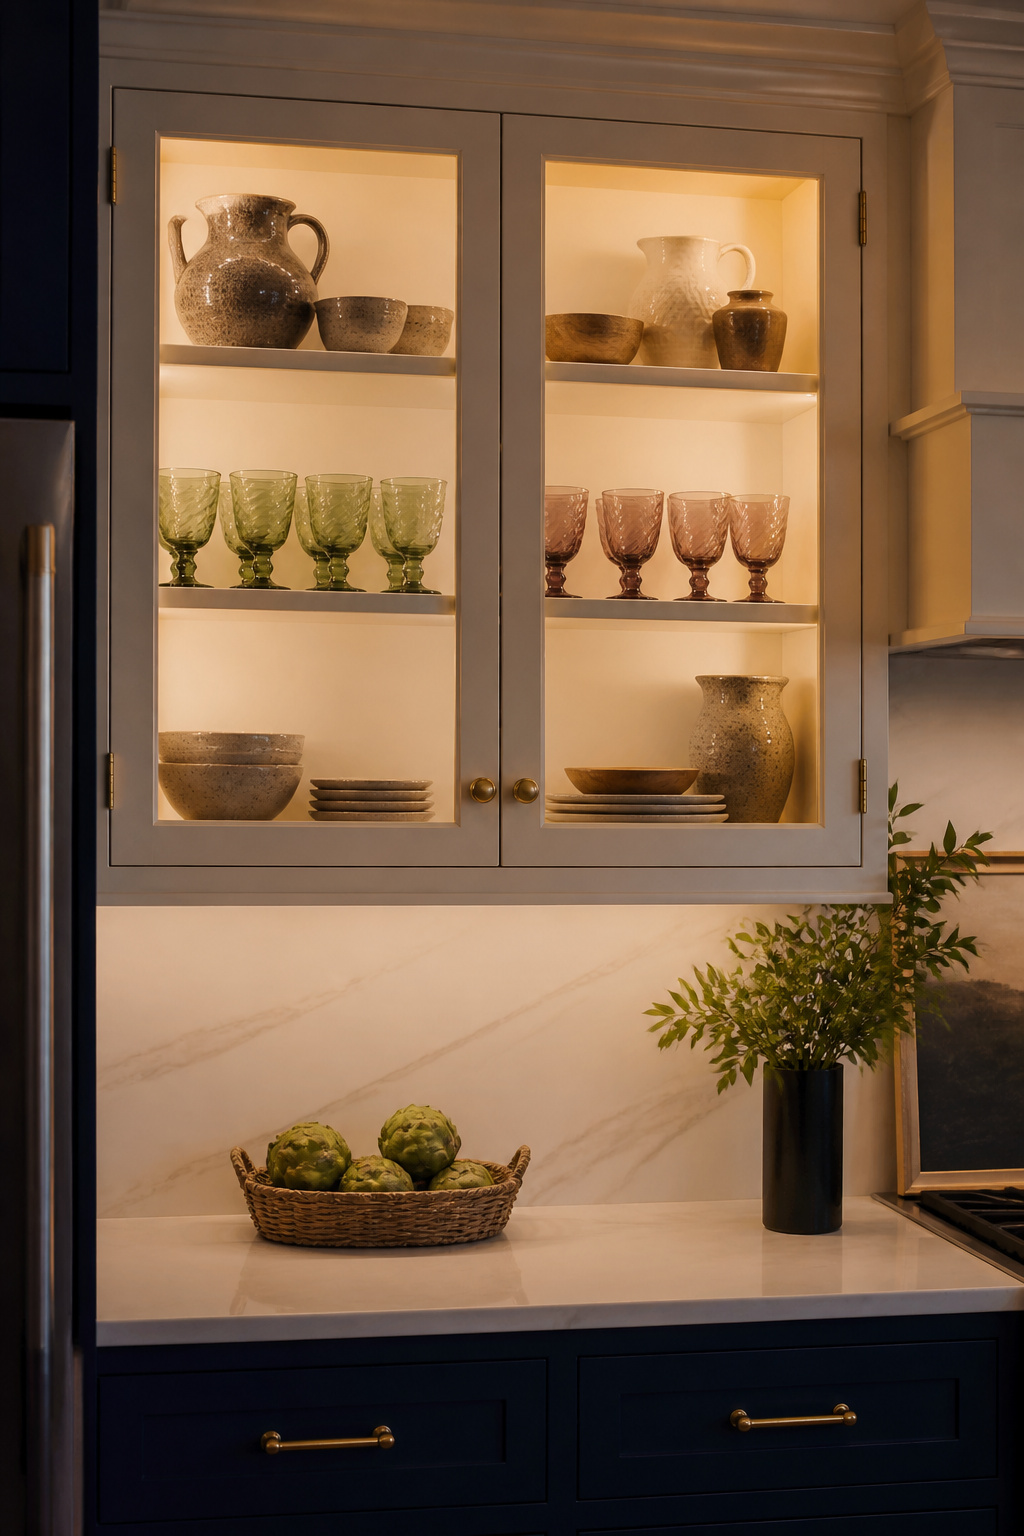
LED tape in an aluminum diffuser channel, installed at the top and bottom interior edges, produces an even wash across the full shelf depth. Puck lights create pools rather than washes — fine for a few widely spaced statement objects, but uneven on a fully arranged shelf. Battery-powered puck lights suit renters or situations without accessible wiring; hardwired LED tape looks cleaner and provides more consistent output over time.
For what to put in lit cabinets: objects with texture and color catch internal lighting well — handmade ceramics, colored glassware, woven baskets, wood bowls. Smooth white dishes in a lit cabinet largely disappear. Keep the cabinet interior one tone lighter than the external cabinetry — a white interior behind navy doors creates a beautiful framed contrast. Arrange items in odd numbers with varying heights, and leave 20–30% of each shelf as empty space; the light needs room to breathe. For cabinet styling principles that apply across kitchen styles, the guidance on farmhouse kitchen cabinet ideas translates well to contemporary and transitional kitchens too.
10. Flush-Mount Fixtures: Kitchen Lighting Ideas for Low Ceilings
The most common mistake when buying a flush-mount fixture is choosing it for its appearance and discovering later that it barely lights the kitchen. A standard 10×12 kitchen needs at least 6,000 lumens of total ambient output from ceiling fixtures — and most decorative flush mounts sold in home stores produce 800–1,200 lumens. That’s enough for a bedroom, not a kitchen work space.
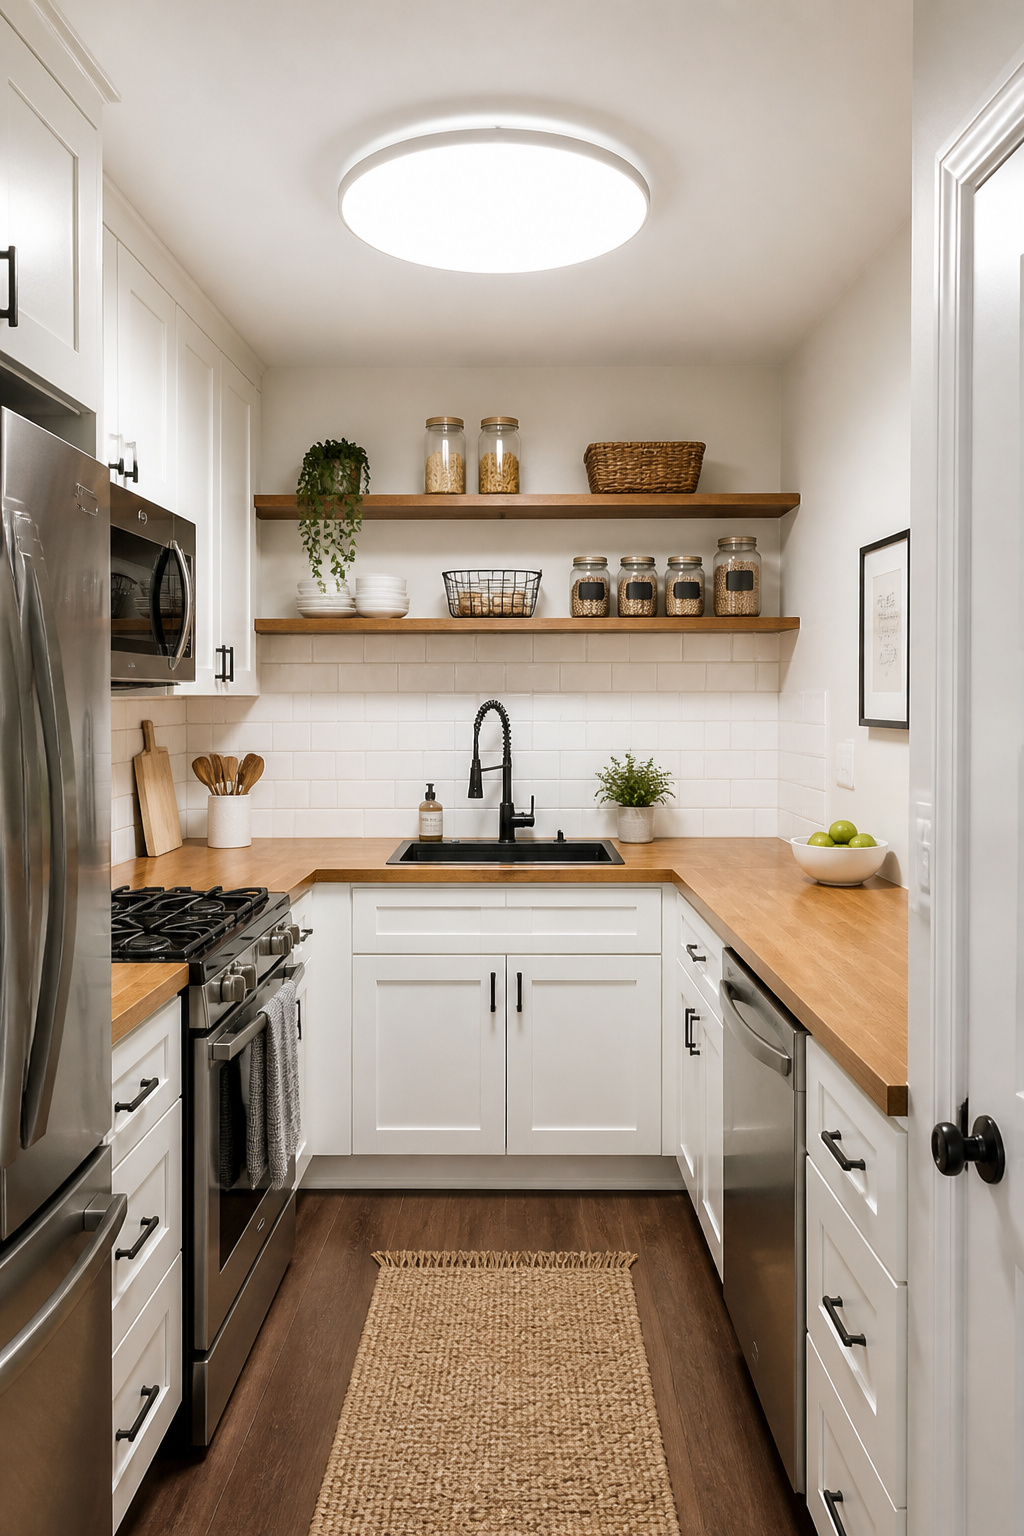
For a kitchen with a single central fixture as the primary source, spec a minimum of 4,000 lumens — lower than this requires supplementary task and accent layers to reach safe prep lighting levels. LED flush mounts in the $120–$300 range from brands like Kichler, Progress Lighting, or Hunter typically hit 3,000–5,000 lumens while staying within a decorative form. Also, for kitchens where ceiling height isn’t the only constraint, the broader context in small kitchen decor ideas covers light-enhancing approaches beyond fixtures.
Semi-flush mounts (with a 2–8-inch drop) distribute light more efficiently than true flush fixtures — the slight distance allows the shade to project light at a wider angle. For ceilings at exactly 8 feet, a semi-flush with a 2–4-inch drop is still well within safe head clearance and performs noticeably better. The trend toward “cloud” pendant forms — large, low-profile shade structures that appear to float near the ceiling — gives the performance of a semi-flush with more design presence. Avoid dome covers with small apertures; they trap light inside the fixture and reduce effective output by 40–60%.
11. Industrial Metal Pendants for a Contemporary Kitchen With Edge
Industrial pendants are kitchen lighting ideas that earn their place through honesty: they make no attempt to conceal what they are. The construction is visible, the materials are genuine, and the light goes exactly where the design points — straight down onto the surface below. In a kitchen, where function is the point, that directness is exactly right.
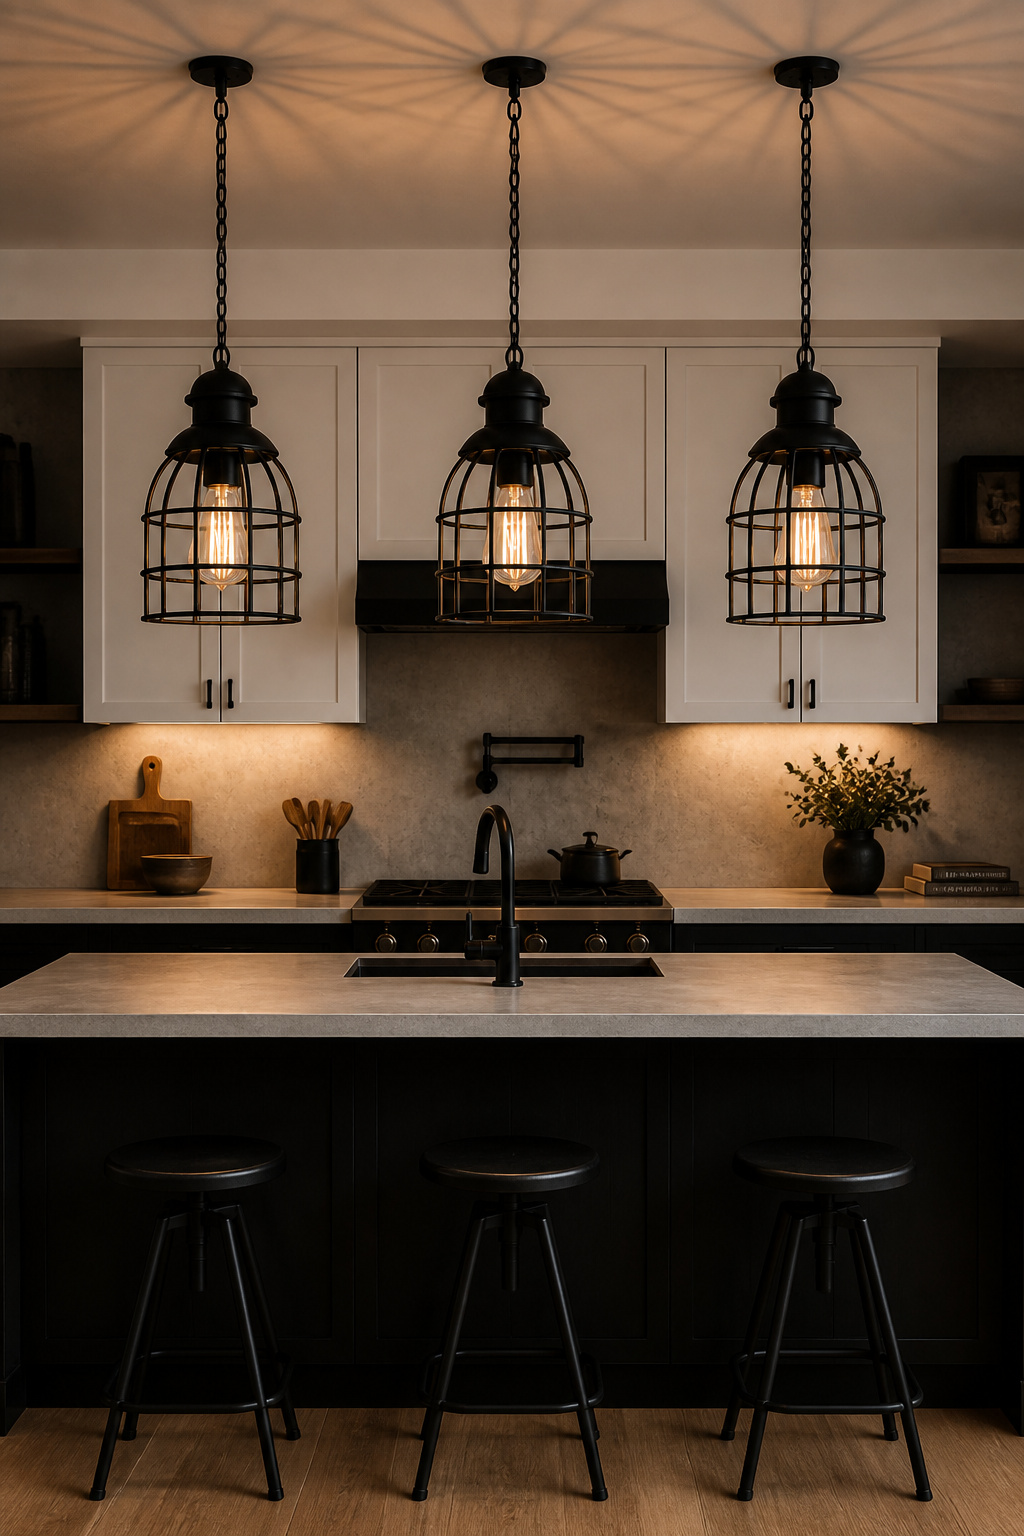
Matte black is the most versatile industrial finish: it pairs with white, gray, navy, sage, and warm wood kitchens without competing with any of them. It reads as a deliberate grounding element in light-colored kitchens, providing visual weight where the rest of the design has none. Brushed brass has moved from trend to baseline over 2023–2026 — it bridges modern and transitional kitchens with equal ease and is genuinely warmer than chrome without the formality of polished brass. Aged copper develops verdigris naturally in a moist environment; embrace that evolution or choose a different finish.
For pendant groupings, three fixtures over a 60–72-inch island is the standard, spaced 24–28 inches center to center. Match the pendant finish to the cabinet hardware for visual cohesion — matte black pendants above matte black pulls is more intentional than mixing warm and cool metals across the same view. If you’re updating the backsplash at the same time, the material palette choices in contemporary kitchen backsplash ideas pair well with most industrial metal finishes.
12. Sconces to Balance Overhead Light and Eliminate Harsh Shadows
Wall sconces are kitchen lighting ideas that rarely make it onto the planning list, which is exactly why they’re worth adding. Ceiling-only lighting creates a high-contrast visual environment — bright tops, dark middles, shadowed corners — that produces low-grade eye fatigue over extended time in the kitchen. Sconces at 60–65 inches from the floor add a mid-level fill layer that smooths this contrast and makes the space significantly more comfortable to inhabit for hours at a time.
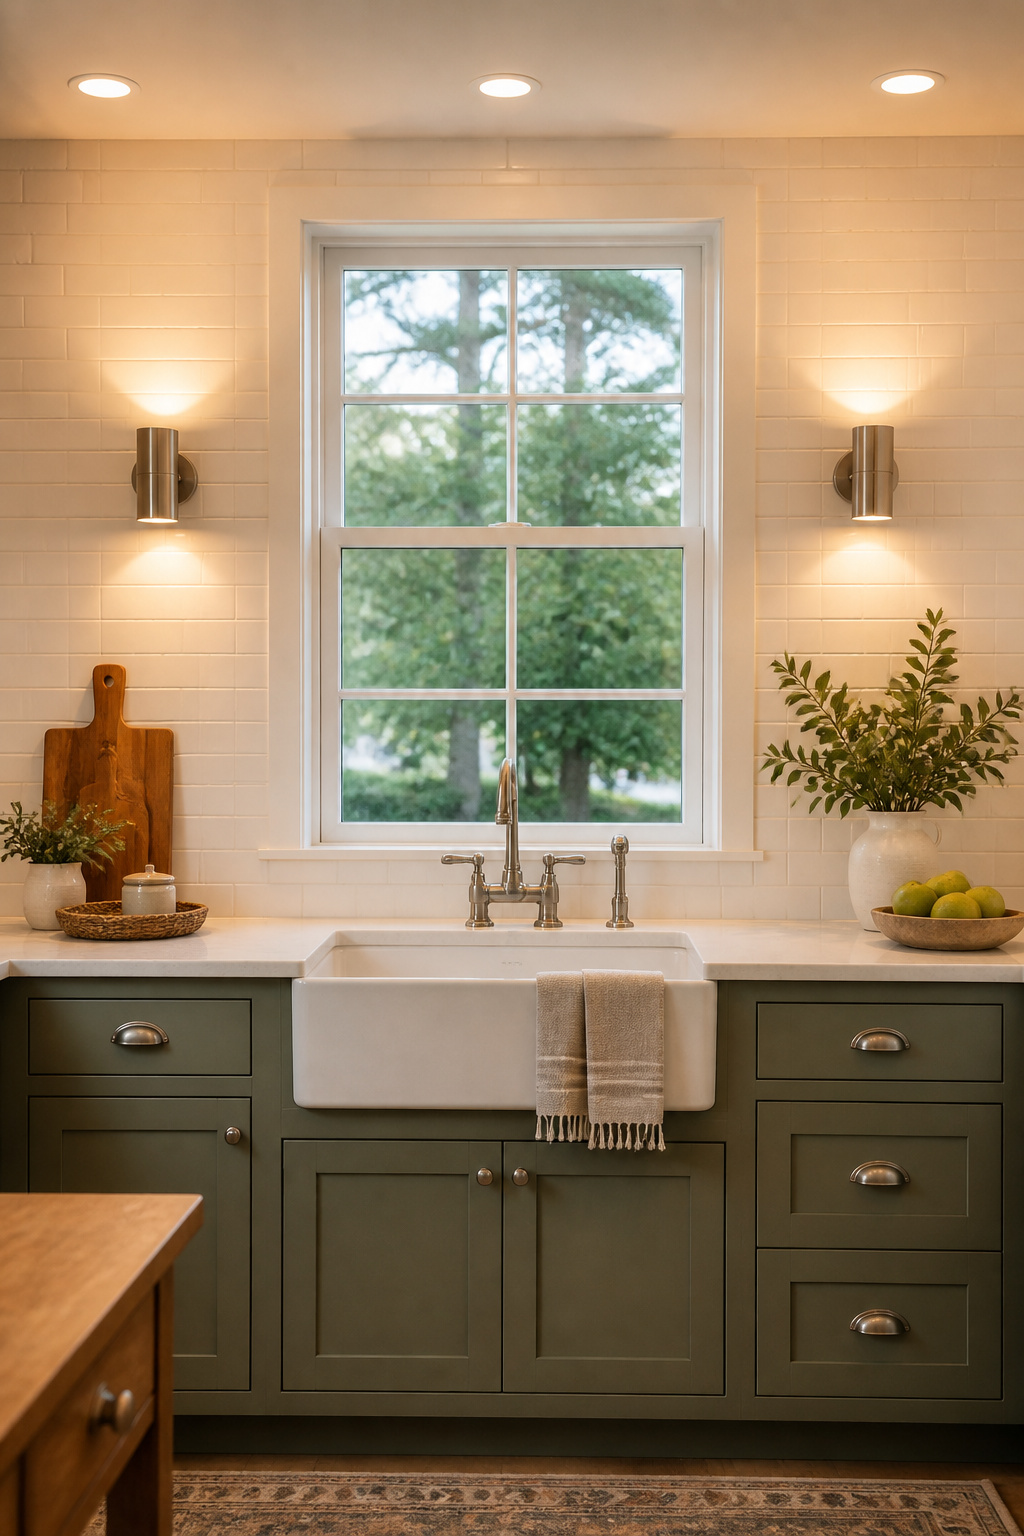
The best positions for kitchen sconces: flanking a window above the sink (where the placement counters glare from a bright window behind the primary light source), on wall space between upper and lower cabinets, or on a dining alcove wall within the kitchen zone. For anyone designing a wellness-centered kitchen — even a compact one — adding mid-level ambient light layers changes how comfortable the space feels to spend time in.
Upward-projecting sconces add indirect bounce light from the ceiling — the softest, most natural-feeling ambient fill available. Downward-projecting sconces function more like task lighting and suit the area above the sink best. One technical detail worth noting: any sconce installed near a kitchen sink needs to be rated for damp locations (IP44 minimum). Standard dry-location sconces at a splashing sink are a code violation and a genuine safety risk.
13. Rattan and Woven Pendants for Kitchen Lighting With Natural Warmth
There’s a quality that rattan and woven pendants produce that no glass or metal fixture can: light that travels through the weave in soft, organic patterns, casting dappled shadows on the ceiling and walls above. It mimics the visual experience of sunlight filtering through a tree canopy — and that’s not incidental. It’s the specific effect that makes these fixtures feel so unlike artificial light in the best possible way.
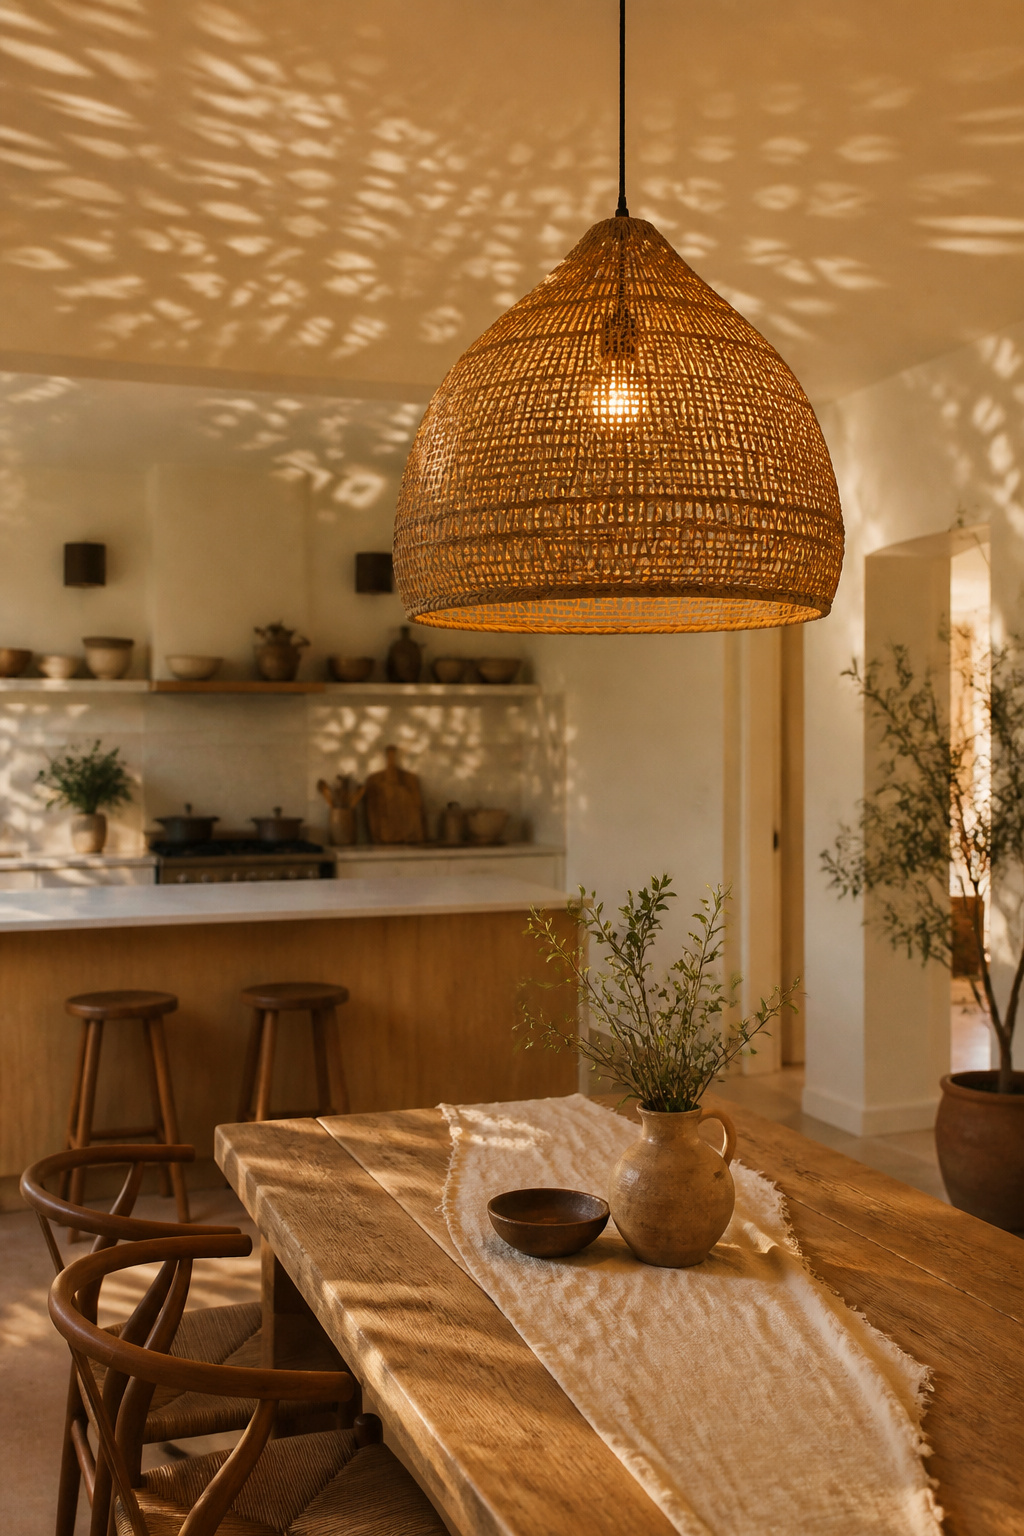
Biophilic design research supports the intuition most people have about natural materials. A 2015 study in the Journal of Environmental Psychology found that spaces featuring biophilic elements reduced cortisol markers by measurable amounts over a workday. In the kitchen, where many people spend more connected, mindful time than anywhere else in the home, introducing natural-material lighting is a low-effort, high-return wellness intervention.
Among the woven options: rattan has a tight weave and a golden-amber cast — the warmest of the natural materials, and the most durable. Bamboo tends toward more open lattice patterns, producing more dramatic wall and ceiling shadows; World Market and Serena & Lily both offer bamboo pendants at $60–$350 that hold up well over years of kitchen use. Seagrass and jute have the loosest weave and softest light diffusion, but they absorb cooking odors more readily — best positioned above a dining area rather than directly over the cooktop. For maintenance, vacuum monthly with a soft brush attachment. Never wipe rattan or bamboo with water; moisture swells the fibers, causes cracking, and cuts the fixture’s lifespan significantly.
14. Toe-Kick LED Lighting for Kitchen Safety and Night Navigation
Toe-kick lighting is among the most overlooked kitchen lighting ideas available — a low-cost addition that delivers one of the most genuinely useful functions in the list: low-level floor illumination for safe nighttime navigation without disrupting sleep. The toe kick is the 3.5-inch-tall recessed strip at the base of your kitchen cabinets. Running an LED strip through this channel costs less than most people expect, requires no overhead work, and is installed in an afternoon.
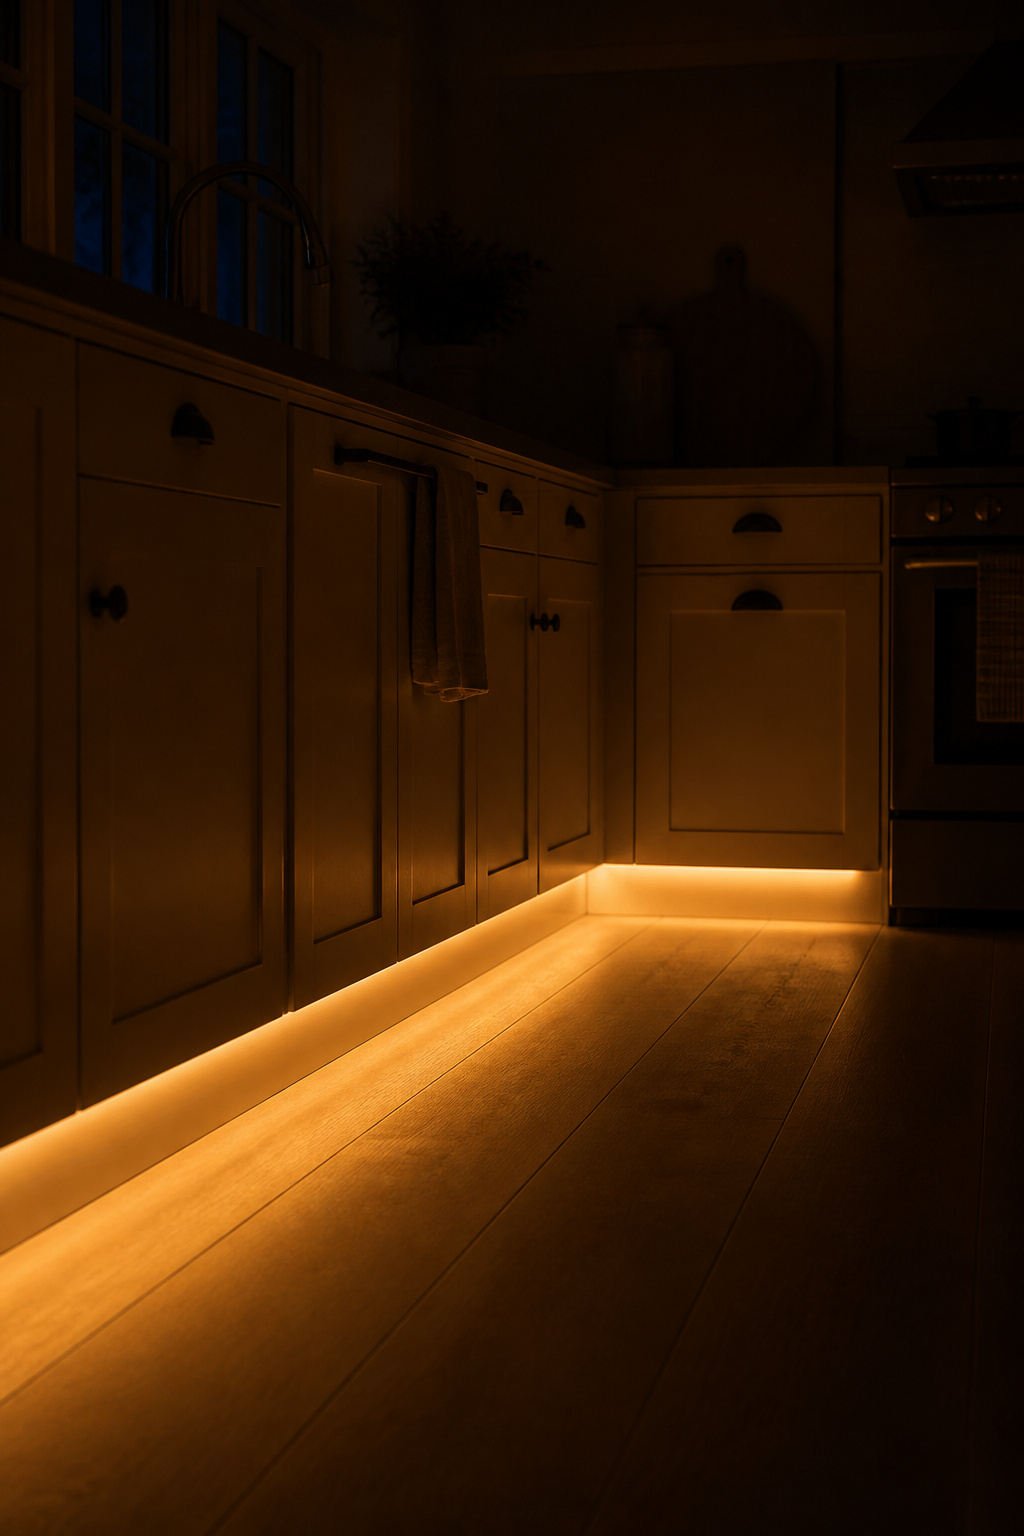
Motion-triggered toe-kick strips activate automatically when someone enters the kitchen, stay on for a 30-second to 2-minute delay, then go dark again. Always-on strips running at very low output (under 50 lumens per meter) provide continuous ambient navigation at a negligible electricity cost — approximately $0.50–$1.50 per year. Either approach illuminates the floor plane directly, which is exactly what matters for placing feet safely in a dark kitchen.
The wellness dimension matters particularly for anyone who values sleep quality. Specify toe-kick LEDs at 2200K–2700K — warm amber to warm white. A 2022 study in PLOS Biology confirmed that amber light at night produces significantly less melatonin suppression than cool white light. In practice, switching from a 4000K overhead to a 2200K toe-kick as the sole kitchen light source after 9pm is a free circadian hygiene upgrade once the strip is installed. Most standard base cabinets have a 3.5×3-inch recessed toe kick that accommodates standard LED strip profiles easily — no cutting or modification required.
15. Color Temperature Explained: How 2700K vs. 4000K Changes Your Kitchen
What the Numbers Actually Mean
Color temperature is probably the most misunderstood specification in home lighting, and yet it’s one of the kitchen lighting ideas that will most affect how your kitchen feels to be in every single day. It’s measured in Kelvin, describes the color of the light (not how warm or cold the room feels physically), and has a direct effect on how food looks, how alert the kitchen makes you feel, and how comfortable the space is at different hours.
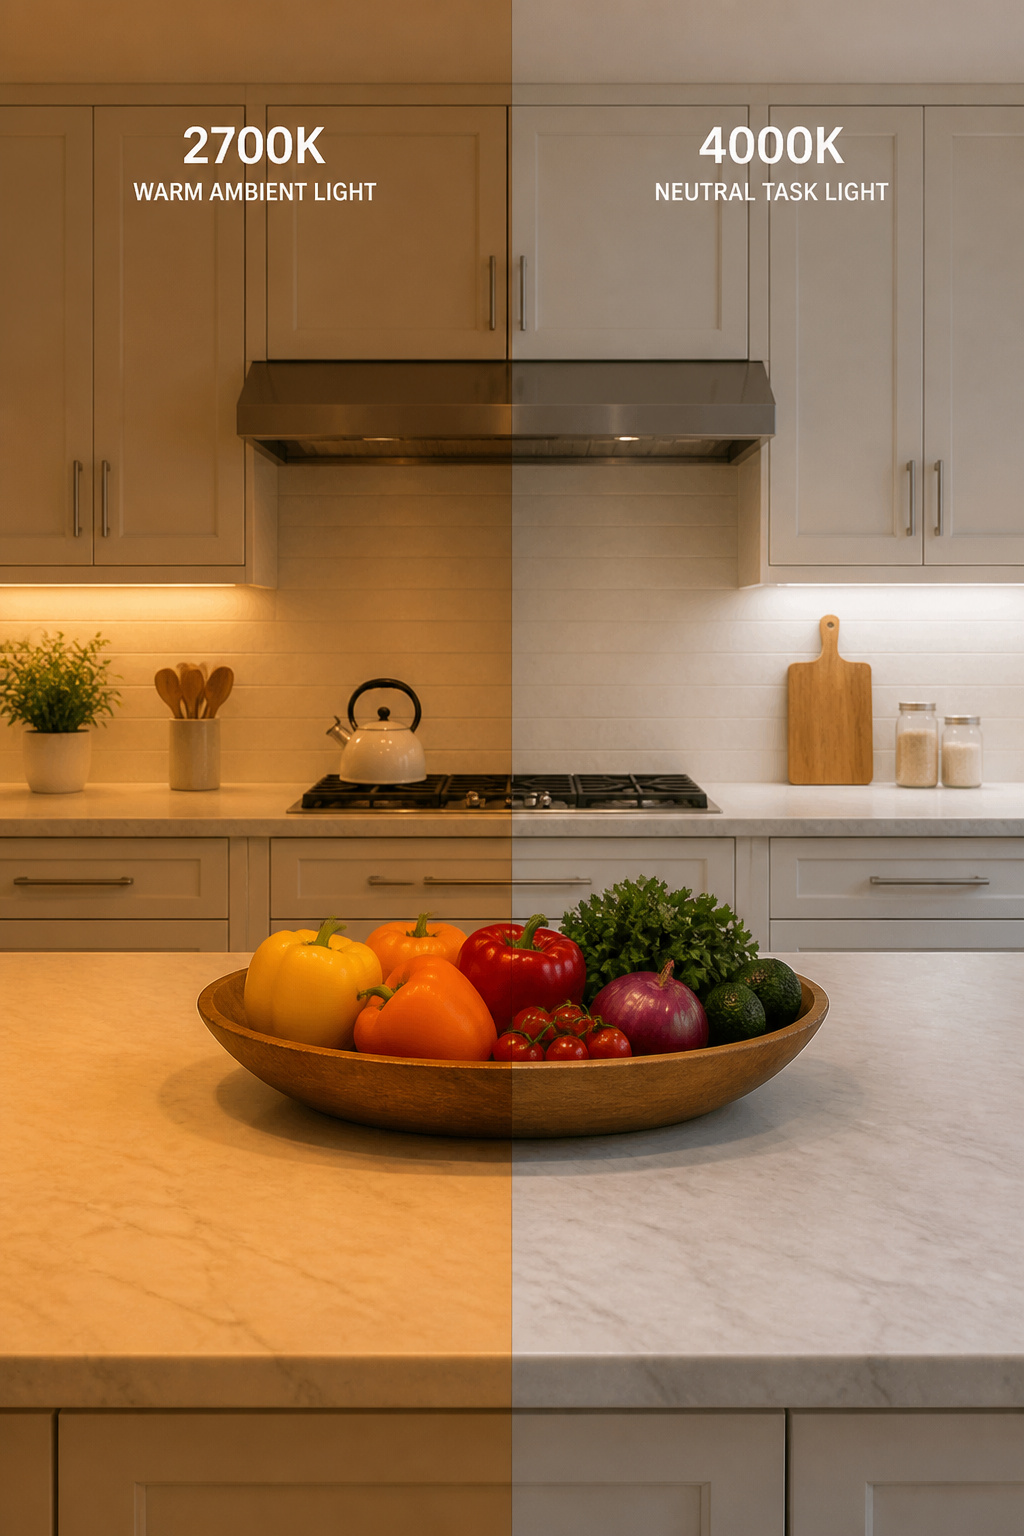
2700K is warm white — a soft amber tone equivalent to traditional incandescent bulbs. It makes a kitchen feel cozy and residential, and it renders food in a warm, appetizing way, but the yellow cast distorts some produce colors: greens can look yellowish, and telling a ripe avocado from an unripe one requires intuition rather than clear visual information. 4000K is cool white — the professional chef’s choice for prep areas because it shows ingredient colors accurately, supports alertness during morning routines, and doesn’t introduce color bias into visual tasks. 5000K and above reads as institutional in most home kitchens — appropriate for a garage workshop, too clinical for a space meant to feel welcoming.
Mixing Temperatures: What to Avoid
The recommended approach for a wellness-oriented kitchen is to layer by function: 3000K for general ambient overhead, 3500K–4000K for under-cabinet task strips where color accuracy matters, and 2700K for pendant and accent lights that contribute to the evening ambience layer. Keep adjacent zones within one color temperature step — mixing 2700K pendants with 4000K overheads is visually noticeable; mixing 2700K with 5000K in the same line of sight produces a jarring clash that makes the kitchen feel incoherent. If you photograph your kitchen with all lights on and the zones look obviously different in color, the temperatures are too far apart. For a broader view of kitchen aesthetic decisions — including how lighting works with color and material choices — the modern kitchen aesthetic guide covers the full picture.
16. Farmhouse Lantern Pendants for Kitchen Lighting With Timeless Character
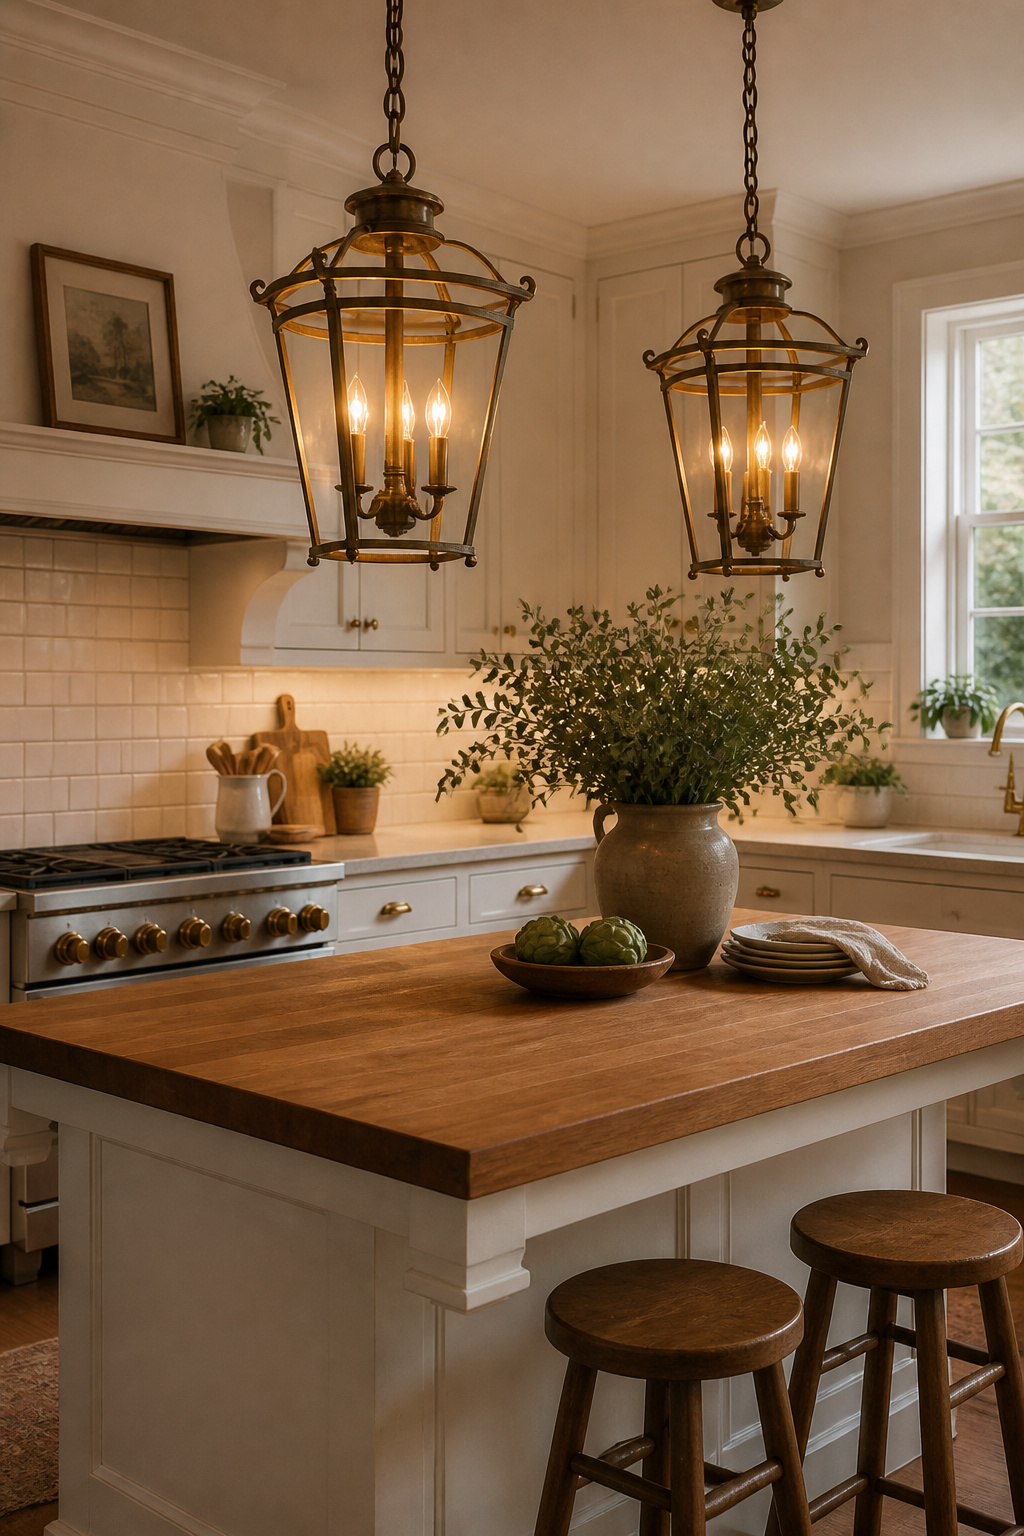
Lantern-style pendants are the quietly versatile fixtures in the kitchen lighting catalogue. Their form — an open cage or glass panel construction that lets the interior bulb become part of the design — reads as traditional in a farmhouse kitchen, industrial in a loft, and transitional in virtually everything in between. Changing the bulb type from an Edison filament to a modern LED globe shifts the fixture significantly toward contemporary without altering anything structural.
Sizing and Finish Selection
Schoolhouse pendants occupy similar cross-style territory — their smooth, rounded silhouette and gooseneck or rod mount are equally at home in a 1920s craftsman kitchen and a freshly renovated organic modern space. Both forms are available at meaningful price differences: Pottery Barn at $150–$350, Rejuvenation’s Rose City and Haleigh pendants at $289–$489, and Visual Comfort designer collaborations at $1,200 and beyond. The finish choice often matters as much as the fixture form: matte black anchors a light-colored kitchen, aged brass reads as heritage alongside warm wood tones and cream cabinetry, and galvanized steel ages beautifully in both farmhouse and coastal kitchens. For pairing lantern pendants with a warm color palette, the farmhouse kitchen color palettes guide provides finish and color combinations that consistently work.
One sizing note that catches people out: cage-style lanterns with open metalwork read visually larger than their physical dimensions because the eye extends the form to include the negative space within the cage. Order cage lanterns 2–4 inches smaller in diameter than you’d specify for an equivalent solid-shade pendant. So a single oversized lantern (18–24 inches) centered above a 36-inch kitchen sink is a confident statement move — but it needs to be paired with recessed task lights flanking the sink for the light level to work functionally.
Choosing the Right Kitchen Lighting for Your Home
The 16 kitchen lighting ideas in this guide span a significant range — from a $60 set of plug-in LED strips to a multi-zone smart system that programs itself around your circadian rhythm. The right starting point isn’t a shopping list. It’s an audit.
Stand at your primary prep counter during the day with only overhead lights on. Extend your arms in front of you. If your hands are in shadow, task lighting is your first priority. That one change — adding under-cabinet strips — delivers more immediate daily improvement than any other single upgrade on this list. Next, photograph your kitchen with all lights on simultaneously. Color temperature mismatches appear immediately in photos as zones of yellow, white, and blue light that look incoherent together. If you see this, matching color temperatures across your fixtures is a low-cost fix with a noticeable visual result.
For prioritizing by budget: under-cabinet LED strips are the first investment ($50–$150, DIY installation, immediate impact on daily cooking comfort and eye strain). Pendant lights over the island are second ($100–$400, transforms the kitchen’s visual character). Recessed downlight repositioning or addition is third ($200–$600, requires an electrician, but provides a permanent lighting foundation that all the decorative layers can build on). Smart tunable lighting comes after those foundations are in place — the circadian benefits are real and meaningful, but they deliver full value only when the underlying task and ambient layers are already working well.
Your kitchen lighting ideas don’t need to be a renovation. Even a single change — a set of under-cabinet strips, a new pendant above the island, a toe-kick strip installed in an afternoon — shifts the experience of your most-used room in a way that’s felt every single day. Start there.