The kitchen sink might be the most hardworking spot in your home, yet it’s often the most neglected when it comes to thoughtful organization. As an outdoor living specialist who spends plenty of time designing outdoor kitchens, I’ve learned that the principles of good sink organization apply whether you’re indoors or out. A well-organized sink area doesn’t just look better—it functions better, saves time, and even promotes better hygiene.
Let’s transform that chaotic splash zone into a model of efficiency with these 18 practical solutions for kitchen sink organization that I’ve gathered from years of kitchen design experience.
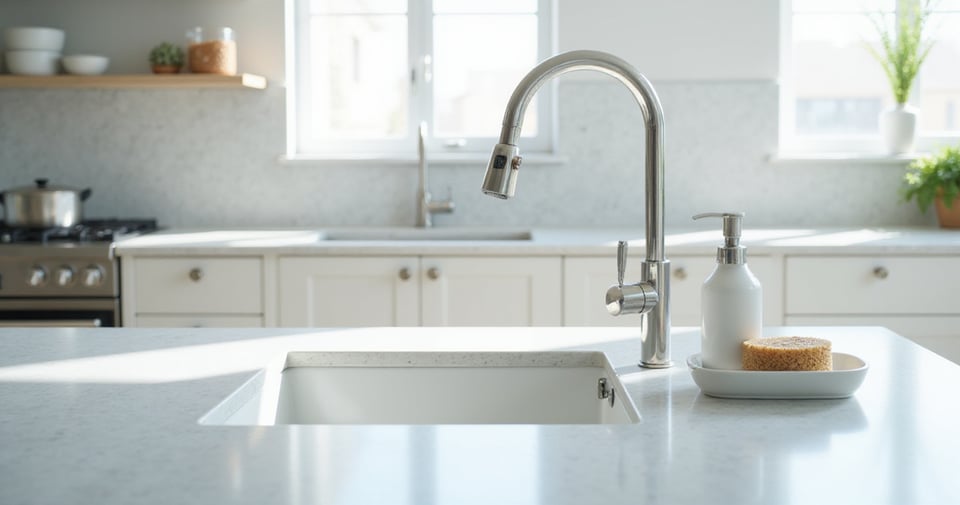
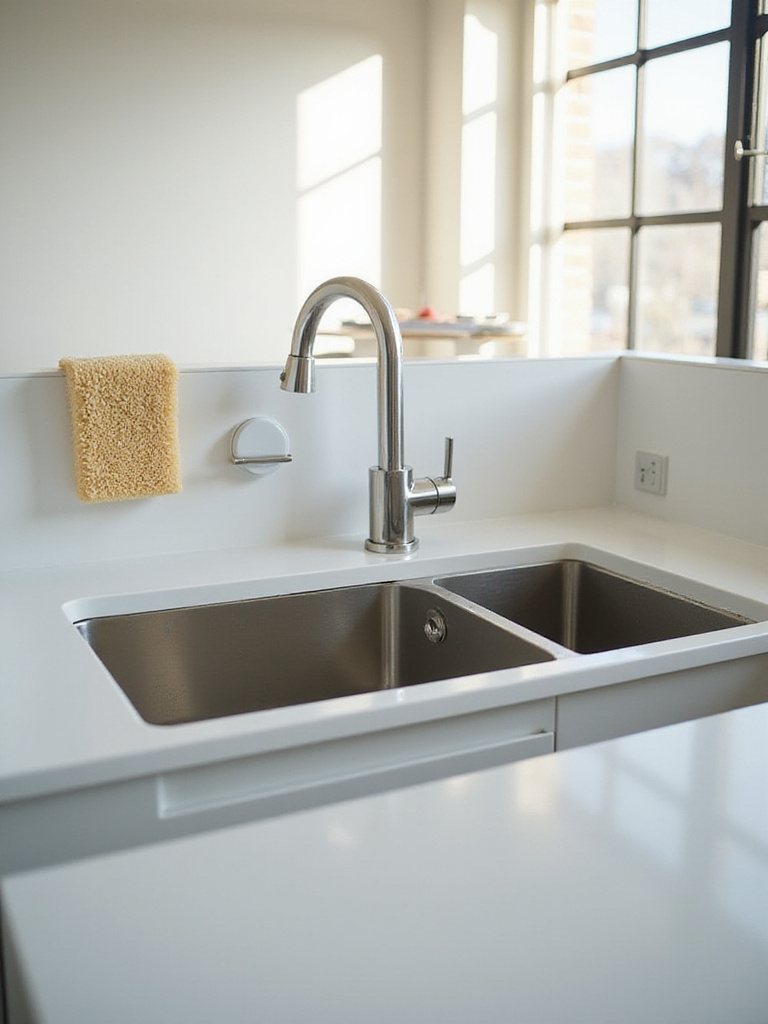
1. Clear the Decks: Declutter Around the Sink
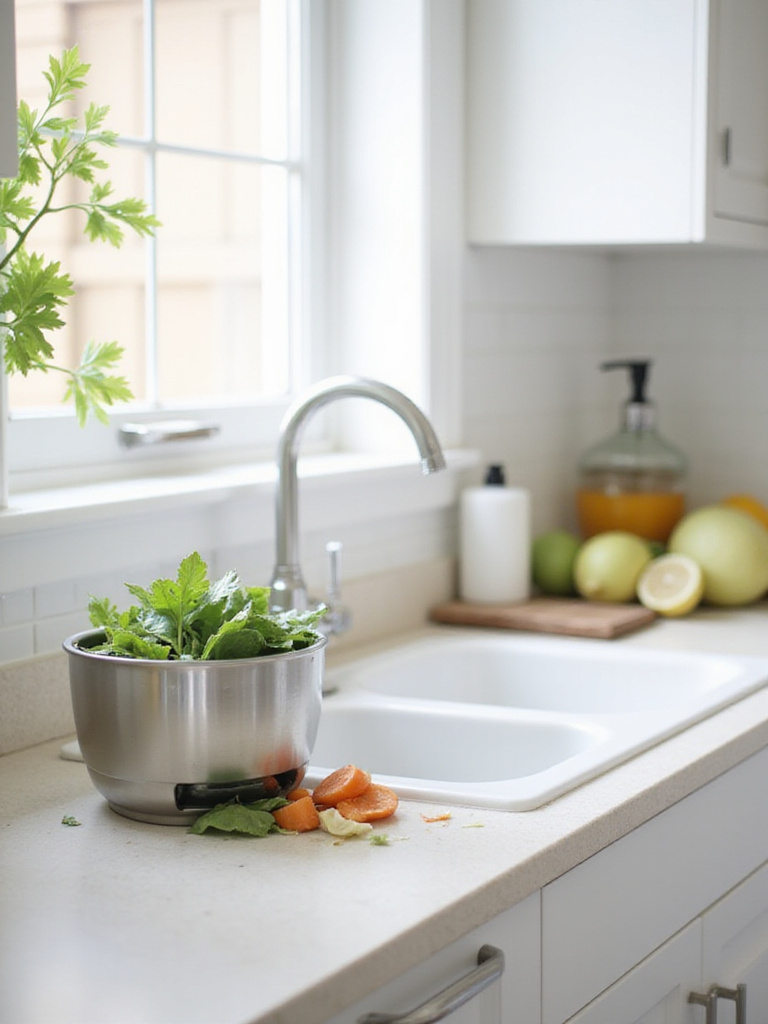
The area directly around your kitchen sink is prime real estate that’s often squandered by clutter. Multiple soap bottles, random sponges, and miscellaneous items create not just visual chaos but also a hygiene hazard. Studies show your kitchen sink can harbor more bacteria than a toilet seat, making a clear, easy-to-clean surface vital.
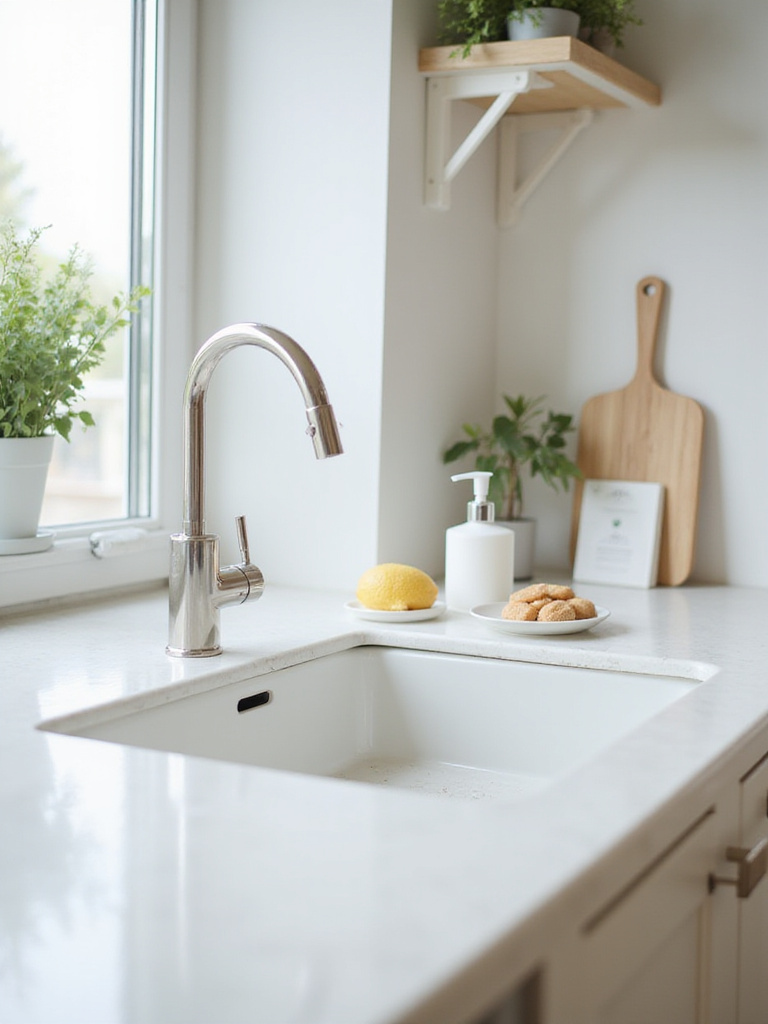
Start by completely clearing everything away from the sink edge and counter. Sort items into categories: cleaning supplies, hand soaps, dish soaps, tools, and non-kitchen items that don’t belong. Be ruthless about what truly deserves to occupy this valuable space. For the items that make the cut, consider uniform dispensers that reduce visual clutter from mismatched packaging.
The magic of this approach lies in its simplicity—a clear sink perimeter creates a sense of calm that ripples through the entire kitchen experience.
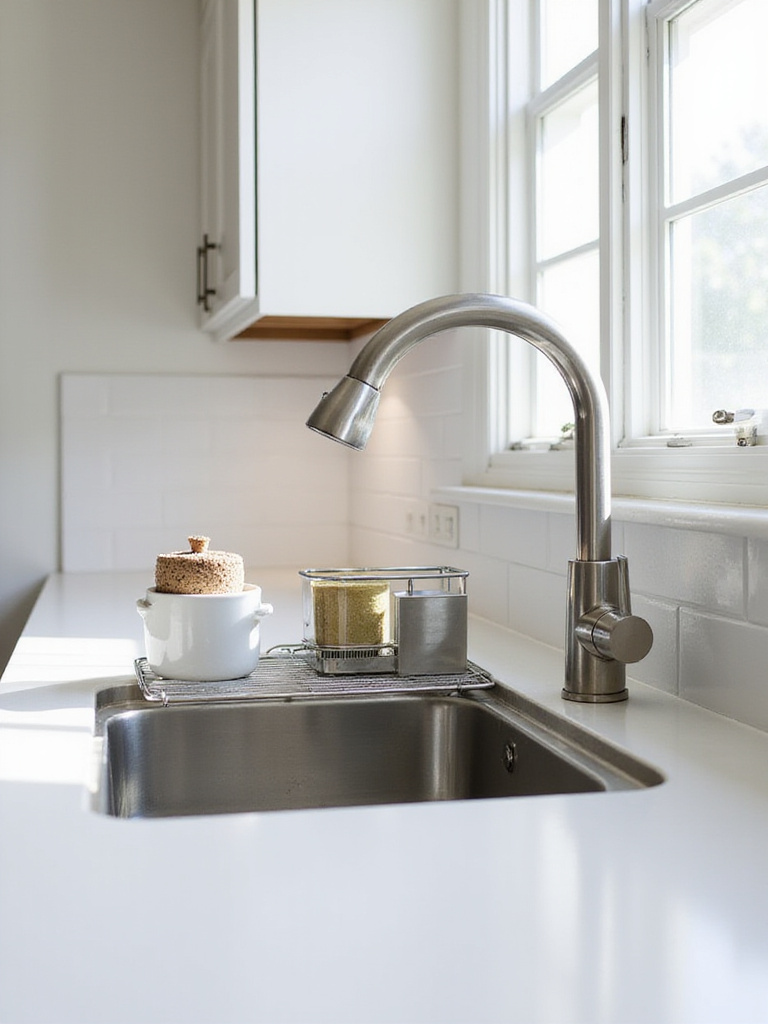
2. Maximize Inside: Use an In-Sink Dish Drying Rack
Running your hand across the smooth surface of an in-sink dish drying rack reveals the genius of this space-saving solution. By positioning the rack directly over your sink basin, wet dishes drip dry into the sink rather than pooling on your countertop. This keeps your limited horizontal surfaces free for meal prep and other tasks.
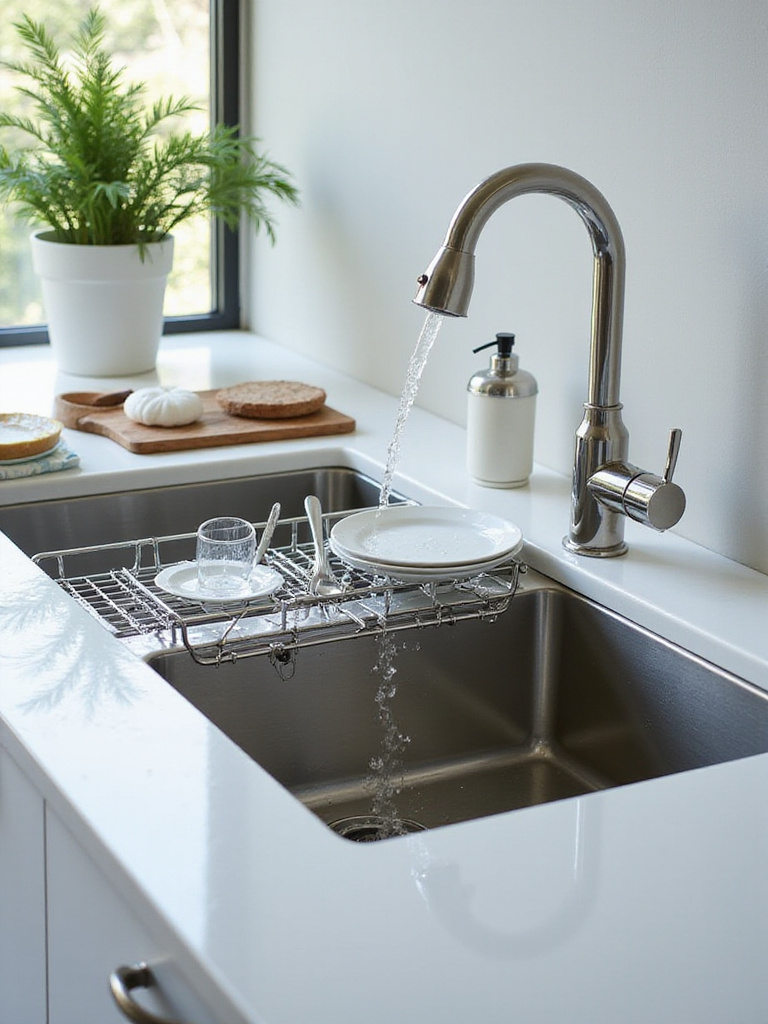
When choosing an in-sink rack, consider your sink’s dimensions carefully. Options include roll-up racks made of silicone-coated metal rods, expandable racks that adjust to different sink sizes, and fixed-size racks designed for standard dimensions. Materials matter too—stainless steel offers durability and rust resistance, while silicone-coated options protect delicate items from scratches.
Beyond the obvious placement for drying dishes, consider using this versatile tool as a convenient platform for washing and draining fruits and vegetables, creating an efficient workflow in your kitchen sink organization system.
3. Go Overhead: Install an Over-the-Sink Roll-Up Rack
The unexpected pairing that always works is combining vertical space utilization with flexible storage solutions. An over-the-sink roll-up rack exemplifies this perfectly. These ingenious racks consist of parallel stainless steel rods, usually coated with heat-resistant, non-slip silicone or rubber, that span across your sink basin and can be rolled up when not needed.
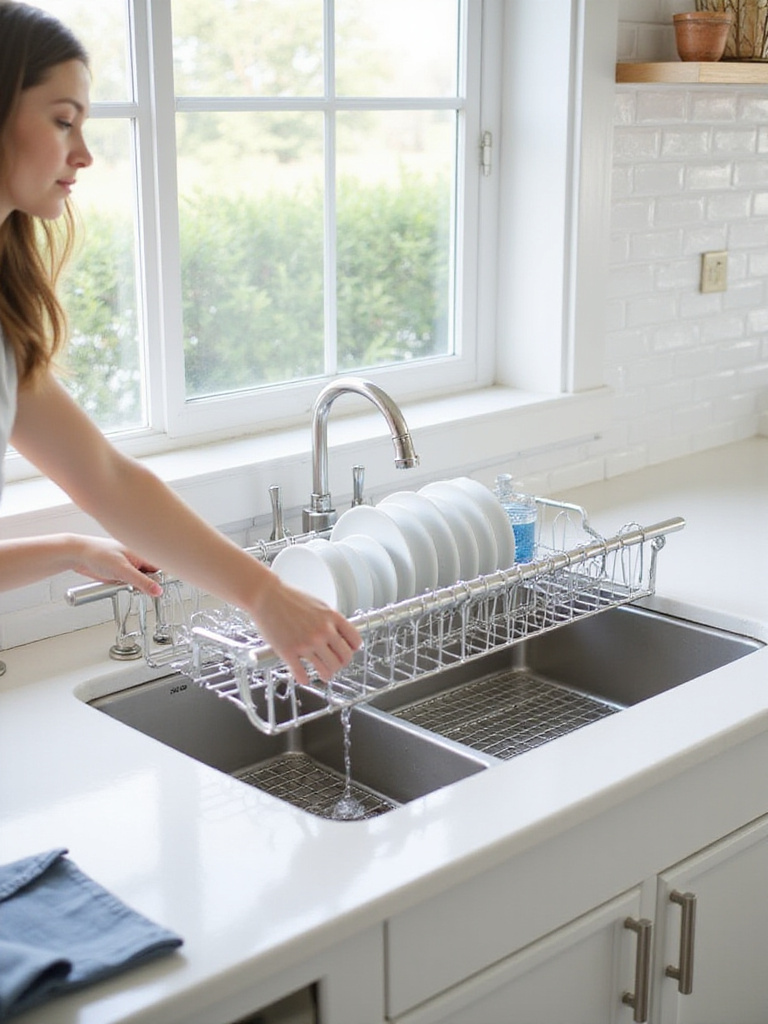
This multifunctional wonder serves multiple purposes:
- Drying dishes and glassware directly over the sink
- Rinsing and draining fruits and vegetables
- Acting as a temporary cooling rack for hot pots
- Serving as a thawing platform for frozen foods
- Creating an extra prep surface when topped with a cutting board
- Drying dishes and glassware directly over the sink
- Rinsing and draining fruits and vegetables
The versatility reveals itself when you pair this with your existing kitchen sink organization system—suddenly you have additional usable space without sacrificing a square inch of counter.
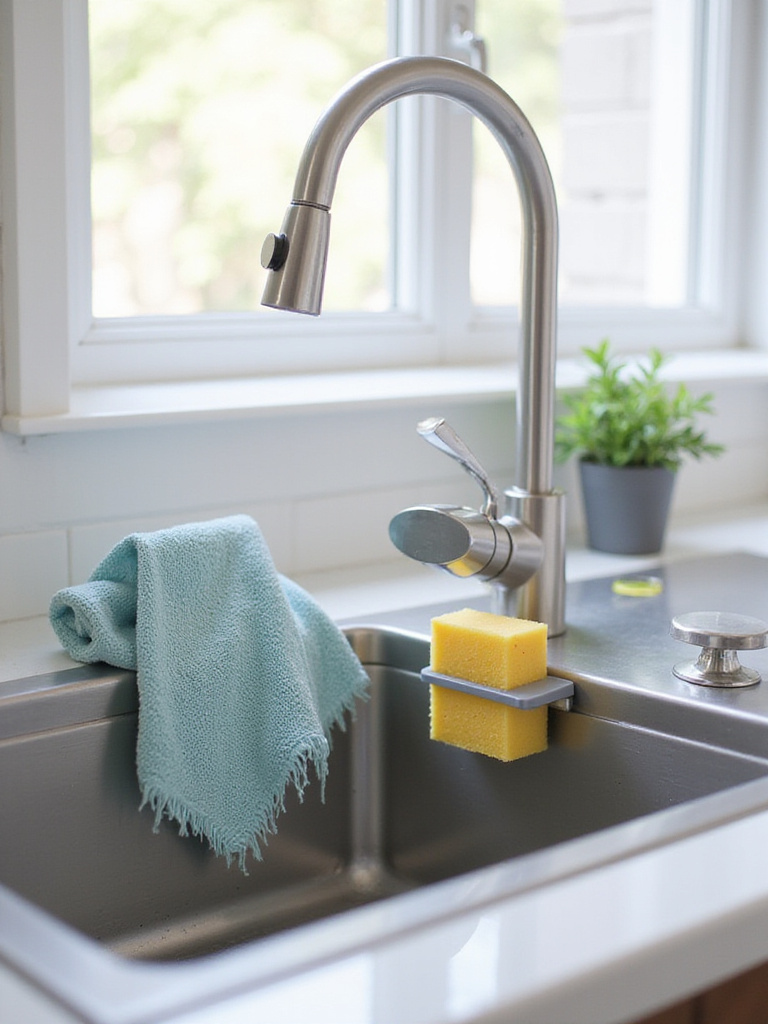
4. Give Sponges a Home: Use a Dedicated Sponge Holder
What makes this design special is the way it addresses both hygiene and organization. Sponges left sitting in the sink basin or on countertops become breeding grounds for bacteria, but a proper holder allows airflow that helps them dry between uses. This simple change can dramatically reduce bacteria levels in one of your most-used cleaning tools.
Sponge holders come in various styles to suit different preferences:
- Suction cup holders that attach to sink walls
- Over-the-faucet holders that hang conveniently
- Freestanding holders for countertop placement
- Magnetic holders that attach to stainless steel sinks
- In-sink caddies that hang over sink dividers
- Suction cup holders that attach to sink walls
- Over-the-faucet holders that hang conveniently
The craftsmanship in this collection speaks to the thoughtful details that make kitchen sink organization effective—look for designs with ample drainage holes and open construction that promotes airflow around the sponge.
5. Streamline Soap: Opt for a Stylish Soap Dispenser
The inspiration for this collection struck when I noticed how much visual noise store-bought soap bottles create around kitchen sinks. Their inconsistent branding, bulky shapes, and tendency to leave sticky residue undermine even the most organized spaces. A dedicated soap dispenser, whether built-in or freestanding, creates a cleaner aesthetic while reducing plastic waste.
Two main types exist: built-in dispensers installed directly into the countertop with a pump head visible above and a reservoir below, and freestanding dispensers that sit on the countertop in various materials and styles. For a cohesive look, match your dispenser’s finish (brushed nickel, matte black, brass) with your faucet and other sink accessories.
While designed for the living room, we’ve seen creative uses in kitchen sink organization systems where homeowners coordinate hand soap and dish soap dispensers to create a unified, intentional look that elevates the entire sink area.
6. Keep Soaps Organized: Group Dish & Hand Soap Together
After months of sourcing and curation, I’ve found that grouping dish and hand soap together creates a functional “cleaning station” that streamlines both handwashing and dishwashing tasks. This simple kitchen sink organization strategy enhances efficiency while creating a more polished appearance.
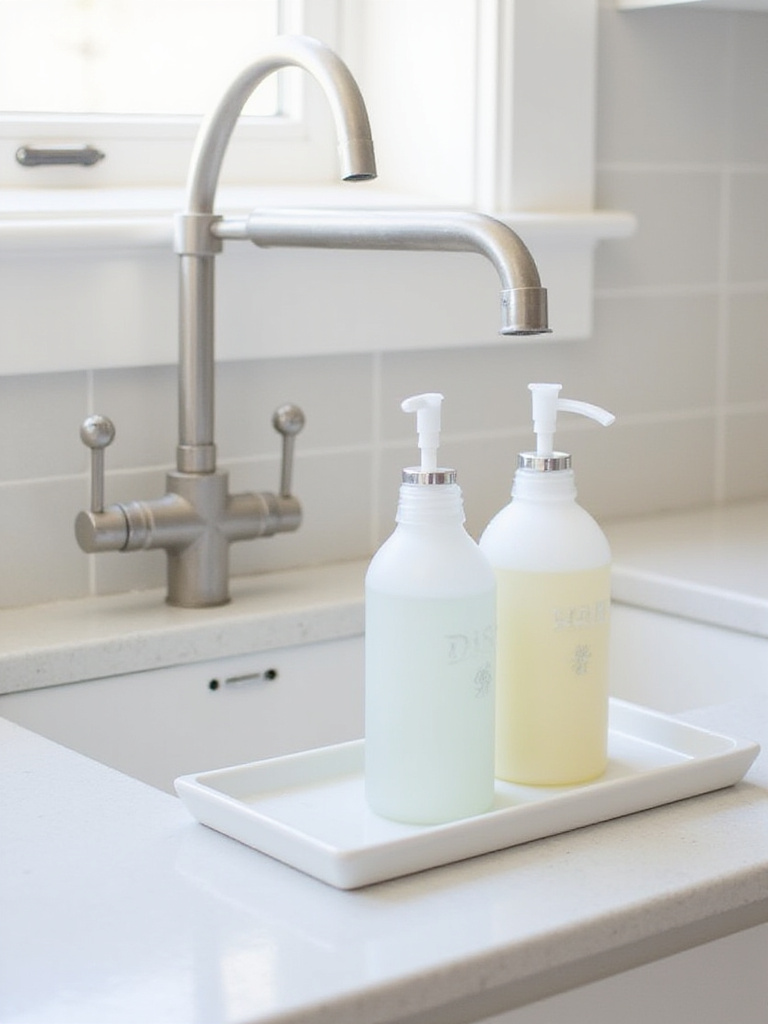
Several effective approaches work well:
- Using a small tray or dish to corral both dispensers
- Utilizing a dedicated sink caddy with compartments
- Transferring soaps to matching dispensers for visual cohesion
- Placing grouped soaps on a decorative, easy-to-clean tray
- Using a small tray or dish to corral both dispensers
- Utilizing a dedicated sink caddy with compartments
The environmental story behind this piece began with the realization that proper grouping not only looks better but also protects your surfaces by containing potential drips within a specific area, especially when using a tray or caddy.
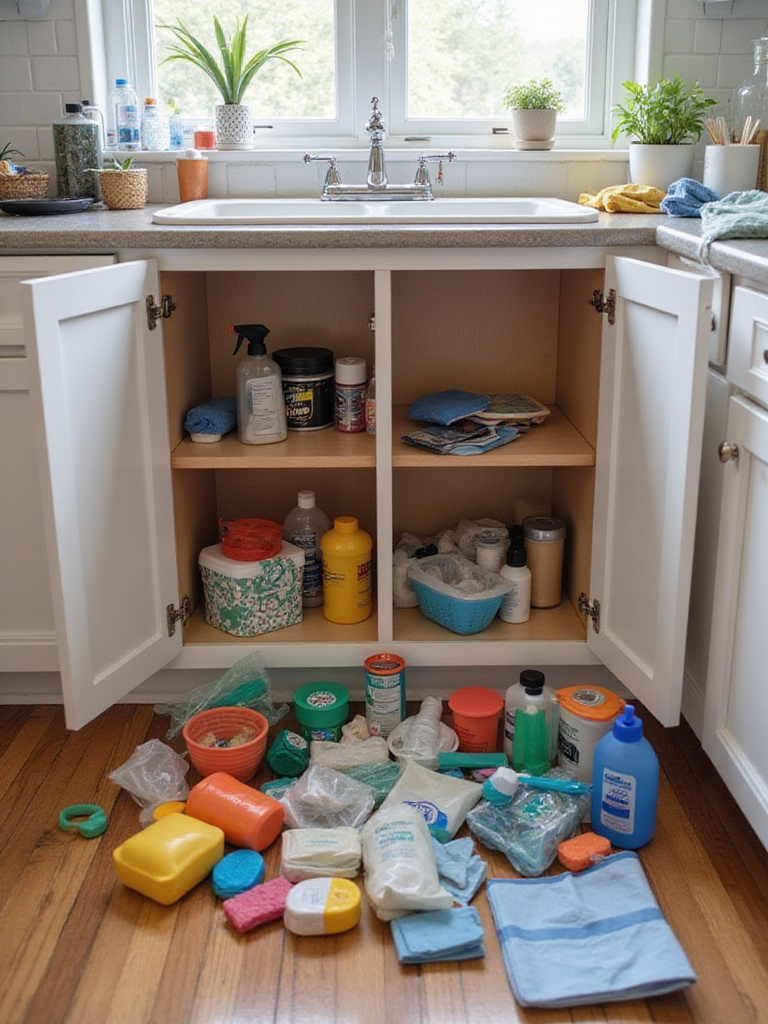
7. Build a Cleaning Hub: Create an Under-Sink Caddy
The designer’s secret here is to create a portable, contained hub for frequently used cleaning supplies under your sink. Instead of rummaging through a cluttered cabinet, you can simply pull out your caddy and have everything you need at your fingertips—saving time and reducing frustration.
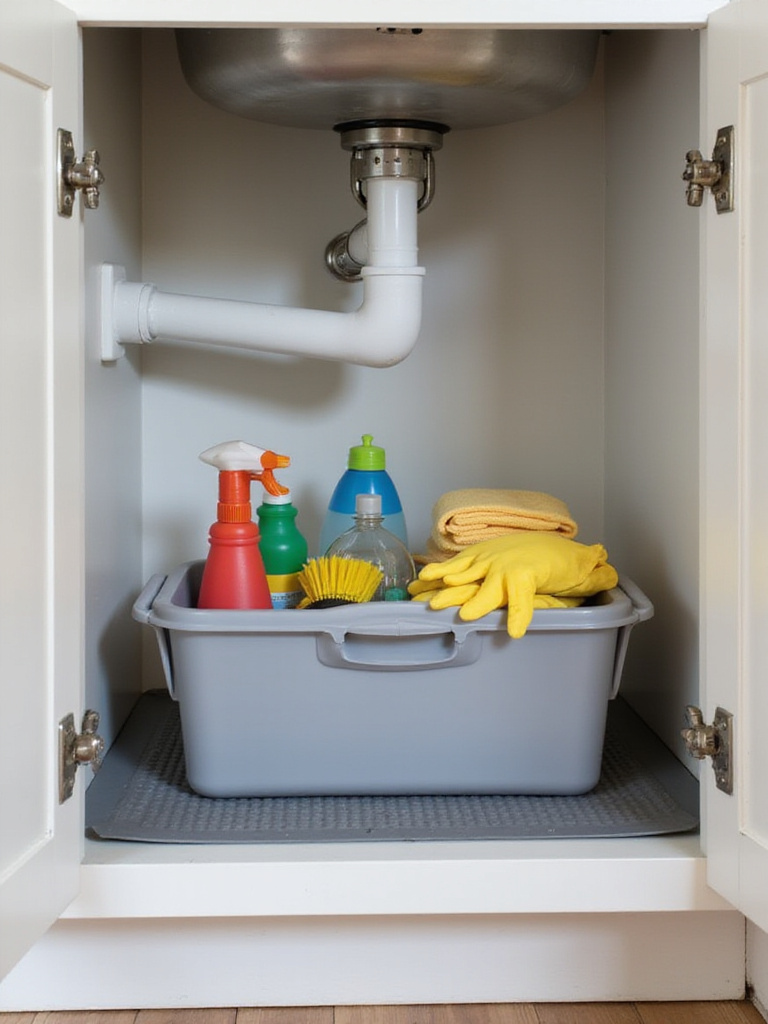
Look for sturdy plastic caddies with comfortable handles and multiple compartments to keep bottles upright and separate items like cloths and brushes. A well-stocked under-sink caddy might include:
- Sink/countertop spray cleaner
- Backup dish soap
- Scrub brushes or sponges
- Microfiber cloths
- Rubber gloves
- Sink/countertop spray cleaner
- Backup dish soap
The styling mistake most people make is treating the under-sink area as a catchall rather than creating intentional kitchen sink organization systems. A caddy transforms this approach by making cleaning supplies accessible and portable, ready to tackle messes throughout the kitchen or even adjacent rooms.
8. Stack it Up: Utilize Vertical Space Under the Sink
As morning light filters through, the texture creates shadows that highlight the wasted vertical space in most under-sink cabinets. The area’s irregular shape—thanks to plumbing, pipes, and possibly a garbage disposal—makes traditional storage challenging. Vertical organization solutions navigate around these obstacles while dramatically increasing usable storage.

Several effective vertical storage options include:
- Pull-out multi-tier sliding shelf units with cutouts for pipes
- Stackable bins or drawers designed specifically for under-sink use
- Tension rods installed horizontally to hang spray bottles
- Wall-mounted racks on cabinet doors or walls for smaller items
- Pull-out multi-tier sliding shelf units with cutouts for pipes
- Stackable bins or drawers designed specifically for under-sink use
The challenge of awkward spaces becomes easier when you implement narrow, tall slide-out drawers specifically designed to fit around under-sink plumbing. This kitchen sink organization approach transforms a typically chaotic area into a model of efficiency.
9. Pull It Out: Install Sliding Shelves Under the Sink
The artisans behind these designs began with a simple observation: items at the back of deep cabinets are rarely used because they’re so difficult to access. Sliding shelves (also called pull-out shelves or drawers) solve this kitchen sink organization challenge by bringing the entire contents forward out of the cabinet with a single motion.
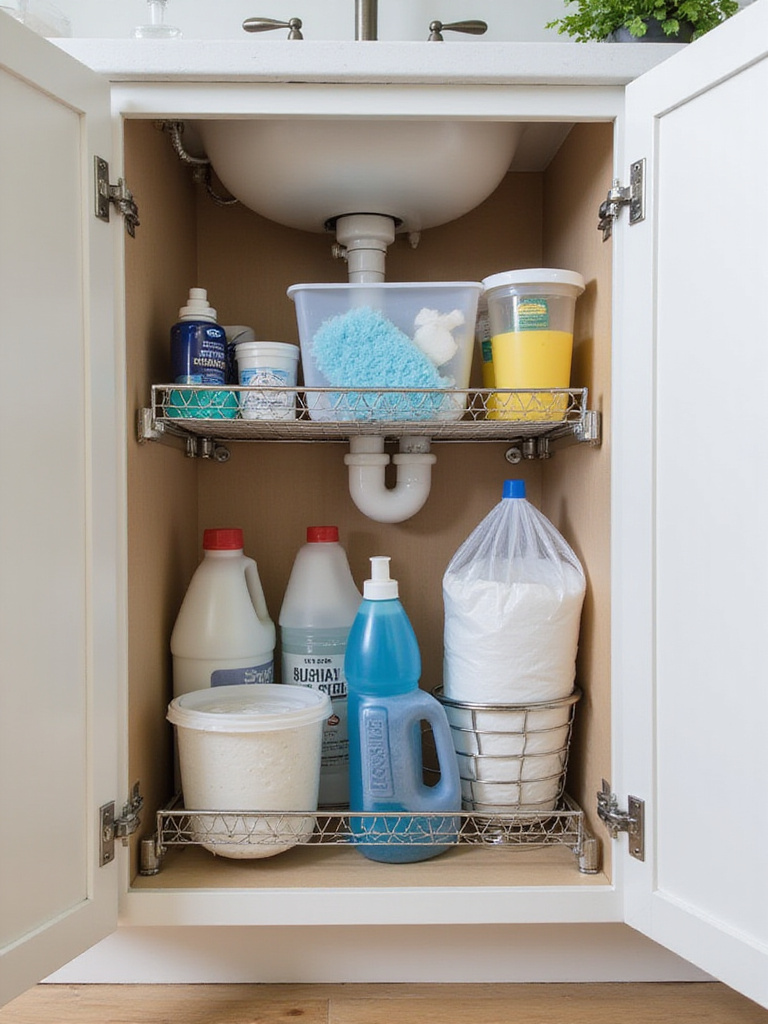
These game-changers provide full visibility and easy reach to everything stored on them, eliminating awkward rummaging or kneeling. They’re perfect for organizing:
- Cleaning supplies (bottles, sprays, wipes)
- Sponges and scrub brushes
- Dish soap and dishwasher pods
- Garbage and recycling bags
- Small tools or extra paper towels
- Cleaning supplies (bottles, sprays, wipes)
- Sponges and scrub brushes
Unlike conventional options, this approach reduces wasted space and dramatically improves functionality. Organization experts estimate that the average under-sink cabinet utilizes only 50% of its potential storage capacity without proper sliding systems—making this one of the highest-impact kitchen sink organization improvements you can make.
10. Hang ‘Em High: Use Cabinet Door Organizers for Supplies
The unexpected environmental benefit comes from maximizing every inch of available storage space, including the often-overlooked cabinet doors. Door organizers utilize this vertical real estate for smaller, frequently used items, freeing up valuable shelf or floor space inside the cabinet for larger items. This can increase usable storage area by up to 20% in a standard kitchen cabinet.
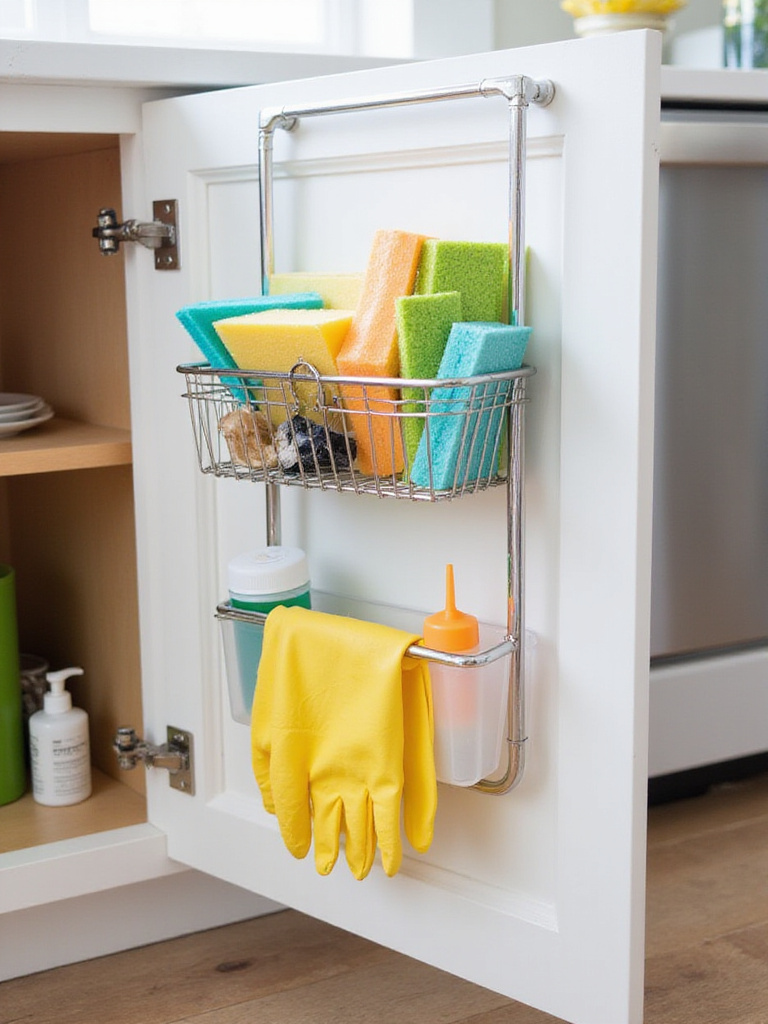
The most effective door organizers include:
- Wire baskets for sponges and scrub brushes
- Plastic caddies for small bottles or gloves
- Hook systems for hanging dishcloths or cleaning gloves
- Wire baskets for sponges and scrub brushes
- Plastic caddies for small bottles or gloves
For those worried about maintenance, look for organizers designed specifically for cabinet doors with appropriate mounting hardware. Some use adhesive for easy installation (though they hold less weight), while others require screws for more substantial storage needs.
The interplay between the colors creates a visual rhythm when you open the cabinet, revealing neatly organized supplies rather than the jumble that typically characterizes under-sink storage.
11. Tame the Bins: Optimize Trash and Recycling Storage
The designer’s attention to detail shows in thoughtful waste management solutions near the kitchen sink. Since this area generates the majority of kitchen waste, keeping trash and recycling bins here minimizes drips and messes from transporting waste across the room. It also helps contain odors, keeps bins out of sight, and encourages proper sorting.
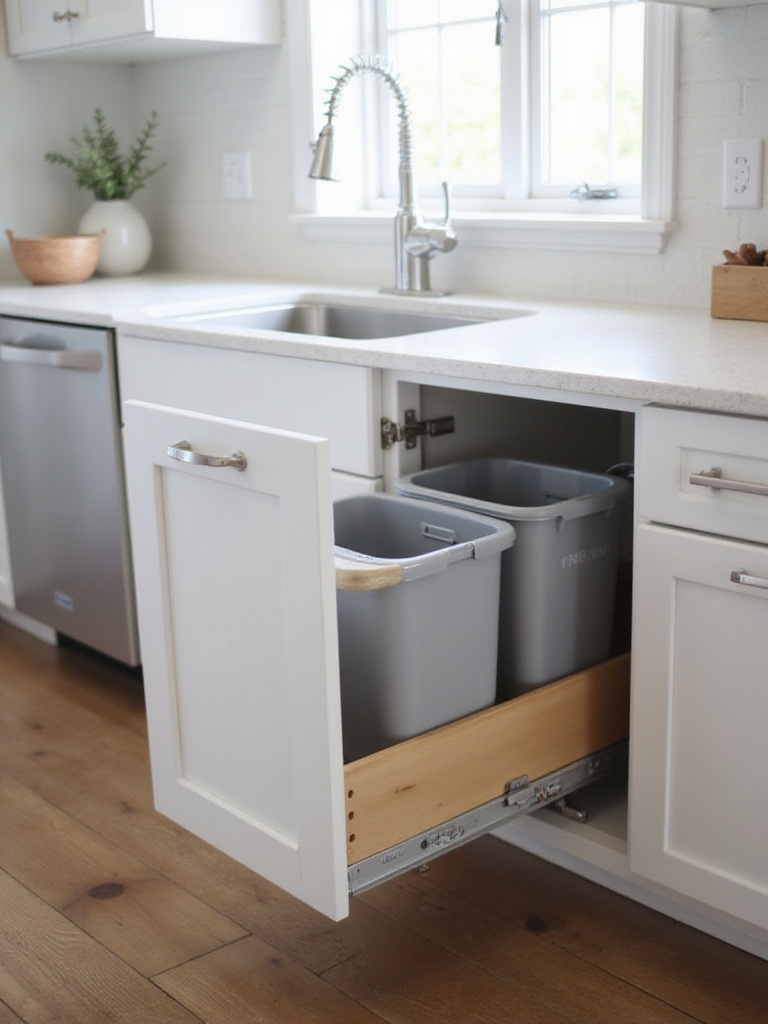
When choosing storage solutions, consider:
- Available space under your sink, accounting for pipes
- Your household’s needs regarding bin size and number
- Accessibility (pull-out systems are typically most convenient)
- Odor control features like tight-fitting lids
- Durable, easy-to-clean materials
- Available space under your sink, accounting for pipes
- Your household’s needs regarding bin size and number
If you’ve struggled with similar rooms before, consider a dedicated pull-out cabinet system that houses multiple bins for different waste streams. This kitchen sink organization approach creates an efficient waste management station that keeps your floor clear and your kitchen looking tidy.
12. Brush Up: Corral Dish Brushes and Scrubbers Neatly
Many homeowners wonder how to keep dish brushes and scrubbers organized without sacrificing hygiene. The answer lies in proper storage that allows these tools to dry thoroughly between uses. When left in a damp sink basin or lying flat, they become breeding grounds for bacteria and mold—a significant concern for items used to clean dishes.
The most important features in brush storage solutions include:
- Excellent drainage and ventilation
- Stability to prevent tipping
- Easy-to-clean materials
- Appropriate size for your tools
- Complementary design for your kitchen aesthetic
- Excellent drainage and ventilation
- Stability to prevent tipping
Look closely and you’ll notice the subtle texture of high-quality brush organizers that incorporate self-draining features. For optimal kitchen sink organization, select storage made from materials that resist mold growth, such as stainless steel, silicone, or certain plastics, and clean the holder itself regularly.
13. Cloth & Sponge Central: Designate a Drying Spot
The finishing touch that elevates the entire look of your sink area is a dedicated drying spot for dishcloths and sponges. Wet cleaning tools are breeding grounds for bacteria when left crumpled in the sink or on counters. A designated drying location ensures maximum airflow, allowing them to dry quickly between uses—significantly reducing bacterial growth and unpleasant odors.
Effective drying methods prioritize airflow and drainage:
- Sink caddy organizers that attach inside the sink
- Over-the-faucet holders that utilize vertical space
- Magnetic holders for stainless steel sinks
- Small countertop drying racks
- Under-sink door racks
- Sink caddy organizers that attach inside the sink
- Over-the-faucet holders that utilize vertical space
When clients ask us about balancing style with comfort, we recommend choosing a drying solution that complements your kitchen’s aesthetic while providing practical functionality. This seemingly small kitchen sink organization detail makes a substantial difference in both hygiene and visual appeal.
14. Glove Story: Keep Cleaning Gloves Organized
The silhouette draws inspiration from practical necessity—cleaning gloves need proper storage to remain hygienic and accessible. Proper organization ensures they’re ready when needed, prevents mold and bacteria growth by allowing complete drying, and prolongs their lifespan by protecting them from damage.
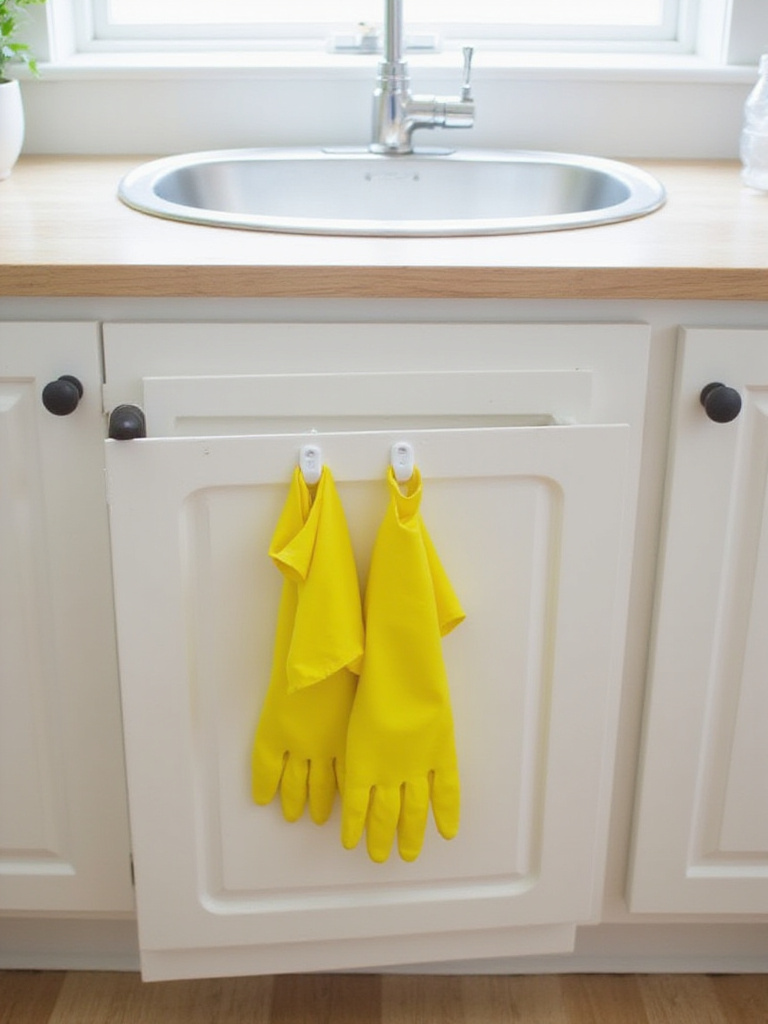
Common challenges in glove storage include:
- Ensuring they dry properly after use
- Finding a convenient yet out-of-the-way location
- Working within limited sink-area space
- Keeping them accessible but not unsightly
- Preventing them from being knocked into wet areas
- Ensuring they dry properly after use
- Finding a convenient yet out-of-the-way location
Beyond aesthetics, the ecological impact matters because properly stored gloves last longer, reducing waste. For effective kitchen sink organization, consider adhesive hooks on the inside of the cabinet door to hang gloves upside down, allowing water to drain completely and air to circulate inside and out.
15. Compost Corner: Add a Small Countertop Bin
The revival of this classic form comes with a twist—modern countertop compost bins combine functionality with style. Placing a small compost container near your kitchen sink provides an immediate spot for food scraps during prep and cleanup, keeping wet organic items out of your main trash and reducing odors and mess.
For effective odor and pest management, look for:
- Tight-fitting lids to seal in smells
- Activated charcoal filters in the lid to absorb odors
- Easy-to-clean materials like stainless steel or durable plastic
- Appropriate size for your household’s needs (typically 0.8-1.3 gallons)
- Tight-fitting lids to seal in smells
- Activated charcoal filters in the lid to absorb odors
Even in smaller spaces, here’s how this works—a countertop compost bin streamlines your kitchen sink organization by consolidating waste at its source, encouraging consistent composting habits that divert up to 30% of household waste from landfills where it would produce methane, a potent greenhouse gas.
16. Bin There, Done That: Use Bins & Trays Under Sink
The material sourcing makes all the difference in how effective under-sink storage can be. Bins and trays create structure in this challenging space, allowing you to group similar items, contain potential spills, and make everything more accessible despite the obstacles presented by plumbing.
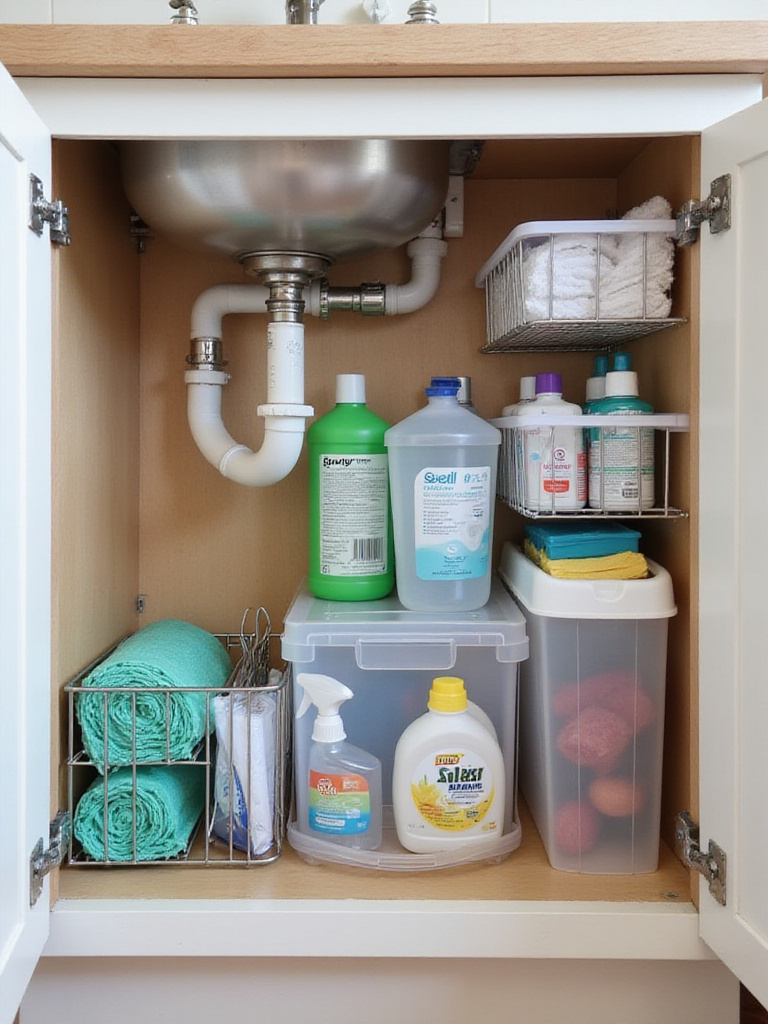
The most effective options include:
- Durable, water-resistant plastic bins
- Metal wire or coated metal baskets for ventilation
- Pull-out drawers or caddies
- Stackable containers
- Shallow trays for smaller items
- Clear bins for visibility
- Durable, water-resistant plastic bins
- Metal wire or coated metal baskets for ventilation
The sustainable journey of this material involves choosing options that last for years and potentially double your usable storage space through efficient organization. For optimal kitchen sink organization, measure your cabinet carefully, noting pipe locations, before selecting bins that fit your specific configuration.
17. The Great Purge: Regularly Declutter Under the Sink
We’ve been working behind the scenes on something special—a maintenance system that prevents under-sink chaos from returning. Regular decluttering prevents the accumulation of expired products, helps identify and safely dispose of hazardous waste, makes finding items easier, and reduces the likelihood of pests or mold in this often damp environment.
Focus your purge on removing:
- Expired cleaning products
- Empty or near-empty containers
- Broken spray bottles or tools
- Items that belong elsewhere
- Hazardous waste
- Unused or forgotten products
- Expired cleaning products
- Empty or near-empty containers
For those hesitant about bold patterns or dramatic changes to their kitchen sink organization, this simple maintenance habit delivers outsized results. Aim for a thorough purge at least once or twice yearly, emptying everything out to assess what you have and what you actually need.
18. Daily Shine: Maintain a Regular Sink Cleaning Habit
The emotional response this evokes begins with the satisfaction of a gleaming sink at day’s end. Daily cleaning is the foundation of effective kitchen sink organization, preventing clutter build-up and addressing the hygiene concerns of this high-use area. Kitchen sinks can harbor more than 500,000 bacteria per square inch—significantly more than the average toilet seat.
A quick and effective daily routine includes:
- Clearing the sink completely
- Rinsing thoroughly with hot water
- Applying a mild cleaner appropriate for your sink material
- Scrubbing briefly with a dedicated sink brush
- Rinsing again
- Wiping dry with a clean microfiber cloth
The visual weight balances perfectly when you make sink cleaning the final step in your evening kitchen routine. This creates a clean slate for morning and establishes a rhythm of maintenance that keeps your kitchen sink organization system functioning beautifully day after day.
Conclusion
The journey to perfect kitchen sink organization isn’t about achieving magazine-worthy perfection—it’s about creating systems that work for your specific needs and habits. By implementing these 18 smart solutions, you’ll transform what’s often the most chaotic area of the kitchen into a functional, hygienic, and visually appealing space.
Start with the strategies that address your biggest pain points, whether that’s cluttered countertops, disorganized under-sink storage, or hygiene concerns. Small changes, consistently maintained, create significant improvements in both the function and feel of your kitchen. Remember that the best kitchen sink organization system is one you can actually maintain—so choose solutions that align with your lifestyle and daily routines.
Your sink area sets the tone for the entire kitchen. Make it work beautifully for you.